When the WordPress team releases a new version, they introduce some new features not only for users but for developers, as well. WordPress offers a lot of tools that make it easier to develop new fantastic themes or plugins.
One of the latest API available for WordPress developers is the new Color Picker; this feature allows to replace the standard text field with a nice and user friendly color picker.
In this tutorial, I’m going to show you how add the color picker inside your WordPress project. Let's get started.
Why It Can Be Useful
There are some interesting reasons why WordPress developers should implement colors choice using the new picker API:
For Users
- It provides a quicker and easier way to choose a color.
- Users don't have to worry about what format of color they have to type – hexadecimal, RBG and so on.
- Generally speaking, it provides an overall better user experience.
For Developers
- Your dashboard pages will be integrated with the WordPress user interface.
- It provides an easier input validation of the value of the color field.
- It results in a more professional final product because it's using native controls.
After we cover some of the main aspects of WordPress Color Picker, let’s add it inside our plugin or theme.
Include Color Picker Assets
Before continuing, I have to specify that Color Picker API was introduced with WordPress version 3.5 so in order to work through this tutorial, then make sure you have release 3.5 or later installed.
To add the color picker, you simply include a jQuery file and stylesheet file. The code lines below show you how to do that.
add_action( 'admin_enqueue_scripts', 'wptuts_add_color_picker' );
function wptuts_add_color_picker( $hook ) {

    if( is_admin() ) {

		// Add the color picker css file
		wp_enqueue_style( 'wp-color-picker' );

		// Include our custom jQuery file with WordPress Color Picker dependency
		wp_enqueue_script( 'custom-script-handle', plugins_url( 'custom-script.js', __FILE__ ), array( 'wp-color-picker' ), false, true );
	}
}
Note that when we have included the custom-script.js with wp-color-picker dependency. Now you can apply the color picker to your text fields inside your jQuery file.
(function( $ ) {

    // Add Color Picker to all inputs that have 'color-field' class
    $(function() {
        $('.color-field').wpColorPicker();
    });

})( jQuery );
Creating a Plugin That Uses The WordPress Color Picker
At this point, it's time to show how integrate the Color Picker inside a real plugin.
Here's what we are going to cover:
- How to add a dashboard option page that simulates a theme settings page.
- How to add settings fields that are prepared for the Color Picker.
- How to validate and save inputs.
Step 1
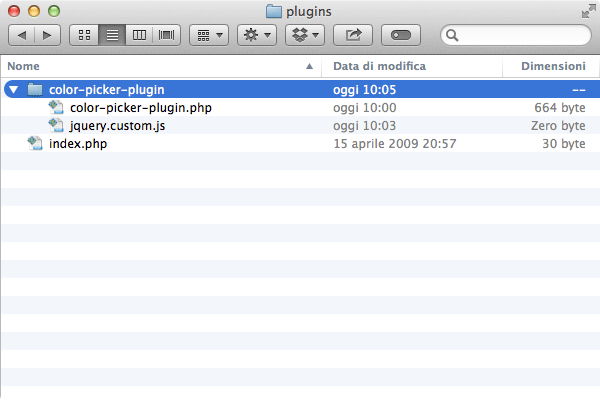
Once you have set up your plugin inside your WordPress wp-content/plugins folder we are ready to get started. The image below shows how I've structured the plugin for this tutorial.
Step 2
Inside color-picker-plugin.php file, write the comments with plugin info and create a new PHP class called CPA_Theme_Options. The code below shows all class methods we are going to implements step-by-step.
/*
Plugin Name: Color Picker API
Plugin URI: http://code.tutsplus.com
Description: Demo about the new Color Picker API
Version: 1.0
Author: code.tutsplus.com
Author URI: http://code.tutsplus.com
*/

/**
 * Main Class - CPA stands for Color Picker API
 */
class CPA_Theme_Options {

    /*--------------------------------------------*
     * Attributes
     *--------------------------------------------*/

    /** Refers to a single instance of this class. */
    private static $instance = null;

    /* Saved options */
    public $options;

    /*--------------------------------------------*
     * Constructor
     *--------------------------------------------*/

    /**
     * Creates or returns an instance of this class.
     *
     * @return  CPA_Theme_Options A single instance of this class.
     */
    public static function get_instance() {

        if ( null == self::$instance ) {
            self::$instance = new self;
        }

        return self::$instance;

    } // end get_instance;

    /**
     * Initializes the plugin by setting localization, filters, and administration functions.
     */
    private function __construct() { }

    /*--------------------------------------------*
     * Functions
     *--------------------------------------------*/

    /**
     * Function that will add the options page under Setting Menu.
     */
    public function add_page() { }

    /**
     * Function that will display the options page.
     */
	public function display_page() { }

    /**
     * Function that will register admin page options.
     */
    public function register_page_options() { }

    /**
     * Function that will add javascript file for Color Piker.
     */
    public function enqueue_admin_js() { }

    /**
     * Function that will validate all fields.
     */
    public function validate_options( $fields ) { }

    /**
     * Function that will check if value is a valid HEX color.
     */
    public function check_color( $value ) { }

    /**
     * Callback function for settings section
     */
    public function display_section() { /* Leave blank */ }

    /**
     * Functions that display the fields.
     */
    public function title_settings_field() { }

    public function bg_settings_field( ) { }

} // end class

CPA_Theme_Options::get_instance();
Step 3
First, let's implement the class constructor. The code below shows what the plugin will do when a new instance will be created.
It will:
- add a new options page under the Setting section of WordPress admin menu
- register settings fields inside the options page
- add CSS stylesheet for the WordPress Color Picker
- add a custom JavaScript file that calls Color Picker
- set the
optionsattribute with settings saved.
private function __construct() {

    // Add the page to the admin menu
	add_action( 'admin_menu', array( &$this, 'add_page' ) );

	// Register page options
	add_action( 'admin_init', array( &$this, 'register_page_options') );

	// Css rules for Color Picker
	wp_enqueue_style( 'wp-color-picker' );

	// Register javascript
	add_action('admin_enqueue_scripts', array( $this, 'enqueue_admin_js' ) );

	// Get registered option
	$this->options = get_option( 'cpa_settings_options' );
}
Step 4
The next step covers how to add the options page and how to display it.
/**
 * Function that will add the options page under Setting Menu.
 */
public function add_page() {

	// $page_title, $menu_title, $capability, $menu_slug, $callback_function
	add_options_page( 'Theme Options', 'Theme Options', 'manage_options', __FILE__, array( $this, 'display_page' ) );
}

/**
 * Function that will display the options page.
 */
public function display_page() {
    ?>
	<div class="wrap">

		<h2>Theme Options</h2>
		<form method="post" action="options.php">
		<?php
			settings_fields(__FILE__);
			do_settings_sections(__FILE__);
			submit_button();
		?>
		</form>
	</div> <!-- /wrap -->
	<?php
}
Note that we have already written - inside the display_page() method - the code that will add the form, the fields and the submit button for registering page options.
Step 5
In this step we are going to implement the methods which will register and display two settings fields: Blog Title field and Background Color field. Both fields belong to the Theme Options section.
/**
 * Function that will register admin page options.
 */
public function register_page_options() {

	// Add Section for option fields
	add_settings_section( 'cpa_section', 'Theme Options', array( $this, 'display_section' ), __FILE__ ); // id, title, display cb, page

	// Add Title Field
	add_settings_field( 'cpa_title_field', 'Blog Title', array( $this, 'title_settings_field' ), __FILE__, 'cpa_section' ); // id, title, display cb, page, section

	// Add Background Color Field
	add_settings_field( 'cpa_bg_field', 'Background Color', array( $this, 'bg_settings_field' ), __FILE__, 'cpa_section' ); // id, title, display cb, page, section

	// Register Settings
	register_setting( __FILE__, 'cpa_settings_options', array( $this, 'validate_options' ) ); // option group, option name, sanitize cb
}

/**
 * Functions that display the fields.
 */
public function title_settings_field() {

	$val = ( isset( $this->options['title'] ) ) ? $this->options['title'] : '';
	echo '<input type="text" name="cpa_settings_options[title]" value="' . $val . '" />';
}

public function bg_settings_field() {

	$val = ( isset( $this->options['title'] ) ) ? $this->options['background'] : '';
	echo '<input type="text" name="cpa_settings_options[background]" value="' . $val . '" class="cpa-color-picker" >';

}
Step 6
This steps is focused on validation. The code below show how to validate the two fields before saving them.
/**
 * Function that will validate all fields.
 */
public function validate_options( $fields ) {

	$valid_fields = array();

	// Validate Title Field
	$title = trim( $fields['title'] );
	$valid_fields['title'] = strip_tags( stripslashes( $title ) );

	// Validate Background Color
	$background = trim( $fields['background'] );
	$background = strip_tags( stripslashes( $background ) );

	// Check if is a valid hex color
	if( FALSE === $this->check_color( $background ) ) {

		// Set the error message
		add_settings_error( 'cpa_settings_options', 'cpa_bg_error', 'Insert a valid color for Background', 'error' ); // $setting, $code, $message, $type

		// Get the previous valid value
		$valid_fields['background'] = $this->options['background'];

	} else {

		$valid_fields['background'] = $background;

	}

	return apply_filters( 'validate_options', $valid_fields, $fields);
}

/**
 * Function that will check if value is a valid HEX color.
 */
public function check_color( $value ) {

	if ( preg_match( '/^#[a-f0-9]{6}$/i', $value ) ) { // if user insert a HEX color with #
		return true;
	}

	return false;
}
If the user tries to insert the color code manually, the Color Picker notifies him or her that s/he has typed a invalid value on the submission form; however, color - though it may be wrong - will still be saved. The check_color() function takes care to validate the color input.
Step 7
This is the final step where we are going to include our JavaScript file that convert a simple text field in an useful color picker.
/**
 * Function that will add javascript file for Color Piker.
 */
public function enqueue_admin_js() {

	// Make sure to add the wp-color-picker dependecy to js file
	wp_enqueue_script( 'cpa_custom_js', plugins_url( 'jquery.custom.js', __FILE__ ), array( 'jquery', 'wp-color-picker' ), '', true  );
}
Let's create the jquery.custom.js file.
(function( $ ) {
    $(function() {

        // Add Color Picker to all inputs that have 'color-field' class
        $( '.cpa-color-picker' ).wpColorPicker();

    });
})( jQuery );
If you try to activate the plugin, you should get an dashboard page with all fields like in the image shown below:

That's It!
In this tutorial, you have learned how to include the new Color Picker powered by WordPress. In the plugin demo I've shown you how to integrate the color picker in a real plugin but you can use the API where you need such as inside a meta box, a widget form and so on.
The Color Picker works with WordPress 3.5+, but if a user has a previous version your code will work. Make sure to validate each color input using the check_color() method shown in Step 6.
Now your plugins or themes will be more powerful and user friendly.

Comments