Web applications need to provide easy-to-use solutions for uploading and manipulating rich content. This process can create difficulties for some users who have minimal photo editing skills. Cropping is one of the most used photo manipulation techniques, and this step-by-step tutorial will cover the entire development process of an image cropping plug-in for the jQuery JavaScript library.
A Quick Recap
In the previous tutorial, we reviewed:
- how to extend jQuery
- how to make a plug-in more flexible by using custom options
- how to create basic image cropping application
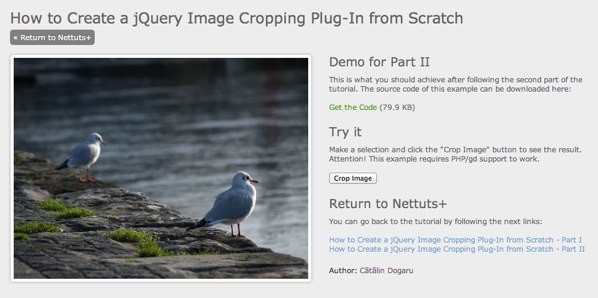
Today, we'll take things further and wrap up our plug-in: we'll define more custom option, add callbacks, make the selection draggable and resizable, build a preview pane and a size hint and write some server-side code to crop the image.
Step 1: Adding More Options
Open your jquery.imagecrop.js file located at /resources/js/imageCrop/and add the following code:
var defaultOptions = {
    allowMove : true,
    allowResize : true,
    allowSelect : true,
    aspectRatio : 0,
    displayPreview : false,
    displaySizeHint : false,
    minSelect : [0, 0],
    minSize : [0, 0],
    maxSize : [0, 0],
    outlineOpacity : 0.5,
    overlayOpacity : 0.5,
    previewBoundary : 90,
    previewFadeOnBlur : 1,
    previewFadeOnFocus : 0.35,
    selectionPosition : [0, 0],
    selectionWidth : 0,
    selectionHeight : 0,

    // Plug-in's event handlers
    onChange : function() {},
    onSelect : function() {}
};
We've added more options and two callbacks, onChange and onSelect. These two can be quite useful in retrieving the state of the plug-in.
The Options
Here is a quick rundown of the options we're adding:
-
aspectRatio - Specifies the aspect ratio of the selection (default value is
0). -
displayPreview - Specifies whether the preview pane is visible or not (default value is
false) -
displaySizeHint - Specifies whether the size hint is visible or not (default value is
false) -
minSize - Specifies the minimum size of the selection (default value is
[0, 0]) -
maxSize - Specifies the maximum size of the selection (default value is
[0, 0]) -
previewBoundary - Specifies the size of the preview pane (default value is
90) -
previewFadeOnBlur - Specifies the opacity of the preview pane on blur (default value is
1) -
previewFadeOnFocus - Specifies the opacity of the preview pane on focus (default value is
0.35) - onCahnge - Returns the plug-in's state when the selection is changed
- onSelect - Returns the plug-in's state when the selection is made
Step 2: Adding More Layers
In this step, we're going to add more layers. Let's begin with the size hint.
...

// Initialize a background layer of size hint and place it above the
// selection layer
var $sizeHintBackground = $('<div id="image-crop-size-hint-background" />')
        .css({
            opacity : 0.35,
            position : 'absolute'
        })
        .insertAfter($selection);

// Initialize a foreground layer of size hint and place it above the
// background layer
    var $sizeHintForeground = $('<span id="image-crop-size-hint-foreground" />')
            .css({
                position : 'absolute'
            })
            .insertAfter($sizeHintBackground);
We've added two separate layers because we don't want the foreground to be affected by the background opacity.
Now we'll add nine more layers: the resize handlers.
...

// Initialize a north/west resize handler and place it above the
// selection layer
var $nwResizeHandler = $('<div class="image-crop-resize-handler" id="image-crop-nw-resize-handler" />')
        .css({
            opacity : 0.5,
            position : 'absolute'
        })
        .insertAfter($selection);

// Initialize a north resize handler and place it above the selection
// layer
var $nResizeHandler = $('<div class="image-crop-resize-handler" id="image-crop-n-resize-handler" />')
        .css({
            opacity : 0.5,
            position : 'absolute'
        })
        .insertAfter($selection);

// Initialize a north/east resize handler and place it above the
// selection layer
var $neResizeHandler = $('<div class="image-crop-resize-handler" id="image-crop-ne-resize-handler" />')
        .css({
            opacity : 0.5,
            position : 'absolute'
        })
        .insertAfter($selection);

// Initialize an west resize handler and place it above the selection
// layer
var $wResizeHandler = $('<div class="image-crop-resize-handler" id="image-crop-w-resize-handler" />')
        .css({
            opacity : 0.5,
            position : 'absolute'
        })
        .insertAfter($selection);

// Initialize an east resize handler and place it above the selection
// layer
var $eResizeHandler = $('<div class="image-crop-resize-handler" id="image-crop-e-resize-handler" />')
        .css({
            opacity : 0.5,
            position : 'absolute'
        })
        .insertAfter($selection);

// Initialize a south/west resize handler and place it above the
// selection layer
var $swResizeHandler = $('<div class="image-crop-resize-handler" id="image-crop-sw-resize-handler" />')
        .css({
            opacity : 0.5,
            position : 'absolute'
        })
        .insertAfter($selection);

// Initialize a south resize handler and place it above the selection
// layer
var $sResizeHandler = $('<div class="image-crop-resize-handler" id="image-crop-s-resize-handler" />')
        .css({
            opacity : 0.5,
            position : 'absolute'
        })
        .insertAfter($selection);

// Initialize a south/east resize handler and place it above the
// selection layer
var $seResizeHandler = $('<div class="image-crop-resize-handler" id="image-crop-se-resize-handler" />')
        .css({
            opacity : 0.5,
            position : 'absolute'
        })
        .insertAfter($selection);
We've initialized a resize handler for each corner and the middle side.
And finally, the preview pane.
...

// Initialize a preview holder and place it after the outline layer
var $previewHolder = $('<div id="image-crop-preview-holder" />')
        .css({
            opacity : options.previewFadeOnBlur,
            overflow : 'hidden',
            position : 'absolute'
        })
        .insertAfter($outline);

// Initialize a preview image and append it to the preview holder
var $preview = $('<img alt="Crop preview" id="image-crop-preview" />')
        .css({
            position : 'absolute'
        })
        .attr('src', $image.attr('src'))
        .appendTo($previewHolder);
We've initialized two layers:
- the holder, which works as a mask and
- the preview image, which has the same
srcas the original image.
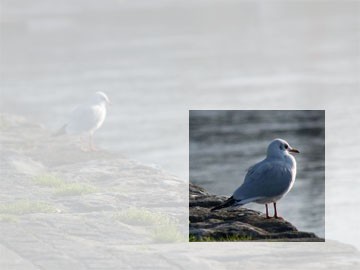
We've used the .appendTo() method to insert the preview image at the end of the holder.
Step 3: Enhancing the Interface
First, we'll add two new global variables.
...

// Initialize global variables
var resizeHorizontally = true,
    resizeVertically = true,
    selectionExists,
    selectionOffset = [0, 0],
    selectionOrigin = [0, 0];
We'll need these variables later, when we update the resizeSelection() function.
In the first part, we only took care of the allowSelect option. Let's handle allowMove and allowResize too.
...

if (options.allowMove)
    // Bind an event handler to the 'mousedown' event of the selection layer
    $selection.mousedown(pickSelection);

if (options.allowResize)
    // Bind an event handler to the 'mousedown' event of the resize handlers
    $('div.image-crop-resize-handler').mousedown(pickResizeHandler);
We've attached the mousedown event to the selection and all resize handlers.
Now we need to write a little more code to update the new layers we've added before.
...

// Update the size hint
function updateSizeHint(action) {
    switch (action) {
        case 'fade-out' :
            // Fade out the size hint
            $sizeHintBackground.fadeOut('slow');
            $sizeHintForeground.fadeOut('slow');

            break;
        default :
            var display = (selectionExists && options.displaySize) ? 'block' : 'none';

            // Update the foreground layer
            $sizeHintForeground.css({
                    cursor : 'default',
                    display : display,
                    left : options.selectionPosition[0] + 4,
                    top : options.selectionPosition[1] + 4
                })
                .html(options.selectionWidth + 'x' + options.selectionHeight);

            // Update the background layer
            $sizeHintBackground.css({
                    cursor : 'default',
                    display : display,
                    left : options.selectionPosition[0] + 1,
                    top : options.selectionPosition[1] + 1
                })
                .width($sizeHintForeground.width() + 6)
                .height($sizeHintForeground.height() + 6);
    }
};
The updateSizeHint() function treats two cases depending on the specified parameter.
- If none is specified, the default behavior is to display and update the size hint (if the selection exists).
- The second behavior is to fade out the hint. This will be used when the user is done with resizing the selection.
On the previous step, we've only initialized the resize handlers. Now we'll place them in the right position.
...

// Update the resize handlers
function updateResizeHandlers(action) {
    switch (action) {
        case 'hide-all' :
            $('.image-crop-resize-handler').each(function() {
                $(this).css({
                        display : 'none'
                    });
            });

            break;
        default :
            var display = (selectionExists && options.allowResize) ? 'block' : 'none';

            $nwResizeHandler.css({
                    cursor : 'nw-resize',
                    display : display,
                    left : options.selectionPosition[0] - Math.round($nwResizeHandler.width() / 2),
                    top : options.selectionPosition[1] - Math.round($nwResizeHandler.height() / 2)
                });

            $nResizeHandler.css({
                    cursor : 'n-resize',
                    display : display,
                    left : options.selectionPosition[0] + Math.round(options.selectionWidth / 2 - $neResizeHandler.width() / 2) - 1,
                    top : options.selectionPosition[1] - Math.round($neResizeHandler.height() / 2)
                });

            $neResizeHandler.css({
                    cursor : 'ne-resize',
                    display : display,
                    left : options.selectionPosition[0] + options.selectionWidth - Math.round($neResizeHandler.width() / 2) - 1,
                    top : options.selectionPosition[1] - Math.round($neResizeHandler.height() / 2)
                });

            $wResizeHandler.css({
                    cursor : 'w-resize',
                    display : display,
                    left : options.selectionPosition[0] - Math.round($neResizeHandler.width() / 2),
                    top : options.selectionPosition[1] + Math.round(options.selectionHeight / 2 - $neResizeHandler.height() / 2) - 1
                });

            $eResizeHandler.css({
                    cursor : 'e-resize',
                    display : display,
                    left : options.selectionPosition[0] + options.selectionWidth - Math.round($neResizeHandler.width() / 2) - 1,
                    top : options.selectionPosition[1] + Math.round(options.selectionHeight / 2 - $neResizeHandler.height() / 2) - 1
                });

            $swResizeHandler.css({
                    cursor : 'sw-resize',
                    display : display,
                    left : options.selectionPosition[0] - Math.round($swResizeHandler.width() / 2),
                    top : options.selectionPosition[1] + options.selectionHeight - Math.round($swResizeHandler.height() / 2) - 1
                });

            $sResizeHandler.css({
                    cursor : 's-resize',
                    display : display,
                    left : options.selectionPosition[0] + Math.round(options.selectionWidth / 2 - $seResizeHandler.width() / 2) - 1,
                    top : options.selectionPosition[1] + options.selectionHeight - Math.round($seResizeHandler.height() / 2) - 1
                });

            $seResizeHandler.css({
                    cursor : 'se-resize',
                    display : display,
                    left : options.selectionPosition[0] + options.selectionWidth - Math.round($seResizeHandler.width() / 2) - 1,
                    top : options.selectionPosition[1] + options.selectionHeight - Math.round($seResizeHandler.height() / 2) - 1
                });
    }
};
Similar to the last function, the updateResizeHandlers() tests two cases: hide-all and default. In the first case, we call the .each() method to iterate over the matched elements.
Let's create the updatePreview() function.
...

// Update the preview
function updatePreview(action) {
    switch (action) {
        case 'focus' :
            // Fade in the preview holder layer
            $previewHolder.stop()
                .animate({
                    opacity : options.previewFadeOnFocus
                });

            break;
        case 'blur' :
            // Fade out the preview holder layer
            $previewHolder.stop()
                .animate({
                    opacity : options.previewFadeOnBlur
                });

            break;
        case 'hide' :
            // Hide the preview holder layer
            $previewHolder.css({
                display : 'none'
            });

            break;
        default :
            var display = (selectionExists && options.displayPreview) ? 'block' : 'none';

            // Update the preview holder layer
            $previewHolder.css({
                    display : display,
                    left : options.selectionPosition[0],
                    top : options.selectionPosition[1] + options.selectionHeight + 10
                });

            // Update the preview size
            if (options.selectionWidth > options.selectionHeight) {
                if (options.selectionWidth && options.selectionHeight) {
                    // Update the preview image size
                    $preview.width(Math.round($image.width() * options.previewBoundary / options.selectionWidth));
                    $preview.height(Math.round($image.height() * $preview.width() / $image.width()));

                    // Update the preview holder layer size
                    $previewHolder.width(options.previewBoundary)
                    .height(Math.round(options.selectionHeight * $preview.height() / $image.height()));
                }
            } else {
                if (options.selectionWidth && options.selectionHeight) {
                    // Update the preview image size
                    $preview.height(Math.round($image.height() * options.previewBoundary / options.selectionHeight));
                    $preview.width(Math.round($image.width() * $preview.height() / $image.height()));

                    // Update the preview holder layer size
                    $previewHolder.width(Math.round(options.selectionWidth * $preview.width() / $image.width()))
                        .height(options.previewBoundary);
                }
            }

            // Update the preview image position
            $preview.css({
                left : - Math.round(options.selectionPosition[0] * $preview.width() / $image.width()),
                top : - Math.round(options.selectionPosition[1] * $preview.height() / $image.height())
            });
    }
};
The code for the first three cases should be self explanatory. We call the .animate() method to perform a custom animation of a set off CSS properties. Next, we decide the display value and set the position of the preview holder. Then, we scale the preview image to fit the previewBoundary option and calculate its new position.
We need to update the updateCursor() function too.
...

// Update the cursor type
function updateCursor(cursorType) {
    $trigger.css({
            cursor : cursorType
        });

    $outline.css({
            cursor : cursorType
        });

    $selection.css({
            cursor : cursorType
        });

    $sizeHintBackground.css({
            cursor : cursorType
        });

    $sizeHintForeground.css({
            cursor : cursorType
        });
};
And now, the last function of this step.
...

// Update the plug-in interface
function updateInterface(sender) {
    switch (sender) {
        case 'setSelection' :
            updateOverlayLayer();
            updateSelection();
            updateResizeHandlers('hide-all');
            updatePreview('hide');

            break;
        case 'pickSelection' :
            updateResizeHandlers('hide-all');

            break;
        case 'pickResizeHandler' :
            updateSizeHint();
            updateResizeHandlers('hide-all');

            break;
        case 'resizeSelection' :
            updateSelection();
            updateSizeHint();
            updateResizeHandlers('hide-all');
            updatePreview();
            updateCursor('crosshair');

            break;
        case 'moveSelection' :
            updateSelection();
            updateResizeHandlers('hide-all');
            updatePreview();
            updateCursor('move');

            break;
        case 'releaseSelection' :
            updateTriggerLayer();
            updateOverlayLayer();
            updateSelection();
            updateSizeHint('fade-out');
            updateResizeHandlers();
            updatePreview();

            break;
        default :
            updateTriggerLayer();
            updateOverlayLayer();
            updateSelection();
            updateResizeHandlers();
            updatePreview();
    }
};
Step 4: Enhancing setSelection()
We'll add just one thing here: support for the preview pane.
...

// Set a new selection
function setSelection(event) {
    // Prevent the default action of the event
    event.preventDefault();

    // Prevent the event from being notified
    event.stopPropagation();

    // Bind an event handler to the 'mousemove' event
    $(document).mousemove(resizeSelection);

    // Bind an event handler to the 'mouseup' event
    $(document).mouseup(releaseSelection);

    // If display preview option is enabled
    if (options.displayPreview) {
        // Bind an event handler to the 'mouseenter' event of the preview
        // holder
        $previewHolder.mouseenter(function() {
            updatePreview('focus');
         });

         // Bind an event handler to the 'mouseleave' event of the preview
         // holder
         $previewHolder.mouseleave(function() {
             updatePreview('blur');
         });
    }

    // Notify that a selection exists
    selectionExists = true;

    // Reset the selection size
    options.selectionWidth = 0;
    options.selectionHeight = 0;

    // Get the selection origin
    selectionOrigin = getMousePosition(event);

    // And set its position
    options.selectionPosition[0] = selectionOrigin[0];
    options.selectionPosition[1] = selectionOrigin[1];

    // Update only the needed elements of the plug-in interface
    // by specifying the sender of the current call
    updateInterface('setSelection');
};
We've tested the displayPreview option and used the .mouseenter() and .mouseleave() functions to attach event handlers to the preview holder.
Step 5: Picking the Selection
To make the selection draggable, we need to deduce when the user moves and releases the mouse button.
...

// Pick the current selection
function pickSelection(event) {
    // Prevent the default action of the event
    event.preventDefault();

    // Prevent the event from being notified
    event.stopPropagation();

    // Bind an event handler to the 'mousemove' event
    $(document).mousemove(moveSelection);

    // Bind an event handler to the 'mouseup' event
    $(document).mouseup(releaseSelection);

    var mousePosition = getMousePosition(event);

    // Get the selection offset relative to the mouse position
    selectionOffset[0] = mousePosition[0] - options.selectionPosition[0];
    selectionOffset[1] = mousePosition[1] - options.selectionPosition[1];

    // Update only the needed elements of the plug-in interface
    // by specifying the sender of the current call
    updateInterface('pickSelection');
};
Also, we've got the selection offset relative to the mouse position. We'll need it later, in the moveSelection() function.
Step 6: Picking the Resize Handlers
The user will be able to resize the selection by picking and dragging one of the resize handlers. And this can be done in two ways: on both axis - if the user chooses to drag a handler from a corner - or on one axis - if the user chooses to drag a handler from the middle of a side.
...

// Pick one of the resize handlers
function pickResizeHandler(event) {
// Prevent the default action of the event
    event.preventDefault();

    // Prevent the event from being notified
    event.stopPropagation();

    switch (event.target.id) {
        case 'image-crop-nw-resize-handler' :
            selectionOrigin[0] += options.selectionWidth;
            selectionOrigin[1] += options.selectionHeight;
            options.selectionPosition[0] = selectionOrigin[0] - options.selectionWidth;
            options.selectionPosition[1] = selectionOrigin[1] - options.selectionHeight;

            break;
        case 'image-crop-n-resize-handler' :
            selectionOrigin[1] += options.selectionHeight;
            options.selectionPosition[1] = selectionOrigin[1] - options.selectionHeight;

            resizeHorizontally = false;

            break;
        case 'image-crop-ne-resize-handler' :
            selectionOrigin[1] += options.selectionHeight;
            options.selectionPosition[1] = selectionOrigin[1] - options.selectionHeight;

            break;
        case 'image-crop-w-resize-handler' :
            selectionOrigin[0] += options.selectionWidth;
            options.selectionPosition[0] = selectionOrigin[0] - options.selectionWidth;

            resizeVertically = false;

            break;
        case 'image-crop-e-resize-handler' :
            resizeVertically = false;

            break;
        case 'image-crop-sw-resize-handler' :
            selectionOrigin[0] += options.selectionWidth;
            options.selectionPosition[0] = selectionOrigin[0] - options.selectionWidth;

            break;
        case 'image-crop-s-resize-handler' :
            resizeHorizontally = false;

            break;
    }

    // Bind an event handler to the 'mousemove' event
    $(document).mousemove(resizeSelection);

    // Bind an event handler to the 'mouseup' event
    $(document).mouseup(releaseSelection);

    // Update only the needed elements of the plug-in interface
    // by specifying the sender of the current call
    updateInterface('pickResizeHandler');
};
We've written a case for each resize handler, because each one needs specific settings.
Step 7: Enhancing resizeSelection()
Different from the first version, the resizeSelection() function will be able to test the minimum/maximum size and lock the aspect ratio of the selection.
...

// Resize the current selection
function resizeSelection(event) {
    // Prevent the default action of the event
    event.preventDefault();

    // Prevent the event from being notified
    event.stopPropagation();

    var mousePosition = getMousePosition(event);

    // Get the selection size
    var height = mousePosition[1] - selectionOrigin[1],
        width = mousePosition[0] - selectionOrigin[0];

    // If the selection size is smaller than the minimum size set it
    // accordingly
    if (Math.abs(width) < options.minSize[0])
        width = (width >= 0) ? options.minSize[0] : - options.minSize[0];

    if (Math.abs(height) < options.minSize[1])
        height = (height >= 0) ? options.minSize[1] : - options.minSize[1];

    // Test if the selection size exceeds the image bounds
    if (selectionOrigin[0] + width < 0 || selectionOrigin[0] + width > $image.width())
        width = - width;

    if (selectionOrigin[1] + height < 0 || selectionOrigin[1] + height > $image.height())
        height = - height;

    if (options.maxSize[0] > options.minSize[0] &&
        options.maxSize[1] > options.minSize[1]) {
        // Test if the selection size is bigger than the maximum size
        if (Math.abs(width) > options.maxSize[0])
            width = (width >= 0) ? options.maxSize[0] : - options.maxSize[0];

        if (Math.abs(height) > options.maxSize[1])
            height = (height >= 0) ? options.maxSize[1] : - options.maxSize[1];
    }

    // Set the selection size
    if (resizeHorizontally)
        options.selectionWidth = width;

    if (resizeVertically)
        options.selectionHeight = height;

    // If any aspect ratio is specified
    if (options.aspectRatio) {
        // Calculate the new width and height
        if ((width > 0 && height > 0) || (width < 0 && height < 0))
            if (resizeHorizontally)
                height = Math.round(width / options.aspectRatio);
            else
                width = Math.round(height * options.aspectRatio);
        else
            if (resizeHorizontally)
                height = - Math.round(width / options.aspectRatio);
            else
                width = - Math.round(height * options.aspectRatio);

        // Test if the new size exceeds the image bounds
        if (selectionOrigin[0] + width > $image.width()) {
            width = $image.width() - selectionOrigin[0];
            height = (height > 0) ? Math.round(width / options.aspectRatio) : - Math.round(width / options.aspectRatio);
        }

        if (selectionOrigin[1] + height < 0) {
            height = - selectionOrigin[1];
            width = (width > 0) ? - Math.round(height * options.aspectRatio) : Math.round(height * options.aspectRatio);
        }

        if (selectionOrigin[1] + height > $image.height()) {
            height = $image.height() - selectionOrigin[1];
            width = (width > 0) ? Math.round(height * options.aspectRatio) : - Math.round(height * options.aspectRatio);
        }

        // Set the selection size
        options.selectionWidth = width;
        options.selectionHeight = height;
    }

    if (options.selectionWidth < 0) {
        options.selectionWidth = Math.abs(options.selectionWidth);
        options.selectionPosition[0] = selectionOrigin[0] - options.selectionWidth;
    } else
        options.selectionPosition[0] = selectionOrigin[0];

    if (options.selectionHeight < 0) {
        options.selectionHeight = Math.abs(options.selectionHeight);
        options.selectionPosition[1] = selectionOrigin[1] - options.selectionHeight;
    } else
        options.selectionPosition[1] = selectionOrigin[1];

    // Trigger the 'onChange' event when the selection is changed
    options.onChange(getCropData());

    // Update only the needed elements of the plug-in interface
    // by specifying the sender of the current call
    updateInterface('resizeSelection');
};
Additionally, we've invoked the onChange() callback at the end of the function. The getCropData() function returns the current state of the plug-in. We'll write its body a few steps later.
Step 8: Moving the Selection
Now we'll write the moveSelection() function.
...

// Move the current selection
function moveSelection(event) {
    // Prevent the default action of the event
    event.preventDefault();

    // Prevent the event from being notified
    event.stopPropagation();

    var mousePosition = getMousePosition(event);

    // Set the selection position on the x-axis relative to the bounds
    // of the image
    if (mousePosition[0] - selectionOffset[0] > 0)
        if (mousePosition[0] - selectionOffset[0] + options.selectionWidth < $image.width())
            options.selectionPosition[0] = mousePosition[0] - selectionOffset[0];
        else
            options.selectionPosition[0] = $image.width() - options.selectionWidth;
    else
        options.selectionPosition[0] = 0;

    // Set the selection position on the y-axis relative to the bounds
    // of the image
    if (mousePosition[1] - selectionOffset[1] > 0)
        if (mousePosition[1] - selectionOffset[1] + options.selectionHeight < $image.height())
            options.selectionPosition[1] = mousePosition[1] - selectionOffset[1];
        else
            options.selectionPosition[1] = $image.height() - options.selectionHeight;
        else
            options.selectionPosition[1] = 0;

    // Trigger the 'onChange' event when the selection is changed
    options.onChange(getCropData());

    // Update only the needed elements of the plug-in interface
    // by specifying the sender of the current call
    updateInterface('moveSelection');
};
Just like before, we've invoked the onChange() callback at the end of the function.
Step 9: Enhancing releaseSelection()
We need to edit the releaseSelection() function too.
...

// Release the current selection
function releaseSelection(event) {
    // Prevent the default action of the event
    event.preventDefault();

    // Prevent the event from being notified
    event.stopPropagation();

    // Unbind the event handler to the 'mousemove' event
    $(document).unbind('mousemove');

    // Unbind the event handler to the 'mouseup' event
    $(document).unbind('mouseup');

    // Update the selection origin
    selectionOrigin[0] = options.selectionPosition[0];
    selectionOrigin[1] = options.selectionPosition[1];

    // Reset the resize constraints
    resizeHorizontally = true;
    resizeVertically = true;

    // Verify if the selection size is bigger than the minimum accepted
    // and set the selection existence accordingly
    if (options.selectionWidth > options.minSelect[0] &&
        options.selectionHeight > options.minSelect[1])
        selectionExists = true;
    else
        selectionExists = false;

    // Trigger the 'onSelect' event when the selection is made
    options.onSelect(getCropData());

    // If the selection doesn't exist
    if (!selectionExists) {
        // Unbind the event handler to the 'mouseenter' event of the
        // preview
        $previewHolder.unbind('mouseenter');

        // Unbind the event handler to the 'mouseleave' event of the
        // preview
        $previewHolder.unbind('mouseleave');
    }

    // Update only the needed elements of the plug-in interface
    // by specifying the sender of the current call
    updateInterface('releaseSelection');
};
We've reset the resize constraints and added support for the preview pane. Also, we've invoked the onSelect() callback in the same manner as we did before with the onChange() function.
Step 10: Getting the Current State
Now, we are almost ready. Let's write the getCropData() function.
...

// Return an object containing information about the plug-in state
function getCropData() {
    return {
        selectionX : options.selectionPosition[0],
        selectionY : options.selectionPosition[1],
        selectionWidth : options.selectionWidth,
        selectionHeight : options.selectionHeight,

        selectionExists : function() {
            return selectionExists;
        }
    };
};
We've just written the last function of this file. Save it and prepare for the next step.
Step 11: Minifying the Code
"Minifying the code reduces its size and improves loading time."
In this step, we'll minify the code of our plug-in to reduce its size and improve the loading time. This practice consists in removing unnecessary characters like comments, spaces, newlines and tabs. Two popular tools for minifying JavaScript code are YUI Compressor (which can also minify CSS) and JSMin. We'll use the first one. Also, it is open-source, so you can take a look at the code to understand exactly how it works.
Using the YUI Compressor
YUI Compressor is written in Java, so it doesn't matter which operating system you use. The only requirement is Java >= 1.4. Download the YUI Compressor and extract it in the /resources/js/imageCrop/ folder. Open the command line and change the current working directory to the same path.
If you're using it for the first time you should start by executing the following line in the command line and read the usage instructions.
$ java -jar yuicompressor-x.y.z.jar
Now let's minify our code.
$ java -jar yuicompressor-x.y.z.jar jquery.imagecrop.js -o jquery.imagecrop.js --preserve-semi
Don't forget to replace x.y.z with the YUI Compressor version that you're using. And that's it; wait for it to finish and then close the command line window.
Step 12: Styling the New Elements
Open up /resources/js/imageCrop/jquery.imagecrop.css and add the following lines to it:
...

div#image-crop-size-hint-background {
    background-color : #000000;
}

span#image-crop-size-hint-foreground {
    color : #ffffff;
    font-family : 'Verdana', 'Geneva', sans-serif;
    font-size : 12px;
    text-shadow : 0 -1px 0 #000000;
}

div#image-crop-preview-holder {
    -moz-box-shadow : 0 0 5px #000000;
    -webkit-box-shadow : 0 0 5px #000000;
    border : 3px #ef2929 solid;
    box-shadow : 0 0 5px #000000;
}

img#image-crop-preview {
    border : none;
}

div.image-crop-resize-handler {
    background-color : #000000;
    border : 1px #ffffff solid;
    height : 7px;
    overflow : hidden;
    width : 7px;
}
We've added some styling for the size hint, preview pane and resize handlers.
Step 13: Testing the Final Result
First, let's load the minified plug-in.
<script src="resources/js/imageCrop/jquery.imagecrop.min.js" type="text/javascript"></script>
To be able to test the plug-in, we need to somehow get the selection size and position. That's why we'll use onSelect callback; it returns an object with the current state of the plug-in.
$(document).ready(function() {
    $('img#example').imageCrop({
        displayPreview : true,
        displaySize : true,
        overlayOpacity : 0.25,

        onSelect : updateForm
    });
});

var selectionExists;

// Update form inputs
function updateForm(crop) {
    $('input#x').val(crop.selectionX);
    $('input#y').val(crop.selectionY);
    $('input#width').val(crop.selectionWidth);
    $('input#height').val(crop.selectionHeight);

    selectionExists = crop.selectionExists();
};

// Validate form data
function validateForm() {
    if (selectionExists)
        return true;

    alert('Please make a selection first!');

    return false;
};
The updateForm() function sets the input values and retains it if the selection exists. Next, the validateForm() function tests if the selection exists and displays an alert pop-up if it's needed.
Let's add the form.
...

<br /><br />

<form action="crop.php" method="post" onsubmit="return validateForm();">
    <input id="x" name="x" type="hidden" />
    <input id="y" name="y" type="hidden" />
    <input id="width" name="width" type="hidden" />
    <input id="height" name="height" type="hidden" />
    <input type="submit" value="Crop Image" />
</form>
We've added a few hidden inputs and a submit button.
The PHP
In this example, we'll use PHP with the gd library but you can use any other server-side scripting language that supports a graphic library.
Create an empty file, name it crop.php and fire up your editor.
<?php
    if ($_SERVER['REQUEST_METHOD'] == 'POST')
    {
        // Initialize the size of the output image
        $boundary = 150;
        $dst_w = $_POST['width'];
        $dst_h = $_POST['height'];

        if ($dst_w > $dst_h)
        {
            $dst_h = $dst_h * $boundary / $dst_w;
            $dst_w = $boundary;
        }
        else
        {
            $dst_w = $dst_w * $boundary / $dst_h;
            $dst_h = $boundary;
        }

        // Initialize the quality of the output image
        $quality = 80;

        // Set the source image path
        $src_path = 'resources/images/example.jpg';

        // Create a new image from the source image path
        $src_image = imagecreatefromjpeg($src_path);

        // Create the output image as a true color image at the specified size
        $dst_image = imagecreatetruecolor($dst_w, $dst_h);

        // Copy and resize part of the source image with resampling to the
        // output image
        imagecopyresampled($dst_image, $src_image, 0, 0, $_POST['x'],
                           $_POST['y'], $dst_w, $dst_h, $_POST['width'],
                           $_POST['height']);

        // Destroy the source image
        imagedestroy($src_image);

        // Send a raw HTTP header
        header('Content-type: image/jpeg');

        // Output the image to browser
        imagejpeg($dst_image, null, $quality);

        // Destroy the output image
        imagedestroy($dst_image);

        // Terminate the current script
        exit();
    }
?>
We've used the imagecreatefromjpeg() method to create a new image from the source path and imagecreatetruecolor() to create the output as a true color image. Next, we've called imagecopyresampled() to copy and resize a part of the image with resampling. The current document type is not what we need, so we call the header() function to change it to image/jpeg. The images that aren't needed anymore are destroyed with the imagedestroy() function. With exit(), we stop the execution of the current script.
That's All
We now have a fully customizable jQuery image cropping plug-in that allows the user to make, drag and resize a selection and displays a size hint and a preview pane. And yes, it looks the same even in Internet Explorer 6! So that completes are two-part tutorial! Thanks for reading!

Comments