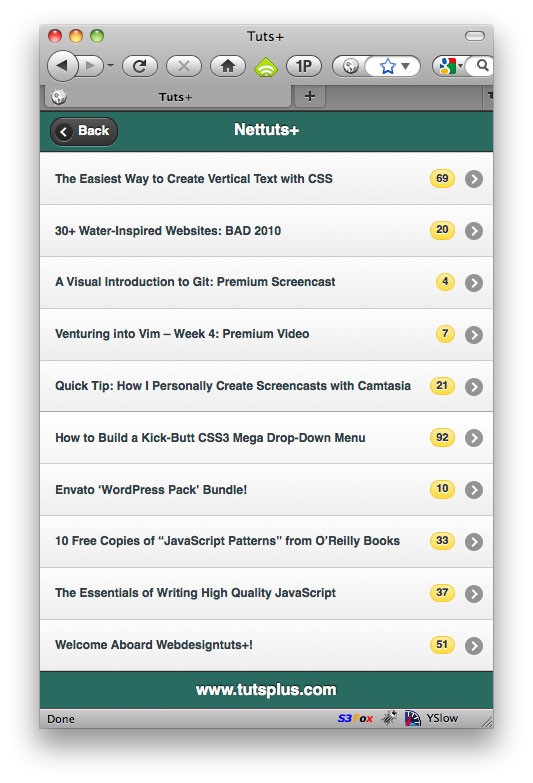
Twice a month, we revisit some of our readers’ favorite posts from through out the history of Nettuts+. This tutorial was first published in October 2010.
Today, we'll dive into jQuery Mobile, which, at the time of this writing, is in a RC1 state. We'll build a simple Tuts+ RSS reader, using PHP and jQuery Mobile. When we're finished, you'll have the ability to add this simple project to your iPhone or Android phone with the click of a button, as well as the skills to build your own custom mobile web apps!
Step 1: Outline the Project
It's always helpful to first outline what you want your project to do/achieve.
- Display a list of every Tuts+ site, along with its square logo
- Display the feed for each site, when clicked on
- Create a basic *article* stylesheet for rendering each posting
- Create an Apple-touch icon for the users who add the "app" to their phone
- Use YQL to retrieve the desired RSS feed
- Implement a basic form of "text file" caching every three hours
Step 2: Begin
The next step is to begin creating our project. Go ahead and make a new folder -- name it how you wish -- and add a new header.php file. *Note that this project uses PHP. If you're not familiar with this language, feel free to skip the PHP parts! Within this file, we'll reference jQuery mobile, its stylesheet, and any other assets that we require. If only to stay organized, I've placed my header.php file within an includes/ folder.
<!DOCTYPE html>
<html>
   <head>
   <meta charset="utf-8">
   <meta http-equiv="X-UA-Compatible" content="IE=edge,chrome=1" />

   <title> Tuts+ </title>

   <link rel="stylesheet" href="http://code.jquery.com/mobile/1.0a1/jquery.mobile-1.0a1.min.css" />
   <link rel="apple-touch-icon" href="img/tutsTouchIcon.png" />

   <script src="http://code.jquery.com/jquery-1.4.3.min.js"></script>
   <script src="http://code.jquery.com/mobile/1.0a1/jquery.mobile-1.0a1.min.js"></script>
</head>
There are a handful of things worth noting here.
- An HTML5 doctype is required. But you should be using that anyways!
- The
X-UA-Compatibletag forces IE to use it most current rendering engine - We need to reference jQuery Mobile's stylesheet. You can use their CDN, and save on bandwidth!
- If you want to designate an icon for when users add your webpage to their iPhone (or Android) home screen, add a
linktag, with arelattribute ofapple-touch-icon. - We're referencing the most recent version of jQuery: 1.4.3
- Finally, we're loading the jQuery mobile script file (currently in Alpha 1)
The Basic Structure
The jQuery Mobile framework can be activated by applying unique data-* attributes to your code. The basic structure for most sites will look similar to:
<!-- Let's include the header file that we created above -->
<?php include('includes/header.php'); ?>
<body>
 <div data-role="page">

   <header data-role="header">

   </header>


   <div data-role="content">

   </div>

   <footer data-role="footer">

   </footer>

 </div>

</body>
</html>
Add the code above to a new index.php file, within the root of your project.
We have to tell jQuery about our project. For example, try not to think of each file as a page. Technically, you can create multiple pages at a time, by adding additional wrapping data-role="page" attributes. These are referred to as inner pages.
Further, the framework has specific settings and stylings in place for the header, main content area, and footer. To inform jQuery Mobile about the locations of these elements, we add the following attributes.
-
data-role="header" -
data-role="content" -
data-role="footer"
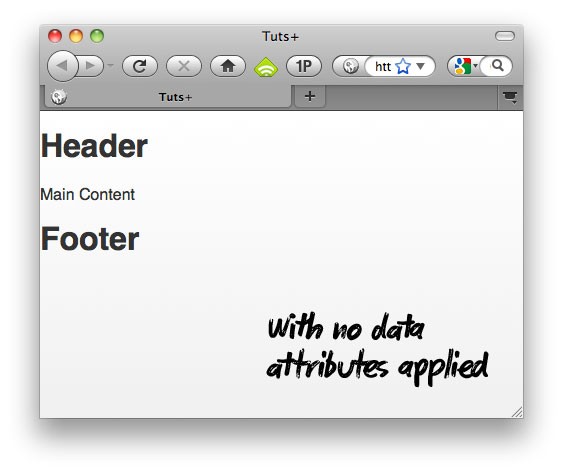
No data-role attributes have been applied.
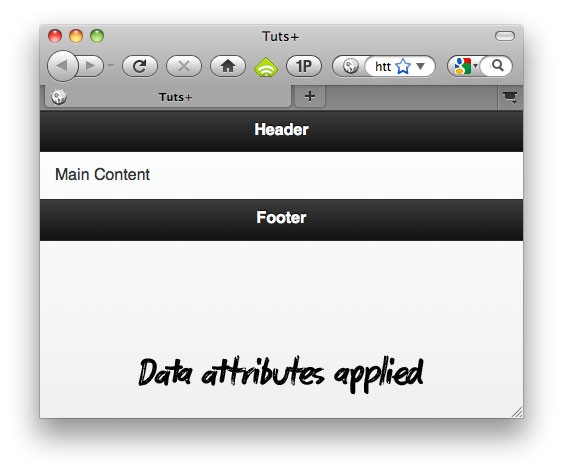
Data-role attributes applied.
Step 3: Listing the Tutorial Sites
Now that the structure of our index.php page is complete, we can populate each section with our Tuts+ specific mark-up.
<body>
 	<div>
	    <header data-role="header">
	    	<h1> <img src="img/TLogo.png" alt="Tuts+"/> </h1>
	    </header>

	    <div data-role="content">
			<ul>
				<li>
					<img src="img/ntLogo.jpg" alt="Nettuts" class="ui-li-icon"/>
					<a href="site.php?siteName=nettuts"> Nettuts+ </a>
				</li>
				<li>
					<img src="img/psdLogo.jpg" alt="Psdtuts" class="ui-li-icon"/>
					<a href="site.php?siteName=psdtuts"> Psdtuts+ </a>
				</li>
				<li>
					<img src="img/vectorLogo.jpg" alt="Vectortuts+" class="ui-li-icon"/>
					<a href="site.php?siteName=vectortuts"> Vectortuts+ </a>
				</li>
				<li>
					<img src="img/mobileLogo.png" alt="Mobiletuts+" class="ui-li-icon"/>
					<a href="site.php?siteName=mobiletuts"> Mobiletuts+ </a>
				</li>
				<li>
					<img src="img/aeLogo.jpg" alt="Aetuts+" class="ui-li-icon"/>
					<a href="site.php?siteName=aetuts"> Aetuts+ </a>
				</li>
				<li>
					<img src="img/photoLogo.jpg" alt="Phototuts+" class="ui-li-icon"/>
					<a href="site.php?siteName=phototuts"> Phototuts+ </a>
				</li>
				<li>
					<img src="img/cgLogo.jpg" alt="Cgtuts+" class="ui-li-icon"/>
					<a href="site.php?siteName=cgtuts"> Cgtuts+ </a>
				</li>
				<li>
					<img src="img/audioLogo.jpg" alt="Audiotuts+" class="ui-li-icon"/>
					<a href="site.php?siteName=audiotuts"> Audiotuts+ </a>
				</li>
				<li>
					<img src="img/wdLogo.jpg" alt="Webdesigntuts+" class="ui-li-icon"/>
					<a href="site.php?siteName=webdesigntutsplus"> Webdesigntuts+ </a>
				</li>
			</ul>
	    </div>

	    <footer data-role="footer">
			<h4> www.tutsplus.com </h4>
	    </footer>

	</div>

</body>
</html>
- Header: In this section, we're simply inserting the Tuts+ graphic, and providing alternate text if images are turned off.
-
Content: In the content area, we need to list all of the tutorial sites, and apply a unique icon next to each heading. We also link to a new page,
site.phpthat will handle the process of retrieving the RSS feed. For convenience, when we link tosite.php, we also pass through the name of the selected site, via the querystring:siteName=nettuts. - Footer: At the bottom, for now, we'll simply add a link to Tuts+.
jQuery Mobile offers a plethora of helpful CSS classes, including
ui-li-icon. When applied to an image, it'll float it to the left, and apply 10px worth of margin-right.
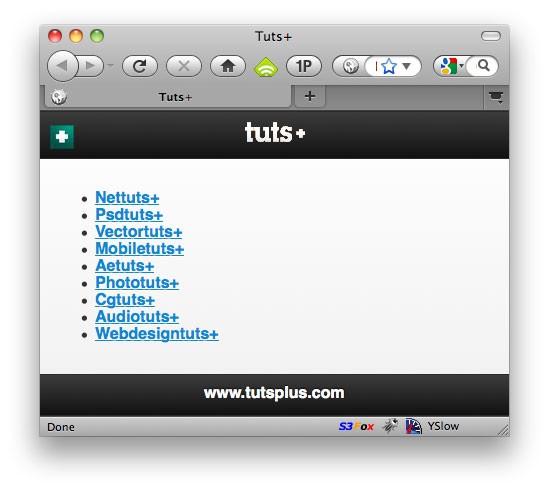
At this point, our site should look like the above image.
Page Transitions
As jQuery will load local pages asynchronously with AJAX, we can specify any number of cool page transitions. The default is the basic slide-left or slide-right effect that most touch-phone users are aware of. To override the default, use the data-transition attribute on the anchor tag.
<a href="site.php?siteName=nettuts" data-transition="pop"> Nettuts+ </a>
Available Transitions
- slide
- slideup
- slidedown
- pop
- flip
- fade
Step 4: ListViews
Ehh - the image, shown above, still looks like a website. We need to make things a bit more phone-like. The answer is to use the data-role="listview" attribute. Watch what happens when we do nothing more than apply this attribute to the wrapping unordered list.
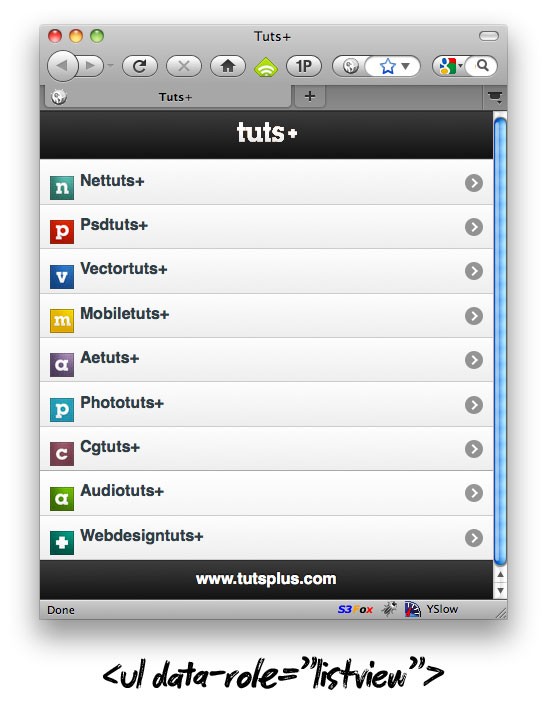
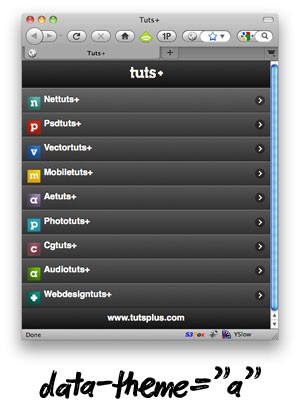
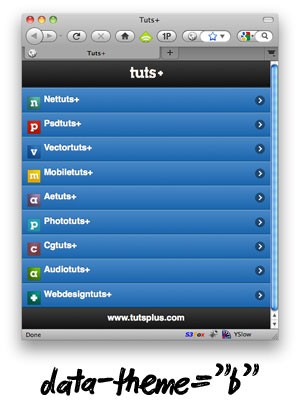
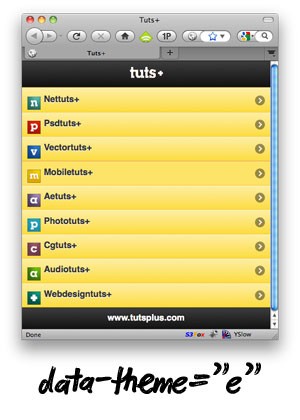
Wow - what an improvement! Even better, we have access to theme-roller, which allows us, with the change of a single letter, to switch color themes.
<ul data-role="listview" data-theme="a">
<ul data-role="listview" data-theme="b">
<ul data-role="listview" data-theme="e">
List Dividers
Now, what if we wanted to divide this list of tutorial sites? In these situations, we can take advantage of data-role="list-divider", which can be applied to the <li> element.
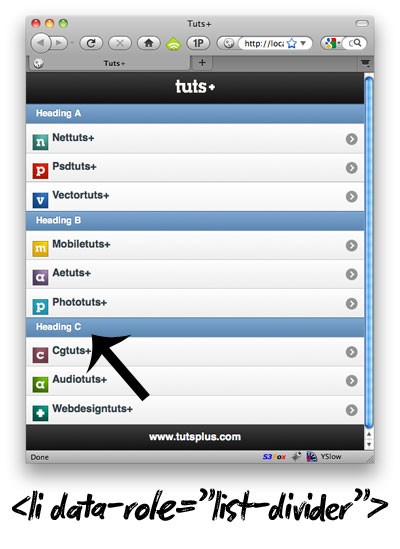
These, too, can receive lettered theme roller stylings. They can be set within the parent <ul>.
<ul data-role="listview" data-dividertheme="d">
Note that we won't be using dividers for this particular application.
Step 5: CSS
jQuery Mobile takes care of a great deal of the formatting, however, we still, of course, need our own stylesheet for tweaking. For example, looking at the images above, we can see that the tutorial icons need to be pushed up a bit. Additionally, I'd like to use the Tuts+ red for the background color of the heading and footer, rather than the default black.
Create a new folder, CSS, and add a new stylesheet -- I'll call mine: mobile.css. Within this file, we'll first fix the icon positioning:
 .ui-li-icon {
   top:  9px;
}
Next, we'll create a handful of classes, named after their respective tutorial sites. These classes will contain any specific formatting/colors for the site. For example, Nettuts+ has a darker green color, while MobileTuts+ is yellow.
.tuts { background: #c24e00; }
.nettuts { background: #2d6b61; }
.psdtuts { background: #af1c00; }
.vectortuts { background: #1e468e; }
.aetuts { background: #4a3c59; }
.phototuts { background: #3798aa; }
.cgtuts { background: #723b4a; }
.audiotuts { background: #4b7e00; }
.webdesigntutsplus { background: #0d533f; }
.mobiletuts { background: #dba600; }
That should be fine for now. The last step for index.php is to apply the .tuts class to the header and footer elements. That way, the header and footer will render the correct background color.
<header data-role="header" class="tuts">
...
<footer data-role="footer" class="tuts">
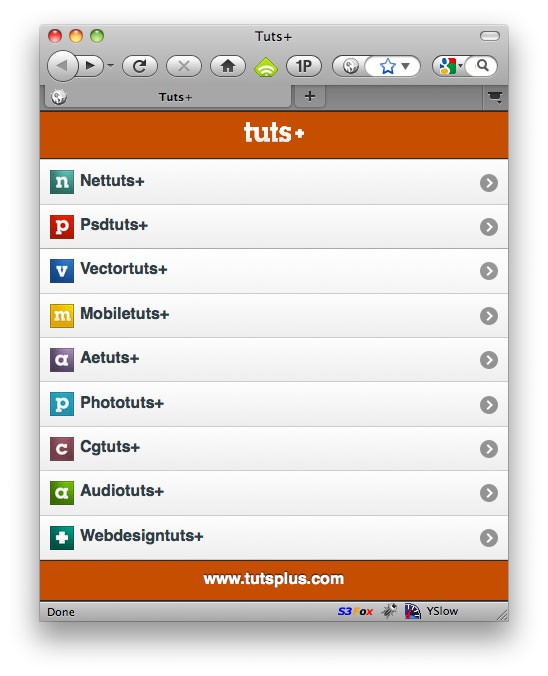
Step 6: YQL, PHP, and Caching
Now, it's time to step away from the layout, and work on the functionality. Each of the links we created directed to site.php?siteName="siteName". Let's go ahead and create that file now.
Even though this is a relatively tiny app, we should still strive to follow best practices. In this case, it means that we should keep as little PHP in our document as possible. Instead, we'll use site.php as a controller of sorts. This file will handle the initial logic, and will then, at the bottom, load in our HTML template.
Assigning the Site Name
In order to retrieve the desired RSS feed, we first need to capture the name of the site that the user clicked on initially. If you'll refer to a previous step, when we linked to site.php, we also passed the name of the site through the querystring. With PHP, this can easily be retrieved, with $_GET['siteName']. However, what if, for some odd reason, this value doesn't exist? Maybe site.php was accessed directly?? We should set a default site to compensate for these situations.
$siteName = empty($_GET['siteName']) ? 'nettuts' : $_GET['siteName'];
If $_GET['siteName'] is empty, we'll set "nettuts" to the variable, $siteName. Otherwise, it'll be equal to the name of the respective site.
Security
Even though this is a small project, let's also try to set some security in place. To prevent the user from automatically assigning a potentially dangerous value to the siteName key, let's ensure that the value is in fact the name of one of our tutorial sites.
// Prepare array of tutorial sites
$siteList = array(
   'nettuts',
   'flashtuts',
   'webdesigntutsplus',
   'psdtuts',
   'vectortuts',
   'phototuts',
   'mobiletuts',
   'cgtuts',
   'audiotuts',
   'aetuts'
);

// If the string isn't a site name, just change to nettuts instead.
if ( !in_array($siteName, $siteList) ) {
   $siteName = 'nettuts';
}
The in_array() function allows us to determine if a value -- in our case, the value of $siteName -- is equal to one of the items in the $siteList array.
Caching
Ultimately, we'll be using the excellent YQL to perform our queries. Think of YQL as an API for APIs. Rather than having to learn twenty different APIs, YQL's SQL-like syntax allows you to only learn one. However, though YQL does perform a bit of caching on its own, let's also save the RSS feeds to a text file on our server. That way, we can improve performance a fair bit.
We begin by creating a new variable, $cache, and making it equal to the location of where the cached file will be stored.
$cache = dirname(__FILE__) . "/cache/$siteName";
The code above points to the current directory of the file, and then into a cache folder, and, finally, the name of the selected site.
I've decided that this cached file should be updated every three hours. As such, we can run a quick if statement, and determine the last time that the file was updated. If the file does not exist, or the update was longer than three hours ago, we query YQL.
$cache = dirname(__FILE__) . "/cache/$siteName";
// Re-cache every three hours
if( filemtime($cache) < (time() - 10800) ) {
 // grab the site's RSS feed, via YQL
}
YQL is ridiculously easy to work with. In our case, we'll use it for a very simple purpose: grab the RSS feed, in JSON form, of the site that was passed through the querystring, via siteName. You can experiment with the various commands by using the YQL console.
To query an RSS feed, we using the command: SELECT * FROM feed WHERE url="path/to/rss/feed".
- Nettuts+ Feed: http://feeds.feedburner.com/nettuts
- Psdtuts+ Feed: http://feeds.feedburner.com/psdtuts
- Vectortuts+ Feed: http://feeds.feedburner.com/vectortuts
- etc.
Building the Path
For the sake of readability, we'll build up our YQL query in sections.
 // YQL query (SELECT * from feed ... ) // Split for readability
 $path = "http://query.yahooapis.com/v1/public/yql?q=";
 $path .= urlencode("SELECT * FROM feed WHERE url='http://feeds.feedburner.com/$siteName'");
 $path .= "&format=json";
The key is the second part above; when the page loaded, we grabbed the name of the site from the querystring. Now, we only need to insert it into the SELECT query. Luckily, all of the tutorial sites use Feedburner! Make sure that you urlencode the query to replace any special characters.
Okay, the path is ready; let's use file_get_contents() to grab the feed!
$feed = file_get_contents($path, true);
Assuming that $feed is now equal to the returned JSON, we can store the results in a text file. However, let's first ensure that data was returned. As long as something is returned from the query, $feed->query->count will be equal to a value greater than zero. If it is, we'll open the cached file, write the data to the file, and finally close it.
// If something was returned, cache
if ( is_object($feed) && $feed->query->count ) {
   $cachefile = fopen($cache, 'w');
   fwrite($cachefile, $feed);
   fclose($cachefile);
}
It seems confusing, but it's really not. The function fopen() accepts two parameters:
- The file to open: We stored this path in the
$cachevariable at the top of the page. Note that, if this file doesn't exist, it will create the file for you. - Access privileges: Here, we can specify which privileges are available.
wstands for "write."
Next, we open that file, and write the contents of $feed (the returned RSS JSON data) to the file, and close it.
Using the Cached File
Above, we first checked whether the cached file was greater than three hours old.
if( filemtime($cache) < (time() - 10800) ) {
 // grab the site's RSS feed, via YQL
}
But what if it wasn't? In that case, we run an else statement, and grab the contents of the text file, rather than using YQL.
if( filemtime($cache) < (time() - 10800) ) {
 // grab the site's RSS feed, via YQL
 ....
}
else {
// We already have local cache. Use that instead.
$feed = file_get_contents($cache);
}
Lastly, we can't do much with the JSON RSS feed until we decode it with PHP.
// Decode that shizzle
$feed = json_decode($feed);
And that should do it for our controller! With the logic out of the way, let's include our HTML template.
// Include the view
include('views/site.tmpl.php');
Here's our final site.php. Click on the expand icon to view it.
<?php
// If "siteName" isn't in the querystring, set the default site name to 'nettuts'
$siteName = empty($_GET['siteName']) ? 'nettuts' : $_GET['siteName'];

$siteList = array(
   'nettuts',
   'flashtuts',
   'webdesigntutsplus',
   'psdtuts',
   'vectortuts',
   'phototuts',
   'mobiletuts',
   'cgtuts',
   'audiotuts',
   'aetuts'
);

// For security reasons. If the string isn't a site name, just change to
// nettuts instead.
if ( !in_array($siteName, $siteList) ) {
   $siteName = 'nettuts';
}

$cache = dirname(__FILE__) . "/cache/$siteName";
// Re-cache every three hours
if(filemtime($cache) query->count ) {
      $cachefile = fopen($cache, 'wb');
      fwrite($cachefile, $feed);
      fclose($cachefile);
   }
}
else
{
   // We already have local cache. Use that instead.
   $feed = file_get_contents($cache);
}

// Decode that shizzle
$feed = json_decode($feed);

// Include the view
include('views/site.tmpl.php');
Step 7: The Site Template
At the end of the previous step, we loaded in our template (or view). Go ahead and create that views folder, and site.tmpl.php file. Feel free to name it how you wish. Next, we'll insert our HTML.
<?php include('includes/header.php'); ?>
<body>

<div data-role="page">

   <header data-role="header" class="<?php echo $siteName; ?>">
      <h1><?php echo ucwords($siteName).'+'; ?></h1>
   </header>

   <div data-role="content">
      <ul data-role="listview" data-theme="c" data-dividertheme="d" data-counttheme="e">

      </ul>
   </div>

   <footer data-role="footer" class="<?php echo $siteName; ?>">
      <h4> www.tutsplus.com</h4>
   </footer>
</div>

</body>
</html>
Points of Interest Above
- Notice how we follow the same basic layout: header, content area, footer.
- As this template will be used for every Tuts+ tutorial site, we need to set the title dynamically. Luckily, if you remember, the site name was passed through the querystring, and stored in the
$siteNamevariable (like, "nettuts"). To capitalize the first letter, and apply the signature + after the name, we'll run the variable throughucwords()(uppercases the first letter of each word in the string), and append a "+":<h1><?php echo ucwords($siteName).'+'; ?></h1> - We'll soon be displaying the number of comments for each posting next to the title. We can, again, use ThemeRoller to style it, via the
data-counttheme="e"attribute.
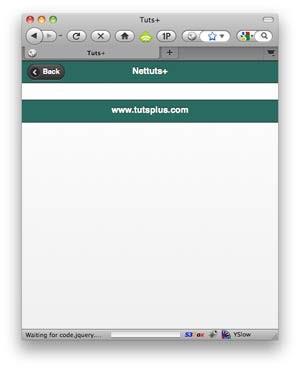
Filtering Through the Feed
At this point, we have access to the $feed object that contains our RSS feed. To dissect this object, you can either print_r($feed), or use the YQL console for a prettier view. We'll use the latter in this case. Check it out.
To grab the data for each posting, we need to filter through: $feed->query->results->item. PHP makes this a cinch with foreach().
Within the foreach() statement, we can now access the desired values with $item->title, or $item->comments, which will display the title, and the comment number, respectively. Add the following within the <ul> tags.
<ul data-role="listview" data-theme="c" data-dividertheme="d" data-counttheme="e">
<?php
    foreach($feed->query->results->item as $item) { ?>

    <li>
      <h2>
         <a href="article.php?siteName=<?php echo $siteName;?>&origLink=<?php echo urlencode($item->guid->content); ?>">
               <?php echo $item->title; ?>
         </a>
      </h2>
      <span class="ui-li-count"><?php echo $item->comments; ?> </span>
   </li>

<?php  } ?>
</ul>
In the code above, we build up a list item, containing the title of the posting, the number of comments, and a link to article.php that also contains the site name and the permanent link (to the original article on the Tuts+ site) in the query-string.
When we view the updated page in the browser, tada!
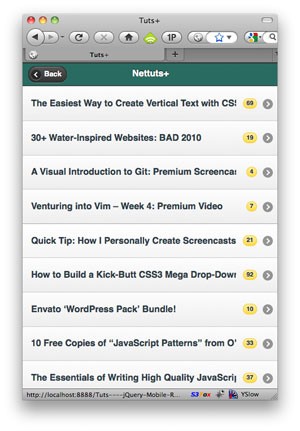
Notice how the comment count is in a yellow bubble, and is floated to the right? That's because we applied the data-counttheme="e" attribute to the wrapping unordered list. How convenient.
Hmm...I think the text is too large for these long titles. A quick visit to Firebug shows that I can target the h2 tags with a class of .ui-li-heading. Let's return to our stylesheet (mobile.css), and add a new rule:
.ui-li-heading { font-size: 12px; }
That's better.

Step 8: Displaying the Full Posting
The final step is to build article.php, which will display the entire posting. As with site.php, article.php will serve as our controller, and will query the selected article with YQL, and load the appropriate view.
<?php

$siteName = $_GET['siteName'];
$origLink = $_GET['origLink'];

// YQL query (SELECT * from feed ... ) // Split for readability
$path = "http://query.yahooapis.com/v1/public/yql?q=";
$path .= urlencode("SELECT * FROM feed WHERE url='http://feeds.feedburner.com/$siteName' AND guid='$origLink'");
$path .= "&format=json";

$feed = json_decode(file_get_contents($path));
$feed = $feed->query->results->item;

include('views/article.tmpl.php');
If you've been following along, the code above should look a bit more familiar to you. When we loaded this page, from site.php, we passed through two items, via the query string:
- Site Name: Contains the name of the currently selected tutorial site
- Orig Link: A link to the original posting on the tutorial site
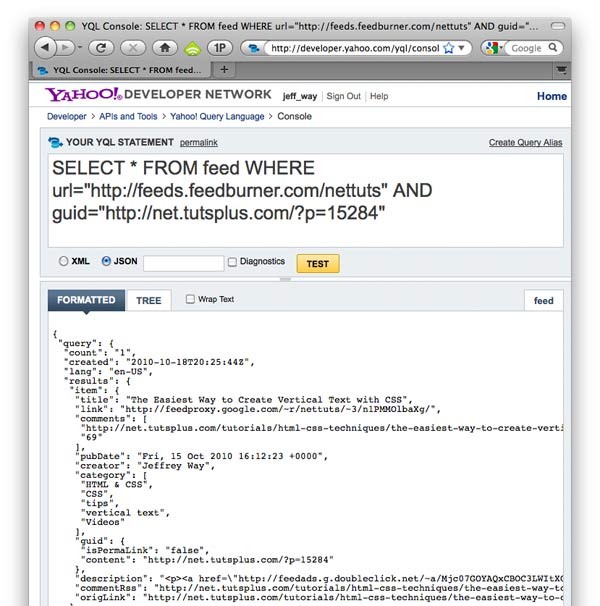
The difference with the YQL query, this time, is that we match the guid (orig link) with the posting that the user clicked on (or pressed). This way, exactly one posting will be returned. Check out this sample YQL query to gain a better idea of what I mean.
Article Template
At the bottom of the code above, we loaded the template file for the article page: views/article.tmpl.php. We'll create that file now.
<?php include('includes/header.php'); ?>
<body>

<div data-role="page">

   <header data-role="header" class="<?php echo $siteName; ?>">
      <h1> <?php echo ucWords($siteName).'+'; ?> </h1>
   </header>

   <div data-role="content">
        <h1> <?php echo $feed->title; ?> </h1>
        <div> <?php echo $feed->description; ?> </div>
   </div>

   <footer data-role="footer" class="<?php echo $siteName; ?>">
      <h4> <a href="<?php echo $feed->guid->content;?>"> Read on <?php echo ucWords($siteName); ?>+</a></h4>
   </footer>
</div>

</body>
</html>
Ah - so familiar. We've already gone over this template. The only difference is that, this time, because there's only one posting from the YQL query to display, we don't need to bother with a foreach() statement.
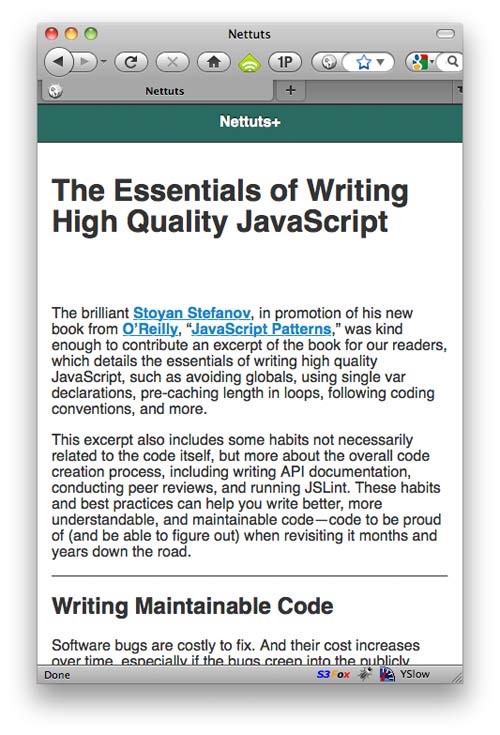
Unstyled article page
At this point, on your own, the next step would be to begin applying your desired styling to the article. I don't see a need to go over it in this tutorial, as it all comes down to personal taste. Here's my super-minimal version.
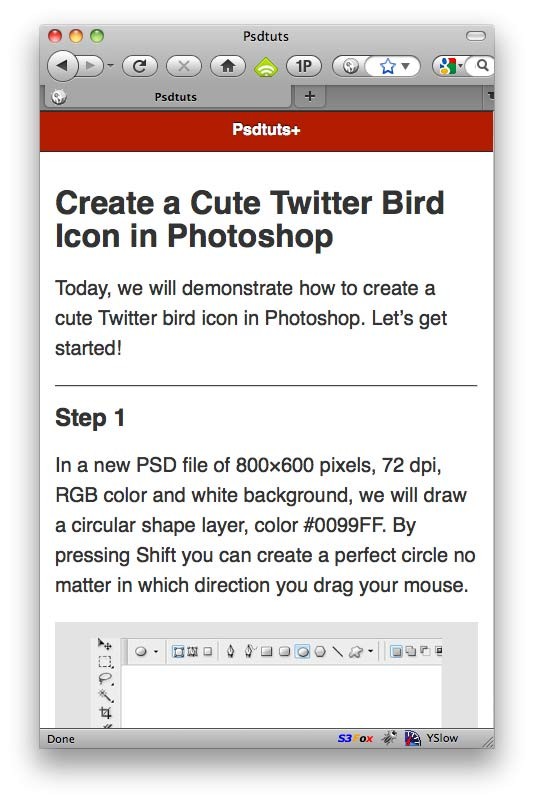
Applying a font-size, line-height, padding, and image formatting.
Locked Footers
One last thing: in the footer section of the article, we link to the original posting on Nettuts+. In its current state, the reader will only see that when they reach the bottom of the article. Let's lock the footer to the bottom of the current view-point at all times. We can use the data-position attribute to achieve this.
   <footer data-role="footer" data-position="fixed">
      <h4> <a href="<?php echo $feed->guid->content;?>"> Read on <?php echo ucWords($siteName); ?>+</a></h4>
   </footer>
That's better!
We're Done!
And, with relatively little work, we've successfully built a mobile RSS reader for the Tuts+ sites. It can certainly be expanded to provide additional features, error checking, and performance improvements, but this will hopefully get you started! If you'd like to fork the project and make it better, by all means...do! Thanks for reading, and be sure to refer to the jQuery Mobile documentation for more details. I've no doubt that you'll come across more jQuery mobile tutorials on our sister site, Mobiletuts+.


Comments