What is JSONModel?
Our iOS devices are connected to the internet most of the time and, naturally, most of the apps on our devices connect to a remote server to grab this or that chunk of data every now and again.
Some apps only consume a little bit of data, only fetching the latest headlines every hour or so. Other apps interact a lot with a backend service while the user browses their social feed, reads trough posts, and uploads photos.
The days that every web service spoke XML are long gone. Nowadays, most mobile applications communicate with web services using JSON. If you plan to create a mobile application that talks to a remote backend, chances are that you'll need to be able to send and receive JSON.
JSONModel is an open source library written in Objective-C, which helps you fetch JSON from a server, parse it, and initialize your model classes with the data. It also validates the JSON data, cascades trough nested models, and more.

"But wait!" you may be thinking "I already wrote an iPhone app that fetches some JSON and shows it on screen. That was pretty easy!"
Well, that's partially true. NSJSONSerialization has been available since iOS 5, so it's indeed pretty easy to convert a JSON response to an NSDictionary object. This works fine for simple applications, but believe me when I say that this isn't a good idea for a complex application with a complex data model. Let's see how JSONModel can save your bacon.
Note that I'm the author of JSONModel, developing and maintaining the library with the help of contributors on GitHub. I'm obviously biased, but this is good news for you as you'll be able to learn from the person who created the library.
Basic Features
In this section, I'll briefly highlight and discuss the basic features of the library. If you are too eager to dive into code, then jump over to the next section, The Hello Chuck App.
Automatic Mapping of JSON to Model Classes
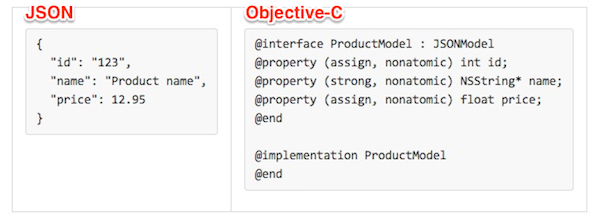
When you look at the JSON data that populates your model object, you often feel inclined to match the names of the keys used in the JSON data. You end up writing code that looks like this:
self.firstName = [json objectForKey:@"firstName"];
self.familyName = [json objectForKey:@"familyName"];
self.age = [json objectForKey:@"age"];
With JSONModel, you don't need to write this type of boilerplate code. JSONModel automatically maps JSON to the properties of the model class.
Input Validation
JSONModel automatically inspects the properties of your model class and ensures that the JSON that's used to initialize a model object matches the model class definition. If there's a mismatch, then the model object won't be initialized.
In addition, the model verifies that the JSON data matches the types defined by the model class. If you get an array instead of a string, for example, the JSON data is considered invalid.
Data Transformation
Due to JSON's simple specification, it's easy to use, but it also removes a lot of metadata when it's used to transfer data from a backend to a client and vice versa. A JSON object can only contain strings, numbers, arrays, and objects.
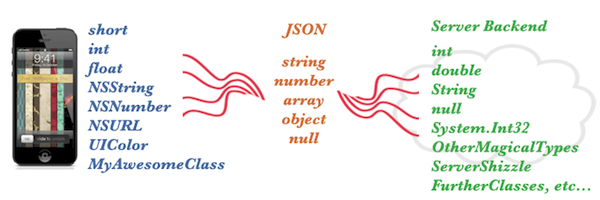
In your Objective-C model class, you usually have properties of various types, not limited to strings and numbers, which are the only data types supported by JSON. For example, you often have URLs in a JSON object. It's easy to convert a string in a JSON object to an NSURL object, but the annoying part is that you need to do this yourself.
JSONModel let's you define transformations for data types once and use them across your models. For example, if a JSON response provides you with a date as a timestamp in the form of an integer, then you only need to tell JSONModel how to convert the integer to an NSDate object once. You'll learn more about data transformations in the second installment of this series.
Nested Models
More often than not, a JSON response has a complex structure. An object, for example, can contain one or more other objects. Take a look at the following JSON object.
{
    "id": 10,
    "more": {
        "text": "ABC",
        "count": 20
    }
}
JSONModel let's you nest model classes too. It doesn't matter whether your model contains another model or an array of model object, JSONModel inspects your model classes and automatically initializes objects of the correct type. We'll take a closer look at nested models a bit later.
That's enough theory for now. Let's learn how to use the JSONModel library by creating a simple, sample application.
The Hello Chuck App
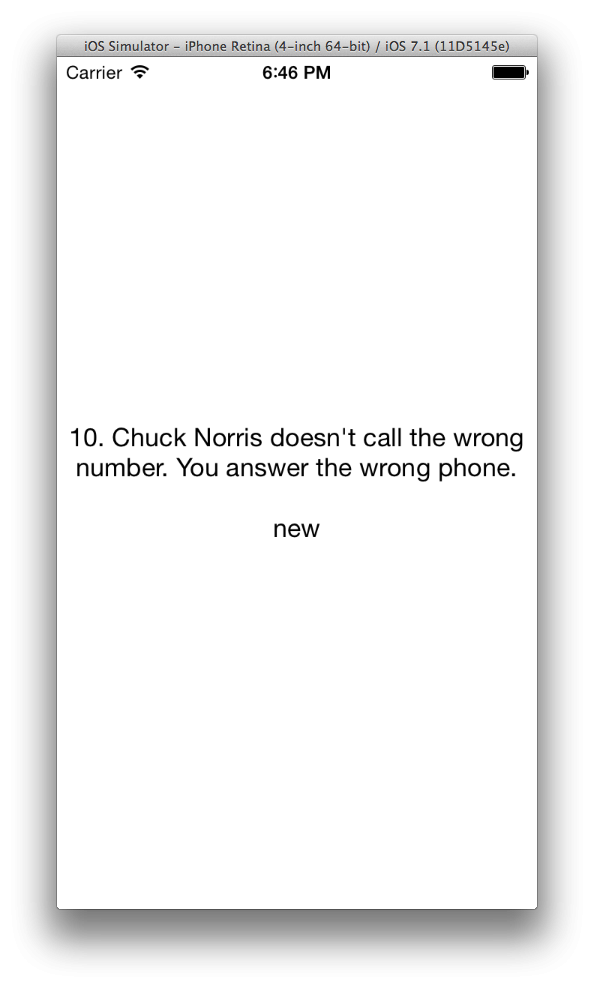
Now that you have a basic idea what JSONModel does, you will develop a simple app that fetches a JSON feed of Chuck Norris jokes and shows them to the user one by one. When you are finished, the app will look something like this:
Step 1: Project Setup
Launch Xcode 5, create a new project by selecting New > Project... from the File menu, and select the Single View Application template from the list of iOS Application templates.

Name the project HelloChuck, tell Xcode where you'd like to save it, and hit Create. There's no need to put the project under source control.

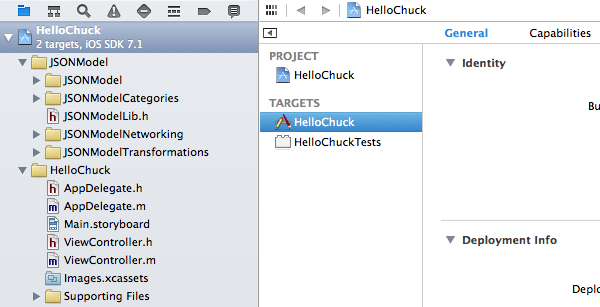
Next, download the latest version of the JSONModel library from GitHub, unzip the archive, and have a peak inside.
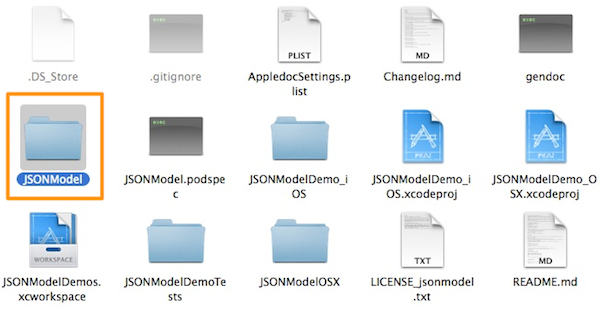
The archive contains demo applications for iOS and OSX, unit tests, and more. You are only interested in the folder named JSONModel. Drag it to your Xcode project. The installation is even easier if you use CocoaPods.
Step 2: Create Model Classes
The JSON feed you are going to use is pretty simple. It contains an array of jokes, with each joke having an id, the joke itself, and, optionally, an array of tags.
{
    "id": 7,
    "text": "There used to be a street named after Chuck Norris but it was changed because nobody crosses Chuck Norris and lives",
    "tags": [
        { "id":1, "tag":"lethal" },
    	{ "id":2, "tag":"new" }
    ]
}
Let's start by creating the model classes to match the JSON data. Create a new class, JokeModel, and make it inherit from JSONModel. Add id and text properties to match the keys in the JSON data like so:
@interface JokeModel : JSONModel

@property (assign, nonatomic) int id;
@property (strong, nonatomic) NSString* text;

@end
The JSONModel library will automatically convert numbers to match the property's type.
You also need to create a class for the tag objects in the JSON data. Create a new class, TagModel, and make it inherit JSONModel. Declare two properties id and tag of type NSString. The TagModel class should look like this:
@interface TagModel : JSONModel

@property (strong, nonatomic) NSString* id;
@property (strong, nonatomic) NSString* tag;

@end
Note that you've set the type of id to NSString. JSONModel knows perfectly fine how to transform numbers to strings, it will handle the transformation for you. The idea is that you only need to focus on the data you need in your application without having to worry about what the JSON data looks like.
Even though the TagModel class is ready to use, you need a way to tell the JokeModel class that the key tags contains a list of TagModel instances. This is very easy to do with JSONModel. Add a new empty protocol in TagModel.h and call it TagModel:
@protocol TagModel
@end
Open JokeModel.h and import the header file of the TagModel class:
#import "TagModel.h"
Here comes the magic. Declare a new property to JokeModel like shown below. The tags property is of type NSArray and it conforms to two protocols.
@property (strong, nonatomic) NSArray<TagModel, Optional>* tags;
-
TagModelis the protocol you declared a moment ago. It tellsJokeModelthat the array of tags should contains instances of theTagModelclass. - By adhering to the
Optionalprotocol, theJokeModelclass knows that the JSON data won't always contain a list of tags.
This is a good moment to stress that every property in your model class is by default required. If id or text are missing in the JSON data, the initialization of the JokeModel object will fail. However, if tags are absent for a particular joke, JSONModel won't complain about it.
Step 3: View Controller Setup
You first need to make a couple of adjustments to the ViewController class. Open up ViewController.m and, below the existing import statement at the top, import the JokeModel class:
#import "JokeModel.h"
You need to add two properties to the ViewController class:
-
labelto display the joke's text onto the screen -
jokesto store the array of jokes
@interface ViewController ()

@property (strong, nonatomic) UILabel* label;
@property (strong, nonatomic) NSArray* jokes;

@end
You also need to set up the label so that it's ready whenever you fetch the JSON data and have a joke ready to be displayed. Update the viewDidLoad method as shown below.
- (void)viewDidLoad {
    [super viewDidLoad];

    self.label = [[UILabel alloc] initWithFrame:self.view.bounds];
    self.label.numberOfLines = 0;
    self.label.textAlignment = NSTextAlignmentCenter;
    self.label.alpha = 0;

    [self.view addSubview: self.label];

    [self fetchJokes];
}
You create a UILabel instance the size of the device's screen and you set it's alpha property to 0. The label is hidden until the first joke is ready to be displayed.
In the last line of viewDidLoad, you call fetchJokes, in which the application fetches the remote JSON data and stores its contents in the view controller's jokes property. You'll implement fetchJokes in just a moment.
Step 4: Fetch JSON and Create Model Objects
In this example, you'll use the NSURLSession class to fetch the remote JSON data. You create the URL for the request, initialize a data task, and send it on its way.
- (void)fetchJokes {
    NSURL* jokesUrl = [NSURL URLWithString:@"https://s3.amazonaws.com/com.tuts.mobile/jokes.json"];

    [[[NSURLSession sharedSession] dataTaskWithURL:jokesUrl completionHandler:^(NSData *data, NSURLResponse *response, NSError *error) {
        //handle data here
    }] resume];
}
dataTaskWithURL:completionHandler: creates for an NSURLSessionDataTask instance with the URL that is passed to it. By calling resume on the data task, you tell the NSURLSession instance to add the data task to its queue.
Next, you need to add the code to initialize the JokeModel instances. Replace //handle data here with:
self.jokes = [JokeModel arrayOfModelsFromData:data error:nil];
arrayOfModelsFromData:error: takes an NSData object from a JSON response and returns an array of models. But what happens under the hood?
-
[JokeModel arrayOfModelsFromData:error:]takes the JSON data and turns it into an array of JSON objects. - Then
JokeModelloops over those objects and createsJokeModelinstances from each JSON object. - Each
JokeModelinstance inspects the JSON data it receives and and initializes its properties with the proper values. - If the
JokeModelinstance finds content in the data'stagskey, then it creates an array ofTagModelinstances from the value associated with thetagskey.
If you only need to create one model instance, then initWithData: and initWithString: are the methods you need to use. We'll take a closer look at these methods in the next tutorial.
After initializing the array of jokes, you can display the first joke to the user using the following code snippet.
dispatch_async(dispatch_get_main_queue(), ^{
    [self showNextJoke];
});
Step 5: Displaying Jokes
- (void)showNextJoke {
    JokeModel* model = self.jokes[arc4random() % self.jokes.count];

    NSString* tags = model.tags?[model.tags componentsJoinedByString:@","]:@"no tags";
    self.label.text = [NSString stringWithFormat:@"%i. %@\n\n%@", model.id, model.text, tags];

    [UIView animateWithDuration:1.0 animations:^{
        self.label.alpha = 1.0;
    } completion:^(BOOL finished) {
        [self performSelector:@selector(hideJoke) withObject:nil afterDelay:5.0];
    }];
}
You first pull a random joke from the jokes array and store it in model. If the joke has tags, you store them as a comma separated list in a variable named tags. If the joke doesn't have any tags, you set tags to @"no tags".
You update the label to show the id, text, and tags of the current joke and use a fade animation to show the joke to the user.
When the animation completes, you wait five seconds before invoking hideJoke, which hides the joke with another fade animation. When the animation completes, you call showNextJoke once again.
- (void)hideJoke {
    [UIView animateWithDuration:1.0 animations:^{
        self.label.alpha = 0.0;
    } completion:^(BOOL finished) {
        [self showNextJoke];
    }];
}
This creates an infinite loop, fading randomly selected jokes in and out. The effect is pretty cool. Give it a try by running the application.
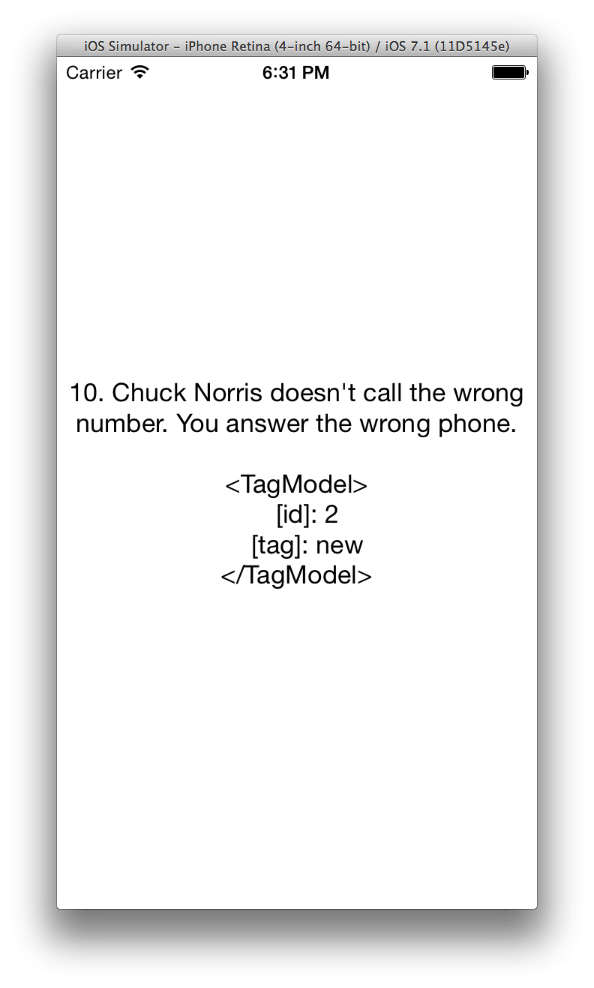
However, there is the problem that printing out the array of tags displays TagModel objects instead of string objects. This behavior is actually a feature of the JSONModel library. It automatically creates a description of the object like the one you saw in the previous screenshot. It lists the model object's properties and their values, which really helps with debugging.
Step 6: Customizing Models
To wrap this tutorial up, you are going to write your first line of model code. Models that inherit from JSONModel are just like any other Objective-C class. This means that you can override the methods of JSONModel and customize their behavior however you like.
Open TagModel.m and override the default description method:
- (NSString *)description {
    return self.tag;
}
When you now call componentsJoinedBySeparator: on the array of tags, instead of the default description of TagModel you will just get the tag as plain text.
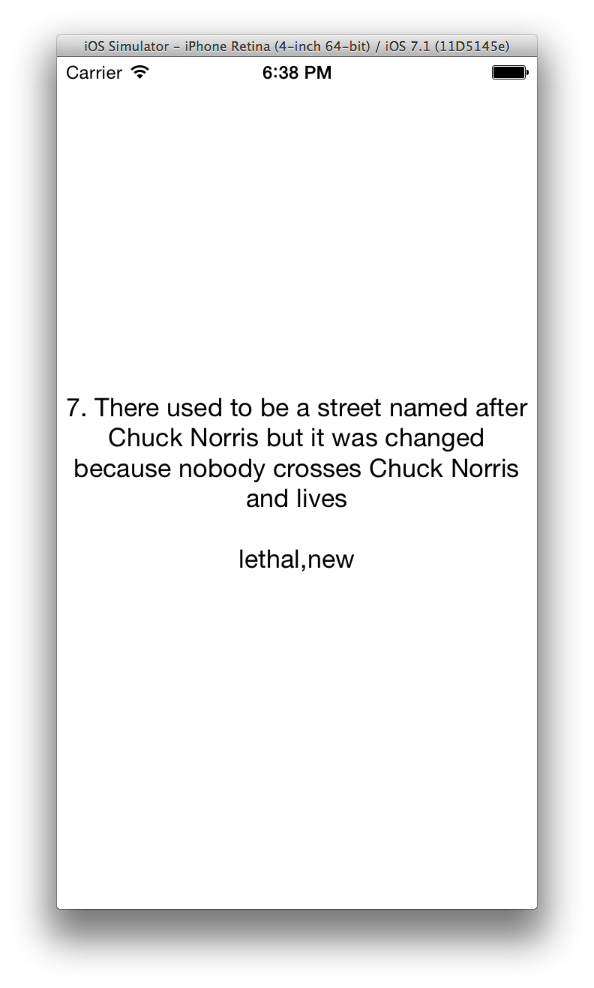
Give it a try by running the application one more time. You should now see the list of tags neatly appear under each joke.
Conclusion
You now have a basic understanding of the JSONModel library. So far, you've learned:
- how to create a simple model class that inherits from
JSONModel - how to define required and optional properties
- and how to nest model classes
In this short tutorial, I only touched upon a few of the features of the JSONModel library. In the next installments of this series, you will learn more about data transformation, working with remote JSON APIs, and you'll look into some more advanced JSONModel features.


Comments