In this tutorial, I am going to create a small Rails app. I will show you how to create a rake task to import some venues from Foursquare to our database. Then we will index them on Elasticsearch. Also, the location of each venue is going to be indexed, so that we are able to search by distance.
Rake Task to Import Foursquare Venues
A rake task is only a ruby script that we can run manually, or we can execute it periodically if we need to perform some background tasks, for maintenance for example. In our case we are going to run it manually. We are going to need a new rails application and some models to save to our database, the venues that we are going to import from Foursquare. Let's start by creating a new rails app, so type in your console:
$ rails new elasticsearch-rails-geolocation
I'm going to create two models: venue and category, using rails generators. To create the Venue model, type in your terminal:
$ rails g model venue name:string address:string country:string latitude:float longitude:float
Type the following command to generate the Category model:
$ rails g model category name:string venue:references
The relationship from Venue to Category is many to many. For instance, if we import an Italian restaurant, it might have the categories 'Italian' and 'Restaurant', but other venues can have the same categories too. To define the many to many relationship from Venues to Categories, we use the has_and_belongs_to_many active record method, as we don't have any other properties that belong to the relationship. Our models look like this now:
class Venue < ActiveRecord::Base
  has_and_belongs_to_many :categories
end

class Category < ActiveRecord::Base
  has_and_belongs_to_many :venues
end
Now we still need to create the 'join' table for the relationship. It will store the list of 'venue_id, category_id' for the relationships. To generate this table, run the following command in your terminal:
$ rails generate migration CreateJoinTableVenueCategory venue category
If we take a look at the migration generated, we can verify that the right table for the relationship is created:
class CreateJoinTableVenueCategory < ActiveRecord::Migration
  def change
    create_join_table :venues, :categories do |t|
      # t.index [:venue_id, :category_id]
      # t.index [:category_id, :venue_id]
    end
  end
end
To actually create the table in the database, don't forget to run the migration by executing the command bin/rake db:migrate in your terminal.
To import the venues from foursquare, we need to create a new Rake task. Rails has a generator for tasks too, so just type in your terminal:
$ rails g task import venues
If you open the new file created in lib/tasks/import.rake, you can see that it contains a task with no implementation.
namespace :import do
  desc "TODO"
  task venues: :environment do
  end
end
To implement the task, I am going to use two gems. The gem 'foursquare2' is used to connect to foursquare. The second gem is 'geocoder' to convert the name of the city that we pass to the task as an argument to geo-coordinates. Add these two gems to your Gemfile:
gem 'foursquare2'gem 'geocoder'
Run bundle install in your terminal, inside your rails project folder, to get the gems installed.
To implement the task, I have checked the documentation for foursquare2, as well as the official Foursquare documentation. Foursquare doesn't accept anonymous calls to its API, so we need to create a developer account and register this app to get the client_id and client_secret keys that we need to connect. For this sample, I'm interested in the Venue Search API endpoint, so we can have some real data for our sample. After we have the data back from the API, we just save it to the database. The final implementation looks like:
namespace :import do
  desc "Import venues from foursquare"
  task :venues, [:near] => :environment do |t, args|

    client = Foursquare2::Client.new(
      client_id: 'your_foursquare_client_id',
      client_secret: 'your_foursquare_client_secret',
      api_version: '20160325')

    result = client.search_venues(near: args[:near].to_s, query: 'restaurants', intent: 'browse')
    result.venues.each do |v|
        venue_object = Venue.new(name: v.name, address: v.location.address, country: v.location.country, latitude: v.location.lat, longitude: v.location.lng)

        v.categories.each do |c|
          venue_object.categories << Category.find_or_create_by(name: c.shortName)
        end

        venue_object.save

        puts "'#{venue_object.name}' - imported"
    end
  end
end
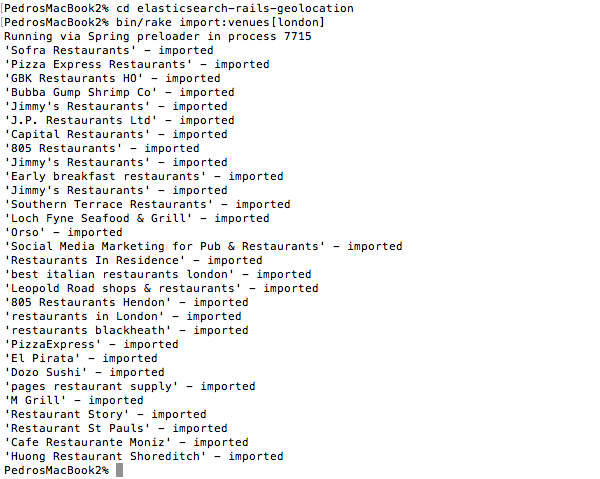
Once you have added your Foursquare API keys, to import some venues from 'London', run this command in your terminal: bin/rake import:venues[london]

You can try with your city if you prefer, or you can also import data from multiple places too. As you can see, our rake task is only sending that to Foursquare, and then saving the results to our database.
Indexing Venues in Foursquare Using Chewy
At this point we have our importer and data model, but we still need to index our venues on Elasticsearch. Then we need to create a view with a search form that allows you to enter an address near which you are interested in finding venues.
Let's start by adding the gem 'chewy' to the Gemfile and running bundle install.
According to the documentation, create the file app/chewy/venues_index.rb to define how each Venue is going to be indexed by Elasticsearch. Using chewy we don't need to annotate our models, so the indexes for Elasticsearch are completely isolated from the models.
class VenuesIndex < Chewy::Index
  define_type Venue do
    field :country
    field :name
    field :address
    field :location, type: 'geo_point', value: ->{ {lat: latitude, lon: longitude} }
    field :categories, value: ->(venue) { venue.categories.map(&:name) } # passing array values to index
  end
end
As you can see, in the class VenuesIndex, I'm indicating that I want to index the fields country, name and address as string. Then, to be able to search by geo-location, I need to indicate that latitude and longitude make a geo_point, which is a geo-location on Elasticsearch. The last thing that we want to index with each venue is the list of categories.
Run the rake task by typing in your terminal bin/rake chewy:reset to index all the Venues that we have in the database. You can use the same command to re-index your database in Elasticsearch if you need to.
Now we have our data in the SQLite database and indexed in Elasticsearch, but we haven't created any views yet. Let's generate our Venues controller, with a 'show' action only.
Let's start by modifying our routes.rb file:
Rails.application.routes.draw do
  root 'venues#show'
  get 'search', to: 'venues#show'
end
Now, create the view app/views/venues/show.html.erb, where I'm just adding a form to enter the location where you want to find venues. I also render the list of venues if the result of the search is available:
<h1>Search venues</h1>

<% if @total_count %>
    <h3><%= @total_count %> venues found near <%= params[:term] %></h3>
<% end %>

<%= form_for :term, url: search_path, method: :get do |form| %>
	<p>
		Venues near
    <%= text_field_tag :term, params[:term] %>
    <%= submit_tag "Search", name: nil %>
	</p>
<% end %>

<hr/>

<div id='search-results'>
	<% @venues.each do |venue| %>
	  <div>
	    <h3><%= venue.name %></h3>
	    <% if venue.address %>
	      <p>Address: <%= venue.address %></p>
	    <% end %>
			<p>Distance: <%= number_to_human(venue.distance(@location), precision: 2, units: {unit: 'km'}) %></p>
		</div>
	<% end %>
</div>
As you can see, I'm displaying the distance from the location entered in the search form to each Venue. In order to calculate and display the distance, add the 'distance' method to your Venue class:
class Venue < ActiveRecord::Base
  has_and_belongs_to_many :categories

  def distance location
    Geocoder::Calculations.distance_between([latitude, longitude], [location['lat'], location['lng']])
  end
end
Now, we need to generate VenuesController, so type in your terminal $ rails g controller venues show. This is the full implementation:
class VenuesController < ApplicationController
  def show
    if params[:term].nil?
      @venues = []
    else
      @location = address_to_geolocation params[:term]

      scope = search_by_location
      @total_count = scope.total_count
      @venues = scope.load
    end
  end

  private
    def address_to_geolocation term
      res = Geocoder.search(term)
      res.first.geometry['location'] # lat / lng
    end

    def search_by_location
      VenuesIndex
        .filter {match_all}
        .filter(geo_distance: {
          distance: "2km",
          location: {lat: @location['lat'], lon: @location['lng']}
        })
        .order(_geo_distance: {
            location: {lat: @location['lat'], lon: @location['lng']}
          })
    end
end
As you can see, we only have the 'show' action. The search location is stored in params[:term], and if that value is available we convert the address to a geo-location. In the method 'search_by_location', I'm just querying Elasticsearch to match any venue within 2km from the search distance and order by the nearest one.
You might be thinking, "Why is the result not ordered by distance by default if we're doing a geo-search?" Elasticsearch considers a geolocation filter as one filter, that's all. You can also perform a search on the other fields, so we could be searching 'pizza restaurant' near a location. Maybe there is an Italian restaurant that has four pizzas on the menu very near, but there is a big pizza place a bit farther away. Elasticsearch takes into account the relevance of a search by default.
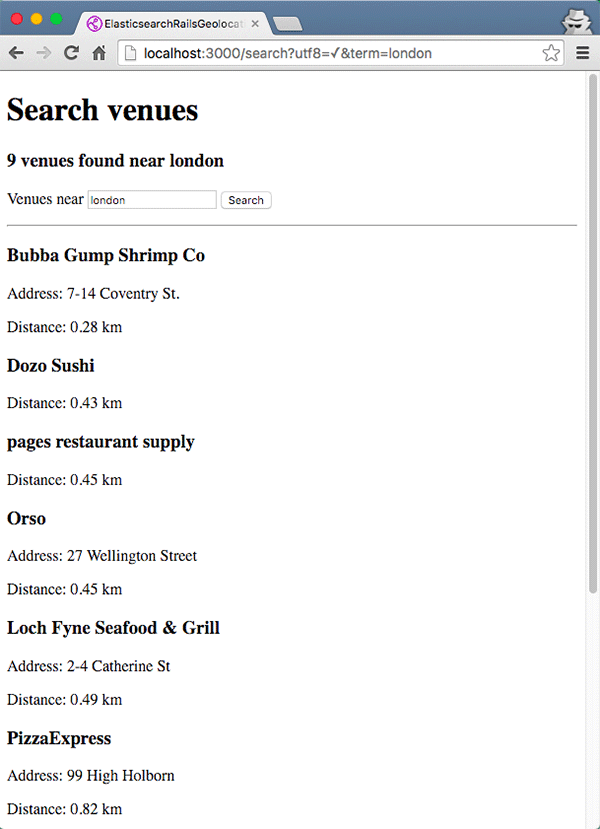
If I perform a search, I can see a list of venues:

Filtering Venues by Category
We are also storing the category for each venue, but we are not displaying it or filtering by category at the moment, so let's start by displaying it. Edit views/venues/show.html.erb, and in the search results list display the category, with a link to filter by that category. We also need to pass the location, so we can search by location and category:
<p>Category:
  <% venue.categories.each do |c| %>
    <%= link_to c.name, search_path(term: params[:term], category: c.name) %>
  <% end %>
</p>
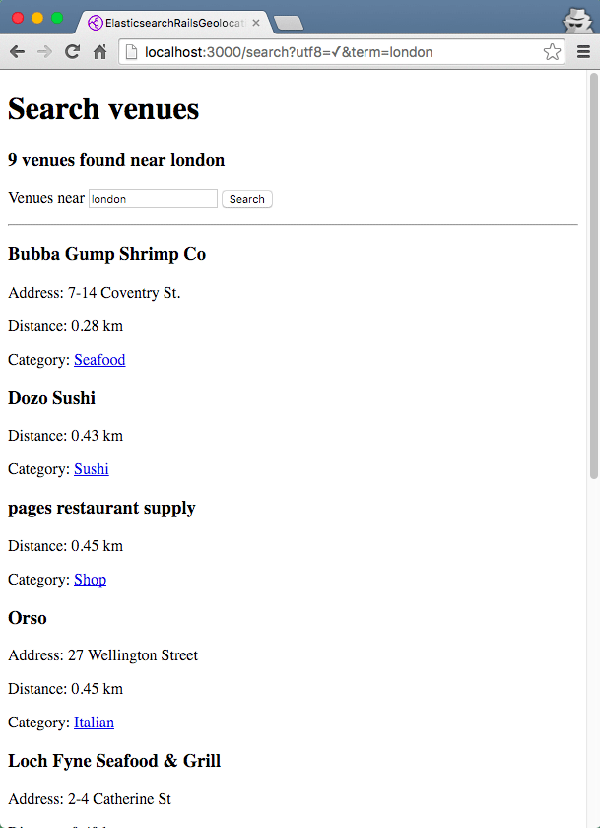
If we refresh the search page, we can see the categories being displayed now:

Now we need to implement the controller, and we have a new optional 'category' parameter. Also, when we query the index, we need to check if the parameter 'category' is set, and then filter by the category after searching by distance.
class VenuesController < ApplicationController
  def show
    if params[:term].nil?
      @venues = []
    else
      @location = address_to_geolocation params[:term]
      @category = params[:category]

      scope = search_by_location
      @total_count = scope.total_count
      @venues = scope.load
    end
  end

  private
    def address_to_geolocation term
      res = Geocoder.search(term)
      res.first.geometry['location'] # lat / lng
    end

    def search_by_location
      scope = VenuesIndex
        .filter {match_all}
        .filter(geo_distance: {
          distance: "2km",
          location: {lat: @location['lat'], lon: @location['lng']}
        })
        .order(_geo_distance: {
            location: {lat: @location['lat'], lon: @location['lng']}
          })

      if @category
        scope = scope.merge(VenuesIndex.filter(match: {categories: @category}))
      end

      return scope
    end
end
Also, in the header I'm adding a link to go back to the 'unfiltered results'.
<h1>Search venues</h1>

<% if @total_count %>
    <% if @category %>
		<h3><%= "#{@total_count} #{@category} found near #{params[:term]}" %></h3>
		<%= link_to 'All venues', search_path(term: params[:term]) %>
	<% else %>
		<h3><%= @total_count %> venues found near <%= params[:term] %></h3>
	<% end %>
<% end%>
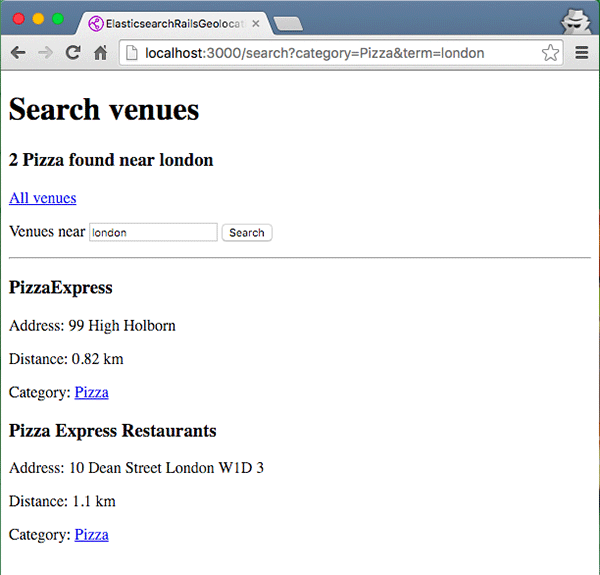
Now if I click on a category after performing a search, you can see that the results are being filtered by that category.

Conclusion
As you can see, there are different gems to index your data to Elasticsearch and perform different search queries. Depending on your needs, you might prefer to use different gems, and possibly when you need to perform complex queries, you will need to learn about Elasticsearch API and make queries at a lower level, which is allowed by most gems. If you want to implement full text search and maybe autosuggest only, you probably don't need to learn much about the details of Elasticsearch.


Comments