With over half a million apps, the Apple App Store may be a little crowded, but the good news is that smart developers can add a secret weapon to their arsenal in the quest for App Store domination. That secret is design! In this three part tutorial series, I am going to show you how to design and build a small business app from scratch.
Final Effect
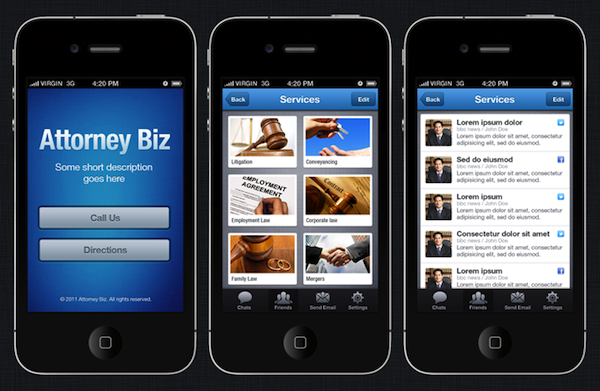
Let's call the app for this series "Biz App", as this can be used to show a small business' services. The idea is to follow along and understand how apps are designed so you can go out there and make your apps rock.
Ready? Let's go!
Create the Project
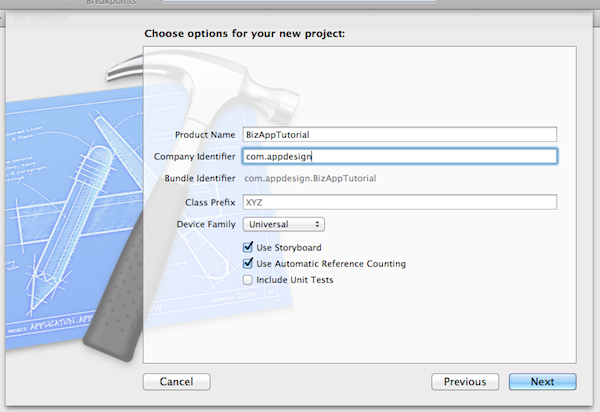
Create new Xcode project and use the Tabbed Application template. Call it BizAppTutorial and make sure the "Use Storyboard" and "Use Automatic Reference Counting" boxes are checked. Click on Next, select a place to save the project, and you are ready to roll.
Designing the Splashscreen
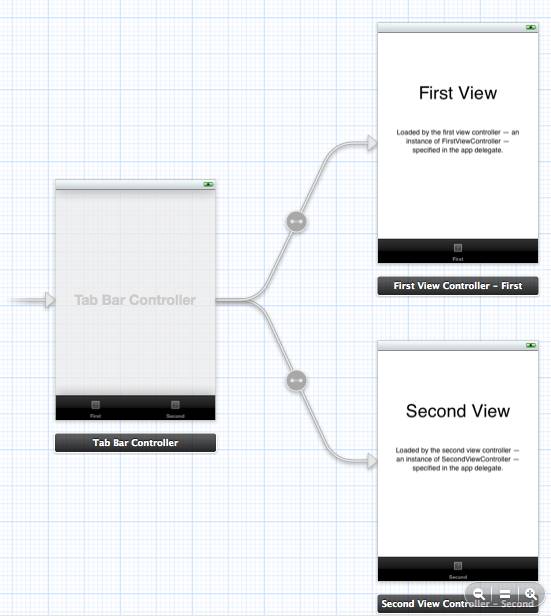
Select the Storyboard file, called MainStoryBoard_iPhone and you should now have a view similar to the image below. This is the initial couple of View Controllers that Xcode has created for us.
The first step is to implement the following screen. To do this, select the FirstViewController in the Storyboard and delete the two sample labels on the screen. Select the FirstViewController.h file and declare the following variables:
@property (nonatomic, strong) IBOutlet UILabel* logoLabel;

@property (nonatomic, strong) IBOutlet UILabel* descriptionLabel;

@property (nonatomic, strong) IBOutlet UIButton* callUsButton;

@property (nonatomic, strong) IBOutlet UIButton* directionsButton;

@property (nonatomic, strong) IBOutlet UILabel* copyrightLabel;
These are the UI elements that are present in this screen and we shall be customizing them soon.
Now let's synthesize these variables in the FirstViewController.m file
@synthesize logoLabel, descriptionLabel, callUsButton, directionsButton, copyrightLabel;
The next step is to create the labels that will be added to the screen. The code below defines a function that creates a label with some customization. The properties that are set on the label are the color, shadow, shadowOffset, and the alignment.
-(UILabel*)createLabelWithFrame:(CGRect)frame andFontSize:(float)fontSize andText:(NSString*)text
{
    UILabel* label = [[UILabel alloc] initWithFrame:frame];

    [label setFont:[UIFont systemFontOfSize:fontSize]];

    [label setTextColor:[UIColor whiteColor]];
    [label setShadowColor:[UIColor blackColor]];
    [label setShadowOffset:CGSizeMake(0, -1)];
    [label setTextAlignment:UITextAlignmentCenter];
    [label setBackgroundColor:[UIColor clearColor]];
    [label setText:text];

    return label;
}
We can now call this method and assign the return value to two of our labels. Each time we give it different parameters. After doing that, we then add the label to the ViewController.
- (void)viewDidLoad
{


    self.descriptionLabel = [self createLabelWithFrame:CGRectMake(42, 91, 238, 55) andFontSize:19 andText:@"A short description goes here"];

    self.copyrightLabel = [self createLabelWithFrame:CGRectMake(22, 379, 269, 23) andFontSize:11 andText:@"Copyright 2012 Attorney Biz"];

    [self.view addSubview:descriptionLabel];
    [self.view addSubview:copyrightLabel];


    [super viewDidLoad];
	// Do any additional setup after loading the view, typically from a nib.
}
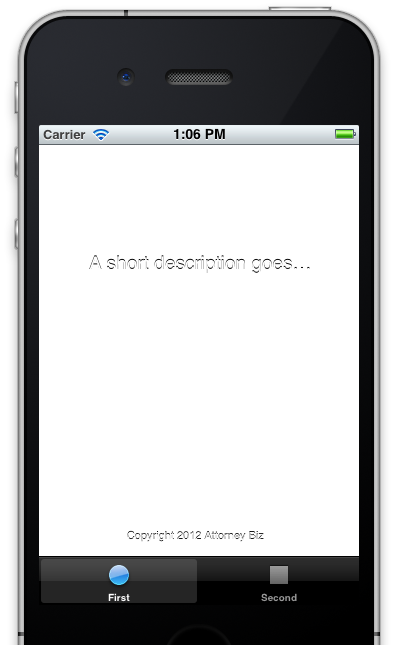
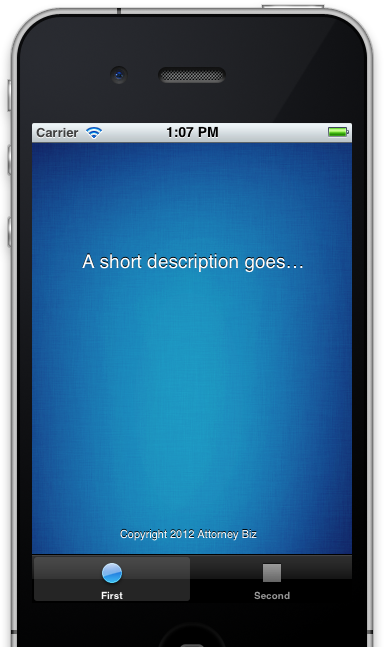
If you run the application, you will see that our labels have been added to the View and they are at different locations and different sizes.
We can't really see the labels because of the background. Let's add a background texture to the View. The image that will be used is a blue fabric texture that I designed for one of our iPhone App Designs, but in this case, you can use it for free! Actually, all the designs used in this tutorial are available in the sample project that accompanies this Mobiletuts+ post.
The image in question is called bg-splash.pngm and we can use this image as the background by adding the following code to the viewDidLoad method. This will create a colour pattern with the image and then set the background image to the color pattern.
UIColor *backgroundColor = [UIColor colorWithPatternImage:[UIImage imageNamed:@"bg-splash.png"]];
[self.view setBackgroundColor:backgroundColor];
If you run the application, you should see a blue background behind the labels. Our app is now taking shape.
Adding a Gradient Label
Now we need to add a gradient label to the screen and to do that we will use an Open Source component called FXLabel. Apple does not allow us to add gradients to labels easily without some custom drawing, hence, the helper code. Download the ZIP file from Github and add the two files FXLabel.h and FXLabel.m to your project
Add this to the top of the viewDidLoad method:
    self.logoLabel = [[FXLabel alloc] initWithFrame:CGRectMake(14, 11, 280, 87)];

    [logoLabel setFont:[UIFont boldSystemFontOfSize:45]];

    [logoLabel setTextColor:[UIColor whiteColor]];
    [logoLabel setShadowColor:[UIColor blackColor]];
    [logoLabel setShadowOffset:CGSizeMake(0, 2)];
    [logoLabel setTextAlignment:UITextAlignmentCenter];
    [logoLabel setBackgroundColor:[UIColor clearColor]];
    [logoLabel setText:@"Attorney Biz"];

    [logoLabel setGradientStartColor:[UIColor colorWithRed:163.0/255 green:203.0/255 blue:222.0/255 alpha:1.0]];
    [logoLabel setGradientEndColor:[UIColor whiteColor]];

    [self.view addSubview:logoLabel];
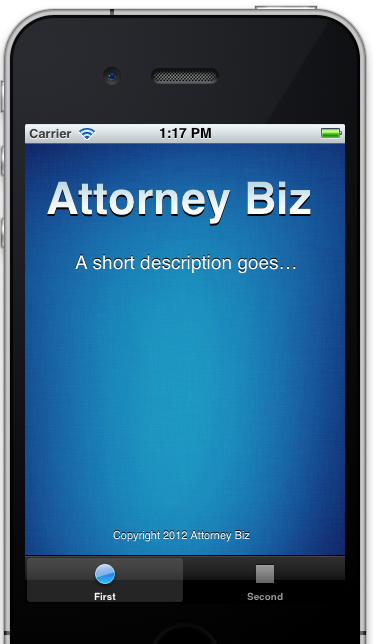
This does a similar customization to our previous labels, but in this case we add a gradient that runs from a sky blue color to a white color. If you run the app in the simulator, you will get the following screen:
Adding the Buttons
The next step is to add the buttons to our app. We do so with the following code:
-(UIButton*)createButtonWithFrame:(CGRect)frame andLabel:(NSString*)label
{
    UIButton *button = [[UIButton alloc] initWithFrame:frame];


    UIColor* buttonColor = [UIColor colorWithRed:95.0/255 green:113.0/255 blue:126.0/255 alpha:1.0];

    [button setTitle:label forState:UIControlStateNormal];
    [button setTitleColor:buttonColor forState:UIControlStateNormal];
    [button setBackgroundImage:[UIImage imageNamed:@"button-splash.png"] forState:UIControlStateNormal];

    [button.titleLabel setFont:[UIFont boldSystemFontOfSize:18]];

    return button;
}
This function creates a button at the specified location with the specified text. In the method, some customizations happen. The colour of the text is changed to a grayish colour. The background image is also set to one of the sample graphics in the resources folder.
After adding this method and the definition on the header file, the next step is to call the method and assign the resulting buttons to the "Call Us" and "Directions" buttons.
    self.callUsButton = [self createButtonWithFrame:CGRectMake(22, 259, 276, 52) andLabel:@"Call us"];

    self.directionsButton = [self createButtonWithFrame:CGRectMake(22, 319, 276, 52) andLabel:@"Directions"];


    [self.view addSubview:callUsButton];
    [self.view addSubview:directionsButton];
The piece of code above is added to the viewDidLoad method in the FistViewController.m file. This uses the new createButton method and passes some specific parameters to it, namely the location of the button and the text.
The buttons are then added to the view.
If you run the application, you should see the following screen, which makes up our completed design.

A Couple of Tweaks
If you notice, the screen above does not look exactly like the initial screen I showed you at the beginning of this tutorial. The description label is truncated and the "Attorney Biz" text does not have a gradient.
To make the description span two lines, add the following code to the viewDidLoad method just after we create the descriptionLabel.
[descriptionLabel setNumberOfLines:2];
Making it Functional
Right now, our screen looks good, but it doesn't do anything. The buttons don't lead anywhere. Let's fix that. The following lines of code define two methods. The first method will call the specified number and the second method will open a map to the specified location (London in this case).
-(void)callNumber
{
    UIApplication *app = [UIApplication sharedApplication];
    [app openURL:[NSURL URLWithString:[NSString stringWithFormat:@"tel:004-102-3929"]]];
}

-(void)openMap
{
    UIApplication *app = [UIApplication sharedApplication];
    [app openURL:[NSURL URLWithString:@"http://maps.google.com/maps?q=Paris"]];
}
The next step is to hook our buttons up with this new method.
    [self.callUsButton addTarget:self action:@selector(callNumber) forControlEvents:UIControlEventTouchUpInside];

    [self.directionsButton addTarget:self action:@selector(openMap) forControlEvents:UIControlEventTouchUpInside];
Now when you tap the buttons, the app tries to either make a call or open the Maps app.
Note: Calls cannot be made in the Simulator. Run this on an iPhone to test the functionality.
Conclusion
We have come to the end of the first part of the App Design series. Look out for Parts 2 and 3 where we will design more apps and make them look stunning so you can go on and do the same with your own apps.
If you have any questions, please let me know in the comments and I will be there to answer them!

Comments