Welcome to the last of a three part series of tutorials where I show you how to design an iPhone App for small business clients from scratch. In this final lesson, I will teach you how to create and theme a custom detail view describing a company's services.
Tutorial Overview
In this section, I will show you how to design the last page of the app which is going to be the detail page that shows more information about the company's services.
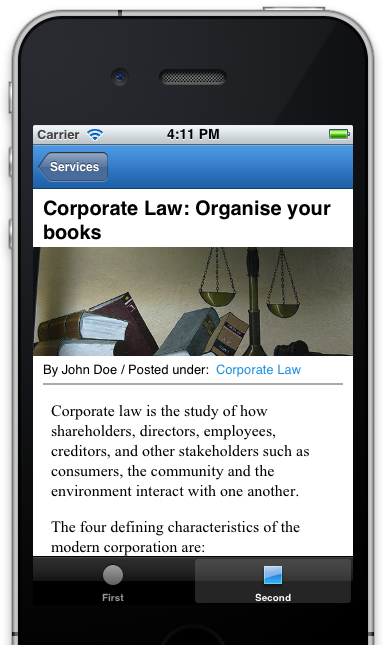
The end result will look similar to the screen below:
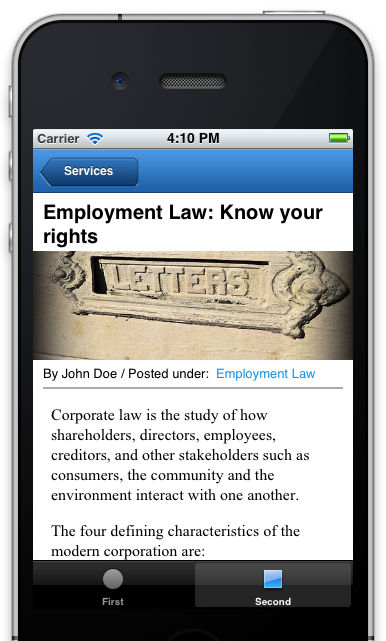
This screen has the look and feel of a website article, with a title, image, author info in addition to the article itself. The inspiration for this design is from the BizApp iPhone app design template. The article will be implemented with a UIWebView. This allows us to show rich content with links as well as typography.
Creating the UI Elements
Add a new View Controller to the Xcode project. Call it DetailViewController. Open the DetailViewController.h file and add the following fields to the header. These are the UI elements in the view.
@interface DetailViewController : UIViewController

@property (nonatomic, strong) UILabel *titleLabel;

@property (nonatomic, strong) UIImageView *articleImageView;

@property (nonatomic, strong) UILabel* metaLabel;

@property (nonatomic, strong) UILabel* nameLabel;

@property (nonatomic, strong) UIWebView* articleWebView;

@property (nonatomic, strong) UIScrollView* scrollView;

@end
In the DetailViewController. file, we shall create these fields and insert them into the view. This is done in the viewDidLoad method.
Don't forget to synthesize the fields at the top of the file.
@synthesize titleLabel, articleWebView, articleImageView, metaLabel, nameLabel, scrollView;
The first two elements to be inserted in the viewDidLoad method are a scroll view and a label. The UILabel is added to the scroll view so it can be moved off the screen to allow the user to see more fields below it:
    self.scrollView = [[UIScrollView alloc] initWithFrame:CGRectMake(0, 0, 320, 480)];
    [self.view addSubview:scrollView];

    self.titleLabel = [[UILabel alloc] initWithFrame:CGRectMake(10, 0, 300, 61)];
    [titleLabel setFont:[UIFont boldSystemFontOfSize:20]];
    [titleLabel setNumberOfLines:2];
    [scrollView addSubview:titleLabel];
The next element to be inserted is the image for the article itself:
    self.articleImageView = [[UIImageView alloc] initWithFrame:CGRectMake(0, 58, 320, 109)];
    [articleImageView setContentMode:UIViewContentModeScaleAspectFill];
    [articleImageView setClipsToBounds:YES];
    [scrollView addSubview:articleImageView];
The setContentMode property will make sure the image is not stretched and the setClipsToBounds property will make sure the image doesn't extend over the bounds of the Image View. Next up are the two labels below the image:
    self.nameLabel = [[UILabel alloc] initWithFrame:CGRectMake(10, 169, 170, 21)];
    [nameLabel setFont:[UIFont systemFontOfSize:13]];
    [nameLabel setText:@"By John Doe / Posted under: "];
    [scrollView addSubview:nameLabel];

    self.metaLabel = [[UILabel alloc] initWithFrame:CGRectMake(183, 169, 117, 21)];
    [metaLabel setFont:[UIFont systemFontOfSize:13]];
    [metaLabel setTextColor:[UIColor colorWithRed:30.0/255 green:144.0/255 blue:224.0/255 alpha:1.0]];
    [scrollView addSubview:metaLabel];
The metaLabel will be bluish in color and both have the system font of size 13.
Next are the divider line and the web view that will show the content.
    self.articleWebView = [[UIWebView alloc] initWithFrame:CGRectMake(10, 204, 300, 700)];
    [scrollView addSubview:articleWebView];

    UIView* dividerView = [[UIView alloc] initWithFrame:CGRectMake(10, 194, 300, 2)];
    [dividerView setBackgroundColor:[UIColor lightGrayColor]];
    [scrollView addSubview:dividerView];
At this point, we have our basic UI elements in place, so we need to hook up the new View Controller into the story board so we can navigate to it somehow.
Adding the View Controller to the Storyboard
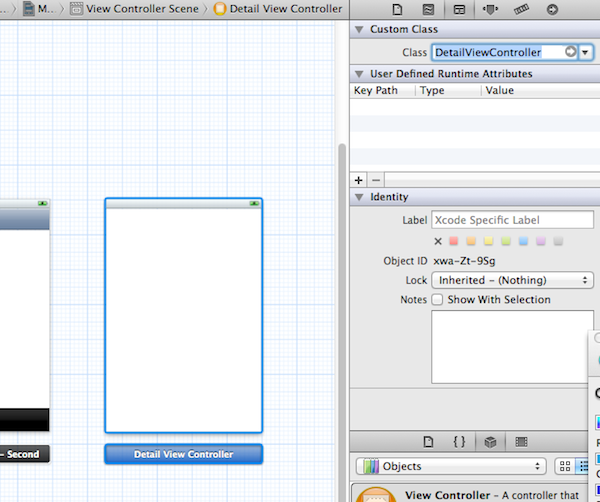
Add a new View Controller to the MainStoryboard_iPhone file. Select the View Controller and change the class to the DetailViewController. This will make sure that any code we implement in the DetailViewController file will be connected with this new View on the Storyboard.
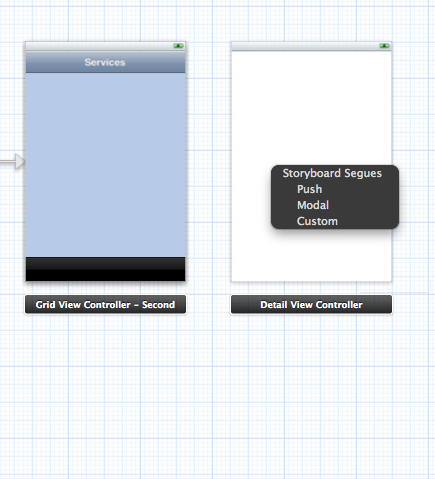
To make sure the new View Controller is shown when we tap on a service in the Grid, we can connect it by using a segue. This is a new feature in the iOS 5 SDK. To do that, select the Storyboard file and CTRL+Drag from the GridViewController to the DetailViewController. An action pop-up is shown with some options. select "push". This means the new ViewController will be pushed onto the screen in a normal UITableView way.
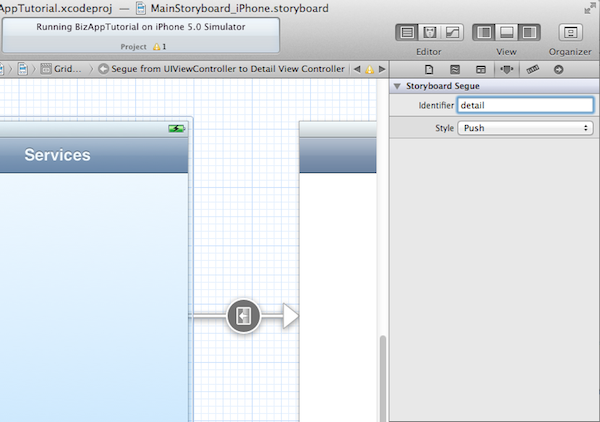
After doing that, a link (segue) is created between the two ViewControllers. Click on the segue and name it "detail".
To add the last part of the connection, open the GridViewController.m file and add the following piece of code:
-(void)gridView:(AQGridView *)gridView didSelectItemAtIndex:(NSUInteger)index
{
    [self performSegueWithIdentifier:@"detail" sender:self];
}
When an item is selected in the grid, this method will perform the operation on the segue called "detail" (which we have just created).
Now if you run the application in the simulator and tap on an item in the Grid, you should see a new View being pushed from the right.
However, the view will be empty because we have not added any data to it.
Adding Data from the Model
The next step is to pass some data from our model (which we created in Part 2) to the Detail View Controller. To do this, the first step is to extend the Model with the data we need.
Let's add three more fields to the model for the title, image, and content of the article in the DataModel.h file
@interface Model : NSObject

@property (nonatomic, copy) NSString* name;

@property (nonatomic, retain) UIImage* image;

@property (nonatomic, copy) NSString* webContentTitle;

@property (nonatomic, copy) NSString* webContent;

@property (nonatomic, retain) UIImage* webContentImage;

-(id)initWithName:(NSString*)theName andImage:(UIImage*)theImage andWebContentTitle:(NSString*)theTitle andWebContent:(NSString*)theWebContent andWebContentImage:(UIImage*)theWebImage;

@end
And extend the initialization method in the DataModel.m file.
@synthesize name, image, webContent, webContentTitle, webContentImage;

-(id)initWithName:(NSString*)theName andImage:(UIImage*)theImage andWebContentTitle:(NSString*)theTitle andWebContent:(NSString*)theWebContent andWebContentImage:(UIImage*)theWebImage
{
    self = [super init];

    if(self)
    {
        self.name= theName;
        self.image = theImage;
        self.webContent = theWebContent;
        self.webContentTitle = theTitle;
        self.webContentImage = theWebImage;
    }

    return self;
}
The next step is to add the sample data. This would be ideally loaded from a web service, but that is out of the scope of this tutorial.
For the sake of saving space, I am going to show the sample data for only one of the models. The others are exactly the same but with a different set of text.
NSString *content = @"<p>Corporate law is the study of how shareholders, directors, employees, creditors, and other stakeholders such as consumers, the community and the environment interact with one another. </p><p>The four defining characteristics of the modern corporation are:</p> <ul><li>Separate Legal Personality of the corporation (access to tort and contract law in a manner similar to a person)</li><li>Limited Liability of the shareholders</li><li>Shares (if the corporation is a public company, the shares are traded on a stock exchange)</li><li>Delegated Management; the board of directors delegates day-to-day management</li><ul>";

BusinessService *service1 = [[BusinessService alloc] initWithCaption:@"Litigation" andImage:[UIImage imageNamed:@"service-1.jpg"] andWebContentTitle:@"Litigation: Peace of mind with the experts" andWebContent:content andWebContentImage:[UIImage imageNamed:@"service-1.jpg"]];
You will have to add the images named "service-1.jpg" to "service-6.jpg" from the sample folder to your project. Our sample data is now complete. Let's hook up our UI elements to show them.
Displaying the Data on the Screen
Add a new field to the DetailViewController.h file. This field is an instance of the BusinessService class. Don't forget to include the BusinessService header file and synthesise it in the implementation.
@property (nonatomic, retain) BusinessService* service;
Add some statements in the viewDidLoad method on the DetailViewController to populate the UI elements with the information from the service that was selected.
    [titleLabel setText:service.webContentTitle];
    [articleImageView setImage:service.webContentImage];
    [articleWebView loadHTMLString:service.webContent baseURL:nil];
    [metaLabel setText:service.caption];
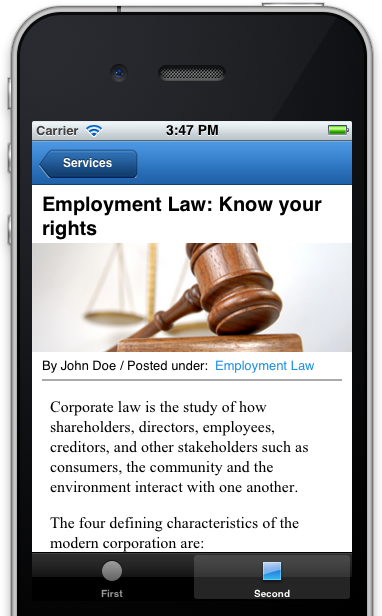
Now, you can run the application and navigate to the detail screen by tapping on an item in the Grid. You should see a similar screen below.
Now you can see that our detail view is almost complete. The only thing left is the back button which looks ugly because the default back button does not look on the navigation.
Adding a Custom UIBarButtonItem
To fix that, we will use an image in the resources folder called "back.png". To insert the image as the back button, add this piece of code to the AppDelegate.m file. This should be in the application:didFinishLaunchingWihOptions method.
- (BOOL)application:(UIApplication *)application didFinishLaunchingWithOptions:(NSDictionary *)launchOptions
{
    UIImage *navBarImage = [UIImage imageNamed:@"menubar.png"];

    [[UINavigationBar appearance] setBackgroundImage:navBarImage
                                       forBarMetrics:UIBarMetricsDefault];


    UIImage* backButtonImage = [UIImage imageNamed:@"back.png"];

    [[UIBarButtonItem appearance] setBackButtonBackgroundImage:backButtonImage forState:UIControlStateNormal barMetrics:UIBarMetricsDefault];

    return YES;
}
This uses the iOS 5 SDK to decorate the back button throughout the app. If you run the app, you should see the final screen below.
Conclusion
We are now at the end of this series of tutorials.
I hope you now have an idea of how to design your apps and make them look unique.
Thanks for following it up until the end. If you have any questions, please let me know in the comments!
The following images were used under a Creative Commons license:

Comments