If you've developed a WordPress theme or plugin, then you know how fast your codebase can grow in just a short amount of time.
You start off with just a few PHP, JavaScript and CSS files. Then you find yourself creating image assets and adding them to your codebase together with their Photoshop file counterparts. After a while you'll be including other third-party PHP libraries as well. Then when you're finally ready to ship your WordPress project, you'll end up having a web of multiple file types like *.php, *.css, *.scss, *.js, *.min.js, *.png and *.psd, maybe you'll have some hidden files like .DS_Store.
You would eventually need to clean your codebase up before zipping them all up for your users. Normally, this just means that you duplicate your files, then scan each and every directory deleting all the unwanted files. You'd then archive your project then perhaps use a third party app to remove the hidden files.
This article will teach you on how to automate this packaging process by building a TextMate Bundle that would do everything for us with a single shortcut key.
Intro to TextMate Bundles
Bundles in TextMate are like plugins in WordPress. WordPress plugins provide additional functionality to the WordPress core. In the same manner, TextMate Bundles provide additional functionality to TextMate, such as colorizing parts your code for a better coding experience, or performing a certain process when a shortcut key is pressed.
One good thing about TextMate Bundles is that you can use any programming language that's locally available to your system. Some languages natively available to Macs are Bash, Perl, Ruby and Python. For the purposes of this article, I will be using Python for coding the Bundle.
What Are We Going to Build?
Before we start coding, first we need to finalize what we want our bundle to do. We need to be able to:
- package our whole project in a zip file,
- specify which files should not be included,
- specify which files should always be included, and
- trigger this with the shortcut key
option+command+shift+s
Creating Our Bundle
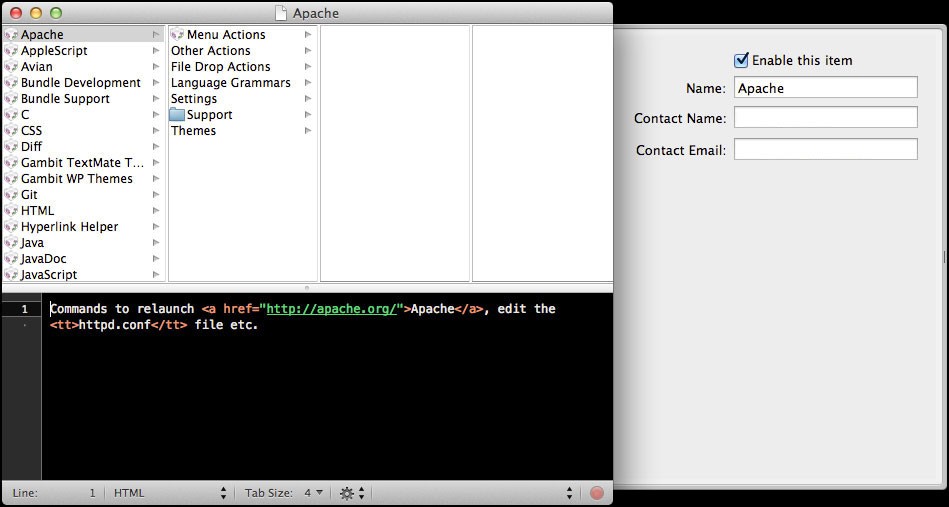
Now let's jump into creating our bundle. Open the Bundle editor from TextMate's menu bar (Bundles > Edit Bundles...). A window should pop up with that looks like this:
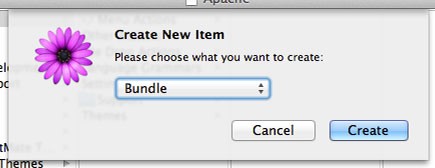
With the Bundle window open and currently in your view, create a new file from the menu bar (File > New) then select to create a new Bundle:
By default your Bundle is going to be named "YourUserName's Bundle", you can change that on the right pane of the Edit Bundle window.
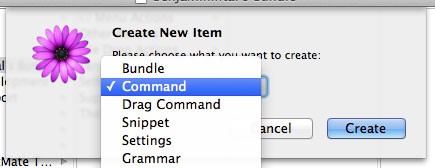
With your Bundle selected, head again to the menu bar, then create a new file (File > New) but this time select Command:
Change the name of your "untitled" command into something more descriptive like "Package WP Project".
2.0-alpha.9503, the screenshots here might differ from your screen, but the contents should be the same.The Command Code
As of the moment, we have a new Bundle with a command which does nothing yet.
In the Edit Bundle window, click on the command which we have just created. On the bottom pane of the window is the code which will be executed when our command is triggered. Since the command is new, TextMate was kind enough to put in some sample hello world code for us:
#!/System/Library/Frameworks/Ruby.framework/Versions/1.8/usr/bin/ruby -wKU
puts 'Hello world'
Remove that code and let's start writing our own.
1. Shebang
First off, we need to specify what interpreter to use for our code. Our code will be in Python, so we need to put this as the first line of our code:
#!/usr/bin/env python
2. Some Options
The main function of our command is output a clean package our project. We need a way to specify which types of files should and should not be included in our output zip file.
# Files to exclude
excludedFiles = ['.*', '*.psd', 'languages/*.mo', 'languages/*.po']

# Files to include
includedFiles = ['languages/en_US.mo', 'languages/en_US.po']
The excludedFiles array specifies not to include hidden files, Photoshop assets, and language files from our package. We've included language files here since while testing your project, you might have created multiple language files that you don't want to be included in your final package.
On the other hand, the includedFiles array forces the inclusion of English (US) only language files.
You can extend these arrays to tailor it to your own needs. For example, if you are using CodeKit in your project, you may want to exclude CodeKit's settings files codekit-config.json and config.rb
3. Project Variables
Before we can archive any of the project files, we first need to know where our TextMate project is located. TextMate exposes some essential properties to us which are accessible with Python's os library:
import os

# Our project's main directory
projDir = os.environ['TM_PROJECT_DIRECTORY']

# Project name
projName = projDir[projDir.rindex('/')+1:]

# Project parent directory
projParentDir = projDir[:projDir.rindex('/')]
4. Create the Zip Package
The last piece of the code is to perform the packaging. TextMate itself doesn't have the ability to archive directories, but luckily for us, Macs have the zip command line utility built in.
We're going to use that command within our Python script:
# Format file exclude / includes for the command line
exclude = ''
for f in excludedFiles:
    exclude += '"*/' + f + '" '
exclude = exclude.strip()

include = ''
for f in includedFiles:
    include += '"*/' + f + '" '
include = include.strip()

# Change directory
os.chdir(projParentDir)

# Delete existing zip file
if os.path.exists(projDir + ".zip"):
    os.system("rm " + projName + ".zip")

# Zip it up
os.system("zip -rq9 " + projName + ".zip " + projName + " -x " + exclude)
os.system("zip -rq9 " + projName + ".zip " + projName + " -i " + include)
The Command Properties
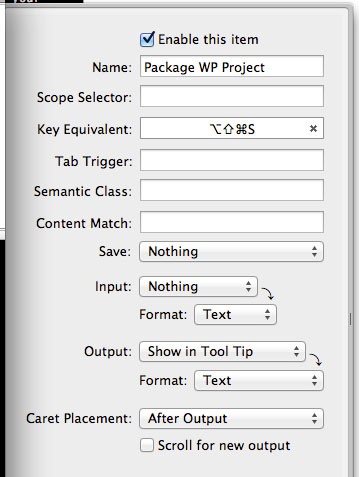
We're all done with the code that performs the packaging of our project. Now we need a way to trigger this from inside in the project window. The right pane of the Edit Bundle window contains the properties of our command. There we can assign a shortcut key for this command as well as modify some other behaviors of our command. Set these properties in the right pane:
-
Key Equivalent to
option+command+shift+s - Input to Nothing
- Output to Show in Tool Tip
Try It Out
Save your changes (File > Save) and close the Bundle editor window.
Now whenever you want to package your project for deployment, you can just use the shortcut key option + command + shift + s. You can also access the package command by navigating to it from the menu bar under Bundles.
Conclusion
In this article, we learned of a faster way of creating a final zip file for your WordPress project by creating your own TextMate Bundle. Hopefully, you can use this in your development workflow to save you time.
I hope you enjoyed this article. I highly appreciate any feedback, comments and suggestions.
Will you be using this method in your coding workflow? Share your thoughts below!

Comments