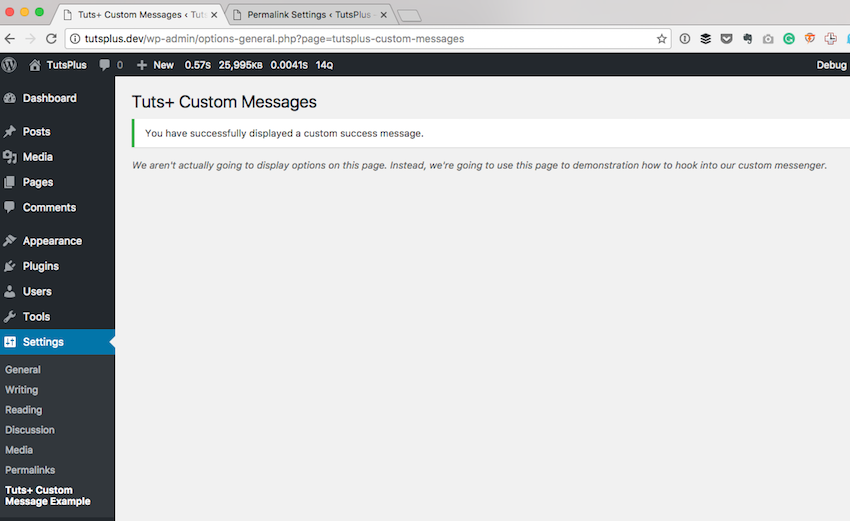
At this point in this series, we've laid the foundation for our plugin, defined a custom hook, and wired up a perpetual message to show how we can take advantage of said hook.
What we haven't done, though, is implement various message types, allow user input, and display messages based on the result of input the user has provided.
But before we do that, we need to add support for the various message types, a class interface that will support each type of message, and the data structures necessary for storing such messages.
Ready to Get Started?
I'm looking forward to continuing with this tutorial, but there are a few things we need to review before hopping back into the source code. Make sure that your system has the following software installed:
- PHP 5.6.25 and MySQL 5.6.28
- Apache or Nginx
- WordPress 4.6.1
- Your preferred IDE or editor
And if you're looking for an all-in-one solution, don't forget to give MAMP a try.
The Road Thus Far
As mentioned previously, we're right in the middle of this series. If you've missed any of the previous tutorials, here's what we've covered thus far:
- In the first tutorial, we focused on the groundwork for the bare minimum of our plugin and what we need to get started.
- In the second piece, we took the plugin a bit further by adding a very basic WordPress administration page. We also made a call to the custom hook that we're using, and we wired that up on the server-side. We also started the groundwork for our Settings Messenger.
And here's what we'll be reviewing in the final tutorial:
- We'll end by tying everything together, seeing it in action, and making the final plugin publicly available for you to download.
For now, though, we have other work on which to focus.
Back to Work
As we get back to work (and as we've reviewed in previous tutorials), we're going to be looking at the following implementation during this piece of the series:
In this tutorial, we'll begin implementing our Settings Messenger by adding support for errors and success messages as well as covering some points on security.
In the last article, we began working on the Settings Messenger, but only in so far as setting up a function that will perpetually display a success notice whenever our custom page is loaded.

In this tutorial, we're going to add support for errors, warnings, and success messages. We're also going to be displaying them all on screen so we can get a feel for how the messenger will work.
Additionally, we're going to add one more change that will add support for dismissing the notices at the user's discretion.
With this as our plan for the work we need to do in this tutorial, let's get started.
Expanding the Settings Messenger
Remember the entire point of the Settings Messenger is to define a way for us to work with custom messages, custom hooks, and the native WordPress API for displaying messages in the context of the WordPress administration area.
To do this, we're going to expand the work we did in the previous tutorial and continue growing our work from there.
Success Messages
Since we started with the success message in the previous tutorial, let's go ahead and pick up with that. Right now, we have a hard-coded method that displays a single method:
<?php

public function display_message() {

    	$html = "
            <div class='notice notice-success'>
                <p><strong>You have successfully displayed a custom success message.</strong></p>
            </div><!-- .notice-success -->
        ";

        $allowed_html = array(
            'div' => array(
                'class' => array(),
            ),
            'p' => array(),
        );

        echo wp_kses( $html, $allowed_html );
}
Ideally, we'd like to introduce a data structure that will support multiple messages, a function that will give us access to add however many messages we'd like, and a function that will allow us to render all of the success messages.
First, we'll start with an array. This will be a private attribute of the class, and it will be initialized in the constructor. The initial part of the Settings_Messenger should now look like this:
<?php

class Settings_Messenger {

    private $success_messages;

    public function __construct() {

        $this->success_messages = array();
    }
}
And as you can see, we've defined exactly what we said, except that we haven't defined a method for adding our own messages, and we haven't defined a message for rendering our messages.
So let's do that now. First, let's add a method that will allow us to add our own messages:
<?php

public function add_success_message( $message ) {
    $this->success_messages[] = sanitize_text_field( $message );
}
Note here that we're using sanitize_text_field to sanitize the data going into the array. You can make the sanitization as strict or as relaxed as you like. I've opted for this particular method as it helps to get the point across without deviating from the point of the tutorial.
Now let's define a method that will allow us to render the messages on the front-end:
<?php

public function get_success_messages() {

    if ( empty( $this->success_messages ) ) {
        return;
    }

    $html  = "<div class='notice notice-success'>";
    $html .= '<ul>';
    foreach ( $this->success_messages as $message ) {
        $html .= "<li>$message</li>";
    }
    $html .= '</ul>';
    $html .= '</div><!-- .notice-success -->';

    $allowed_html = array(
        'div' => array(
            'class' => array(),
        ),
        'ul' => array(),
        'li' => array(),
    );

    echo wp_kses( $html, $allowed_html );
}
Granted, this method can stand to be refactored, and I'll touch on this in the conclusion of this post.
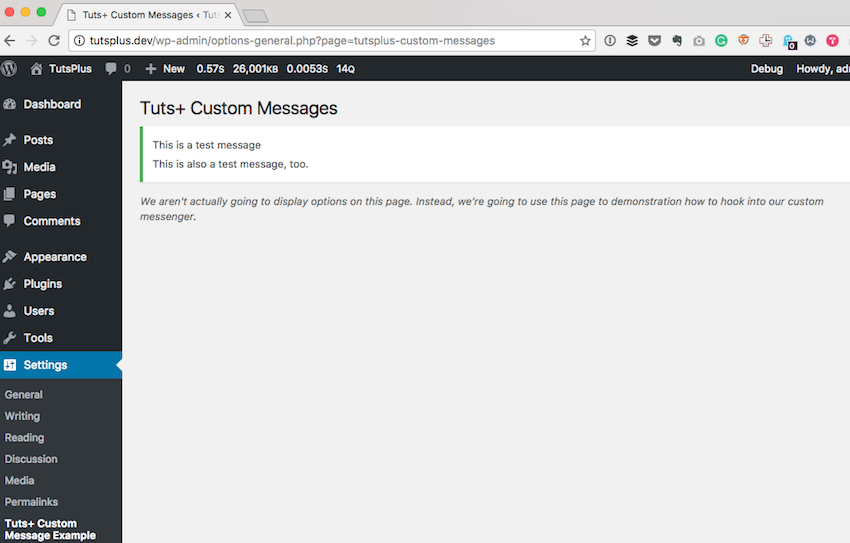
For now, though, let's test this out. Try the following code in the tutsplus-custom-message.php file and then reload the administration screen that we've used throughout the series thus far.
<?php
$messenger = new Settings_Messenger();
$messenger->init();

$messenger->add_success_message( 'This is a test message' );
$messenger->add_success_message( 'This is also a test message, too.' );
Permitting everything has been implemented correctly, you should see something like this:

Luckily, adding the next two message types is very similar to what we've done in this section.
Warning Messages
Adding support for warning messages will be almost exactly like what we've done before; however, rather than naming our array and related functions having something to do with success, we'll name them something to do with warnings.
So first, let's add the array to contain our messages:
<?php

class Settings_Messenger {

    private $success_messages;

    private $warning_messages;

    public function __construct() {

        $this->success_messages = array();
        $this->warning_messages = array();
    }
}
Then let's add the functions that will allow us to add warnings to the messenger:
<?php

public function add_warning_message( $message ) {
    $this->warning_messages[] = sanitize_text_field( $message );
}
And finally, let's add a function to display the function when necessary (notice that we're using the notice-warning class name when creating the div element):
<?php

public function get_warning_messages() {

    if ( empty( $this->warning_messages ) ) {
        return;
    }

    $html  = "<div class='notice notice-warning'>";
    $html .= '<ul>';
    foreach ( $this->warning_messages as $message ) {
        $html .= "<li>$message</li>";
    }
    $html .= '</ul>';
    $html .= '</div><!-- .notice-warning -->';

    $allowed_html = array(
        'div' => array(
            'class' => array(),
        ),
        'ul' => array(),
        'li' => array(),
    );

    echo wp_kses( $html, $allowed_html );
}
Note that how you choose to display this particular set of messages is up to you. You may opt to display this in conjunction with the success messages, or you may opt to display this in a completely separate manner.
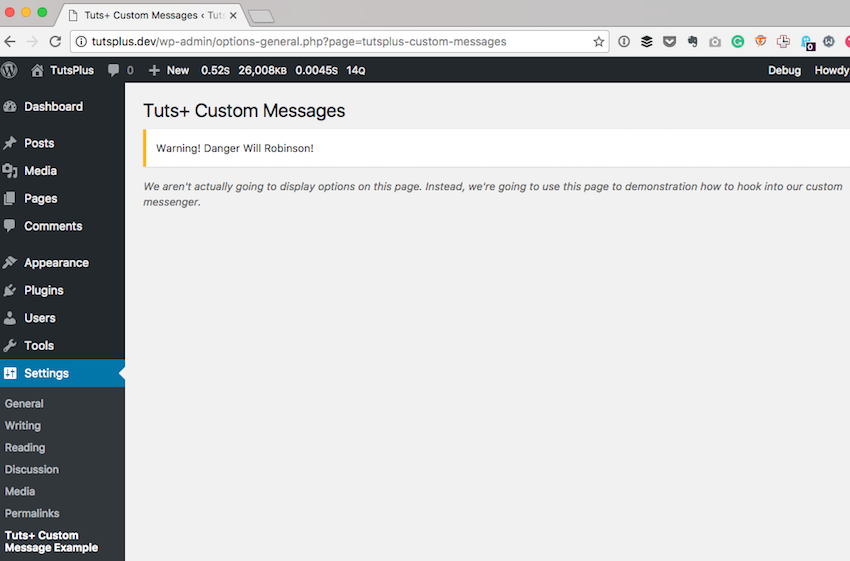
For this tutorial, I'm going to keep it simple and display only the warning message at a time. So I'll add the following line of code to the main plugin file:
<?php
$messenger->add_warning_message( 'Warning! Danger Will Robinson!' );
I will update the hook in the init method of the Settings_Messenger:
<?php
public function init() {
    add_action( 'tutsplus_settings_messages', array( $this, 'get_warning_messages' ) );
}
And then I'll refresh the page. Assuming you've followed all of the above code correctly, you should see something almost like this:

If not, double-check your code or download the project file attached to this tutorial, and we'll go from there.
Error Messages
Finally, let's do the same thing for our error messages. We'll be repeating exactly what we've done in the above sections, so this should becoming a bit second nature at this point.
First, we need to add an attribute that will hold the array where we will store our error messages:
<?php

class Settings_Messenger {

    private $success_messages;

    private $warning_messages;

    private $error_messages;

    public function __construct() {

        $this->success_messages = array();
        $this->warning_messages = array();
        $this->error_messages   = array();
    }
}
Secondly, we need to add a function that will allow us to add to our list of errors:
<?php

public function add_error_message( $message ) {
    $this->error_messages[] = sanitize_text_field( $message );
}
And then we need to be able to display them:
<?php

public function get_error_messages() {

    if ( empty( $this->error_messages ) ) {
        return;
    }

    $html  = "<div class='notice notice-error'>";
    $html .= '<ul>';
    foreach ( $this->error_messages as $message ) {
        $html .= "<li>$message</li>";
    }
    $html .= '</ul>';
    $html .= '</div><!-- .notice-error -->';

    $allowed_html = array(
        'div' => array(
            'class' => array(),
        ),
        'ul' => array(),
        'li' => array(),
    );

    echo wp_kses( $html, $allowed_html );
}
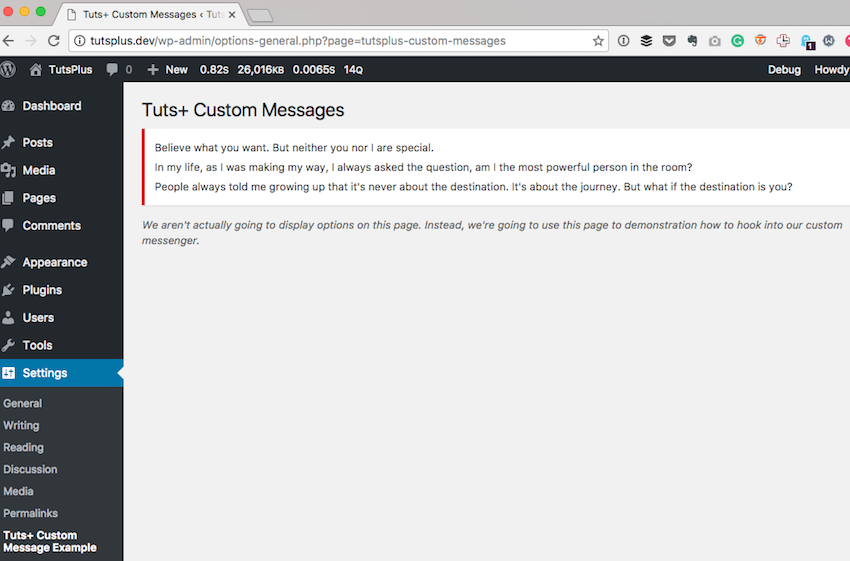
To add your own messages, return to the main plugin file and add the following code:
<?php

$messenger->add_error_message( 'Believe what you want. But neither you nor I are special.' );
$messenger->add_error_message( 'In my life, as I was making my way, I always asked the question, am I the most powerful person in the room?' );
$messenger->add_error_message( 'People always told me growing up that it\'s never about the destination. It\'s about the journey. But what if the destination is you?' );
Next, update the init function in the Settings_Messenger, and you should see something like this when you refresh the page:

And that's how you add custom messages to your administration page using custom hooks. But we've got one more thing to introduce before wrapping up this article.
Dismissing Messages
Before we conclude, I want to show how we can make our messages dismissible or, more simply put, able to be removed by the user. To do this, we can take advantage of functionality that's already built into WordPress.
Since we were just working on the error messages, I'm going to use the error messages as an example. When building the HTML for the error messages, add one more class name to the div element that contains the message(s).
That is, add is-dismissible:
<?php

$html  = "<div class='notice notice-error is-dismissible'>";
$html .= '<ul>';
foreach ( $this->error_messages as $message ) {
    $html .= "<li>$message</li>";
}
$html .= '</ul>';
$html .= '</div><!-- .notice-error -->';
Easy enough, isn't it? You get an icon that allows the user to click on it and, when they do, the message will disappear.
That's nice functionality that fits well within the WordPress user experience for very, very little work on our end.
Conclusion
Now we have a fairly functional Settings_Messenger. We can add success messages, error messages, and warning messages. We can dismiss messages. We can manage this all independently of anything WordPress may be doing.
But if you've read any of my previous tutorials, you know that I'm not a fan of having duplicated code. Nor am I fan of having one class do many things. And, unfortunately, that's exactly that we're doing here.
For the purposes of this tutorial, I don't plan on refactoring the code that's in this example. We've walked through this type of material before. Furthermore, the purpose of what we're doing is showing how to work with custom error messages, not how to apply the most advanced object-oriented techniques that we can (though that would be nice, wouldn't it?).
Depending on the feedback I receive for this series, perhaps we'll revisit it and refactor it so we can see just how much work can be done and just how many principles can be applied.
As you wait for the next tutorial to be published, note that I'm also always happy to answer questions via the comments, and you can also check out my blog and follow me on Twitter. I usually talk all about software development within WordPress and tangential topics, as well.
Until then, download the available source code, compare it to what we have here, and be sure to run it on your local machine so you're familiar with what's left as we move into the final part of this series.


Comments