In this tutorial, we will be using the WordPress widget API and the Flickr API to create a basic Flickr widget. The widget will be a multiple-use widget; it asks the user for a username and number of pictures to display, and uses that information to display Flickr photos. There are lots of pre-built plugins out there that work with Flickr, but nothing's beats making it yourself if you're looking to take another step in your WordPress education!
Introduction
Flickr is one of the most popular photo-sharing sites in the world - it hosts over 5 billion images - and by creating a Flickr widget, you will learn both how to use the Flickr API, and how to create WordPress widgets that can easily be adapted to your own theme or website. Before you begin writing any code, you should prepare yourself for the project. To create a widget within a theme, you first need a file to have the widget code in. I shall be using the default TwentyEleven theme that comes with WordPress, you can of course use any theme of your choice. Carry out these steps:
- Create a new folder in the theme called
widgets. - Make a blank
phpfile namedwidget.phpand save it in the folder. - Download the excellent phpFlickr library from here and paste the files into
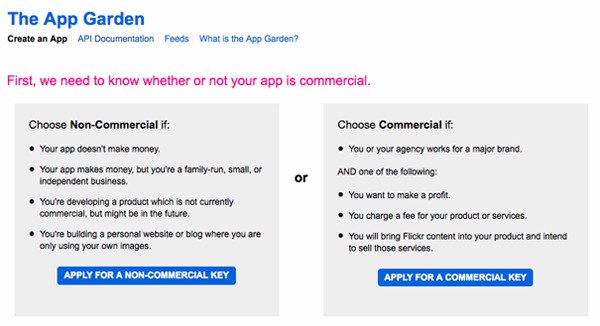
widgets/phpFlickr - Sign up for an API key from Flickr. You should need a non-commercial key, unless you are creating a commercial product.
Step 1 Getting your widget code ready
Since WordPress 2.8, there's been a convenient widget API you can use to create your widgets. Copy and paste this skeleton code into your widgets.php file:
	<?php
	class RM_Flickr extends WP_Widget {

		function RM_Flickr() {
			$widget_ops = array( 'classname' => 'flickr_widget', 'description' => 'Show your favorite Flickr photos!' );
					$this->WP_Widget( 'flickr_widget', 'Flickr Posts', $widget_ops);
		}

		function form($instance) {
	    }

		function update($new_instance, $old_instance) {
		}

		function widget($args, $instance) {
		}

	}


	add_action( 'widgets_init', 'rm_load_widgets' );
	function rm_load_widgets() {
		register_widget('RM_Flickr');
	}
	?>
Each of those functions above has a specific purpose:
-
RM_FLickris both the name of the class, as well as the name of the first function (the constructor). The constructor contains the code to setup the widget - it's called Flickr Posts. -
form()generates the form that you see in the widget management page in WordPress. -
update()updates the options you enter in the form when the widget configuration is saved. -
widget()displays the actual output of the widget in the main site. - The last part of the code hooks into WordPress' widget initialization and instructs it to register your widget
Only one thing remains: your widget file exists, but as of yet, it doesn't actually do anything. For it to be used by WordPress, you need to include the file from your functions.php file. So open up functions.php and paste in this line: (I put it in TwentyEleven's twentyeleven_setup() method)
require_once (TEMPLATEPATH . "/widgets/flickr.php");
If you fire up WordPress, you should see the widget appear in the Widget management page:
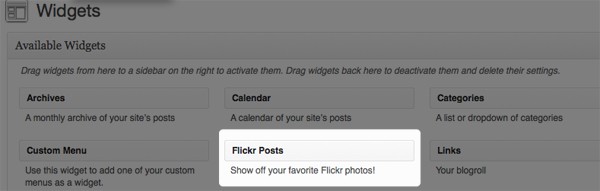
Of course, since haven't added any other code, the widget doesn't have any options or any output. Now, we shall make sure the widget has form inputs
Step 2 Creating The Form
Before creating the form for a widget, you need to figure out what kind of inputs you need. For this particular widget, we need three inputs to be given to use by the user: A title for the widget, the FLickr username, and number of photos to display. If you take a look at the skeleton code above, you will notice that there is a parameter $instance in the form() function. This basically contains the current values for all inputs in the form (for example, when you save the form with certain values). So we need to pull out the current values of the widget and populate thw widget input fields with them. Paste this piece of code into the function:
		$instance = wp_parse_args( (array) $instance, array('title' => 'Flickr Photos', 'number' => 5, 'flickr_id' => '') );

		$title = esc_attr($instance['title']);
		$flickr_id = $instance['flickr_id'];
		$number = absint($instance['number']);
First, we use the wp_parse_args() function to make sure there are certain default values in the widget, and then we extract the values into variables like $title. Now that we have the values, we need to build the html of the function:
		?>
					<p>
			            <label for="<?php echo $this->get_field_id('title'); ?>">
			               Title:
			            </label>
			                <input class="widefat" id="<?php echo $this->get_field_id('title'); ?>" name="<?php echo $this->get_field_name('title'); ?>" type="text" value="<?php echo $title; ?>" />
			        </p>


					<p>
			            <label for="<?php echo $this->get_field_id('flickr_id'); ?>">
			               Flickr username:
			            </label>
			                <input class="widefat" id="<?php echo $this->get_field_id('flickr_id'); ?>" name="<?php echo $this->get_field_name('flickr_id'); ?>" type="text" value="<?php echo $flickr_id; ?>" />

			        </p>

					<p>

					<p>
			            <label for="<?php echo $this->get_field_id('number'); ?>">
			               Number of Photos:
			            </label>
			                <input class="widefat" id="<?php echo $this->get_field_id('number'); ?>" name="<?php echo $this->get_field_name('number'); ?>" type="text" value="<?php echo $number; ?>" />
			        </p>


			<?php
This looks like a hefty chunk of code, but it is really rather simple. It is just creating a regular HTML form, with a few changes. First, instead of using your id's and name's, you have to use get_field_id(). This is because if there are multiple instances of a widget and only one single ID, there will obviously be errors. WordPress takes care of it for you if you use the said function. The other thing is that the value of the input fields is generated using PHP. Save the file, and take a look in WordPress:
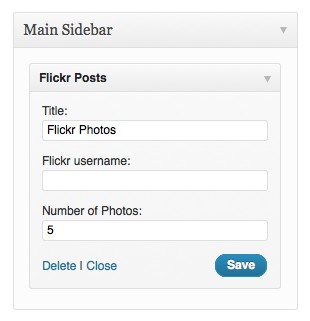
You will notice that if you try to change the values and click Save, they don't get saved. That's because we haven't yet written the update() function. Let's do that next
Step 3 Making Sure Your Form Updates
To make sure your form updates, you need to configure your update() function. This is actually pretty simple. By default, WordPress sends you two parameters - the old instance, and the new instance. We basically don't really need the old instance because the old instance is only used if there are values that you may not want to change. Paste in this code into the update() function:
		$instance=$old_instance;

        $instance['title'] = strip_tags($new_instance['title']);
        $instance['flickr_id']=$new_instance['flickr_id'];
        $instance['number']=$new_instance['number'];
        return $instance;
Quite simple - copy the new instance into a variable $instance, make any changes you may want (like stripping any html tags) and return the variable to ensure changes update. Now if you go to WordPress, you changes will save!
Step 4 Enabling The Widget HTML
This is the final step, and it makes sure you widget displays HTML on the front end. Now that we have the user inputs set up, we can just use the inputs to interact with the Flickr API and display images. The first step in the widget() function is to fetch the values of the user inputs. Paste in this code:
	extract($args);

	$title = apply_filters('widget_title', $instance['title']);
	if ( empty($title) ) $title = false;
    $flickr_id = $instance['flickr_id'];
	$number = absint( $instance['number'] );
Self explanatory - the inputs are fetched and stored in variables. Next, you need to require the phpFlickr library and set it up using your API key:
	require_once(TEMPLATEPATH . "/widgets/phpFlickr/phpFlickr.php");
	$f = new phpFlickr("[<em>API KEY]</em>");
Once this is set up, paste in this code:
	if (!empty($flickr_id)) {

		echo $before_widget;

		if($title){
			echo $before_title;
			echo $title;
			echo $after_title;
		}

		$person = $f->people_findByUsername($flickr_id);
		$photos_url = $f->urls_getUserPhotos($person['id']);
		$photos = $f->people_getPublicPhotos($person['id'], NULL, NULL, $number);


		foreach ((array)$photos['photos']['photo'] as $photo) {
			echo "<br />\n";
			echo "<a href=$photos_url$photo[id]>";
			echo "<img border='0' alt='$photo[title]' ".
			"src=" . $f->buildPhotoURL($photo, "Small") . ">";
			echo "</a>";

			echo "<br />\n";
		}
		echo $after_widget;
	}
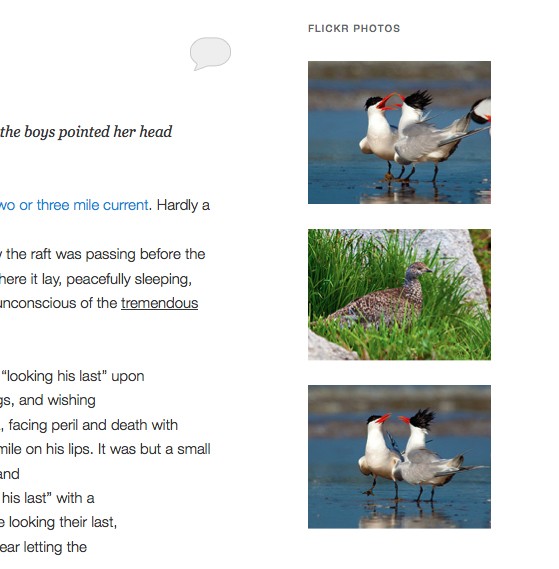
Let's go through this step-by-step. First, we need to see if the Flickr username has been specified. If it hasn't, we can't really display images. The variables $before_widget, $before_title & $after_title, which are automatically given to us by WordPress, must then be displayed. Then, we use the phpFlickr library to get the photos of the specified user. The number of photos is defined by the variable $number. Finally, we loop through the images using a foreach loop and build the HTML to display the photo, and then display the after-widget content. Now depending on what theme you are working with and what you want the images to look like, you can alter the HTML. The only part that needs to remain constant is the link to the image, which can be in several sizes like Square, small, medium, large etc. Now that this has been done, you can try setting up the widget and seeing the output. I used a popular Flickr user, Forget Me Knott Photography as the username. Take a look:
Conclusion
For anyone who enjoys their photography, a Flickr widget is a great addition to a WordPress website. With this tutorial, it is easy to create a customizable Flickr widget. You could add or remove options, change the image sizes, mess around with how the widget looks, and so much more. You now know how to create WordPress widgets easily!
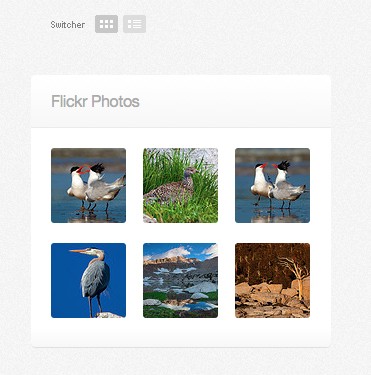
A customized Flickr widget could look like this!

Comments