This is the seventh and final installment of our Cocos2D tutorial series on cloning Centipede for iOS. Make sure you have completed the previous parts before beginning.
Last Time...
In the last tutorial, we discussed how to do simple collision detection between all of the objects in our game.
In today's tutorial, we will wrap things up by discussing the scoring, winning conditions, game audio, and game over screen.
Step 1: Advancing The Game
As of right now, when you destroy the caterpillar, nothing happens. The way to progress forward is to increment the level and restart with some new sprouts and a new caterpillar. This is easily accomplished as we have been building the game to support this since the beginning. Open up GameLayer.m and add the following method:
- (void)checkNextLevel {
    if([self.caterpillars count] == 0) { //1

        self.level++; // 2

        // 3
        CGPoint startingPosition = ccp(kGameAreaStartX, kGameAreaHeight + kGameAreaStartY - kGridCellSize / 2);
        Caterpillar *caterpillar = [[[Caterpillar alloc] initWithGameLayer:self level:self.level position:startingPosition] autorelease];
        [self.caterpillars addObject:caterpillar];

        // 4
        int minSproutCount = kStartingSproutsCount + self.level * 2;
        if([self.sprouts count] < minSproutCount) {
            int numberOfSproutsToPlace = minSproutCount - [self.sprouts count];
            for(int x = 0; x < numberOfSproutsToPlace; x++) {
                [self placeRandomSprout];
            }
        }

    }
}
- Check to see if there are any caterpillars left
- Increment the level
- Create a new caterpillar and add it to the game (based on the new level)
- Add sprouts to match the minSproutCount
Now that we have the method implemented, we need to call it every time the caterpillar gets hit. Inside of the splitCaterpillar:atSegment: method, add the following line before the return statement inside of the first if statement:
if([caterpillar.segments count] == 1) {
    // ...
    // Add this line
    [self checkNextLevel];
    return;
}
This is the condition when the caterpillar is just a single segment. In addition to adding it here, add it to the very bottom of this method as well. That should cover all of the cases.
If you run the game at this point, you should be able to play infinitely with the speed of the caterpillar increasing on each level.
Step 2: Scoring
Within the game, there are several places where the player might increase their score. They are:
- Hitting a sprout
- Hitting the caterpillar
- Advancing to the next level
We are going to jump around quite a bit in order to add scoring to each of these actions, so bare with me.
Before we begin updating the score, we need to define three more constants which will be the base points for the scoring. Open up GameConfig.h and add the following 3 lines:
#define kSproutHitPoints 25
#define kCaterpillarHitPoints 200
#define kNextLevelPoints 1000
You will see how these are used as we get a little further into this tutorial.
Let's start with adding to the player score when they hit a sprout in the game. Open up Missile.m, import Player.h, and add the following code inside of the loop that checks for a collision with a sprout:
self.gameLayer.player.score += kSproutHitPoints +
            (arc4random() % self.gameLayer.level) *
            (arc4random() % self.gameLayer.level);
[[NSNotificationCenter defaultCenter] postNotificationName:kNotificationPlayerScore object:nil];
This increments the player score based on the base points and some amount of randomness based on the current level. That way, as the player goes up in level, they gain more points for taking out the sprouts.
As we did when we set up the initial score, we need to post a notification which will update the player's score label. This is done on each score update. If you run the game at this point, you should see the player's score label updating every time you hit a sprout.
The next place we are going to add scoring is when the caterpillar is hit. At the very bottom of the update: method in Missile.m, add the following code before splitting the caterpillar:
if(hitCaterpillar && hitSegment) {

    // Add these lines
    self.gameLayer.player.score += kCaterpillarHitPoints +
    (arc4random() % self.gameLayer.level) *
    (arc4random() % self.gameLayer.level);
    [[NSNotificationCenter defaultCenter] postNotificationName:kNotificationPlayerScore object:nil];

    // ... code to split the caterpillar ...
}
This code isn't much different than what you saw above. The final place to add scoring is when the player advances in level. This code will be placed inside of the checkNextLevel method that you wrote above. Open GameLayer.m, navigate to the checkNextLevel method and add the following code just after the if statement:
self.player.score += kNextLevelPoints * self.level;
[[NSNotificationCenter defaultCenter] postNotificationName:kNotificationPlayerScore object:nil];
No surprises here. If you want to add some variation to the scoring in your own game, feel free to modify the score values.
Step 3: Game Over
As of right now, your player has the Game Genie on and has infinite lives. We need to change that. First, create a new file called GameOverLayer.m that extends CCLayer.
Add the following code To GameOverLayer.h:
#import "cocos2d.h"
#import "GameConfig.h"

@interface GameOverLayer : CCLayer
@property (nonatomic, assign) NSInteger score;
@property(nonatomic, retain) CCLabelTTF *scoreLabel;
@property(nonatomic, retain) CCLabelTTF *highScoreLabel;
+(CCScene *) sceneWithScore:(NSInteger) score;
@end
I'll explain what each of these properties and methods do during the implementation. Now add the following code to GameOverLayer.m
#import "GameOverLayer.h"
#import "GameLayer.h"
#import "SimpleAudioEngine.h"

@implementation GameOverLayer

@synthesize score = _score;
@synthesize scoreLabel = _scoreLabel;
@synthesize highScoreLabel = _highScoreLabel;

// 1
+(CCScene *) sceneWithScore:(NSInteger) score
{
    // 'scene' is an autorelease object.
    CCScene *scene = [CCScene node];

    // 'layer' is an autorelease object.
    GameOverLayer *layer = [GameOverLayer node];
    layer.score = score;

    // add layer as a child to scene
    [scene addChild: layer];

    // return the scene
    return scene;
}

// 2
- (void)dealloc {
    [_scoreLabel release];
    [_highScoreLabel release];
    [super dealloc];
}

-(id) init
{
    if( (self=[super init])) {
        // 3
        [CCTexture2D setDefaultAlphaPixelFormat:kCCTexture2DPixelFormat_RGB565];
        CCSprite * background = [CCSprite spriteWithFile:@"game-over.png"];
        background.anchorPoint = ccp(0,0);
        [self addChild:background];

        // 4
        _scoreLabel = [[CCLabelTTF labelWithString:@"0"
                                          dimensions:CGSizeMake(320, 30)
                                           alignment:UITextAlignmentCenter
                                            fontName:@"Helvetica"
                                            fontSize:30] retain];
        _scoreLabel.anchorPoint = ccp(0,0);

        _scoreLabel.position = ccp(0,155);
        [self addChild:_scoreLabel];

        _highScoreLabel = [[CCLabelTTF labelWithString:[NSString stringWithFormat:@"High: %d",0]
                                        dimensions:CGSizeMake(320, 35)
                                         alignment:UITextAlignmentCenter
                                          fontName:@"Helvetica"
                                          fontSize:30] retain];
        _highScoreLabel.anchorPoint = ccp(0,0);
        _highScoreLabel.color = (ccColor3B){255,0,0};

        _highScoreLabel.position = ccp(0,195);
        [self addChild:_highScoreLabel];

        // 5
        [[CCTouchDispatcher sharedDispatcher] addTargetedDelegate:self priority:0 swallowsTouches:YES];
        [[SimpleAudioEngine sharedEngine] playEffect:@"game-over.caf"];

    }
    return self;
}

- (void)setScore:(NSInteger)score {
    _score = score;
    self.scoreLabel.string = [NSString stringWithFormat:@"Score: %d",_score];

    // 6
    NSUserDefaults *defaults = [NSUserDefaults standardUserDefaults];
    NSInteger highScore = [defaults integerForKey:@"CentipedeHighScore"];

    // 7
    if(score > highScore) {
        highScore = score;
        [defaults setInteger:score forKey:@"CentipedeHighScore"];
        [defaults synchronize];
    }

    self.highScoreLabel.string = [NSString stringWithFormat:@"High: %d",highScore];
}

// 8
- (BOOL)ccTouchBegan:(UITouch *)touch withEvent:(UIEvent *)event {
    [[CCDirector sharedDirector] replaceScene:[CCTransitionFade transitionWithDuration:.5 scene:[GameLayer scene] withColor:ccWHITE]];
    return YES;
}


@end
- This is our standard method to set up a new scene. The only difference is, it takes an NSInteger and sets it to the current score.
- Clean up
- Render the background
- Set up the labels to display the score and high score
- Enable touches
- Look up the high score
- Compare new score to the highest score, save the new score if it's higher.
- Start a new game if the player touches the screen
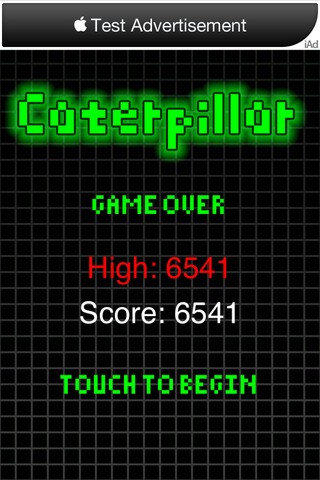
Here is a screenshot of what this screen should look like:
The last step is to open up GameLayer.m and add the following lines to the end of the updateLives method:
if (lifeCount == 0) {
    [[CCDirector sharedDirector] replaceScene:[CCTransitionFade transitionWithDuration:.5 scene:[GameOverLayer sceneWithScore:self.player.score] withColor:ccWHITE]];
}
This checks if the lives are set to 0. If so, we replace the current scene with the Game Over scene.
Step 4: Game Audio
The final step in our game polish is to add sound. First, download the sounds below and add them to your project:
Traditionally, handling sound has been quite a pain in an OpenGL game. You would have to use something like OpenAL or another complicated C++ library. Cocos2D has greatly simplified things with their SimpleAudioEngine library. It gives you the ability to easily play looping background music as well as quick sounds.
Again, we are going to be jumping around quite a bit. So, if the placement of some code is unclear to you, please ask me in the comments or refer to the source code of this tutorial.
Open up AppDelegate.m and import SimpleAudioEngine.h and add the following line to the bottom of the applicationDidFinishLaunching method.
[[SimpleAudioEngine sharedEngine] playBackgroundMusic:@"background.caf"];i
That's it! Only one line is needed to play our background music for the duration of the play time. Now we just need to play sound effects in response to various actions.
In Caterpillar.m, when the Caterpillar collides with the player (towards the end of the update: method):
[[SimpleAudioEngine sharedEngine] playEffect:@"player-hit.caf"];
In Missile.m, when the Missile hits the Sprout:
[[SimpleAudioEngine sharedEngine] playEffect:@"sprout-hit.caf"];
Also in Missile.m, when the Missile hits the Caterpillar:
[[SimpleAudioEngine sharedEngine] playEffect:@"caterpillar-hit.caf"];
In The init method in GameOverLayer.m:
[[SimpleAudioEngine sharedEngine] playEffect:@"game-over.caf"];
That should cover all of the sounds that I have used in the game. Also, be sure to import SimpleAudioEngine.h in each of the classes above.
Conclusion
This concludes the 7 part tutorial series on creating a Caterpillar game using Cocos2D for the iPhone. By now, you should have a solid understanding of how to design and build a simple game using the Cocos2D game engine. If you have any questions or comments, please feel free to leave them in the comments section here or write them to me on Twitter.
Happy coding!

Comments