This tutorial demonstrates how to enhance a drawing application by allowing the user to paint with pattern fills rather than solid colors. Read on!
The touchscreen interaction on many Android devices makes the platform well suited to drawing apps. In a recent series, we created a basic Android drawing app, with the user able to choose from a color palette and draw on a canvas using their finger. In this tutorial, we will expand on what we covered by using pattern fills rather than solid colors. You do not have to complete the drawing app series before attempting this tutorial, but if you have you can use it to enhance the app you built previously.
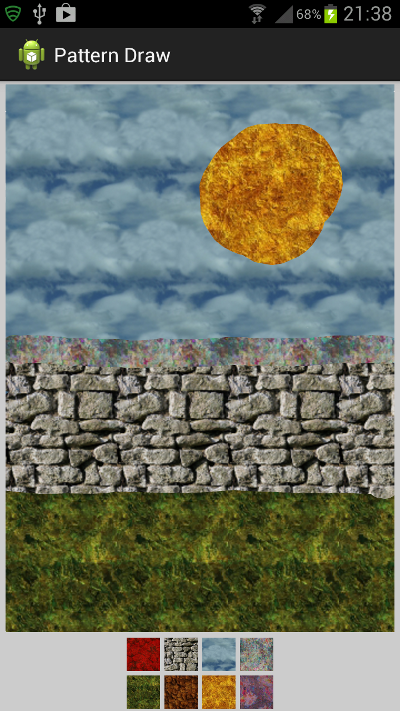
Here is a preview of the pattern drawing app we will create in this tutorial:
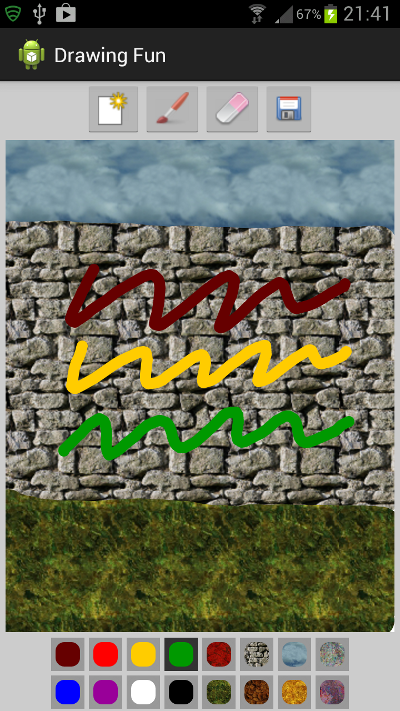
The tutorial will guide you through the process of building a standalone app, but will also include tips for using the code to enhance the app we created in the series. The source code download folder includes both the app we build in this tutorial and the enhanced version of the general drawing app we built in the series. Here is a preview of the existing app enhanced with the pattern drawing functionality:
1. Create or Extend an App
Step 1
Although you can complete this tutorial without having worked through the Drawing App series, we will gloss over some of the details of drawing functions that were covered more thoroughly there. We will include complete instructions for using the code in a new app as well as indicating how you could use it to enhance the existing drawing app. If you already have the app we created in the series, you can jump straight to part 2, step 1 of the tutorial now.
If you are starting a new app for this tutorial, create one in Eclipse now, choosing a minimum API level of 14 and other settings of your choice. Let Eclipse create a blank Activity and layout for the app. We will be using much of the same code we used in the drawing app series, so for more information on the functionality please refer to the three tutorials within it.
Add a new class to the app for a custom View in which the drawing will take place, name the class "DrawingView" and extend the opening declaration as follows:
public class DrawingView extends View
You will need the following import statements in the class:
import android.content.Context;
import android.graphics.Bitmap;
import android.graphics.BitmapFactory;
import android.graphics.BitmapShader;
import android.graphics.Canvas;
import android.graphics.Paint;
import android.graphics.Path;
import android.graphics.Shader;
import android.util.AttributeSet;
import android.view.MotionEvent;
import android.view.View;
Add the following instance variables to the class:
//drawing path
private Path drawPath;
//drawing and canvas paint
private Paint drawPaint, canvasPaint;
//initial color
private int paintColor = 0xFF000000;
//canvas
private Canvas drawCanvas;
//canvas bitmap
private Bitmap canvasBitmap;
Give the class a constructor method in which we call a helper method we will add next:
public DrawingView(Context context, AttributeSet attrs){
	super(context, attrs);
	setupDrawing();
}
Add the helper method now:
private void setupDrawing(){
	drawPath = new Path();
	drawPaint = new Paint();
	drawPaint.setColor(paintColor);
	drawPaint.setAntiAlias(true);
	drawPaint.setStrokeWidth(50);
	drawPaint.setStyle(Paint.Style.STROKE);
	drawPaint.setStrokeJoin(Paint.Join.ROUND);
	drawPaint.setStrokeCap(Paint.Cap.ROUND);
	canvasPaint = new Paint(Paint.DITHER_FLAG);
}
The method sets the class up for drawing. Override the method for when the View is assigned a size next:
@Override
protected void onSizeChanged(int w, int h, int oldw, int oldh) {
	super.onSizeChanged(w, h, oldw, oldh);
	canvasBitmap = Bitmap.createBitmap(w, h, Bitmap.Config.ARGB_8888);
	drawCanvas = new Canvas(canvasBitmap);
}
Now override the onDraw method to display the picture being drawn by the user:
@Override
protected void onDraw(Canvas canvas) {
	canvas.drawBitmap(canvasBitmap, 0, 0, canvasPaint);
	canvas.drawPath(drawPath, drawPaint);
}
Finally, add the following method to implement the user drawing through touch on the View:
@Override
public boolean onTouchEvent(MotionEvent event) {
	float touchX = event.getX();
	float touchY = event.getY();
	//respond to down, move and up events
	switch (event.getAction()) {
	case MotionEvent.ACTION_DOWN:
		drawPath.moveTo(touchX, touchY);
		break;
	case MotionEvent.ACTION_MOVE:
		drawPath.lineTo(touchX, touchY);
		break;
	case MotionEvent.ACTION_UP:
		drawPath.lineTo(touchX, touchY);
		drawCanvas.drawPath(drawPath, drawPaint);
		drawPath.reset();
		break;
	default:
		return false;
	}
	//redraw
	invalidate();
	return true;
}
Step 2
Now let's display the custom View in the app user interface. Open your main layout file and include the following outline:
<LinearLayout xmlns:android="http://schemas.android.com/apk/res/android"
	xmlns:tools="http://schemas.android.com/tools"
	android:layout_width="match_parent"
	android:layout_height="match_parent"
	android:background="#FFCCCCCC"
	android:orientation="vertical"
	tools:context=".MainActivity" >

</LinearLayout>
Inside the Linear Layout, add an instance of the custom View class you created, using the package prefix for your own app:
<com.example.patterndraw.DrawingView
	android:id="@+id/drawing"
	android:layout_width="fill_parent"
	android:layout_height="0dp"
	android:layout_marginBottom="3dp"
	android:layout_marginLeft="5dp"
	android:layout_marginRight="5dp"
	android:layout_marginTop="3dp"
	android:layout_weight="1"
	android:background="#FFFFFFFF" />
We want the canvas area to fill the space apart from the palette buttons we will add next.
2. Pattern Buttons
Step 1
We are going to use 8 pattern fills - you can use the following images or create your own if you prefer. Save them into your project's drawables folder(s) - they are included in the source code download folder. We will use the file names to refer to the images in the application code.

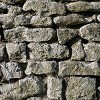

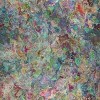
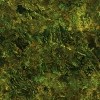
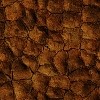
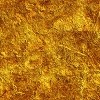

You can use your own pattern images if you like, as long as they each contain a tileable bitmap image. We will be using the images on the pattern buttons in the UI as well as in the drawing functions themselves. We show them on the buttons so that the user can see what each pattern looks like before choosing one.
Step 2
Let's now add a palette to our user interface for the pattern buttons. Open your layout file. If you are working with the app we created in the series, you can add new buttons to the palette area for the patterns - see the tip below and refer to the source code download for a completed example of the existing app with the new functionality added. For the new app, add the following after the custom View element you added:
<LinearLayout
	android:layout_width="wrap_content"
	android:layout_height="wrap_content"
	android:layout_gravity="center"
	android:orientation="vertical" >
	<!-- top row -->
	<LinearLayout
		android:layout_width="wrap_content"
		android:layout_height="wrap_content"
		android:orientation="horizontal" >
	</LinearLayout>
	<!-- bottom row -->
	<LinearLayout
		android:layout_width="wrap_content"
		android:layout_height="wrap_content"
		android:orientation="horizontal" >
	</LinearLayout>
</LinearLayout>
We will list four buttons on each row. Add the first four inside the Linear Layout for the top row:
<ImageButton
	android:layout_width="30dp"
	android:layout_height="30dp"
	android:layout_margin="2dp"
	android:background="@drawable/pattern1"
	android:contentDescription="pattern"
	android:onClick="paintClicked"
	android:src="@drawable/paint"
	android:tag="pattern1" />
<ImageButton
	android:layout_width="30dp"
	android:layout_height="30dp"
	android:layout_margin="2dp"
	android:background="@drawable/pattern2"
	android:contentDescription="pattern"
	android:onClick="paintClicked"
	android:src="@drawable/paint"
	android:tag="pattern2" />
<ImageButton
	android:layout_width="30dp"
	android:layout_height="30dp"
	android:layout_margin="2dp"
	android:background="@drawable/pattern3"
	android:contentDescription="pattern"
	android:onClick="paintClicked"
	android:src="@drawable/paint"
	android:tag="pattern3" />
<ImageButton
	android:layout_width="30dp"
	android:layout_height="30dp"
	android:layout_margin="2dp"
	android:background="@drawable/pattern4"
	android:contentDescription="pattern"
	android:onClick="paintClicked"
	android:src="@drawable/paint"
	android:tag="pattern4" />
Add the next four inside the Linear Layout for the bottom row:
<ImageButton
	android:layout_width="30dp"
	android:layout_height="30dp"
	android:layout_margin="2dp"
	android:background="@drawable/pattern5"
	android:contentDescription="pattern"
	android:onClick="paintClicked"
	android:src="@drawable/paint"
	android:tag="pattern5" />
<ImageButton
	android:layout_width="30dp"
	android:layout_height="30dp"
	android:layout_margin="2dp"
	android:background="@drawable/pattern6"
	android:contentDescription="pattern"
	android:onClick="paintClicked"
	android:src="@drawable/paint"
	android:tag="pattern6" />
<ImageButton
	android:layout_width="30dp"
	android:layout_height="30dp"
	android:layout_margin="2dp"
	android:background="@drawable/pattern7"
	android:contentDescription="pattern"
	android:onClick="paintClicked"
	android:src="@drawable/paint"
	android:tag="pattern7" />
<ImageButton
	android:layout_width="30dp"
	android:layout_height="30dp"
	android:layout_margin="2dp"
	android:background="@drawable/pattern8"
	android:contentDescription="pattern"
	android:onClick="paintClicked"
	android:src="@drawable/paint"
	android:tag="pattern8" />
Tip: For the app we created in the series, alter this code to use the same Image Button structures as your color buttons, but with the pattern listed as drawable instead of a color and the pattern name as tag attribute as in the code above. You can replace some of your color buttons with pattern buttons or simply add some alongside the color buttons. If you are adding lots of buttons to the app, you may need to reduce the sizes so that they fit neatly on a range of screens.
Each Image Button specifies a method to call on user clicks - this method will be able to access the pattern name for a clicked button from its tag attribute.
3. Pattern Fills
Step 1
Tip: You can keep the main Activity class as it is if you completed the series, the only changes you will need to make are to the custom View class as you will see below.
Now we can implement using the pattern fills. In your app's main Activity class, add the following import:
import android.view.View;
Before the onCreate method, add the following instance variable for the custom View class:
private DrawingView drawView;
In onCreate, instantiate this with a reference to the custom View instance we added to the layout:
drawView = (DrawingView)findViewById(R.id.drawing);
Next add the method we listed as onClick attribute for the pattern buttons:
public void paintClicked(View view){
//set pattern
}
Inside the method, retrieve the tag from the clicked pattern Image Button:
String pattern = view.getTag().toString();
We need the custom View to set the pattern fill based on the user selection. In your "DrawingView" class, add the following method (see the tip below if you are enhancing the existing drawing app for an alternative to adding this method):
public void setPattern(String newPattern){
//set pattern
}
Inside the method, first invalidate the View:
invalidate();
We are going to use the pattern drawable name to bring it into the painting class as a Bitmap. Get a reference to the resource ID for the passed pattern String:
int patternID = getResources().getIdentifier(newPattern, "drawable", "com.example.patterndraw");
Alter the package name to suit your own. Next in the method, decode the resource as a Bitmap, passing the retrieved ID value:
Bitmap patternBMP = BitmapFactory.decodeResource(getResources(), patternID);
Rather than drawing directly with the Bitmap, we are going to draw in a solid color and use the Bitmap as Shader for it. Create a Shader object using the decoded pattern Bitmap:
BitmapShader patternBMPshader = new BitmapShader(patternBMP,
	Shader.TileMode.REPEAT, Shader.TileMode.REPEAT);
We want the pattern to repeat throughout the area the user draws on with it. Set the color to solid white and the Shader to use the pattern:
drawPaint.setColor(0xFFFFFFFF);
drawPaint.setShader(patternBMPshader);
This will create the impression that the user is drawing with the pattern as paint, just like with a solid color. It does not matter what size the pattern drawable image is, as long is it is tileable it will be repeated seamlessly throughout the canvas wherever the user chooses to draw with it.
Back in the main Activity paintClicked method, you can now call the new method with the pattern String retrieved from the button tag:
drawView.setPattern(pattern);
The user will be able to tap any pattern they want to use in the palette area and this will be reflected when they then draw on the canvas. For more advanced behavior in the palette buttons, please do refer to the drawing app series if you have not already completed it.
Tip: If you are enhancing the existing drawing app, you can continue using the setColor method from your main Activity, altering the content of the method in the "DrawingView" class to use the above processing if the passed color String does not begin with the "#" character, using the existing processing if it does. If the user has chosen a color rather than a pattern, you also need to set the Shader on the Paint object back to null - see the source code for details.
You should be able to run the app and test the pattern drawing functionality now. Selecting a pattern by tapping the palette buttons, then touching the canvas area with your finger and dragging across the screen will draw with the chosen pattern as it does with a solid color.
Conclusion
In this tutorial we have demonstrated how to implement drawing functions using patterns rather than colors in your Android apps. Using a pattern fill is only slightly different to using solid color, but does require a little more processing as you have seen. Remember to check the source code download for further information if you have been working on the app we created in the drawing app series. There are lots of other options you can explore in drawing apps, including opacity, which we will look at in a forthcoming tutorial. We will also be looking at interaction that does not come from a touchscreen. In the meantime, see if you can enhance your drawing apps in other ways.

Comments