The tutorial content of the still-unnamed "TutList" application we've been building together is getting stale. The data has been the same for over a month now. It's time to breathe some life into the application by providing it with a means to read fresh Mobiletuts tutorial data on the fly.
As it stands now, our application reads a list of tutorial titles and links from a database. This is, fundamentally, the correct way to design the app. However, we need to add a component that retrieves new content from the Mobiletuts website and stores new titles and links in the application database. This component will download the raw RSS feed from the site, parse it for the title and link, then store that data into the database. The database will be modified to disallow duplicate links. Finally, a refresh option will be placed within the list fragment so the user can manually force an update of the database.
As with other tutorials in this series, the pacing will be faster than some of our beginner tutorials; you may have to review some of the other Android tutorials on this site or even in the Android SDK reference if you are unfamiliar with any of the basic Android concepts and classes discussed in this tutorial. The final sample code that accompanies this tutorial is available for download as open-source from the Google code hosting.
Step 0: Getting Started
This tutorial assumes you will start where our last tutorial, Android Fundamentals: Properly Loading Data, left off. You can download that code and work from there or you can download the code for this tutorial and follow along. Either way, get ready by downloading one or the other project and importing it into Eclipse.
Step 1: Creating the Service Class
One way to handle background processing, such as downloading and parsing the Mobiletuts tutorial feed, is to implement an Android service for this purpose. The service allows you to componentize the downloading task from any particular activity or fragment. Later on, this will allow it to easily perform the operation without the activity launching at all.
So let’s create the service. Begin by creating a new package, just like the data package. We named ours com.mamlambo.tutorial.tutlist.service. Within this package, add a new class called TutListDownloaderService and have it extend the Service class (android.app.Service). Since a service does not actually run in a new thread or process from the host (whatever other process or task starts it, in this case, an Activity), we need to also create a class to ensure that the background work is done asyncronously. For this purpose, we could use a Thread/Handler design or simply use the built-in AsyncTask class provided with the Android SDK to simplify this task.
We'll use AsyncTask for our application. Create a private inner class that extends AsyncTask for use just by the Service class. We'll get to the specific implementation details shortly, but here's the empty Service class implementation with the inner AsyncTask:
public class TutListDownloaderService extends Service {

    private static final String DEBUG_TAG = "TutListDownloaderService";
    private DownloaderTask tutorialDownloader;

    @Override
    public int onStartCommand(Intent intent, int flags, int startId) {
        // TBD
        return Service.START_FLAG_REDELIVERY;
    }

    @Override
    public IBinder onBind(Intent intent) {
        return null;
    }

    private class DownloaderTask extends AsyncTask<URL, Void, Boolean> {

        private static final String DEBUG_TAG = "TutListDownloaderService$DownloaderTask";

        @Override
        protected Boolean doInBackground(URL... params) {
            // TBD
        }

        private boolean xmlParse(URL downloadPath) {
            // TBD
        }

    }

}
Step 2: Configuring the Service
Within the Android Manifest file, you must now add a new entry to register the service. Like other entries, the <service> tag entry is simple. In this case, you need only supply its name property. The entry should be placed with the <application> tag.
<service
    android:name=".service.TutListDownloaderService"></service>
Step 3: Database Modifications
We're going to leverage the UNIQUE row attribute of the SQLite database to prevent duplicate entries from being inserted. Let's make this change now.
Within the TutListDatabase class, modify the CREATE_TABLE_TUTORIALS String as follows:
private static final String CREATE_TABLE_TUTORIALS = "CREATE TABLE "
        + TABLE_TUTORIALS + " (" + ID
        + " integer PRIMARY KEY AUTOINCREMENT, " + COL_TITLE
        + " text NOT NULL, " + COL_URL + " text UNIQUE NOT NULL);";
[/code

Since we have fundamentally changed how the database functions, you should now update the database version to 2 by editing the DB_VERSION constant.
<h2><span>Step 4: </span> Provider Modifications</h2>

Our previous implementation of the insert() method within the TutListProvider class used the SQLiteDatabase class method called insert(). In order to catch and ignore the constraint failure for duplicate titles, switch this to the method called insertOrThrow() and catch the SQLiteConstraintException exception. This exception will be fairly routine and may or may not be the most optimal way to prevent duplicates, but it's straightforward and easy to implement. Here's the updated implementation of the insert() method of TutListProvider:
[code language="java"]
@Override
public Uri insert(Uri uri, ContentValues values) {
    int uriType = sURIMatcher.match(uri);
    if (uriType != TUTORIALS) {
        throw new IllegalArgumentException("Invalid URI for insert");
    }
    SQLiteDatabase sqlDB = mDB.getWritableDatabase();
    try {
        long newID = sqlDB.insertOrThrow(TutListDatabase.TABLE_TUTORIALS, null,
                values);
        if (newID > 0) {
            Uri newUri = ContentUris.withAppendedId(uri, newID);
            getContext().getContentResolver().notifyChange(uri, null);
            return newUri;
        } else {
            throw new SQLException("Failed to insert row into " + uri);
        }
    } catch (SQLiteConstraintException e) {
        Log.i(DEBUG_TAG, "Ignoring constraint failure.");
    }
    return null;
}
Step 5: Implementing the AsyncTask
All of the core downloading and parsing background processing occurs within the DownloaderTask inner class, specifically within the doInBackground() callback method. Let's look at the doInBackground() method:
@Override
protected Boolean doInBackground(URL... params) {
    boolean succeeded = false;
    URL downloadPath = params[0];

    if (downloadPath != null) {
        succeeded = xmlParse(downloadPath);
    }
    return succeeded;
}
We're only acting on a single parameter. This could be extended to iterate through all URLs, downloading and parsing many XML files. However, this application is specific to just one feed. We pass on the URL to the xmlParse() helper method where all of the parsing will happen.
Step 6: Parsing the XML
If you're thinking we skipped right over downloading, we didn't. We're going to use the XmlPullParser class to parse the XML. It takes an InputStream. Since the URL class can provide an InputStream via its openStream() method, let's just do that:
XmlPullParser tutorials;

tutorials = XmlPullParserFactory.newInstance().newPullParser();
tutorials.setInput(downloadPath.openStream(), null);
The parts of the RSS format that we're interested in are the item tags and, within those, the link and title tags. We'll do this with two while loops. Here's the parsing:
while (eventType != XmlPullParser.END_DOCUMENT) {
    if (eventType == XmlPullParser.START_TAG) {
        String tagName = tutorials.getName();
        if (tagName.equals("item")) {
            // inner loop looking for link and title
            while (eventType != XmlPullParser.END_DOCUMENT) {
                if (eventType == XmlPullParser.START_TAG) {
                    if (tutorials.getName().equals("link")) {
                    } else if (tutorials.getName().equals(
                            "title")) {
                    }
                } else if (eventType == XmlPullParser.END_TAG) {
                    if (tutorials.getName().equals("item")) {
                        // save the data, and then continue with
                        // the outer loop
                        break;
                    }
                }
                eventType = tutorials.next();
            }
        }
    }
    eventType = tutorials.next();
}
Now the data needs to be added to database through the application’s content provider.
Step 7: Adding New Tutorials to the Content Provider
Adding data through a content provider is straightforward. Here's the code to add a new entry:
ContentValues tutorialData = new ContentValues();
tutorialData.put(
        TutListDatabase.COL_URL,
        "http://some url");
tutorialData.put(
        TutListDatabase.COL_TITLE,
        "Some Title");
getContentResolver().insert(
        TutListProvider.CONTENT_URI,
        tutorialData);
Basically, you're adding a set of content values to a particular URI as a new entry. We don't need to do anything with the results. Additionally, the list control is already listening for changes to the database so as soon as the data is added, the list updates. How nice is that?
Step 8: Adding a Refresh Menu Item
Finally, let's add a mechanism for the user to refresh the data on their own. For this, we'll use the options menu of the TutListFragment class. We could use the new Action Bar if we were only targeting Android 3.0, but we’d prefer if our app runs on a variety of platform versions. Adding a menu item to a Fragment causes that menu item to be added to whatever other menu items the Activity and other contained Fragments have. In this way, it doesn't matter what Activity this Fragment exists under, the option menu item will be there.
Here are the new methods to add to the TutListFragment class to managing an options menu with a refresh option:
private int refreshMenuId;
@Override
public void onCreateOptionsMenu(Menu menu, MenuInflater inflater) {
    Intent intent = new Intent(getActivity().getApplicationContext(),
            TutListDownloaderService.class);
    intent.setData(Uri
            .parse("http://feeds.feedburner.com/MobileTuts?format=xml"));
    inflater.inflate(R.menu.options_menu, menu);
    MenuItem refresh = menu.findItem(R.id.refresh_option_item);
    refresh.setIntent(intent);
    refreshMenuId = refresh.getItemId();
}

@Override
public boolean onOptionsItemSelected(MenuItem item) {
    if (item.getItemId() == refreshMenuId) {
        getActivity().startService(item.getIntent());
    }
    return true;
}
Besides creating and configuring the options menu, you know see how to start a service. That's right! It's exactly like starting an Activity, except using the startService() method instead of the startActivity() method. Consistency is nice, huh?
And here's the options_menu.xml menu XML resource definition (referenced in the above code):
<?xml version="1.0" encoding="utf-8"?>
<menu
    xmlns:android="http://schemas.android.com/apk/res/android">
    <item
        android:id="@+id/refresh_option_item"
        android:icon="@drawable/ic_menu_refresh"
        android:title="Refresh"></item>
</menu>
We also added a typical refresh icon to the resources. In fact, we borrowed ours from the platform resources included with the Android SDK. It's under creative commons licensed.
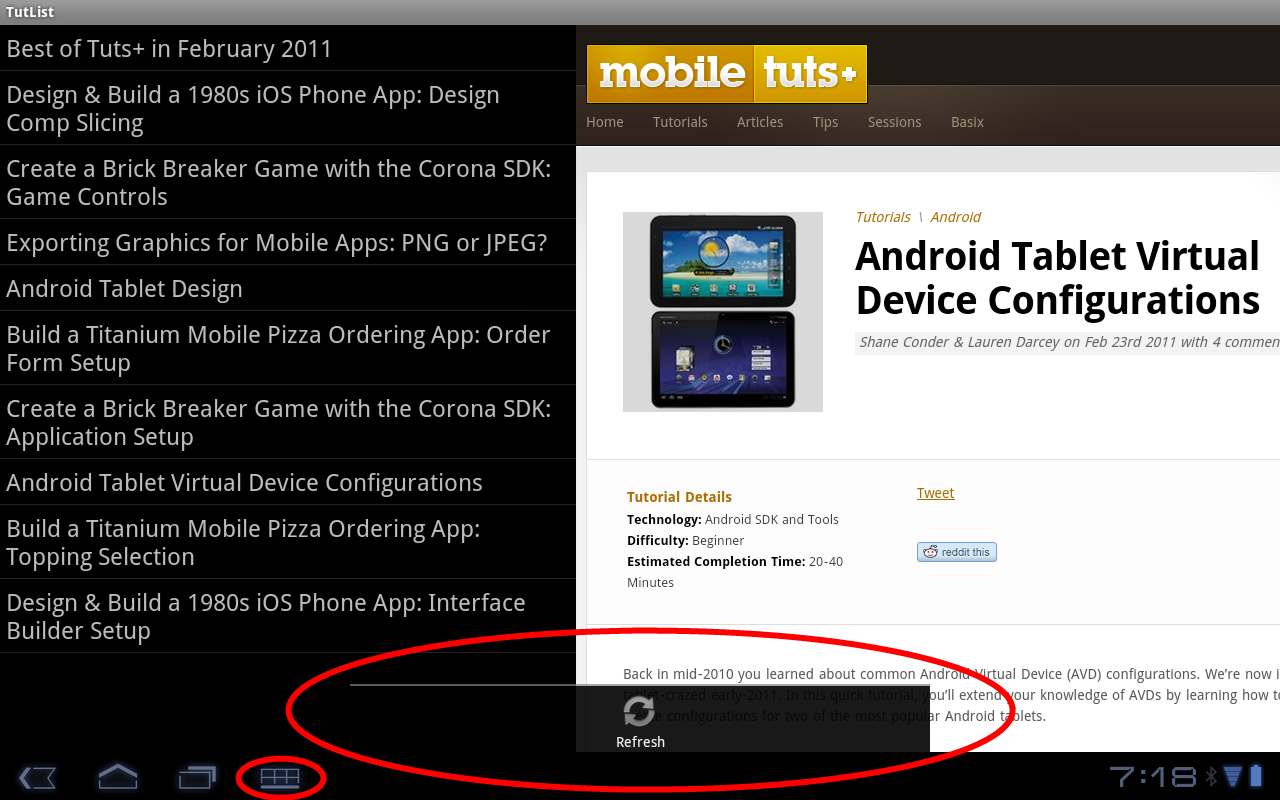
Now, when you run the application, you'll see that it has a menu:

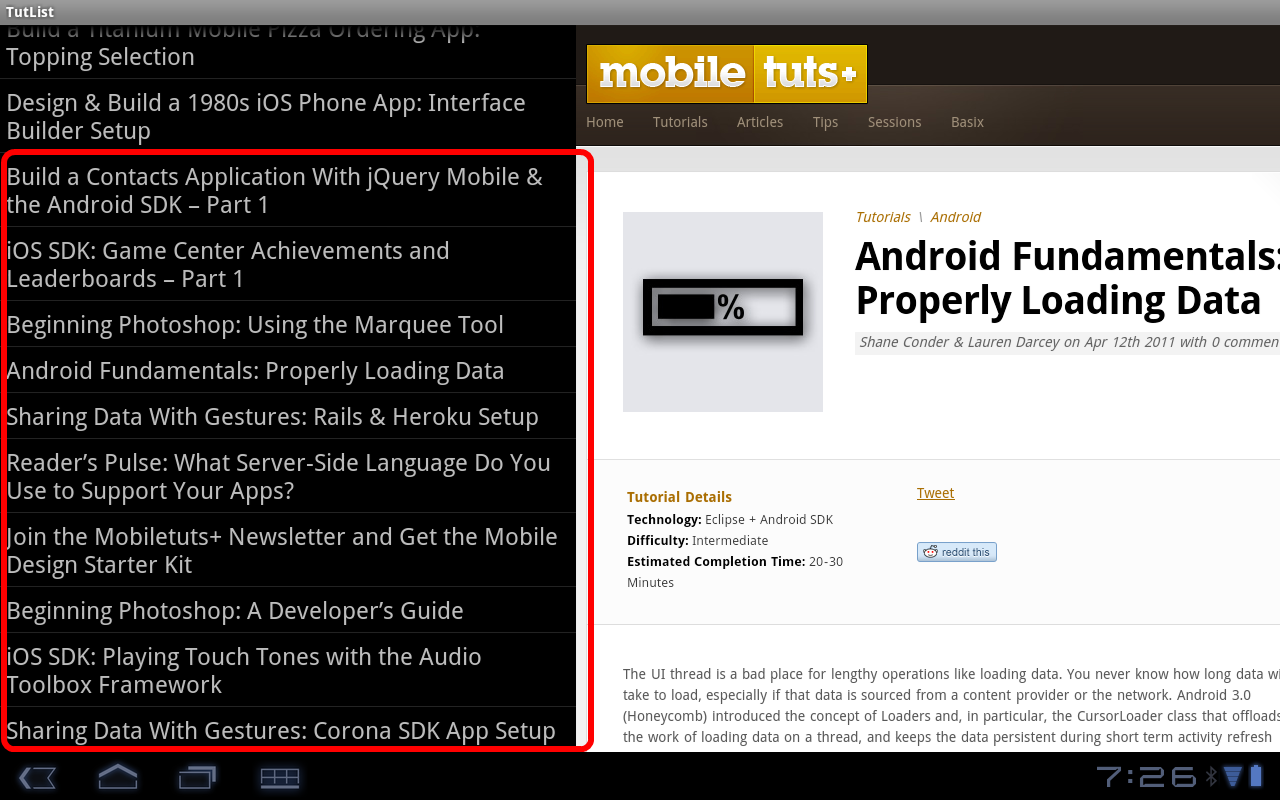
Finally,after pressing the refresh button, you'll see the new items appear at the bottom of the list:

Refinements
There are several refinements that could be made to the application at this point. Ordering the list of tutorials may be high on your list. Search may also be high on the list. As these are tutorials, removing read items may not be, though, as you might need to reference an old tutorial sometime in the future. The RSS data also includes category information, so you might want to consider filtering tutorials based on metadata of this kind. Several other improvements also come to mind.
We've covered none of these topics. So far. :)
Any in particular you'd like to see discussed in a future tutorial? Let us know!
Conclusion
You learned about several new topics in this tutorial by adding a background download service to the "TutList" application. You learned how to create and use an Android Service. You learned how to create and using an AsyncTask object. You learned how to parse XML from the live network URL. Finally, you learned how to create and use a simple options menu in conjunction with Fragments.
As always, we look forward to your feedback.
About the Authors
Mobile developers Lauren Darcey and Shane Conder have coauthored several books on Android development: an in-depth programming book entitled Android Wireless Application Development and Sams Teach Yourself Android Application Development in 24 Hours. When not writing, they spend their time developing mobile software at their company and providing consulting services. They can be reached at via email to [email protected], via their blog at androidbook.blogspot.com, and on Twitter @androidwireless.


Comments