Android 3.0, or Honeycomb, came with some fundamental user interface changes, most notably in the form of the Fragment API. When you were reading the last tutorial on how to use fragments, you were probably thinking, "Wow, this is great, but I can't use any of this because I need to target more than just the Motorola Xoom, the only Android 3.0 device currently on the market." Luckily for all of us developers, Google has released a library called the Android Compatibility package. This package provides support for the Fragment API as well as other key new features to devices as far back as Android 1.6. As of this writing, that covers 97% of all Android devices actively accessing the Android Market. Learn how to use it in this quick tip.
The final sample code that accompanies this tutorial is available for download as open-source from the Google code hosting.
Step 0: Getting Started
This tutorial assumes you will start where our Fragment API tutorial left off. You can download that code and build from there, though you will have some tasks you'll have to do unassisted, or you can download the code for this tutorial and follow along. The choice is yours.
Step 1: Downloading the Package
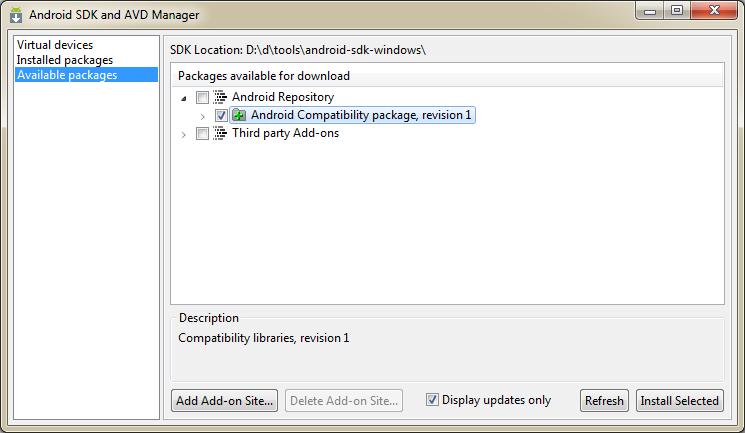
Before you can use the Compatibility package, you must download it. To do this from within Eclipse, open the Android SDK and AVD Manager, click on Available packages, expand Android repository, and then choose Android Compatibility package, currently revision 1. Then choose "Install selected" and follow the on-screen instructions, including possibly restarting Eclipse.

Step 2: Configuring the Build Path
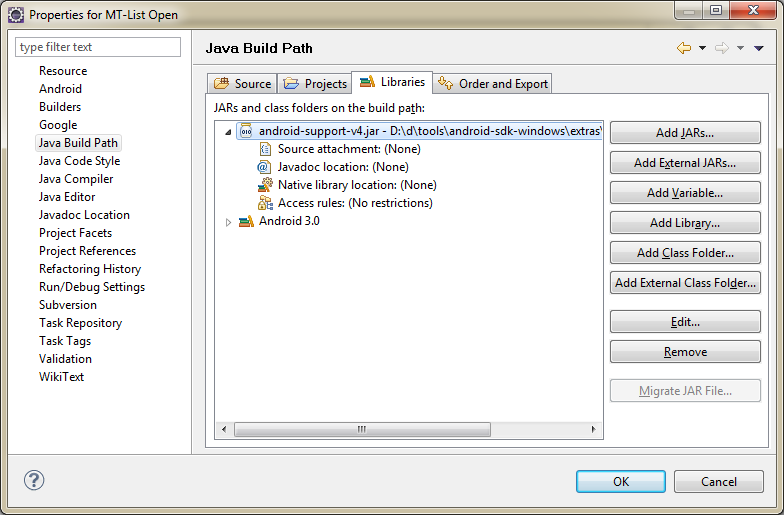
With the compatibility package installed, you now must configure your project's build path to include the library that we need. To do this, follow these steps:
- Open the properties for the project
- Select Java Build Path
- Choose the Libraries tab
- Click the "Add External JARs" button
- Browse to your Android SDK directory, find the extras folder, then android, compatibility, v4. Choose the "android-support-v4.jar" and click open.

Note: You may need to copy the JAR into your project directory and reference it via "Add JARs" button instead. In particular, you'll likely need to do this if you're using source control or otherwise sharing your application project. You'll see how this is done if you download the code corresponding to this tutorial.
Step 3: Updating the Project Build Target
The external library will provide the interface we need for the Fragment API use. We aren't using anything else from Android 3.0 (on purpose) so we no longer need to rely on the Android 3.0 SDK. Instead, switch your project build target to API Level 10 (Android 2.3.3). When you do this, you'll notice several compile errors. Fixing the compile errors in TutListFragment and TutViewerFragment is trivial: simply open them and press ctrl-shift-o to switch around the import statements automatically to the appropriate APIs from the compatibility library instead of the Android 3.0 libraries.
Why Android 2.3.3 instead of Android 1.6? Primarily this is to avoid changing out layout references to "match_parent" with "fill_parent". The final application will be compatible with 1.6 and we'll update or minSdkVersion in the manifest to show that.
Step 4: Switching to the Support Version of the Activity
Updating the two Activity classes is a bit more involved. For both TutListActivity and TutViewer Activity, follow these steps:
- Change the Activity to extend the FragmentActivity class
- Change the call to the getFragmentManager() method to the getSupportFragmentManager() method
- Organize or update the imports
Step 5: Updating the Manifest
Now update the manifest setting for minSdkVersion to 4 and targetSdkVersion to 10.
Step 6: Running the App
That's all there is to it. At this point, you can load the app on almost any device and run it.
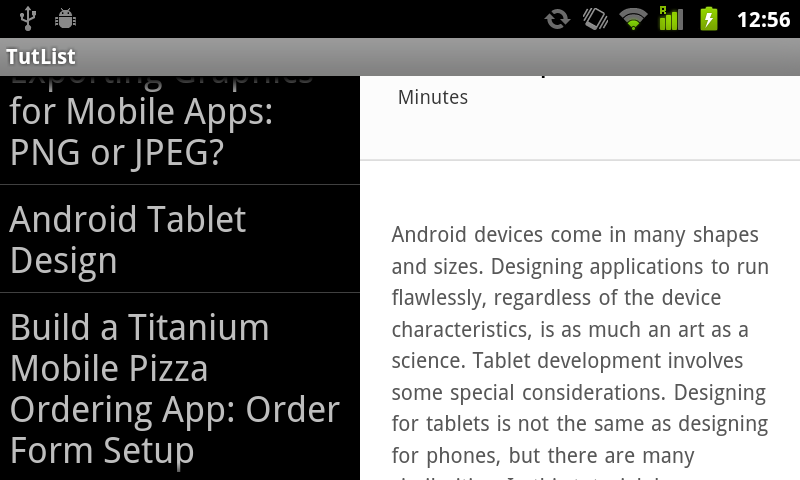
Here's the sample app running on a Nexus S running Android 2.3.3 at 800x480:

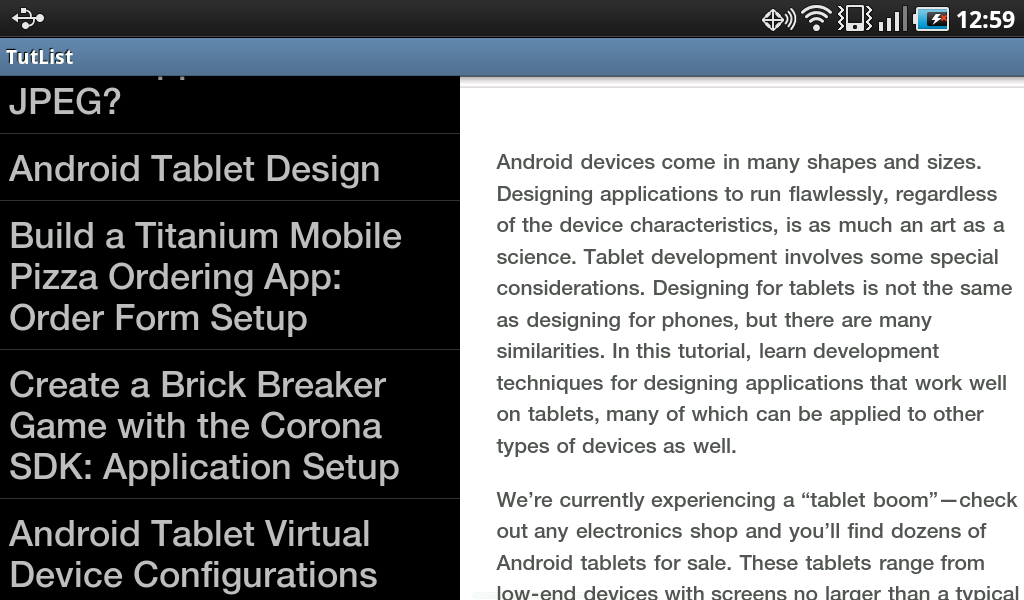
Here it is on a Galaxy Tab running Android 2.2 at 1024x600:

And, finally, here it is on a T-Mobile G1 running Android 1.6 at 480x320:

Of course, it still works and looks the same on the Motorola Xoom.
Step 7: Updating the Layouts (Optional)
As you can see from the above screenshots, the text size and room for the WebView vary by device. The dual view is not particularly practical on the G1. You can configure different layouts for the difference device properties to handle such situations. Provided your user interface workflow fits within the single or dual view paradigm that the code supports, no further coding will be necessary.
The Compatibility Package
Other than the Fragment API, the compatibility package also provides a version of the Loader API for use on older devices. Given that two APIs are already available in this package, and the label is Revision 1, we can only hope that Google will put some effort into bringing more fundamental APIs to older versions of the SDK in the future.
Using the compatibility package does make your application package larger. For instance, the APK for our sample application went from 20KB to 71KB. While that's a substantial change, the 51KB of overhead provides enough benefit that we feel it's very much worthwhile.
Conclusion
By leveraging the Android Compatibility package, you've taken an fragment-aware application that only ran on Android 3.0 devices and made it compatible with devices all the way back to the T-Mobile G1 -- the very first Android device. This is good news for developers and users. Now developers can use the Fragment API for any application they want!
About the Authors
Mobile developers Lauren Darcey and Shane Conder have coauthored several books on Android development: an in-depth programming book entitled Android Wireless Application Development and Sams Teach Yourself Android Application Development in 24 Hours. When not writing, they spend their time developing mobile software at their company and providing consulting services. They can be reached at via email to [email protected], via their blog at androidbook.blogspot.com, and on Twitter @androidwireless.


Comments