This tutorial is the second in a four part series in which you'll learn some techniques for working with images in attachments in WordPress which give you advanced options.
In this series, I cover:
- assigning categories and taxonomies to attachments,
- querying media files by taxonomy so you can output them in a custom loop,
- using taxonomy queries for images to display them on archive pages,
- adding an image to a category or taxonomy term as the category or term's 'featured image'
In Part 1, I demonstrated how to create new taxonomies for attachments. In Parts 2 and 3, I'll show you how to create custom loops to display attachments in a template. In this tutorial I'll create a custom template file for documents and create a loop which displays a link to the media file for each document.
Note: If you want to apply existing categories and tags to your media, see my tutorial on assigning categories and tags to attachments.
What You'll Need
To follow this tutorial you'll need the following:
- a development installation of WordPress
- FTP access (or MAMP or similar if you're working locally)
- a code editor
In Part 1 I created a plugin to register the taxonomies, but in this part I'll be creating a custom theme which will be a child theme of twentyfourteen with the new template file, a stylesheet and a functions file.
If you create a custom theme using the steps I work through here you'll also need to make sure the plugin created in Part 1 is activated - the new template file won't work without it.
If you prefer you might just want to copy the code from the plugin into your theme's functions file, although I prefer to keep custom post types in plugins as they're not theme-dependent. The code bundle for this tutorial includes the plugin and the new child theme, which will only work if you have twenty fourteen installed.
1. Creating The Child Theme
The first step is to create the child theme. Create a new folder in your themes directory, give it an appropriate name and add a new style.css file to it.
Note: If you're adding the template to your existing theme you can skip this step.
In the stylesheet, add the following:
/*
 Theme Name:   WPTutsPlus Advanced Use of Attachments - Part 2
 Theme URI:    http://rachelmccollin.co.uk/wptutsplus-advanced-use-of-attachments-in-wordpress/
 Description:  Theme to accompany Part 2 in tutorial series on advanced use of attachments
 Author:       Rachel McCollin
 Author URI:   http://rachelmccollin.co.uk
 Template:     twentyfourteen
 Version:      1.0.0
 Tags:         light, dark, two-columns, right-sidebar, responsive-layout, accessibility-ready
 Text Domain:  twenty-fourteen-child
*/

@import url("../twentyfourteen/style.css");
This will create a new child theme of the twenty fourteen theme. You don't need to add anything else to this stylesheet.
2. Creating the Template File
To display attachments in the document-category taxonomy which you set up if you were following the first tutorial in this series, you'll need to create a taxonomy template file.
In your new child theme, add a file called taxonomy-document-category.php.
Before adding the custom loop for attachments, you'll need to add the markup to wrap around that, which you can either copy from a file in the parent theme or take from the code below.
Note: If you're using your own theme, copy this code from one of your theme's template files intend, but leave out the loop contents.
<?php
/**
  * template for displaying documents
  * uses a custom query which displays a link to the atachment file instead of outputting the content
  */ get_header();
?>
<div class="main-content" id="main-content">
  <div class="content-area" id="primary">
    <div class="site-content" id="content" role="main">
      <header class="page-header">
        <?php $queried_object = get_queried_object();
        echo '<h1 class="page-title">Document Category - ' . $queried_object->name . '</h1>'; ?>
      </header><!-- .page-header -->
    </div><!-- #content -->
</div><!-- #primary -->
<?php get_sidebar( 'content' ); ?>
</div><!-- #main-content -->

<?php get_sidebar(); get_footer(); ?>
Note that I've used get_queried_object to output the title of the page inside an h1 element.
3. Using parse_query to Add Attachments to the Main Query
By default, the main WordPress query doesn't include attachments. One way to get around this is to add a new query to your template file using WP_Query, but it makes more sense to stick with the main query as WordPress will be running that anyway. To do this, you use the parse_query filter.
So you need to add this to your theme. Create a functions.php file in your theme, and add the following to it:
<?php // add attachments to the main query using parse_query function wptutsplus_add_attachments_to_tax_query() {
     global $wp_query;
     // When inside a custom taxonomy archive include attachments
     if ( is_tax( array( 'document-category', 'gallery-category' ) ) ) {
         $wp_query->query_vars['post_type'] =  array( 'attachment' );
         $wp_query->query_vars['post_status'] =  array( null );

        return $wp_query;
    }

}
add_action('parse_query', 'wptutsplus_add_attachments_to_tax_query');
This uses the parse_query filter to add attachments to the main WordPress query but only when an archive for one of the two taxonomies applied to attachments is being displayed.
4. Creating the Custom Loop
Finally, in the template file you created in step 2, add the following after the closing </header> tag:
<?php
 if ( have_posts() ) :
 else :
 	// If no content, include the "No posts found" template.
 	get_template_part( 'content', 'none' );
endif;
?>
Here I'm using the wp_get_attachment_url() function which links directly to the file itself - if you wanted to link to the attachment page instead, you'd use get_attachment_link().
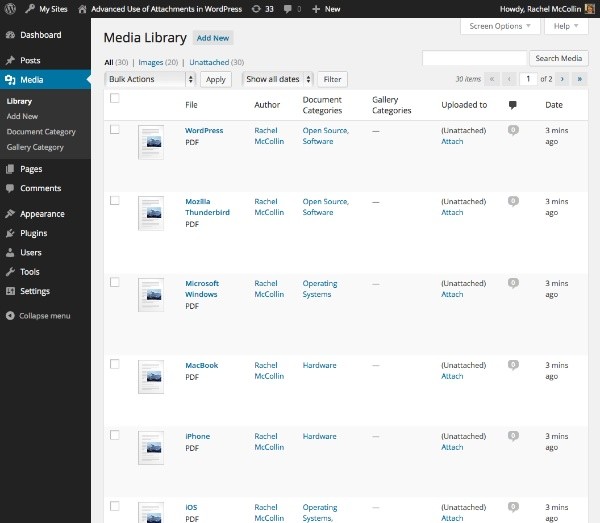
Finally, save your code and have a look at your archive page. I've added a number of documents to my site (which I downloaded from Wikipedia), as you can see in the screenshot of my media library:

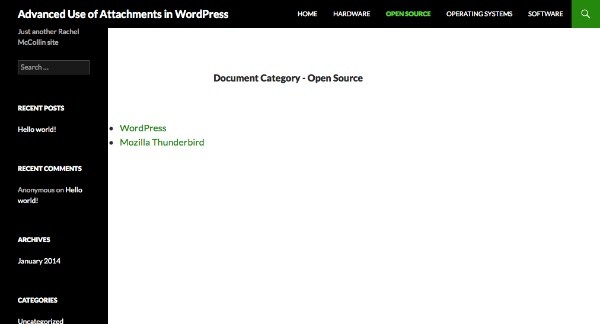
The screenshot below shows my archive page for the 'Open Source' term in the document-category taxonomy. If I click on any of those links, I'm taken straight to the document itself.

Summary
In this tutorial, you've learned how to use the taxonomies applied to attachments to create a custom template and display a list of links to uploaded documents. This would be useful if you were developing a site to be used as a document repository, for example.
In the next tutorial, I'll demonstrate how to create a custom template file for images, which will dimply all of the images with a given term in the gallery-category taxonomy.


Comments