Node.js is great for writing your back-end in JavaScript. But what if you need some functionality that is not provided out of the box, or which also can't be accomplished even using modules, but is available in the form of a C/C++ library? Well, awesomely enough, you can write an addon that will allow you to use this library in your JavaScript code. Let's see how.
As you can read in the Node.js documentation, addons are dynamically linked shared objects that can provide glue to C/C++ libraries. This means that you can take pretty much any C/C++ library and create an addon that will allow you to use it in Node.js.
As an example, we will create a wrapper for the standard std::string object.
Preparation
Before we start writing, you have to make sure you've got everything you need to compile the module later. You need node-gyp and all its dependencies. You can install node-gyp using the following command:
npm install -g node-gyp
As for the dependencies, on Unix systems you will need:
- Python (2.7, 3.x will not work)
- make
- a C++ compiler toolchain (like gpp or g++)
For example, on Ubuntu you can install all of this using this command (Python 2.7 should already be installed):
sudo apt-get install build-essentials
On Windows you will need:
- Python (2.7.3, 3.x will not work)
- Microsoft Visual Studio C++ 2010 (for Windows XP/Vista)
- Microsoft Visual Studio C++ 2012 for Windows Desktop (Windows 7/8)
The Express version of Visual Studio works fine.
The binding.gyp File
This file is used by node-gyp to generate appropriate build files for your addon. The whole .gyp file documentation can be found on their Wiki page, but for our purposes this simple file will do:
{
	"targets": [
		{
			"target_name": "stdstring",
			"sources": [ "addon.cc", "stdstring.cc" ]
		}
	]
}
The target_name can be any name you like. The sources array contains all of the source files that the addon uses. In our example, there is addon.cc, which will contain the code that is required to compile our addon and stdstring.cc, which will contain our wrapper class.
The STDStringWrapper Class
We will start by defining our class in the stdstring.h file. The first two lines should be familiar to you if you've ever programmed in C++.
#ifndef STDSTRING_H
#define STDSTRING_H
This is a standard include guard. Next, we have to include these two headers:
#include <string>
#include <node.h>
The first one is for the std::string class and the second include is for all things related to Node and V8.
After that, we can declare our class:
class STDStringWrapper : public node::ObjectWrap {
For all classes that we want to include in our addon, we must extend the node::ObjectWrap class.
Now we can start defining private properties of our class:
	private:
		std::string* s_;

		explicit STDStringWrapper(std::string s = "");
		~STDStringWrapper();
Apart from the constructor and destructor, we also define a pointer to std::string. This is the core of the technique that can be used to glue C/C++ libraries to Node - we define a private pointer to the C/C++ class and later operate on that pointer in all methods.
Next we declare the constructor static property, which will hold the function that will create our class in V8:
static v8::Handle<v8::Value> New(const v8::Arguments& args);
Please refer to the v8::Persistent template documentation for more information.
Now we will also have a New method, that will be assigned to the constructor above, when V8 initializes our class:
static v8::Handle New(const v8::Arguments& args);
Every function for V8 will look like this: it will accept a reference to the v8::Arguments object and return a v8::Handle>v8::Value> - this is how V8 deals with weak-typed JavaScript when we program in strong-typed C++.
After that, we will have two methods that will be inserted in to the prototype of our object:
    static v8::Handle<v8::Value> add(const v8::Arguments& args);
    static v8::Handle<v8::Value> toString(const v8::Arguments& args);
The toString() method will allow us to get the value of s_ instead of [Object object] when we use it with normal JavaScript strings.
Finally, we will have the initialization method (this will be called by V8 to assign the constructor function) and we can close the include guard:
public:
	static void Init(v8::Handle<v8::Object> exports);
};

#endif
The exports object is equivalent to the module.exports in JavaScript modules.
The stdstring.cc File, Constructor and Destructor
Now create the stdstring.cc file. First we have to include our header:
#include "stdstring.h"
And define the constructor property (since it's static):
v8::Persistent<v8::Function> STDStringWrapper::constructor;
The constructor for our class will just allocate the s_ property:
STDStringWrapper::STDStringWrapper(std::string s) {
	s_ = new std::string(s);
}
And the destructor will delete it, to avoid a memory leak:
STDStringWrapper::~STDStringWrapper() {
	delete s_;
}
Also, you must delete everything you allocate with new, every time there is a chance that an exception will be thrown, so keep that in mind or use shared pointers.
The Init Method
This method will be called by V8 to initialize our class (assign the constructor, put everything we want to use in JavaScript in the exports object):
void STDStringWrapper::Init(v8::Handle<v8::Object> exports) {
First we have to create a function template for our New method:
v8::Local<v8::FunctionTemplate> tpl = v8::FunctionTemplate::New(New);
This is kind of like new Function in JavaScript - it allows us to prepare our JavaScript class.
Now we can set this function's name if we want to (if you omit this, your constructor will be anonymous, it would have function someName() {} versus function () {}):
tpl->SetClassName(v8::String::NewSymbol("STDString"));
We used v8::String::NewSymbol() which creates a special kind of string used for property names - this saves the engine a little bit of time.
After that, we set how many fields each instance of our class will have:
tpl->InstanceTemplate()->SetInternalFieldCount(2);
We have two methods - add() and toString(), so we set this to 2.
Now we can add our methods to the function's prototype:
tpl->PrototypeTemplate()->Set(v8::String::NewSymbol("add"), v8::FunctionTemplate::New(add)->GetFunction());
tpl->PrototypeTemplate()->Set(v8::String::NewSymbol("toString"), v8::FunctionTemplate::New(toString)->GetFunction());
This seems like a lot of code, but when you look closely, you will see a pattern there: we use tpl->PrototypeTemplate()->Set() to add each of the methods. We also give each of them a name (using v8::String::NewSymbol()) and a FunctionTemplate.
Finally, we can put the constructor in the constructor property of our class and in the exports object:
    constructor = v8::Persistent<v8::Function>::New(tpl->GetFunction());
	exports->Set(v8::String::NewSymbol("STDString"), constructor);
}
The New Method
Now we will define the method that will act as a JavaScript Object.prototype.constructor:
v8::Handle<v8::Value> STDStringWrapper::New(const v8::Arguments& args) {
First we have to create a scope for it:
v8::HandleScope scope;
After that, we can use the .IsConstructCall() method of the args object to check if the constructor function was called using the new keyword:
if (args.IsConstructCall()) {
If so, let's first convert the argument passed to std::string like this:
    v8::String::Utf8Value str(args[0]->ToString());
    std::string s(*str);
... so that we can pass it to the constructor of our wrapper class:
STDStringWrapper* obj = new STDStringWrapper(s);
After that, we can use the .Wrap() method of the object we created (which is inherited from node::ObjectWrap) to assign it to the this variable:
obj->Wrap(args.This());
Finally, we can return the newly created object:
return args.This();
If the function was not called using new, we will just invoke the constructor as it would be. Next, let's create a constant for the argument count:
	} else {
		const int argc = 1;
Now let's create an array with our argument:
v8::Handle<v8::Value> STDStringWrapper::add(const v8::Arguments& args) {
And pass the result of the constructor->NewInstance method to scope.Close, so the object can be used later (scope.Close basically allows you to preserve the handle to an object by moving it to the higher scope - this is how functions work):
		return scope.Close(constructor->NewInstance(argc, argv));
	}
}
The add Method
Now let's create the add method which will allow you to add something to the internal std::string of our object:
v8::Handle<v8::Value> STDStringWrapper::add(const v8::Arguments& args) {
First we have to create a scope for our function and convert the argument to std::string like we did earlier:
	v8::HandleScope scope;

	v8::String::Utf8Value str(args[0]->ToString());
	std::string s(*str);
Now we have to unwrap the object. This the reverse of the wrapping we did earlier - this time we will get the pointer to our object from the this variable:
STDStringWrapper* obj = ObjectWrap::Unwrap<STDStringWrapper>(args.This());
Then we can access the s_ property and use its .append() method:
obj->s_->append(s);
Finally, we return the current value of the s_ property (again, using scope.Close):
	return scope.Close(v8::String::New(obj->s_->c_str()));
}
Since the v8::String::New() method accepts only char pointer as a value, we have to use obj->s_->c_str() to get it.
The toString Method
The last method needed will allow us to convert the object to JavaScript's String:
v8::Handle<v8::Value> STDStringWrapper::toString(const v8::Arguments& args) {
It's similar to the previous one, we have to create the scope:
v8::HandleScope scope;
Unwrap the object:
STDStringWrapper* obj = ObjectWrap::Unwrap<STDStringWrapper>(args.This());
And return the s_ property as a v8::String:
	return scope.Close(v8::String::New(obj->s_->c_str()));
}
Building
The last thing to do before we use our addon, is of course compilation and linking. It will involve only two commands. First:
node-gyp configure
This will create the appropriate build configuration for your OS and processor (Makefile on UNIX and vcxproj on Windows). To compile and link the library, just call:
node-gyp build
If all goes well, you should see something like this in your console:
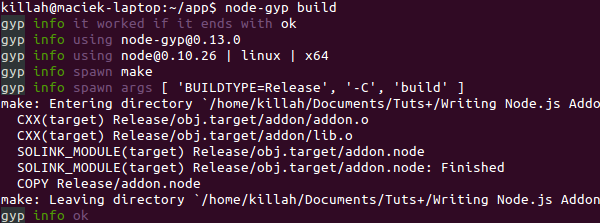
And there should be a build directory created in your addon's folder.
Testing
Now we can test our addon. Create a test.js file in your addon's folder and require the compiled library (you can omit the .node extension):
var addon = require('./build/Release/addon');
Next, create a new instance of our object:
var test = new addon.STDString('test');
And do something with it, like adding or converting it to a string:
test.add('!');
console.log('test\'s contents: %s', test);
This should result in something like the following in the console, after running it:

Conclusion
I hope that after reading this tutorial you will no longer think that it's difficult to create, build and test out customized C/C++ library based, Node.js addons. Using this technique you can port almost any C/C++ library to Node.js with ease. If you want, you can add more features to the addon we created. There is plenty of methods in std::string for you to practice with.
Useful Links
Check out the following resources for more information on Node.js addon development, V8 and the C event loop library.

Comments