Now we've dealt with custom menus, let's focus on dynamic sidebars and how they can be used within a theme.
What is a dynamic sidebar exactly? There are 3 parts of the naming we need to deal with in terms of this topic.
Dynamic
Firstly, "dynamic". Dynamic refers to the fact that the sidebar area can be controlled from within the administration dashboard, and can easily be changed. Furthermore its contents can be pulled from constantly updated WordPress information like posts, comments, and other regularly updated content types so that each time a new post is added it can be pulled into a recent posts block of content, or widget (we'll deal with the term widget in a bit.).
Sidebar
Secondly, "Sidebar" refers to a content area, which does not necessarily need to be located at the side of the layout (strange I know). The term was inherited from the early days of blog style layouts where widgets were pretty much always positioned at the side. The sidebar area contains additional content blocks or plugins' generated data which appears in the form of "widgets" usually at the side, in the header or in the footer of WordPress themes but can also be positioned in any way desired within the theme's layout.
Widget
A widget is a small content block, generally containing links or contents associated with pages or posts. These could include lists of posts, comments, tags, categories and a whole range of other content collections some built-in and some generated by additional plugins.
Widgets can be added to "widget ready" themes via Appearance -> Widgets in the administration dashboard using the built-in drag & drop widget management area. Themes do not support widgets automatically and need to be made widget ready by registering a special function, in a similar way to which we registered the custom menus.
Step 1 Registering Sidebars - via functions.php
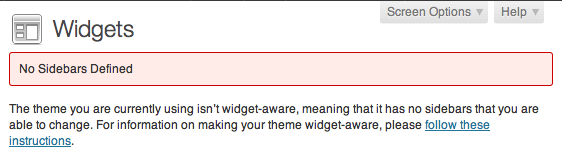
Before we register sidebars in any WordPress theme, when visiting Appearance -> Widgets, we see the following.
Similar to the Custom Menus in our previous lesson, in order for the dynamic sidebar function to work in your theme, your theme needs a functions.php file which registers the sidebars. The simple functions.php file should contain the following code:
	<?php
	  if ( function_exists('register_sidebars') )
	  	register_sidebars(2);
	?>
Pay careful attention as mentioned before not to leave blank spaces after code in your functions file as this sometimes causes problems which may result in white screens when viewing your theme on the front end.
The only aspect of this code which would be necessary to edit in the beginning would be the amount of dynamic sidebar areas to register in "register_sidebars(1);". We'll deal with named sidebars in a little bit. For now our code above has registered 2 sidebars identified merely by their number.
Should you wish to have 5 dynamic sidebar areas in your theme the number will change to 5 - "register_sidebars(5);". In that case you would have 5 dynamic sidebar areas numbered 1 - 5.
The function has an "if" statement or conditional argument which checks if the register_sidebars function exists in this version of WordPress. If the answer comes back with a yes then the register_sidebars function is executed. Considering sidebars have been supported from version 2.2 of WordPress, it's probably unnecessary to worry about this aspect of the code.
Once your functions file is ready you can proceed to insert widgets into the new sidebar areas we have created.
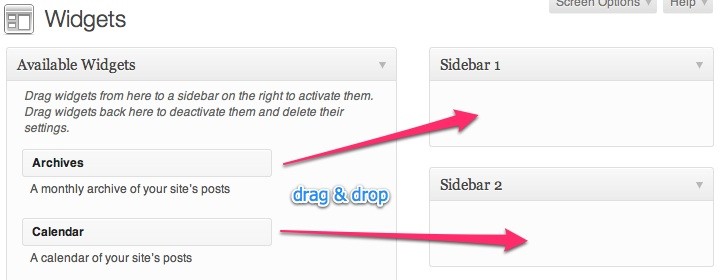
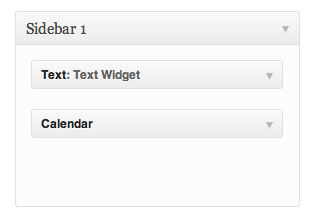
You can now grab widgets from the left side "Available Widgets" area and drop them into the Sidebar 1 or 2 areas in the right.
Step 2 Placing the numbered Sidebar
Once your functions file is ready you can proceed to insert the dynamic sidebar code in the areas of your theme where you wish to dynamically add WordPress widgets. The code below is the most basic form of the sidebar placement code. The only aspect that needs to be modified is the number to reflect which numbered sidebar you'd like to place in the specific location.
<?php dynamic_sidebar(1); ?>
We'll place this code into our left sidebar

The code above should be enough to enable the registered sidebar to display widget content within the theme. So we'll go ahead and add some widgets.
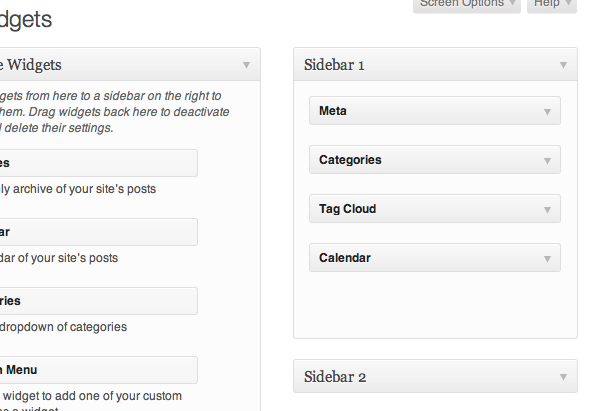
Which results in:
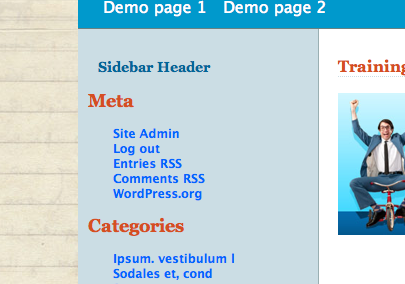
I've had to add additional CSS to take the newly added widgets into account. Essentially I've added in sidebar widget CSS from the Twenty Eleven theme. You may need to write custom CSS for your own themes so they fit in with the layout, styling & coloring for your theme. I'll post the CSS at the end of the lesson.
To ensure that our sidebar still displays something in cases where widgets have not yet been added, or in the outside event that sidebars have not registered, (we hope no-one's running pre version 2 WordPress) we need to extend the placement code with the following. Notice dynamic_sidebar(1) is still in the first line of code!
<?php if (!function_exists('dynamic_sidebar') || !dynamic_sidebar(1) ) : ?>
	<?php wp_list_cats(); ?>
<?php endif; ?>
What does the code above do?
Line 1 of the code checks to see if you have registered any sidebars within your functions.php file, and if so, which sidebar number to insert at this location.
Line 2 acts as a default widget which displays a list of your site's post categories if no dynamic widgets have been added. Once a dynamic widget is added to your sidebar within your dashboard, the default widget will be replaced by the dynamic one.
Line 3 ends the if argument which line 1 started. In PHP arguments like if, which is a conditional statement, have to be ended as well so the argument does not affect any php code which follows. Not closing the if with the endif; will break your theme!
The only part of the 3 lines of dynamic sidebar code which really needs to be edited is the number, to indicate which specific numbered sidebar is being inserted at this particular location.
Default, Hard Coded Widgets
From the WordPress Documentation (The Codex) these are some of the functions that can be used to "hard-code" widgets into sidebar areas and to include as default widgets in sidebar placement code.
wp_list_authors() – Displays a list of the sites' authors (users), and if the user has authored any posts, the author name is displayed as a link to their posts.
wp_list_categories() – Displays a list of categories as links. When a category link is clicked, all the posts in that category will display
wp_dropdown_categories() – Display or retrieve the HTML dropdown list of categories.
wp_tag_cloud() – Displays a list of tags in what is called a 'tag cloud', where the size of each tag is determined by how many times that particular tag has been assigned to posts.
wp_list_pages() – Displays a list of WordPress pages as links.
wp_list_bookmarks() – Displays bookmarks found in the Administration -> Links panel.
get_comments() – List comments based on number, order and other parameters.
wp_get_archives() – This function displays a date-based archive list.
These functions can also be used anywhere in the theme to generate lists of various content from the site to help users find content easier.
Including Default Hard Coded Widgets
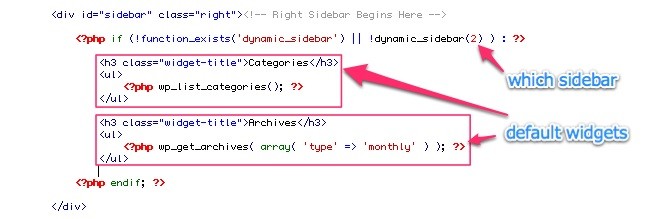
We could then use this placement code convention to place our sidebar number 2 into the right side area of our theme.
<?php if (!function_exists('dynamic_sidebar') || !dynamic_sidebar(2) ) : ?>
	<h3 class="widget-title">Categories</h3>
	<ul>
		<?php wp_list_categories(); ?>
	</ul>
	<h3 class="widget-title">Archives</h3>
	<ul>
		<?php wp_get_archives( array( 'type' => 'monthly' ) ); ?>
	</ul>
<?php endif; ?>
We could also include any other HTML contents as default widget content which should display before dynamic widgets are added via the widgets admin. This may include a message to remind site owners to physically add widgets once activating the new theme.
Including HTML Default Contents
<?php if (!function_exists('dynamic_sidebar') || !dynamic_sidebar(1) ) : ?>
	<h4>No Widgets added</h4>
  	<p>Please login and add some widgets to this sidebar</p>
<?php endif; ?>
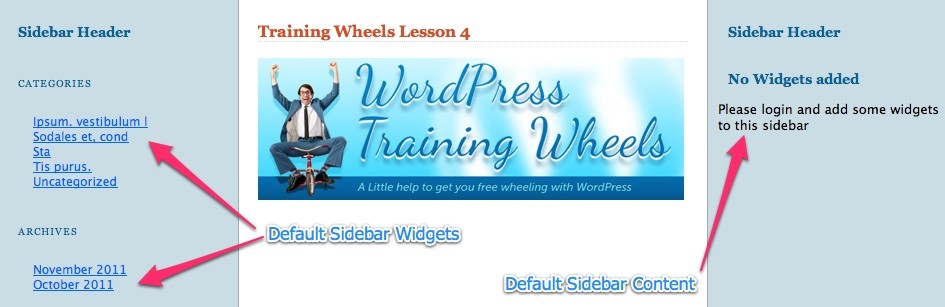
As we can see below, we have inserted sidebar placement code to default contents either of widgets as illustrated in the left sidebar or other HTML contents as illustrated in the right sidebar. This will appear as long as no dynamic widgets are added via the widgets dashboard. Once dynamic widgets are added they will replace these default contents automatically.
Now to test out some dynamic widgets we added the following 2 dynamic widgets:
Which Results in the following appearance.

Currently we have 2 placement codes with differing default content, but pulling the same sidebar area into both the left and right side of our theme. To remedy this we will change or sidebar placement code in the right sidebar to place sidebar number 2 instead of sidebar 1 as follows. As you can see we only need to change the number to whichever numbered sidebar we'd like to place.
<?php if (!function_exists('dynamic_sidebar') || !dynamic_sidebar(2) ) : ?>
	<h3 class="widget-title">No Widgets added</h3>
	<p>Please login and add some widgets to this sidebar</p>
<?php endif; ?>
We can now manage our left and right sidebars independently.
Register Named Sidebars
Once you've added a certain amount of sidebars to your theme you'll quickly realize the need to have names instead of just numbers. This will help you remember which regions of your page or templates the specific sidebar is placed in.
To register named sidebars the following code needs to be used to register the sidebars in your functions.php file:
	<?php if (function_exists('register_sidebar'))
	  register_sidebar('Left Side');
	?>
The only difference in terms of what is being registered here is currently the name of the sidebar. A number of parameters exist for further customizing the HTML output of sidebar widgets as follows:
- name – Sidebar name.
- id - Sidebar id – Must be all in lowercase, with no spaces.
- description – Text description of what/where the sidebar is. Shown on widget management screen. (Since 2.9)
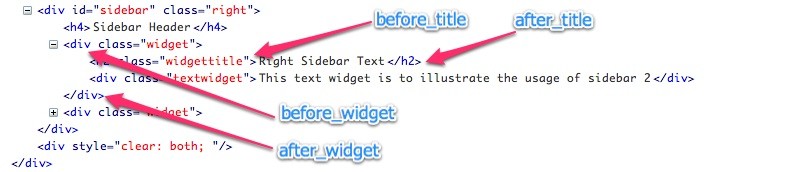
- before_widget – HTML to place before every widget.
- after_widget – HTML to place after every widget.
- before_title – HTML to place before every title.
- after_title – HTML to place after every title.
Source: register_sidebar
Using some of these in array format results in the following code structure.
<?php if (function_exists('register_sidebar'))
	register_sidebar(array(
	'name'=>'Left Side',
	'before_widget' => '<div class="leftwidgets">',
	'after_widget' => '</div>',
	'before_title' => '<h2 class="widgettitle">',
	'after_title' => '</h2>',
	));
?>
This will result in the following HTML output.
We can change the HTML wrappers for the widget container and the title with any other HTML, classes, Id's etc.
Furthermore to register more than one Dynamic Sidebar area we duplicate the register_sidebar area of the code along with its array of parameters as many times as needed to register additional sidebars.
<?php if (function_exists('register_sidebar'))

	register_sidebar(array(
	'name'=>'Left Side',
	'before_widget' => '<div class="leftwidgets">',
	'after_widget' => '</div>',
	'before_title' => '<h2 class="widgettitle">',
	'after_title' => '</h2>',
	));
	<br />
	register_sidebar(array(
	'name'=>'Right Side',
	'before_widget' => '<div class="widget">',
	'after_widget' => '</div>',
	'before_title' => '<h2 class="widgettitle">',
	'after_title' => '</h2>',
	));
?>
With these additional parameters we can more easily control the HTML output so we can match the structure we need for the styling we're trying to achieve. We'll use the code above to replace our numbered sidebars with named ones.
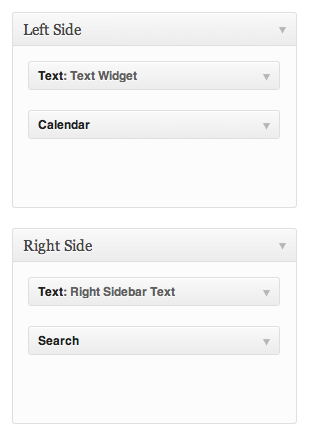
It's important to note, that when changing sidebar registrations the way I've just done, or when adding additional sidebars, especially for themes running on live websites, widgets could possibly be incorrectly allocated by WordPress
WordPress generally tries to keep widgets in sidebars based on their order, so if a sidebar area is removed or added, WordPress may re-allocate your existing widgets to sidebar areas which correspond to the previous sidebar ordering. In our case right now this is not a problem because we still only have 2 sidebars so our widgets stay where they were.
Currently having changed the names in our registration code, because we've got a simple 2 sidebar setup, WordPress is still able to place our named sidebars into our theme based on their order. We do however need to edit our sidebar placement code to reflect the names we've created to avoid possible problems in future.
Placing Named Sidebars
Placing named sidebars essentially requires changing the number, in our placement code, to the sidebar's name. So using the very first placement code we started off with, that being the simplest one:
<?php dynamic_sidebar('Left Side'); ?>
The name we use must be identical to the name we're given the sidebar in our registration code.
In terms of the more extended placement code we used for our numbered sidebars:
<?php if (!function_exists('dynamic_sidebar') || !dynamic_sidebar('Right Side') ) : ?>
	<h3 class="widget-title">No Widgets added</h3>
    <p>Please login and add some widgets to this sidebar</p>
<?php endif; ?>
Sidebar Widget CSS
Using the HTML output generated by the registration code, we can now style our sidebar elements to our heart's content.
The link below outlines some of the essential sidebar/widget CSS elements we need to consider when preparing themes for public release. This is so that users who add the most common widgets will have them pre-styled to match the look & layout of the theme.
WordPress Default CSS Styles - Jeff Star, DigWP
Now go forth and widgetize!

Comments