The last few months have been an exciting time for Android Studio. First came version 2.1 with support for Android N. Then Google I/O brought us a preview of the next major release in the form of Android Studio 2.2 Preview 1, only for this to be rapidly replaced by Preview 2, which contained some important bug fixes and other improvements.
In this article we’re going to take a closer look at what’s new in Android Studio 2.2. And if you don’t already have the latest Android Studio 2.2 Preview, then now's the perfect time to grab it from the Canary page.

1. New Layout Editor
One of the most obvious features introduced in Android Studio 2.2 is the new layout editor. In fact, when you first launch Android Studio 2.2 Preview, you might be surprised by just how different the editor looks.
The first neat addition to Android Studio's layout editor is a blueprint mode that temporarily hides the finer details of your layout, so you're free to scrutinize the spacing and arrangement of your user interface without any distractions. To see blueprint mode in action, make sure you have Android Studio’s Design tab selected and then click the Show Blueprint icon (where the cursor is positioned in the screenshot below).
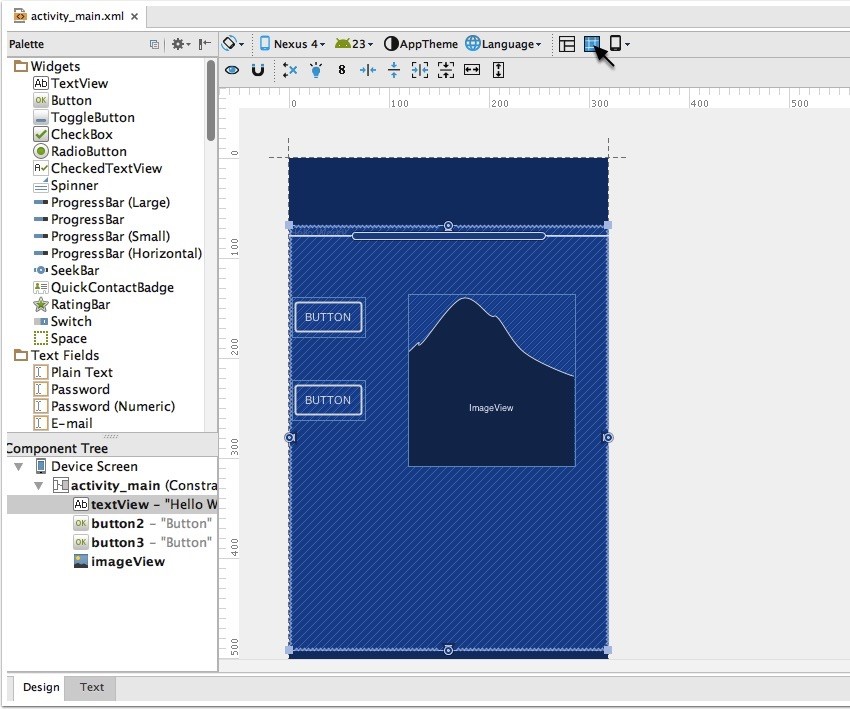
Since you have the Design tab selected, you should also notice another new addition to the layout editor, the Properties panel on the right.
Select any view in your layout and the Properties panel will display the most important properties for this particular view, such as its width, contentDescription, and even the view’s contents if you select something like a TextView or ImageView. You can edit all of these properties directly in the Properties panel.
The final new feature that has an important role to play in Android Studio’s revamped layout editor is a bit special. In fact, it is so special that it deserves its own section. I’m talking about ConstraintLayout.
2. ConstraintLayout
ConstraintLayout is a flexible layout manager that was designed especially for Android Studio's brand new layout editor.
This new layout lets you define the layout of each view based on its relation to other elements in your layout. This means you can create complex user interfaces without having to resort to nesting multiple layouts, which is always bad news for your app’s performance.
If this all sounds a bit familiar, then that’s because ConstraintLayout is fundamentally similar to RelativeLayout. However, ConstraintLayout is more flexible than RelativeLayout, plus it has the added benefit of being designed to work perfectly with Android Studio’s shiny new layout editor.
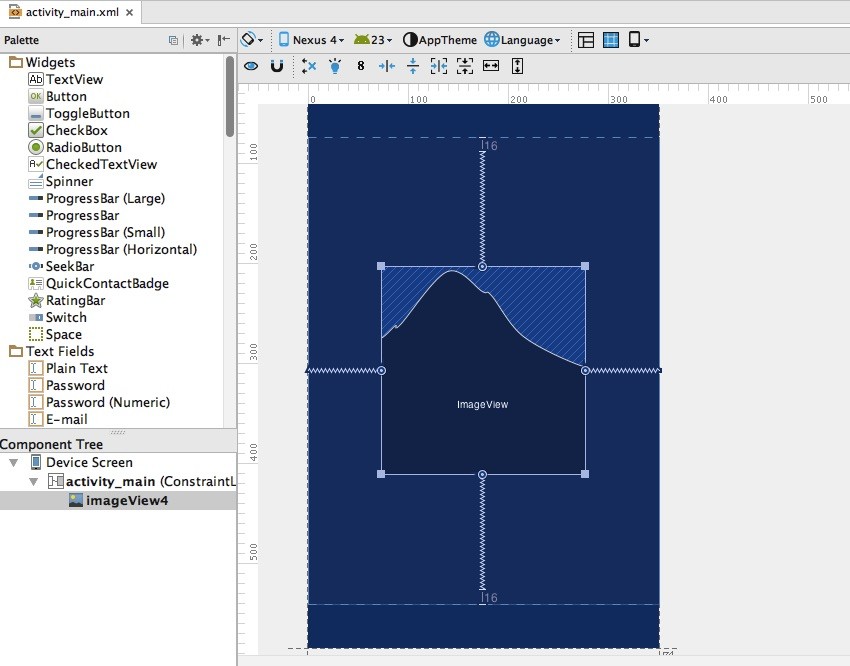
The secret sauce that could make ConstraintLayout your new favorite layout are constraints. Constraints allow you to dictate how a view is positioned on the screen relative to other user interface elements. For example, connecting the top side of ImageView1 to the bottom of ImageView2 means that ImageView1 always appears below ImageView2. You can also create constraints between a view and its parent container. For example, you could connect the right side of a TextView to the right edge of its parent ConstraintLayout.
To help you get started, Android Studio 2.2's New Project wizard uses ConstraintLayout as the default layout for many of its project templates.
To create a new layout resource file that supports ConstraintLayout, create the file as you normally do by right-clicking the Layout directory and selecting New > Layout resource file. Then, open this layout file and set its root to:
<?xml version="1.0" encoding="utf-8"?>
<android.support.constraint.ConstraintLayout xmlns:android="http://schemas.android.com/apk/res/android"
Alternatively, you can convert any layout to a ConstraintLayout by opening that layout, making sure Android Studio’s Design tab is selected, right-clicking the layout, and selecting Convert to ConstraintLayout from the context menu that appears.
If you have a project that was created with an older version of Android Studio that you want to update to support ConstraintLayout, then you just need to add the ConstraintLayout library to your project’s module-level build.gradle file:
dependencies {
...
...
compile 'com.android.support.constraint:constraint-layout:1.0.0-alpha2'
Once you have a project and a layout resource file that supports ConstraintLayout, you’re ready to start working with constraints.
Creating Constraints
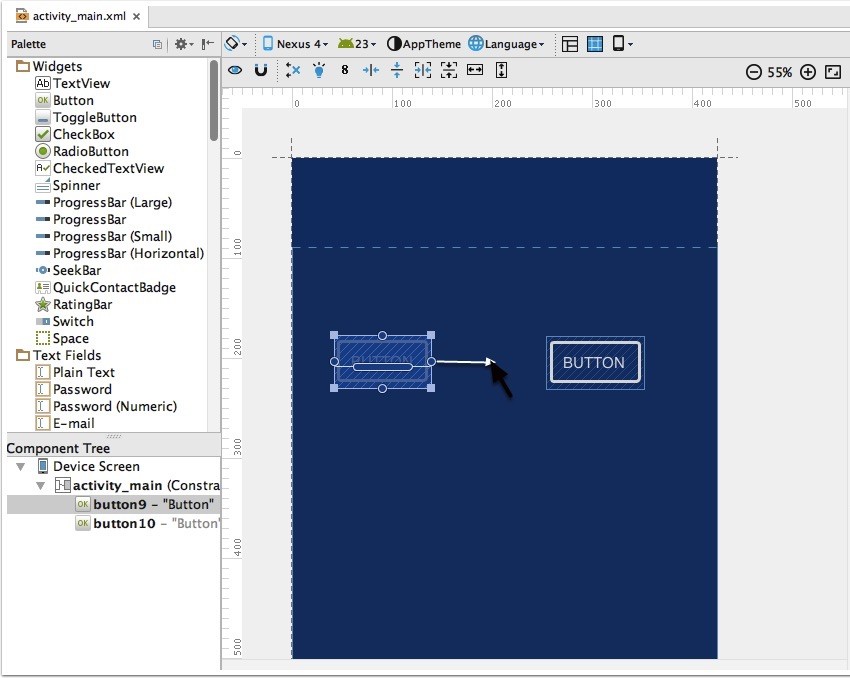
The new layout editor launches with Autoconnect enabled by default, which means Android Studio automatically creates one or more constraints for every view you add to your layout.
To trigger Autoconnect, simply drop a view into a ConstraintLayout and drag that view around. As soon as you release that view, Autoconnect kicks in and creates some constraints with a nice little animated flourish.
Autoconnect is handy for creating some quick constraints, but it does have its limitations. For example, Autoconnect can only create constraints amongst neighboring views.
If Autoconnect doesn’t create the kind of constraint(s) you had in mind, you can always add, remove, or edit constraints manually. If you do decide to go down the manual route, it’s generally easier to disable Autoconnect in advance by selecting the Turn off Autoconnect icon (where the cursor is positioned in the screenshot below).
To create a constraint manually, select the view you want to add the constraint to. You’ll notice small circles appear around the edge of the view. These are the view’s constraint handles.
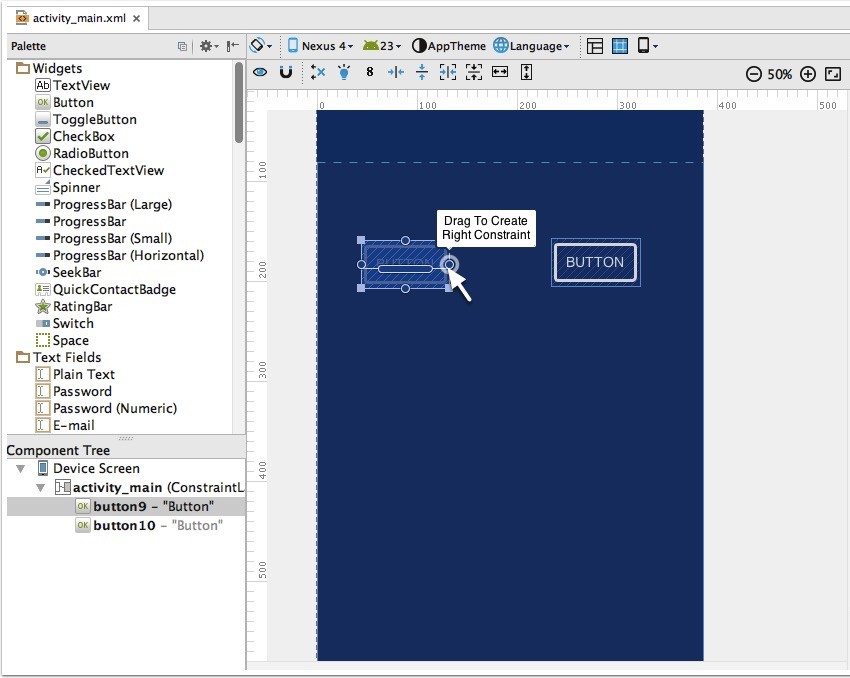
Hover over the handle where you want to create the constraint, then click and drag. The handle will sprout an arrow, which you can then drag to either:
Another View: Drag the handle towards the second view. When you’re positioned correctly, a Release to create… tooltip will appear. To create your constraint, simply release the handle.
Edge of the Parent ConstraintLayout: Drag the handle towards the edge of the
ConstraintLayout. When you see the Release to create…. tooltip, release the handle to finalize the constraint.
If you add opposing constraints to a view, then the view will typically be centered between these two points. The layout editor displays these opposing forces, using jagged lines.
Deleting a Constraint
When it comes to deleting constraints, you have a few options:
Remove All Constraints From a Particular View: Select the view and then click the Delete Constraints icon that appears just beneath that view.
Remove All Constraints From Your Layout: Click the Clear all constraints icon that appears in the little toolbar directly above the Design window.
Delete a Single Constraint: Select the view and then hover over the handle of the constraint you want to delete. When you see the Click to Delete… tooltip, simply give your mouse a click and the constraint will vanish into thin air.
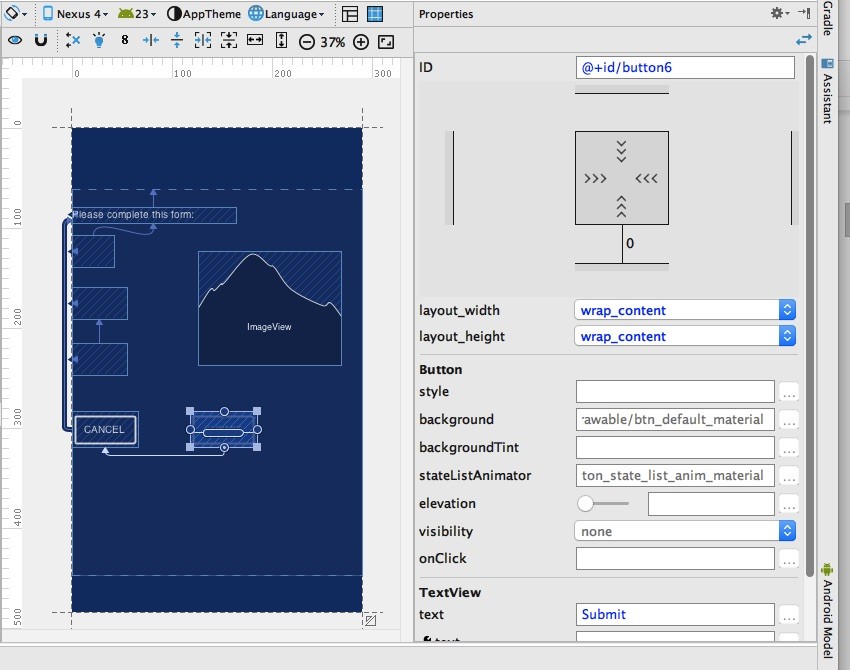
Once you start working with constraints, the Properties panel comes in pretty useful. It allows you to specify the exact size of your constraints.
When you select a view, it appears as a square in the Properties panel with the view's constraints represented as lines. Each constraint is accompanied by a number that represents the length of that constraint.
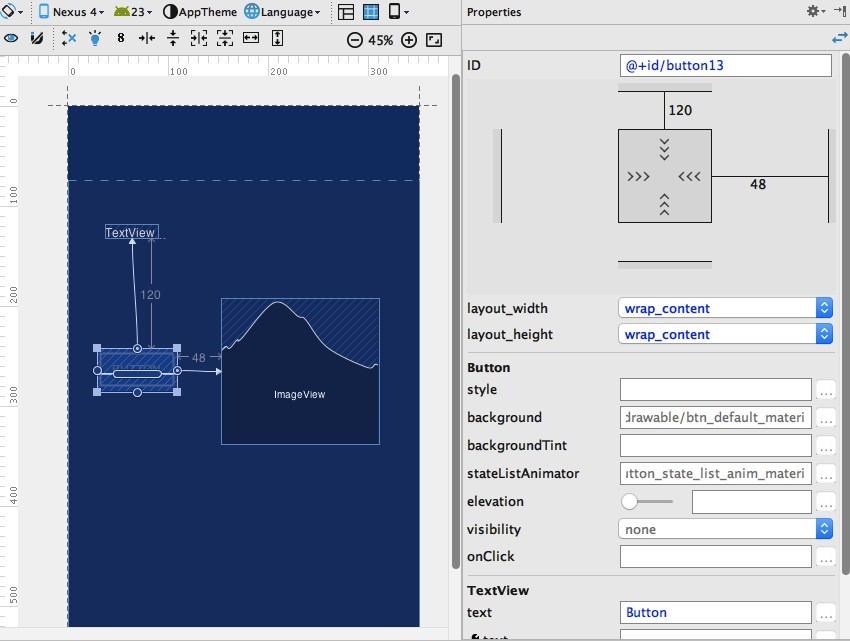
You can adjust the length of each constraint by hovering over that constraint’s number until it turns into a drop-down menu. You can then select a new value from that drop-down menu.
If you select a view that has opposing constraints, the Properties panel will also contain a slider that you can use to position the view along the axis of those opposing constraints.
3. Firebase Integration
Firebase is a new suite of services to help you develop high-quality apps that’ll win you a wide and adoring audience. The Android Studio previews introduce Firebase integration, so you can add Firebase services to your project without even having to leave the IDE.
To add Firebase to your project, click Tools > Firebase in the Android Studio toolbar. This opens the new Assistant window. In this window, you can click any feature to see more information about that particular feature, although your first step will typically be to set up Firebase Analytics, as this provides a strong foundation for exploring additional Firebase services.
The best way to get up and running with Firebase Analytics is to click the Get Started with Firebase Analytics link in the Assistant window. This will walk you through the process of connecting your app to Firebase.
4. APK Analyzer
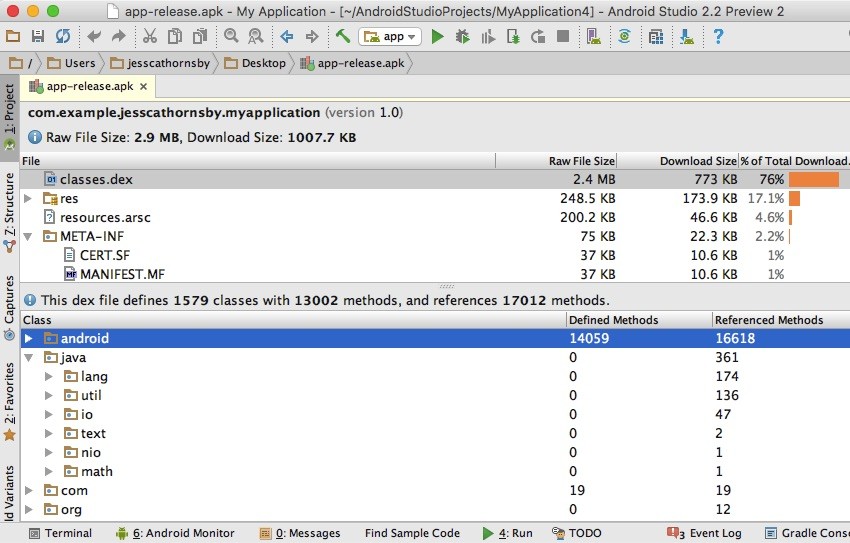
This tool helps you reduce the size of your APK by letting you check the raw file size and estimated download size of each component that makes up your APK. Armed with this information, you can zero in on areas where you could do with losing some excess bytes. The APK Analyzer is also useful for checking that your APK contains everything you’d expect.
To use APK Analyzer, select Build > Analyze APK… followed by the APK you want to take a closer look at. The APK Analyzer output will then appear in the main Android Studio window, ready for you to explore the various components that make up the APK.
5. Samples Browser
If you’ve hit a brick wall in your project, then you can now turn to Android Studio’s samples browser for inspiration. To access this feature, highlight a variable, type, or method in your project, right-click, and select Find Sample Code from the context menu. Android Studio will then search for all the times the highlighted code crops up in Google’s Android code samples and it will display all these matches in an outbox box beneath the main editing window.
6. More Java 8 Language Features
The introduction of the Jack toolchain means you can start using Java 8 features in your Android projects. To enable the Java 8 language features and Jack, open your project’s module-level build.gradle file and add the following:
android {
  ...
  defaultConfig {
    ...
    jackOptions {
      enabled true
    }
  }
  compileOptions {
    sourceCompatibility JavaVersion.VERSION_1_8
    targetCompatibility JavaVersion.VERSION_1_8
  }
}
For more detailed information about the Java 8 features supported in Android Studio, check out the official Android documentation.
7. Layout Inspector
You can use the Layout Inspector to explore and debug a snapshot of your layout as it’s running on an Android Virtual Device (AVD) or a physical Android device. To capture a snapshot, make sure the layout you want to analyze is visible on either your emulator or attached Android device. Next, open Android Studio’s Android Monitor tab along the bottom of the screen and select the Layout Inspector icon.
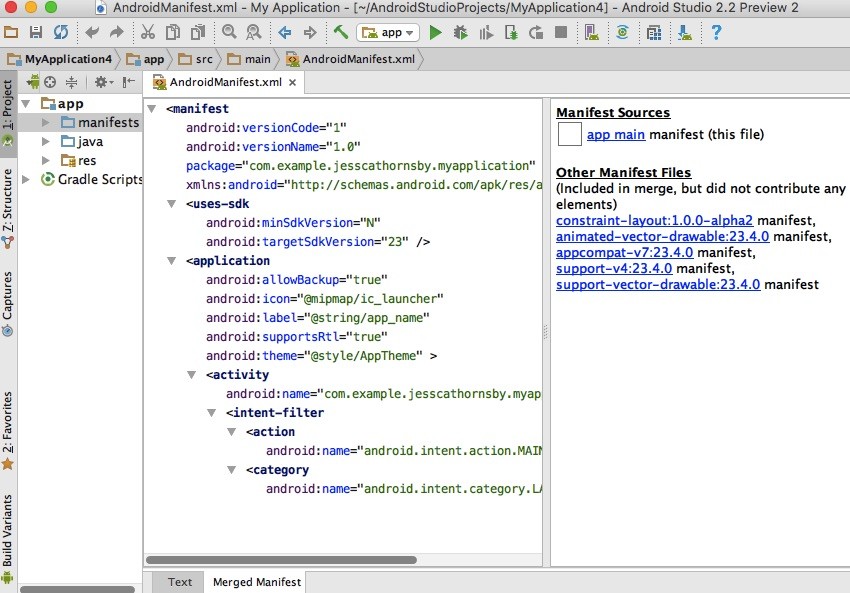
8. Merged Manifest Viewer
Figuring out how your Manifest merges with your app dependencies across your project build variants is now much easier thanks to the Merged Manifest Viewer in Android Studio 2.2. To access the Merged Manifest Viewer, open your project’s AndroidManifest.xml and select the new Merged Manifest tab.
Conclusion
If the previews are anything to go by, then Android Studio 2.2 is shaping up to be a major step forward for the Android IDE. Even though the new features are likely to change between now and the final release, they're such a big improvement to Android Studio that it’s well worth investing some time in getting to grips with these new features now.
And, if you do spend some time exploring these previews, then make sure you help the Android Studio team out and report any issues you encounter.

Comments