When developing software, source control makes our lives so much easier. From tracking our changes to introducing code collaboration, it helps increase our productivity. Furthermore, the fact that there are a number of different tools available - Subversion, Perforce, Mercurial, and so on - make it even better by providing us options from which to choose.
In this series, we’re looking specifically at Git and using Bitbucket and how they can help us in our day-to-day work. In this article, we’re going to be specifically focused on using Bitbucket for feature discussion, bug tracking, release tagging, and more.
One of the major features of Git - and, thus, Bitbucket - is the idea of pull requests. In this article, we’re going to be looking at pull requests and how they not only benefit us from a source control standpoint, but from a peer review standpoint, as well.
A Pull Request Primer
When someone issues a pull request into your project, it means that they are asking to have their code merged into the codebase. That is, they are requesting that you pull their code into the project.
But we, as maintainers, have the ability to review, to test, and to merge the changes introduced by the request. Make no mistake: We play a very important role in deciding if the particular request meets both the standards and goals of our software.
If a discrepancy is found, we can ask the contributor to update the pull request by either cleaning up the code, resolving any outstanding issues, or improving the general quality of the code. On the other hand, we may also reject the pull request if we decide it doesn’t meet whatever criteria we deem necessary for the project.
In order to issue a pull request, a person must first fork the codebase of the initial project. This means that they take a snapshot of the codebase in its current state, create a set of changes, and then commit the changes to their personal copy of the code. From there, the developer then requests that the change be pulled into the initial repository.
As previously mentioned, pull requests can consist of any number of things:
- Bug fixes
- Translations
- Feature additions
- Addition or modification to documentation
- ...and so on
Used by teams of all sizes - both in-house and distributed - source control management is a valuable part of developing software. The thing is, when it comes to working with source control systems, users have varying roles of permissions.
That is to say when it comes to maintaining a repository, some developers will have read-only access while others have both read and write access. And those with write access are the ones who are responsible for maintaining pull requests.
Bitbucket and Pull Requests
In this series of articles, we’re taking a look at how Bitbucket can enhance your team’s workflow when it comes to developing software. Just as we’ve previously discussed, Bitbucket allows people to participate in the project both by committing code to it, by reviewing pull requests, and conducting merges of said requests.
One of the nicest features of Bitbucket is that it allows you to add multiple reviewers to a single pull request who can then approve (or reject) the request. This, in turn, gives those who maintain the repository the ability to review the quality of the code that’s specified in the pull request.
Perhaps they will welcome the additions to the project, perhaps not. Whatever the case may be, Bitbucket gives maintainers the tools necessary to give feedback on any given pull request.
Finally, Bitbucket supports inline commenting on each pull request which makes it much easier to discuss a specific line, block, or module of code.
All in all, this approach makes it much easier to determine whether or not a pull request should be merged, if it should be rejected, or what areas of the could should be changed prior to merging the request.
Learn by Example
Fork a Repository
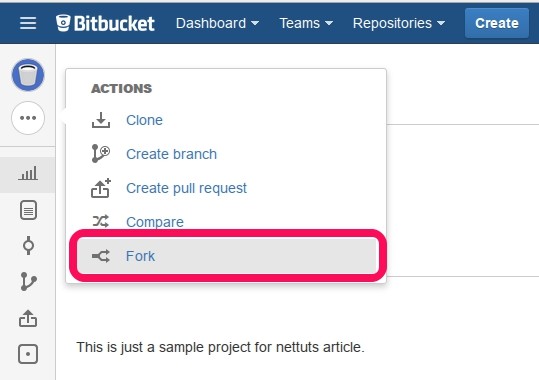
To get started, visit a project’s dashboard in your web browser, and then click on Fork to fork the repository.
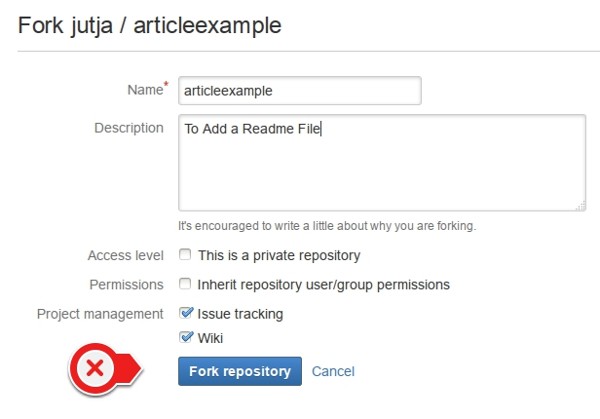
Next, you will be presented with a form that allows you to specify a custom name and custom description. You also have the ability to set the repository’s visibility and permissions among other features.
If you’re responsible for the code that’s going to be written and want access to additional tools to make it easier to work with a team around the codebase, then select the Project Management option from the corresponding interface element.
After clicking on the Fork repository button, you will grab the latest version of the codebase of the project and have it available in a repository that’s all your own. In order to check out the code to your local machine, you can use a Git client such as SourceTree, or you can do so from the command line by issuing the following commands in the local directory where your project is stored:
$ git clone https://[email protected]/yourusername/reponame.git
Notice that the URL that we’ve specified above is visible in the dashboard of your repository in Bitbucket’s dashboard.

After checking out the code, you can begin working on the project on your local machine. As you introduce changes, you will want to commit this to the repository. To do this, you first stage your work and then you commit your work to the repository.
Make Your Changes
At this point, we’re ready to actually get to work. What this means will vary depending on the nature of your project: Perhaps you’re working to close a bug, perhaps you’re refactoring a function, or maybe you’re adding a feature.
Whatever the case, once the changes have been made, you can issue a commit to the repository. This means that you’re taking the files on which you’ve worked and are combining them into a single collection of changes which is called a changeset. Changesets are normally accompanied by a short message that explains what was changed and why.
When you commit code, at least at first, you’re not actually pushing anything to the repository. In other words, if this is your first commit, then your code isn’t actually stored online in Bitbucket. Instead, the changes only exist on your local machine. Once you’ve performed your initial push, the code then exists in the repository.
Ultimately, source control gives a way to maintain a clean history of your changes, as well as an easy way to rollback to a certain point in time.
Issue a Pull Request
Once you’ve pushed a change to the remote repository (either via a client or via the command line), you’re ready to initialize a pull request. This means that you’re ready to take code that you’ve pushed into your fork of the codebase and ask the original maintainers if they’ll merge the code into their project.
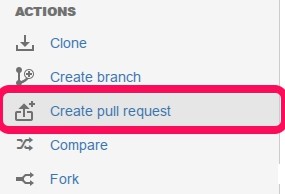
Doing this within the Bitbucket application is easy. Simply go to the dashboard of the forked repository, and then click on Create pull request.
Next, you will be presented with an interface that will allow you to create your pull request. The request will include your repository, the original repository, and a title and description.
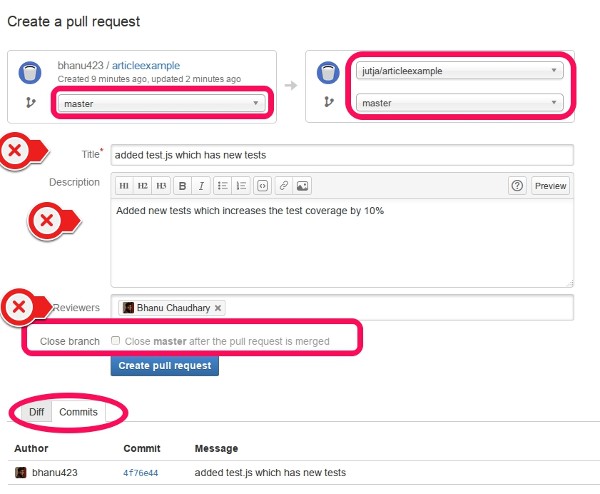
From here, you select your repository as the source repository and the original codebase’s repository as the target repository. You may need to change these within the dashboard depending on your requirements.
For example, if you’ve named your copy of the code “develop” when issuing the “git add remote” command earlier, but the original codebase uses the word “master,” then you will need to make sure that you’ve selected the proper values.
Finally, this is where Bitbucket allows you to add reviewers to a pull request. As previously mentioned, this makes it much easier to attract the attention of project maintainers so that they can review your work, offer up any comments that they may have, and merge (or reject) your request.
Following Up With the Pull Request
Bitbucket automatically updates your pull request when you push code to the source directory so the project reviewer always gets to see the latest code that they can pull.
When the reviewer asks for a specific change, s/he can simply push the requested changes in your copy of the repository - that is, the forked repository.
Managing Pull Requests
If you maintain a repository that receives pull requests from others, then you are likely to notice that your repository will receive both a notification in the Bitbucket application dashboard, as well as in your email.
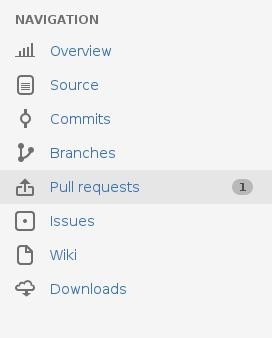
Additionally, if you’re a reviewer, you will also receive a notification and an email. To manage all incoming pull requests, click on the “Pull requests” link and select the pull request with which you want to work.
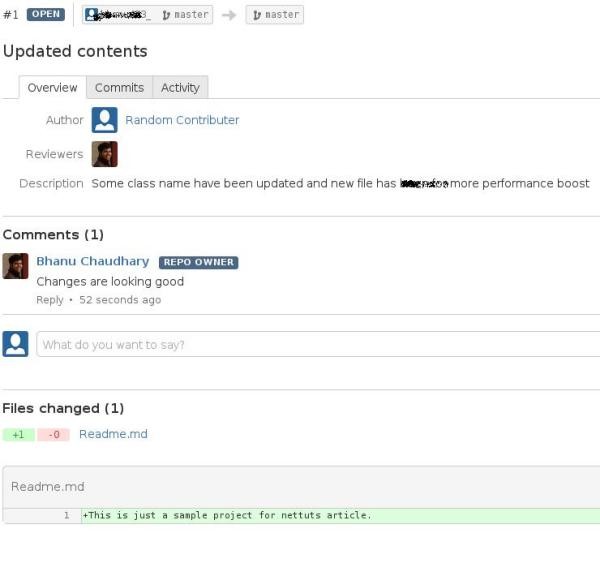
As you can see, Bitbucket provides a clean interface where you can discuss and review pull requests. Both maintainers and viewers can reject, merge, or ask for additional work to be done on a given pull request.
Assuming that you have a request that’s ready to be merged, then you click on the specific option for doing exactly that. If you happen to work with multiple reviewers, then Bitbucket also makes it clear as to who approved the request by applying a check mark on their avatar. Obviously, the more checks that appear across the reviewers, the more likely the request is ready for merging.
But what happens if merging the pull request fails? At this point, a manual merge must be done (which is a common part of source code management, though outside the scope of this article), after which the code will be committed to the repository.
Conclusion
Clearly, source control offers a lot of advantages for teams; however, pull requests are a powerful feature that make it easy to contribute to a project and to have others peer review your code, comment on it, and improve it before merging it into the codebase.
This alone can help one become a much better developer as you’re learning from the experience of other developers who are maintaining the larger project. If you’re not already, try using pull requests in your workflow to help improve your code, and gather feedback from others.
Please leave any questions, comments, or other feedback in the comment area below.

Comments