Namespaces and autoloading are not topics that are usually discussed when it comes to working with WordPress plugins.
Some of this has to do with the community that's around it, some of this has to do with the versions of PHP that WordPress supports, and some of it simply has to do with the fact that not many people are talking about it.
And that's okay, to an extent.
Neither namespaces nor autoloading are topics that you absolutely need to use to create plugins. They can, however, provide a better way to organize and structure your code as well as cut down on the number of require, require_once, include, or include_once statements that your plugins use.
In this series, we're going to take a look at exactly what PHP namespaces are, why they are beneficial, and how to use them. Then we're going to take a look at how to use autoloaders to automatically load the files that we need without having to manually load them in our code.
Before We Begin
To get started, you're going to need the following tools:
- A local development environment that includes PHP 5.6.20, the Apache web server, and a MySQL database server.
- A directory out of which WordPress 4.6 is being hosted.
- A text editor or IDE of your choice that you're comfortable using for writing a plugin.
- A working knowledge of the WordPress Plugin API.
Once you've got all of that in place, let's get started on building a plugin. Note that if any of the above seems new to you, then don't hesitate to review any of my previous tutorials on my profile page.
Furthermore, you can follow me on my blog and/or Twitter at @tommcfarlin where I talk about software development in the context of WordPress.
With that said, let's get started.
What We're Going to Build
In this series, we're going to be building a simple plugin primarily to demonstrate how namespaces and autoloading work in PHP. But to do that, it always helps to apply the concepts in a practical way.
To that end, we'll be building a plugin that makes it easy to load stylesheets and JavaScript styles in our plugin, and that displays a meta box that prompts the user with a question to help them brainstorm something about which to blog.
No, this isn't something that you'd likely submit to the WordPress Plugin Repository, nor is it something that you'll likely use outside of this particular demo. But remember, the purpose of this series is to demonstrate how namespaces and autoloading work.
And it's through this example that we're going to do just that.
Building the Plugin
If you've followed any of my previous tutorials, then you know one of the things I like to do is to plan out what we're going to build before we jump into writing any code. So for the first iteration of this plugin, this is what we know we're going to need to do:
- Define a bootstrap file for starting the plugin.
- Set up a directory for all of the files that will render the meta box.
- Create a directory for housing the class that will load our dependencies.
- Prepare the stylesheets and JavaScript for our plugin.
It seems straightforward, right? If not, no worries. I'm going to walk you through the entire process complete with code, comments, screenshots, and explanations.
Let's get started.
Creating the Plugin Directory
From the outset, we know that we're going to need a file that serves as the bootstrap for the plugin. We also know that we're going to need a directory for the administrative functionality.
Let's go ahead and create that now:
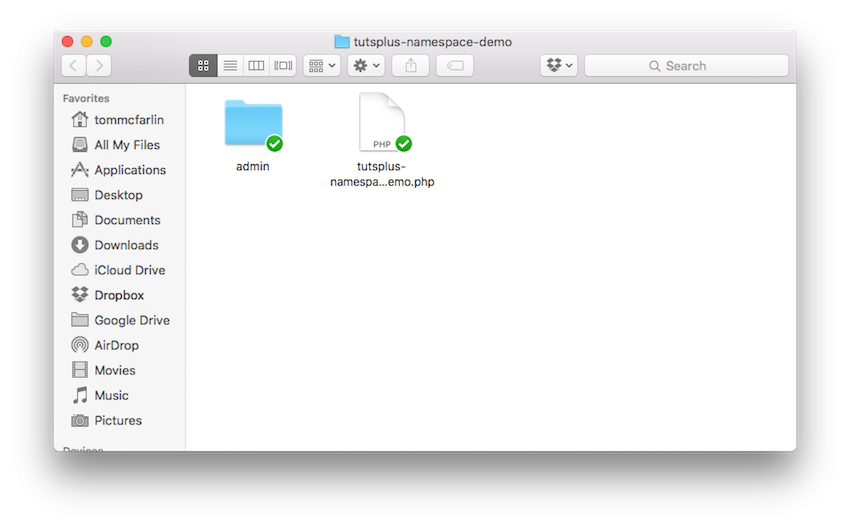
Obviously, we have a single empty file and an admin directory. Let's go ahead and set up this plugin so that it shows up within the context of the WordPress Plugin activation screen.
To do this, we need to add the following block of code to the top of the plugin file:
<?php
/**
 * The plugin bootstrap file
 *
 * This file is read by WordPress to generate the plugin information in the
 * plugin admin area. This file also includes all of the dependencies used by
 * the plugin, registers the activation and deactivation functions, and defines
 * a function that starts the plugin.
 *
 * @link              http://.tutsplus.com/tutorials/using-namespaces-and-autoloading-in-wordpress-plugins-part-1
 * @since             0.1.0
 * @package           tutsplus_namespace_demo
 *
 * @wordpress-plugin
 * Plugin Name:       Tuts+ Namespace Demo
 * Plugin URI:        http://.tutsplus.com/tutorials/using-namespaces-and-autoloading-in-wordpress-plugins-part-1
 * Description:       Learn how to use Namespaces and Autoloading in WordPress.
 * Version:           0.1.0
 * Author:            Tom McFarlin
 * Author URI:        https://tommcfarlin.com/
 * License:           GPL-2.0+
 * License URI:       http://www.gnu.org/licenses/gpl-2.0.txt
 */
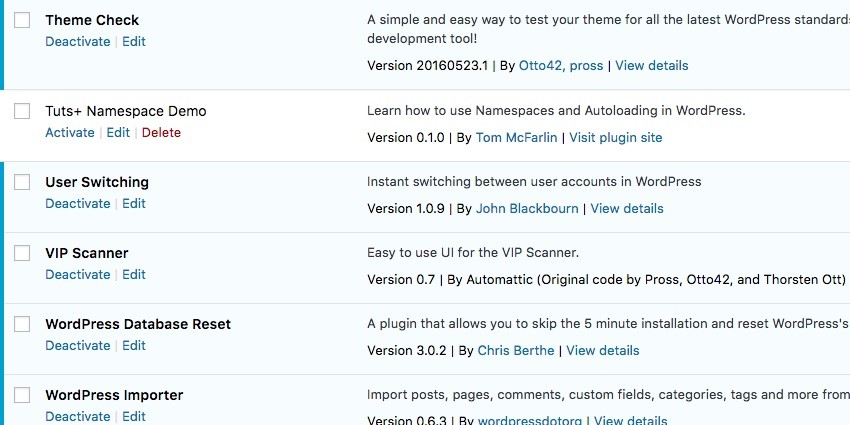
Then, when you navigate to the WordPress Plugin Page in the administration area, you should see it show up in your list of plugins. If you opt to activate it, nothing will happen since we haven't written any code.
At this point, we can go ahead and begin defining the class that will render our meta box on the Add New Post page.
Adding a Meta Box
This part of the tutorial will assume that you're somewhat versed in creating meta boxes. If not, don't hesitate to review the concepts in this series and then return to this part once done.
First, let's create a file called class-meta-box-display.php in the admin directory of our plugin. The code should include the following. Be sure to review the comments to make sure you understand everything that this class is responsible for doing.
<?php
/**
 * Defines the functionality required to render the content within the Meta Box
 * to which this display belongs.
 */

/**
 * Defines the functionality required to render the content within the Meta Box
 * to which this display belongs.
 *
 * When the render method is called, the contents of the string it includes
 * or the file it includes to render within the meta box.
 */
class Meta_Box_Display {

    /**
     * Renders a single string in the context of the meta box to which this
     * Display belongs.
     */
    public function render() {
        echo 'This is the meta box.';
    }
}
From the code above, you should be able to ascertain that this class will be responsible for displaying the content inside the meta box. For now, however, we simply have it echoing a statement for the view.
We'll change this later in the tutorial.
Next, we need to introduce a class that represents the meta box itself. So create a class-meta-box.php file in the admin directory of our plugin. Here's the code for doing exactly that. Again, review the code and then I'll explain what's happening below the class:
<?php
/**
 * Represents a meta box to be displayed within the 'Add New Post' page.
 */

/**
 * Represents a meta box to be displayed within the 'Add New Post' page.
 *
 * The class maintains a reference to a display object responsible for
 * displaying whatever content is rendered within the display.
 */
class Meta_Box {

    /**
     * A reference to the Meta Box Display.
     *
     * @access private
     * @var    Meta_Box_Display
     */
    private $display;

    /**
     * Initializes this class by setting its display property equal to that of
     * the incoming object.
     *
     * @param Meta_Box_Display $display Displays the contents of this meta box.
     */
    public function __construct( $display ) {
        $this->display = $display;
    }

    /**
     * Registers this meta box with WordPress.
     *
     * Defines a meta box that will render inspirational questions at the top
     * of the sidebar of the 'Add New Post' page in order to help prompt
     * bloggers with something to write about when they begin drafting a post.
     */
    public function init() {

        add_meta_box(
            'tutsplus-post-questions',
            'Inspiration Questions',
            array( $this->display, 'render' ),
            'post',
            'side',
            'high'
        );
    }
}
This class maintains a single attribute which is a reference to its display. This means that this class is responsible for defining the meta box (which, in turn, calls on the display object to render the message).
The display is maintained as a private property set in the constructor. The meta box isn't actually defined until the init method is called (which we'll see in the plugin's bootstrap later in the tutorial).
At this point, we have everything we need to display a rudimentary meta box on the Add New Post Page. But first, we need to set up our plugin's bootstrap.
In previous tutorials, I've done this a lot so I'm going to include just the code that's required (since I've defined the header above). I've added comments, but I'll also make sure to explain what's happening after the code.
This is specifically relevant because our autoloader will eventually negate the need for some of what you're going to see.
<?php

// If this file is accessed directory, then abort.
if ( ! defined( 'WPINC' ) ) {
    die;
}

// Include the files for rendering the display.
include_once( 'admin/class-meta-box.php' );
include_once( 'admin/class-meta-box-display.php' );

add_action( 'plugins_loaded', 'tutsplus_namespace_demo' );
/**
 * Starts the plugin by initializing the meta box, its display, and then
 * sets the plugin in motion.
 */
function tutsplus_namespace_demo() {

	$meta_box = new Meta_Box( new Meta_Box_Display() );
	$meta_box->init();
}
First, we make sure that this file can't be accessed directly and it can only be run by WordPress itself.
Next, we include_once the classes we've created thus far. Next, we instantiate the Meta_Box and pass it an instance of the Meta_Box_Display in its constructor.
Finally, we call the init method that resides in the Meta_Box class.
Assuming all goes well, we should be able to activate the plugin and see the meta box on an Add New Post page (or, really, an Update Post page, as well).
At this point, we have a functioning plugin, but it doesn't really do anything other than create a meta box and display a string of text.
Let's at least get it to display some inspirational quotes and display a random one each time the page is loaded.
Displaying Inspiration Quotes
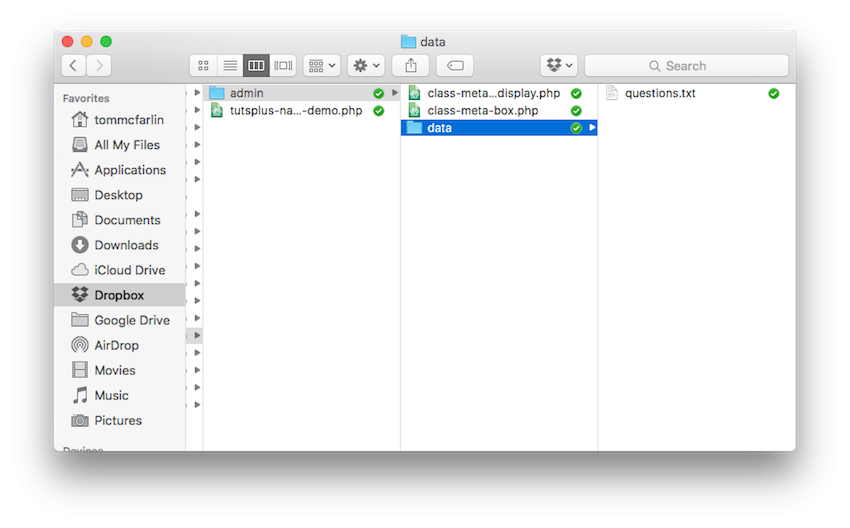
First, we need to find a text file of inspiration quotes. Luckily, the Internet provides a plethora of these that we can use in our project (and they are freely available). To that end, I've created a data subdirectory in admin that I'm using to house my questions.txt file.
Next, we're going to need to create a class that will:
- Open the file.
- Read a random line into a string.
- Close the file.
- Return the string to the caller.
Let's go ahead and create that class now. Because this is a utility and it's going to be used in the administrative side of the plugin, let's create a util subdirectory in admin. Next, let's create a file called class-question-reader.php.
We'll specify the code for this class in a moment, but return to the plugin's bootstrap file and remember to include the file. The resulting code should look like this:
<?php

// Include the files for rendering the display.
include_once( 'admin/class-meta-box.php' );
include_once( 'admin/class-meta-box-display.php' );
include_once( 'admin/util/class-question-reader.php' );
As you can see, the number of files we're having to manually include is getting longer. Imagine if we were working on a large plugin! Nevertheless, we'll come back to this later in the series.
For now, let's turn our attention back to the question reader. The code for the class should look like this:
<?php
/**
* Reads the contents of a specified file and returns a random line from the
* file.
*/

/**
* Reads the contents of a specified file and returns a random line from the
* file.
*
* This class is used to populate the contents of the meta box with questions
* that prompt the user for ideas about which to write.
*
* Note this class is only for demo purposes. It has no error handling and
* assumes the specified file always exists.
*/
class Question_Reader {

  /**
   * Retrieves a question from the specified file.
   *
   * @param  string $filename  The path to the file that contains the question.
   * @return string $question A single question from the specified file.
   */
  public function get_question_from_file( $filename ) {

      $question = '';

      $file_handle = $this->open( $filename );
      $question    = $this->get_random_question( $file_handle, $filename );

      $this->close( $file_handle );

      return $question;
  }

  /**
   * Opens the file for reading and returns the resource to the file.
   *
   * @access private
   * @param  string $filename  The path to the file that contains the question.
   * @return resource          A resource to the file.
   */
   private function open( $filename ) {
      return fopen( $filename, 'r' );
   }

   /**
    * Closes the file that was read.
    *
    * @access private
    * @param  string $file_handle The resource to the file that was read.
    */
   private function close( $file_handle ) {
      fclose( $file_handle );
   }

   /**
    * Opens the file for reading and returns the resource to the file.
    *
    * @access private
    * @param  string $file_handle The resource to the file that was read.
    * @param  string $filename    The path to the file containing the question.
    * @return string $question    The question to display in the meta box.
    */
   private function get_random_question( $file_handle, $filename ) {

      $questions = fread( $file_handle, filesize( $filename ) );
      $questions = explode( "\n", $questions );

      // Look for a question until an empty string is no longer returned.
      $question = $questions[ rand( 0, 75 ) ];
      while ( empty( $question ) ) {
         $question = $questions[ rand( 0, 75 ) ];
      }

      return $question;
    }
}
Notice that the code for this is relatively straightforward, but if you're not familiar with some of the basic file operations in PHP, here's what we're doing:
- We're opening the file using
fopen, which will grant us a resource to read the file. - Next, we're reading the contents of the file and then taking each line of the file and writing it to an index of an array.
- After that, we pick a random number from the array of questions and return it to the method that's calling it. If it returns an empty string, we look again until a question is located.
- Then, we close the resource to the file.
Ultimately, to use this class, you simply need to instantiate it, know the path to a file full of questions, and then call the get_question_from_file method.
Note: This class does not do any error handling. That's a standard practice when working with files. For example, what should we do if the file doesn't exist? What should we do if it's not formatted correctly, or what if we fail to close the resource?
All of these are good questions, but they are outside the scope of this tutorial. All of this information can be found in the PHP manual (and perhaps some other tutorials across the Envato Tuts+ network).
For now, though, we're concerned with reading a file that we know exists, and we're concerned with displaying the results in a meta box.
What We Have So Far
At this point, we can begin putting everything together. Assuming we've done everything correctly, we should be able to pass an instance of the Question_Reader to the Meta_Box_Display, ask for a question, and then display it in the meta box.
First, let's update the bootstrap file:
<?php

function tutsplus_namespace_demo() {

    $meta_box = new Meta_Box(
		new Meta_Box_Display(
			new Question_Reader()
		)
	);

	$meta_box->init();
}
In the code above, notice that the Meta_Box_Display now accepts an instance of the question reader into its constructor. This implies we'll need to introduce a new property, which we'll do now:
<?php
/**
 * Defines the functionality required to render the content within the Meta Box
 * to which this display belongs.
 */

/**
 * Defines the functionality required to render the content within the Meta Box
 * to which this display belongs.
 *
 * When the render method is called, the contents of the string it includes
 * or the file it includes to render within the meta box.
 */
class Meta_Box_Display {

        /**
	 * A reference to the object responsible for retrieving a question to display.
	 *
	 * @access private
	 * @var    Question_Reader $question_reader
	 */
	private $question_reader;

	/**
	 * Initializes the class by setting the question reader property.
	 *
	 * @param Question_Reader $question_reader The object for retrieving a question.
	 */
	public function __construct( $question_reader ) {
		$this->question_reader = $question_reader;
	}

	/**
	 * Renders a single string in the context of the meta box to which this
	 * Display belongs.
	 */
	public function render() {

		$file = dirname( __FILE__ ) . '/data/questions.txt';
		$question = $this->question_reader->get_question_from_file( $file );

		echo wp_kses( $question );
	}
}
Notice that this file uses the path to the questions that file added to the data subdirectory. Aside from the path being hard-coded, this class is also dependent on an instance of the Question_Reader.
For the purposes of the demo that we're working toward (namely, namespaces and autoloading), that's okay. In a future project, we'd like the projects to have less coupling among themselves. Perhaps this will be a topic for a future tutorial.
The primary takeaway from the code above, though, is that the Meta_Box_Display class can now display a question to the user.
Furthermore, notice the use of wp_kses for the sake of sanitizing the data before presenting it to the user.
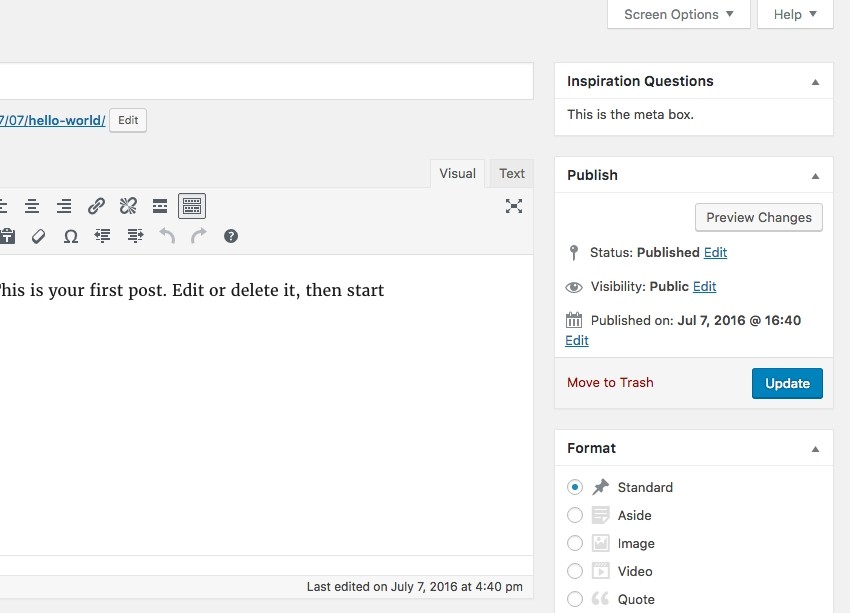
Refreshing the Add New Post page should present you with an image like this:

And if you refresh the page then you can see new questions being loaded.
Where Do We Go From Here?
Obviously, we've yet to actually tackle the topics of namespaces and autoloading, but that's okay! It's important that we lay the foundation for a plugin that doesn't use them. That way, when we do implement them, we can see the benefits they carry.
Furthermore, we've still got some additional work to do: We need to introduce JavaScript and CSS and an assets loader. This will allow us to get an even broader picture of how packaging our files into namespaces is beneficial.
Remember, you can find all of my previous tutorials on my profile page, and you can follow me on my blog or on Twitter.
As always, if you're looking for other utilities to help you build out your growing set of tools for WordPress or for example code to study and become more well-versed in WordPress, don't forget to see what we have available in Envato Market.
With that said, we'll have a working version of the plugin ready to download starting in the next tutorial in this series. If you'd like to use the code in the above tutorial, don't hesitate to try and do so. Furthermore, feel free to ask any questions in the comments.

Comments