I can’t seem to reach the end of the fun stuff you can do with emerging web technologies. Today, I’m going to show you how to do something that—until the last while—has been almost unprecedented: uploading files via AJAX.
Oh, sure, there have been hacks; but if you’re like me, and feel dirty every time you type iframe, you’re going to like this a lot. Join me after the jump!
Looking for a Quick Solution?
If you're looking for a quick solution, there's a great collection of file upload scripts and applications over at Envato Market.
This HTML5 file uploader is particularly nifty — you can add files easily by dragging and dropping them or clicking. All files will be uploaded via AJAX or can be added within a form, and files can be renamed before uploading. A great, quick solution if that's what you're looking for!
Why don’t we get the bad news over with?
This doesn’t work in every browser. However, with some progressive enhancement (or whatever the current buzzword is), we’ll have an upload page that will work right back to IE6 (albeit without the AJAXy bits).
Our AJAX upload will work as long as
FormDatais available; otherwise, the user will get a normal upload.
There are three main components to our project.
- The
multipleattribute on the fileinputelement. - The
FileReaderobject from the new File API. - The
FormDataobject from XMLHttpRequest2.
We use the multiple attribute to allow the user to select multiple files for upload (multiple file upload will work normally even if FormData isn’t available). As you’ll see, FileReader allows us to show the user thumbnails of the files they’re uploading (we’ll be expecting images).
None of our three features work in IE9, so all IE users will get a normal upload experience (though I understand support for `FileReader` is available in IE10 Dev Preview 2). FileReader doesn’t work in the latest version of Safari (5.1), so they won’t get the thumbnails, but they’ll get the AJAX upload and the confirmation message. Finally, Opera 10.50 has FileReader support but not FormData support, so they’ll get thumbnails, but normal uploads.
With that out of the way, let’s get coding!
Step 1: The Markup and Styling
Let’s start with some basic markup and styling. Of course, this isn’t the main part of this tutorial, I won’t treat you like a newbie.
The HTML
<!DOCTYPE html>
<html lang="en">
<head>
  <meta charset="UTF-8" />
  <title>HTML5 File API</title>
  <link rel="stylesheet" href="style.css" />
</head>
<body>
  <div id="main">
    <h1>Upload Your Images</h1>
    <form method="post" enctype="multipart/form-data"  action="upload.php">
      <input type="file" name="images" id="images" multiple />
      <button type="submit" id="btn">Upload Files!</button>
    </form>

    <div id="response"></div>
    <ul id="image-list">

    </ul>
  </div>

  <script src="https://ajax.googleapis.com/ajax/libs/jquery/1.6.2/jquery.min.js"></script>
  <script src="upload.js"></script>
</body>
</html>
Pretty basic, eh? We’ve got a form that posts to upload.php, which we’ll look at in a second, and a single input element, of type file. Notice that it has the boolean multiple attribute, which allows the user to select multiple files at once.
That’s really all there is to see here. Let’s move on.
The CSS
body {
  font: 14px/1.5 helvetica-neue, helvetica, arial, san-serif;
  padding:10px;
}

h1 {
  margin-top:0;
}

#main {
  width: 300px;
  margin:auto;
  background: #ececec;
  padding: 20px;
  border: 1px solid #ccc;
}

#image-list {
  list-style:none;
  margin:0;
  padding:0;
}
#image-list li {
  background: #fff;
  border: 1px solid #ccc;
  text-align:center;
  padding:20px;
  margin-bottom:19px;
}
#image-list li img {
  width: 258px;
  vertical-align: middle;
  border:1px solid #474747;
}
Absolutely no shockers here.
Step 2: The PHP
We need to be able to handle the file uploads on the back end as well, so let’s cover that next.
upload.php
<?php

foreach ($_FILES["images"]["error"] as $key => $error) {
  if ($error == UPLOAD_ERR_OK) {
    $name = $_FILES["images"]["name"][$key];
    move_uploaded_file( $_FILES["images"]["tmp_name"][$key], "uploads/" . $_FILES['images']['name'][$key]);
  }
}

echo "<h2>Successfully Uploaded Images</h2>";
Bear in mind that these were the first lines of PHP I’d written in easily a year (I’m a Ruby guy). You should probably be doing a bit more for security; however, we’re simply making sure that there are no upload errors. If that’s the case, we use the built-in move_uploaded_file to move it to an uploads folder. Don’t forget to make sure that the folder is writable.
So, right now, we should have a working upload form. You choose an image (multiple, if you want to and your browser lets you), click the “Upload Files!” button, and you get the message “Successfully Uploaded Images.”
Here’s what our mini-project looks like so far:

But, come on, it’s 2011: we want more than that. You’ll notice that we’ve linked up jQuery and an upload.js file. Let’s crack that open now.
Step 3: The JavaScript
Let’s not waste time: here we go!
(function () {
  var input = document.getElementById("images"),
      formdata = false;

  if (window.FormData) {
    formdata = new FormData();
    document.getElementById("btn").style.display = "none";
  }


}();
Here’s what we start with. We create two variables: input is our file input element; formdata will be used to send the images to the server if the browser supports that. We initialize it to false and then check to see if the browser supports FormData; If it does, we create a new FormData object. Also, if we can submit the images with AJAX, we don’t need the “Upload Images!” button, so we can hide it. Why don’t we need it? Well, we’re going to auto-magically upload the images immediately after the user selects them.
The rest of the JavaScript will go inside your anonymous self-invoking function. We next create a little helper function that will show the images once the browser has them:
function showUploadedItem (source) {
  var list = document.getElementById("image-list"),
      li   = document.createElement("li"),
      img  = document.createElement("img");
    img.src = source;
    li.appendChild(img);
  list.appendChild(li);
}
The function takes one parameter: the image source (we’ll see how we get that soon). Then, we simply find the list in our markup and create a list item and image. We set the image source to the source we received, put the image in the list item, and put the list item in the list. Voila!
Next, we have to actually take the images, display them, and upload them. As we’ve said, we’ll do this when the onchange event is fired on the input element.
if (input.addEventListener) {
  input.addEventListener("change", function (evt) {
    var i = 0, len = this.files.length, img, reader, file;

    document.getElementById("response").innerHTML = "Uploading . . ."

    for ( ; i < len; i++ ) {
      file = this.files[i];

      if (!!file.type.match(/image.*/)) {

      }
    }

  }, false);
}
We don’t have to worry about IE’s proprietary event model, because IE9+ supports the standard addEventListener function.
There’s more, but let’s start with this. First off, we don’t have to worry about IE’s proprietary event model, because IE9+ supports the standard addEventListener function (and IE9 and down don’t support our new features).
So, what do we want to do when the user has selected files? First, we create a few variables. The only important one right now is len = this.files.length. The files that the user has selected will be accessible from the object this.files. Right now, we’re only concerned with the length property, so we can loop over the files …
… which is exactly what we’re doing next. Inside our loop, we set the current file to file for ease of access. Next thing we do is confirm that the file is an image. We can do this by comparing the type property with a regular expression. We’re looking for a type that starts with “image” and is followed by anything. (The double-bang in front just converts the result to a boolean.)
So, what do we do if we have an image on our hands?
if ( window.FileReader ) {
  reader = new FileReader();
  reader.onloadend = function (e) {
    showUploadedItem(e.target.result);
  };
  reader.readAsDataURL(file);
}
if (formdata) {
  formdata.append("images[]", file);
}
We check to see if the browser supports creating FileReader objects. If it does, we’ll create one.
Here’s how we use a FileReader object: We’re going to pass our file object to the reader.readAsDataURL method. This creates a data url for the uploaded image. It doesn’t work the way you might expect, though. The data url isn’t passed back from the function. Instead, the data url will be part of an event object.
With that in mind, we'll need to register a function on the reader.onloadend event. This function takes an event object, by which we get the data url: it’s at e.target.result (yes, e.target is the reader object, but I had issues when using reader in place of e.target inside this function). We’re just going to pass this data url to our showUploadedItem function (which we wrote above).
Next, we check for the formdata object. Remember, if the browser supports FormData, formdata will be a FormData object; otherwise, it will be false. So, if we have a FormData object, we’re going to call the append method. The purpose of a FormData object is to hold values that you’re submitting via a form; so, the append method simply takes a key and a value. In our case, our key is images[]; by adding the square-brackets to the end, we make sure each time we append another value, we’re actually appending it to that array, instead of overwriting the image property.
We’re almost done. In our for loop, we’ve displayed each of the images for the user and added them to the formdata object. Now, we just need to upload the images. Outside the for loop, here’s the last piece of our puzzle:
if (formdata) {
  $.ajax({
    url: "upload.php",
    type: "POST",
    data: formdata,
    processData: false,
    contentType: false,
    success: function (res) {
      document.getElementById("response").innerHTML = res;
    }
  });
}
Again, we have to make sure we have FormData support; if we don’t, the “Upload Files!” button will be visible, and that’s how the user will upload the photos. However, if we have FormData support, we’ll take care of uploading via AJAX. We’re using jQuery to handle all the oddities of AJAX across browsers.
You’re probably familiar with jQuery’s $.ajax method: you pass it an options object. The url, type, and success properties should be obvious. The data property is our formdata object. Notice those processData and contentType properties. According to jQuery’s documentation, processData is true by default, and will process and transform the data into a query string. We don’t want to do that, so we set this to false. We’re also setting contentType to false to make sure that data gets to the server as we expect it to.
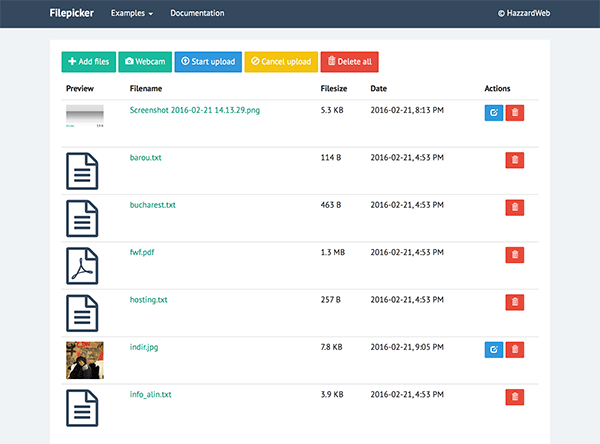
And that’s it. Now, when the user loads the page, they see this:

And after they select the images, they’ll see this:

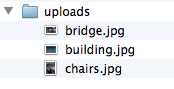
And the images have been uploaded:
That’s a Wrap!
Uploading files via AJAX is pretty cool, and it’s great that these new technologies support that without the need for lengthy hacks. If you’ve got any questions about what we’ve done here, hit those comments! Thank you so much for reading!
And if you still need help with this or any other coding issue, find support on Envato Studio.

Comments