The taxing system is one of the important aspects of any business, and you would like to make sure that it remains transparent and easy to understand for your customers. Most of the e-commerce frameworks nowadays allow you to set up different kinds of taxes for your products, and that's true for OpenCart as well.
OpenCart allows you to set up the tax using "Tax Classes" based on different parameters which we'll see in the detail later in this article. The "Tax Classes" depend on the "Tax Rates" feature, which further depends on the "Geo Zones". Thus, you need to understand this hierarchy to properly set up the taxes for your products.
Let's start the journey by exploring the setup of countries and zones.
Countries and Zones
Head over to the back-end of OpenCart and navigate to System > Localization > Countries. It'll display the list of available countries.
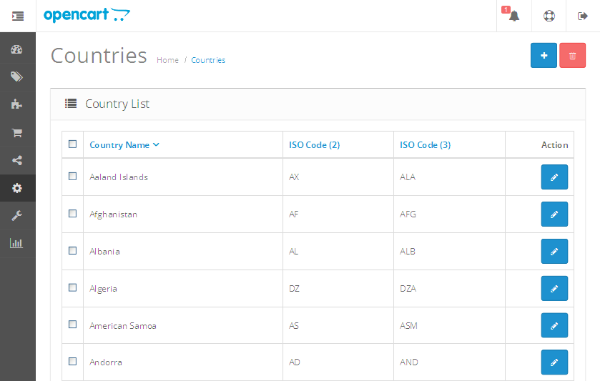
Obviously, all the countries are already available, so we don't need to add any more!
Next, navigate to System > Localization > Zones, and it'll display the list of zones.
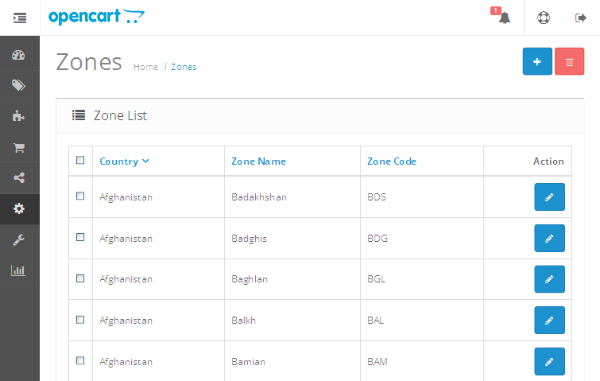
Don't get confused with the title "zone"—it's just the way OpenCart defines states/provinces. When you add a new zone, you need to select the "Country" to which it belongs.
Pretty simple stuff so far, right? Let's start with the actual business!
Set Up the Geo Zone
Navigate to System > Localization > Geo Zones, and it'll display the list of geo-zones provided by OpenCart as default. You should see UK Shipping and UK VAT Zone in the list.
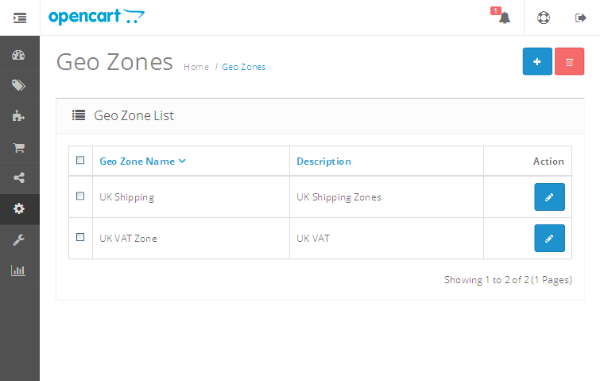
So, what the heck is this geo-zone? You could think of the geo-zone as your custom defined region which includes the zones of your choice. And yes, it's not necessary that you should include zones from the same country in your newly defined geo-zone; you could add zones from multiple countries as well. It allows you to set up specific regions when you want to apply region-specific tax on shipping or products.
Still confused? Let's try to understand this through an example. Say you've decided that you want to charge some fixed tax amount in some of the states in the USA, no matter how diverse they are geographically. For that, you would like to add a new "Geo Zone". Let's do that!
In the Geo Zones listing page, click on the + sign at the top right to add a new geo-zone.
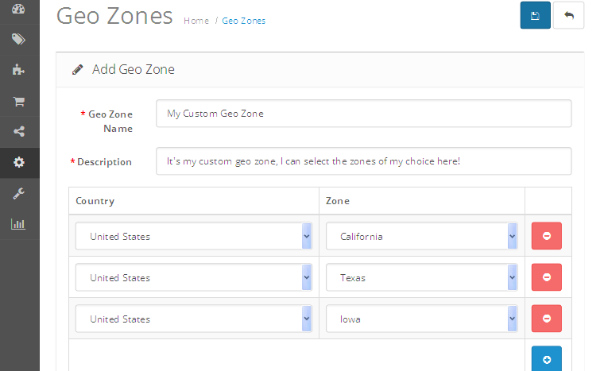
As you can see, I've selected three different zones: California, Texas and Iowa. As I said earlier, you could add a zone from another country as well. But for this example, we'll keep it to the USA. Select the appropriate values and hit the Save button. You've just added a new geo-zone, which includes the zones of your choice!
"Tax Rates" and "Tax Classes"
Now, let's see how to associate our newly created geo-zone to the taxing system! Navigate to System > Localization > Taxes > Tax Rates. It'll display a list of the tax rates available.
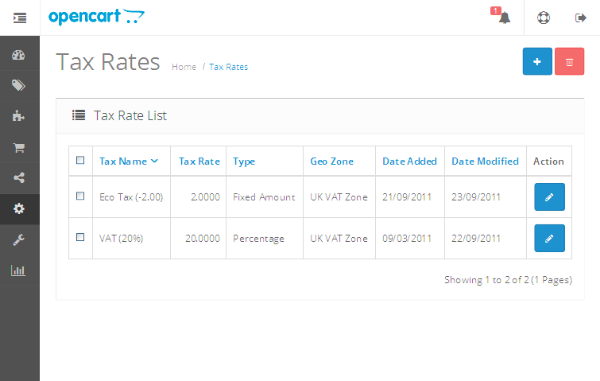
Click on the + sign at the top right to add a new tax rate.
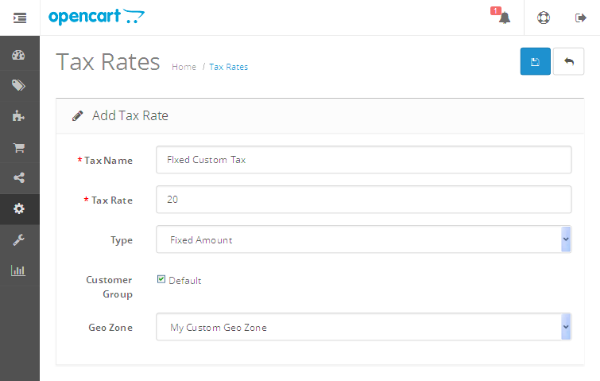
As you can see, I've defined a fixed 20 tax rate and selected My Custom Geo Zone in the Geo Zone field. You could also charge the tax by percentage as well. Fill in the values and hit the Save button to apply the changes.
So, we've added our custom tax rate, and now let's go ahead and assign it to one of the "Tax Classes". The "Tax Classes" feature allows you to combine the different tax rates together and wraps them into a single entity called a "Tax Class". Later on, you could assign these tax classes to products and shipping methods so that the tax is applied accordingly.
Navigate to System > Localization > Taxes > Tax Classes. It'll display a list of the tax classes available.
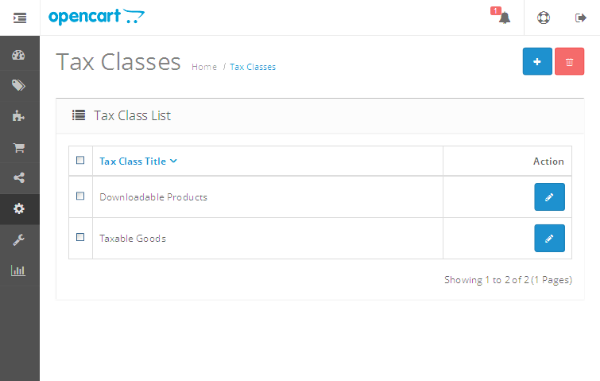
Go ahead and click on the + sign at the top right to add a new tax class.
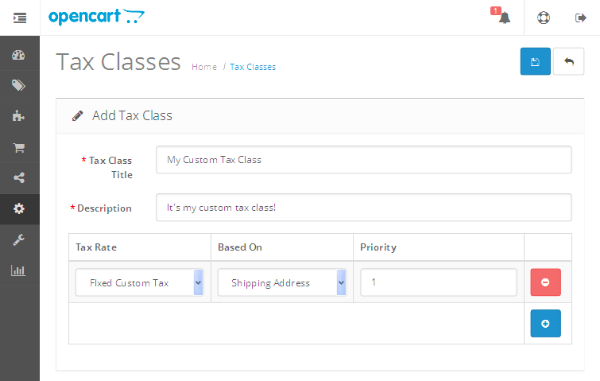
The important thing to note here is that you can assign multiple tax rates to this tax class. It'll charge all the tax rates which are selected on this page.
In our example, we've selected our custom tax rate Fixed Custom Tax. It also allows you to select whether you would like to calculate your tax based on "Shipping Address", "Payment Address" or "Store address". Fill in the values and save the tax class!
Assign "Tax Classes" to Products
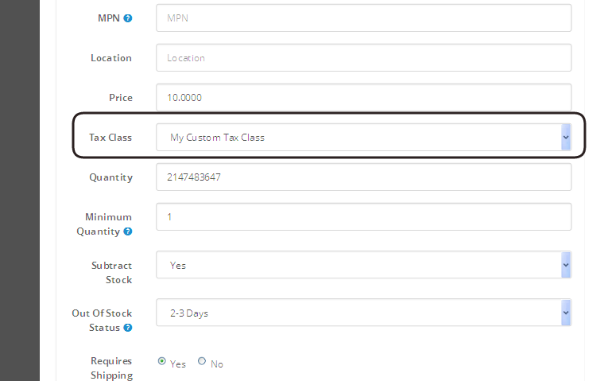
We've everything set up now, so let's move ahead and see it in action. Navigate to Catalog > Products, and edit one of the products to which you would like attach our Fixed Custom Tax. Under the Data tab, select My Custom Tax Class in the Tax Class field as shown in the following screenshot. Also, make sure that the Requires Shipping field is set to Yes, as we'll impose our tax based on the zones.
Save the product information and head over to the front-end. Start the checkout process and go to the Step 6: Confirm Order tab. It's also important that in the Step 3: Delivery Details tab you should select the Country as United States and Region/State should be one of the zones we assigned to My Custom Geo Zone.
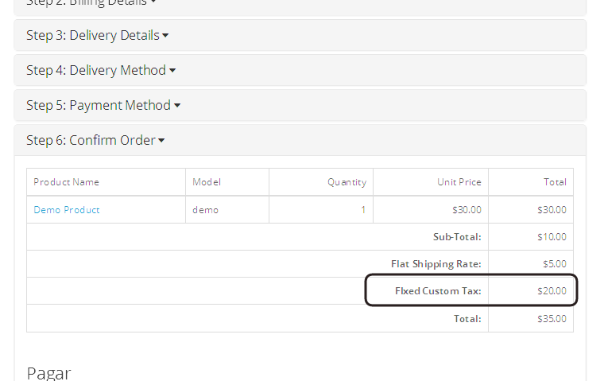
You should notice that Fixed Custom Tax, which is $20 flat, is added to the order total of the checkout. So in this way, you could set up your taxes and apply them using tax classes.
Sometimes, you need to apply taxes for some specific shipping method. You can do this by editing the shipping method and assigning the "Tax Class" to the appropriate value!
Conclusion
Remember that you can also take a look at all of the various OpenCart extensions that we have available for use and for study on CodeCanyon.
Today, we discussed several important features provided in OpenCart, like "Geo Zones", "Tax Classes" and "Tax Rates". Altogether, they provide a really flexible foundation to set up the taxes in your store. I'm eagerly awaiting your views on the topic!

Comments