This tutorial introduces Microsoft WebMatrix, a free web development technology that delivers one of the best experiences for web developers.
What You'll Learn:
- What is WebMatrix?
- How to install WebMatrix.
- How to get started creating a simple website using WebMatrix.
- How to create a dynamic web page using WebMatrix.
- How to program your web pages in Visual Studio to take advantage of more advanced features.
What is WebMatrix?
WebMatrix is a free, lightweight set of web development tools that provides the easiest way to build websites.
It includes IIS Express (a development web server), ASP.NET (a web framework), and SQL Server Compact (an embedded database). It also includes a simple tool that streamlines website development and makes it easy to start websites from popular open source apps. The skills and code you develop with WebMatrix transition seamlessly to Visual Studio and SQL Server.
The web pages that you create using WebMatrix can be dynamic—that is, they can alter their content or style based on user input or on other information, such as database information. To program dynamic Web pages, you use ASP.NET with the Razor syntax and with the C# or Visual Basic programming languages.
If you already have programming tools that you like, you can try the WebMatrix tools or you can use your own tools to create websites that use ASP.NET.
This tutorial shows you how WebMatrix makes it easy to get started creating websites and dynamic web pages.
Installing WebMatrix
To install WebMatrix, you can use Microsoft’s Web Platform Installer, which is a free application that makes it easy to install and configure web-related technologies.
- If you don't already have the Web Platform Installer, download it from the following URL:
- Run the Web Platform Installer, select Spotlight, and then click Add to install WebMatrix.

Note If you already have a WebMatrix Beta version installed, the Web Platform Installer upgrades the installation to WebMatrix 1.0. However, sites you created with earlier Beta editions might not appear in the My Sites list when you first open WebMatrix. To open a previously created site, click the Site From Folder icon, browse to the site, and open it. The next time you open WebMatrix, the site will appear in the My Sites list.
Getting Started with WebMatrix
To begin, you'll create a new website and a simple web page.
- Start WebMatrix.

- Click Site From Template. Templates include prebuilt files and pages for different types of websites.

- Select Empty Site and name the new site Hello World.
- Click OK. WebMatrix creates and opens the new site.
At the top, you see a Quick Access Toolbar and a ribbon, as in Microsoft Office 2010. At the bottom left, you see the workspace selector, which contains buttons that determine what appears above them in the left pane. On the right is the content pane, which is where you view reports, edit files, and so on. Finally, across the bottom is the notification bar, which displays messages as needed.
![[image]](/uploads/posts/9040/assets/legacy/1002_webmatrix/images/ch01_learnweb-4.jpg)
Creating a Web Page
- In WebMatrix, select the Files workspace. This workspace lets you work with files and folders. The left pane shows the file structure of your site.
![[image]](/uploads/posts/9040/assets/legacy/1002_webmatrix/images/ch01_learnweb-5.jpg)
- In the ribbon, click New and then click New File.
![[image]](/uploads/posts/9040/assets/legacy/1002_webmatrix/images/ch01_learnweb-6.jpg)
WebMatrix displays a list of file types.
![[image]](/uploads/posts/9040/assets/legacy/1002_webmatrix/images/ch01_learnweb-7.jpg)
- Select CSHTML, and in the Name box, type default.cshtml. A CSHTML page is a special type of page in WebMatrix that can contain the usual contents of a web page, such as HTML and JavaScript code, and that can also contain code for programming web pages. (You'll learn more about CSHTML files later.)
- Click OK. WebMatrix creates the page and opens it in the editor.
![[image]](/uploads/posts/9040/assets/legacy/1002_webmatrix/images/ch01_learnweb-8.jpg)
As you can see, this is ordinary HTML markup.
- Add the following title, heading, and paragraph content to the page:
<!DOCTYPE html>
<html lang="en">
	<head>
		<meta charset="utf-8" />
		<title>Hello World Page</title>
	</head>

	<body>
		<h1>Hello World Page</h1>
		<p>Hello World!</p>
	</body>
</html>
- In the Quick Access Toolbar, click Save.
![[image]](/uploads/posts/9040/assets/legacy/1002_webmatrix/images/ch01_learnweb-9.jpg)
- In the ribbon, click Run.
![[image]](/uploads/posts/9040/assets/legacy/1002_webmatrix/images/ch01_learnweb-10.jpg)
Note Before you click Run, make sure that the web page you want to run is selected in the navigation pane of the Files workspace. WebMatrix runs the page that's selected, even if you're currently editing a different page. If no page is selected, WebMatrix tries to run the default page for the site (default.cshtml), and if there is no default page, the browser displays an error.
WebMatrix starts a web server (IIS Express) that you can use to test pages on your computer. The page is displayed in your default browser.
![[image]](/uploads/posts/9040/assets/legacy/1002_webmatrix/images/ch01_learnweb-11.jpg)
Installing Helpers with the Administration Tool
Now that you have WebMatrix installed and a site created, it's a good idea learn how to use the ASP.NET Web Pages Administration tool and the Package Manager to install helpers. WebMatrix contains helpers (components) that simplify common programming tasks and that you'll use throughout these tutorials. (Some helpers are already included with WebMatrix, but you can install others as well.) In the appendix you can find a quick reference for the included helpers and for other helpers that you can install as part of a package called the ASP.NET Web Helpers Library. The following procedure shows how to use the Administration tool to install the ASP.NET Web Helpers Library. You will use some of these helpers in this tutorial and other tutorials in this series.
- In WebMatrix, click the Site workspace.
- In the content pane, click ASP.NET Web Pages Administration. This loads an administration page into your browser. Because this is the first time you're logging into the administration page, it prompts you to create a password.
- Create a password.

After you click Create Password, a security-check page that looks like the following screen shot prompts you to rename the password file for security reasons. If this is the first time you're seeing this page, don't try to rename the file yet. Proceed to the next step and follow the directions there.

- Leave the browser open on the security-check page, return to WebMatrix, and click the Files workspace.
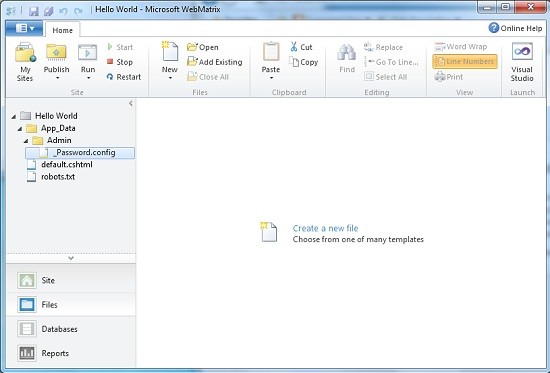
- Right-click the Hello World folder for your site and then click Refresh. The list of files and folders now displays an App_Data folder. Open that and you see an Admin folder. The newly created password file (_Password.config) is displayed in the ./App_Data/Admin/ folder. The following illustration shows the updated file structure with the password file selected:
- Rename the file to Password.config by removing the leading underscore (_) character.
- Return to the security-check page in the browser, and click the Click Here link near the end of the message about renaming the password file.
- Log into the Administration page using the password you created. The page displays the Package Manager, which contains a list of add-on packages.

If you ever want to display other feed locations, click the Manage Package Sources link to add, change, or remove feeds.
- Find the ASP.NET Web Helpers Library package. To narrow down the list, search for helpers using the Search field. The following image shows the result of searching for helpers. Notice that several versions of this package are available.

- Select the version that you want, click the Install button, and then install the package as directed. After the package is installed, the Package Manager displays the result.

This page also lets you uninstall packages, and you can use the page to update packages when newer versions are available. You can go to the Show drop-down list and click Installed to display the packages you have installed, or click Updates to display available updates for the installed packages.
Note The default website templates (Bakery, Calendar, Photo Gallery, and Starter Site) are available in C# and Visual Basic versions. You can install the Visual Basic templates by using the ASP.NET Web Pages Administration tool in WebMatrix. Open the Administration tool as described in this section and search for VB, and then install the templates you need. Website templates are installed in the root folder of your site in a folder named Microsoft Templates.
In the next section, you'll see how easy is it is to add code to the default.cshtml page in order to create a dynamic page.
Using ASP.NET Web Pages Code
In this procedure, you'll create a page that uses simple code to display the server date and time on the page. The example here will introduce you to the Razor syntax that lets you embed code into the HTML on ASP.NET Web Pages. (You can read more about this in the next tutorial.) The code introduces one of the helpers that you read about earlier in the tutorial.
- Open your default.cshtml file.
- Add markup to the page so that it looks like the following example:
<!DOCTYPE html>
<html lang="en">

<head>
	<meta charset="utf-8" />
	<title>Hello World Page</title>
</head>

<body>
	<h1>Hello World Page</h1>
	<p>Hello World!</p>
	<p>The time is @DateTime.Now</p>
</body>
</html>
The page contains ordinary HTML markup, with one addition: the
@character marks ASP.NET program code. - Save the page and run it in the browser. You now see the current date and time on the page.

The single line of code you've added does all the work of determining the current time on the server, formatting it for display, and sending it to the browser. (You can specify formatting options; this is just the default.)
Suppose you want to do something more complex, such as displaying a scrolling list of tweets from a Twitter user that you select. You can use a helper for that; as noted earlier, a helper is a component that simplifies common tasks. In this case, all the work you'd otherwise have to do fetch and display a Twitter feed.
- Create a new CSHTML file and name it TwitterFeed.cshtml.
- In the page, replace the existing code with the following code:
<!DOCTYPE html> <html lang="en"> <head> <meta charset="utf-8" /> <title>Twitter Feed</title> </head> <body> <h1>Twitter Feed</h1> <form action="" method="POST"> <div> Enter the name of another Twitter feed to display: <input type="text" name="TwitterUser" value=""/> <input type="submit" value="Submit" /> </div> <div> @if (Request["TwitterUser"].IsEmpty()) { @Twitter.Search("microsoft") } else { @Twitter.Profile(Request["TwitterUser"]) } </div> </form> </body> </html>This HTML creates a form that displays a text box for entering a user name, plus a Submit button. These are between the first set of
<div>tags.Between the second set of
<div>tags there's some code. (As you saw earlier, to mark code in ASP.NET Web pages, you use the@character.) The first time this page is displayed, or if the user clicks Submit but leaves the text box blank, the conditional expressionRequest["TwitterUser"].IsEmptywill be true. In that case, the page shows a Twitter feed that searches for the term "microsoft". Otherwise, the page shows a Twitter feed for whatever user name you entered in the text box. - Run the page in the browser. The Twitter feed displays tweets with "microsoft" in them.

- Enter a Twitter user name and then click Submit. The new feed is displayed. (If you enter a nonexistent name, a Twitter feed is still displayed, it's just blank.)
This example has shown you a little bit about how you can use WebMatrix and how you can program dynamic web pages using simple ASP.NET code using the Razor syntax. The next tutorial examines code in more depth. The subsequent tutorials then show you how to use code for many different types of website tasks.
Programming ASP.NET Razor Pages in Visual Studio
Besides using WebMatrix to program ASP.NET Razor pages, you can also use Visual Studio 2010, either one of the full editions or the free Visual Web Developer Express edition. If you use Visual Studio or Visual Web Developer to edit ASP.NET Razor pages, you get two programming tools that can enhance your productivity—IntelliSense and the debugger. IntelliSense works in the editor by displaying context-appropriate choices. For example, as you enter an HTML element, IntelliSense shows you a list of attributes that the element can have, and it even can show you what values you can set those attributes for. IntelliSense works for HTML, JavaScript, and C# and Visual Basic (the programming languages you use for ASP.NET Razor pages.)
The debugger lets you stop a program while it's running. You can then examine things like the values of variables, and you can step line by line through the program to see how it runs.
To work with ASP.NET Razor Pages in Visual Studio, you need the following software installed on your computer:
- Visual Studio 2010 or Visual Web Developer 2010 Express
- ASP.NET MVC 3 RTM.
Note You can install both Visual Web Developer 2010 Express and ASP.NET MVC 3 using the Web Platform Installer.
If you have Visual Studio installed, when you are editing a website in WebMatrix, you can launch the site in Visual Studio to take advantage of IntelliSense and the debugger.
- Open the site that you created in this tutorial and then click the Files workspace.
- In the ribbon, click the Visual Studio Launch button.

After the site opens in Visual Studio, you can see the site structure in Visual Studio in the Solution Explorer pane. The following illustration shows the website opened in Visual Web Developer 2010 Express:

For an overview of how to use IntelliSense and the debugger with ASP.NET Razor pages in Visual Studio, see the appendix item ASP.NET Web Pages Visual Studio.

Comments