I come from a PHP background, but these days, I'm a full-time Rails developer. The difficulty for most people who make the switch lies in the learning curve that’s involved. Once you've become proficient in a language or framework, switching to a new one feels like an unnecessary (and time-consuming) challenge.
However, learning Ruby and Rails is actually pretty easy! It's an incredibly powerful framework, and has a huge community pushing it along. So that begs the question: what's the best way to learn Rails? Here's a lesson plan.
This article details a full lesson plan that will get you up and running in no time! Follow each assignment below in order.
Assignment 1 - Work Through the "Try Ruby" Exercises
You might think learning Ruby is the most important step, and this is probably the part where everyone stops learning and just sticks with their current framework. Don’t do that! Don’t be scared to learn this language (or any language, really). Ruby is a fun, beautiful, and easy-to-learn language. Plus, you don’t really need to dominate the language 100% to be able to learn Rails. You just need the basics to begin.

Work through the Try Ruby exercises.
The most recommended tool for dipping into Ruby's syntax is the Try Ruby website. It provides you with an interactive, web-based shell to play with the language. If you type help, you’ll be greeted with an interactive, 15 minute tutorial that’ll teach you the very basics of the language. Typing help 2 will take you to the second chapter of the tutorial.
Once you’ve worked through these exercises a couple of times, you'll have a solid base. Personally, completing those two tutorials is all I initially did. The rest I’ve learned by creating web sites with Rails, Googling, and playing in IRB.
Assignment 2 - Install Ruby And Ruby on Rails
Run
gem install railsto install Rails.
If you want to learn Rails, you’ll of course need to install it on your machine. There are multiple ways to do this, depending on your platform. If you’re on a Mac or a Linux-based computer, I recommend you use RVM. It’s a great tool to install Ruby. Refer to this article for installation instructions. If you’re on Windows, refer to RubyInstaller for Windows.
Next, you need to install Rails. To do so you should have RubyGems installed on your computer. If you used RVM to install Ruby, congratulations, you already have it! If you’re on Windows, refer here. To install Rails, run gem install rails, and, tada, you're all set up!
Bonus Credit
rbenv is another increasingly popular method for installing Ruby. Research that as well.
Assignment 3 - Start with Jeffrey's Introduction to Rails
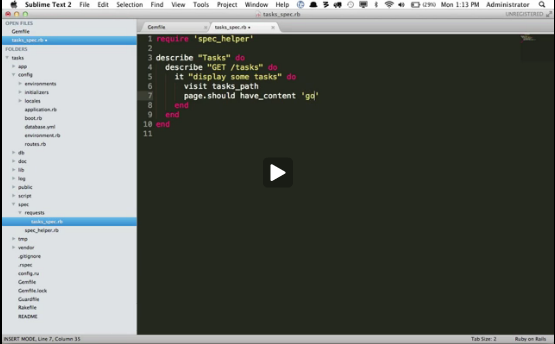
In this 40 minute screencast, Jeffrey Way, Nettuts+ editor extraordinaire, teaches you all the basics you need to know to start developing with Rails.
By following this screencast, you'll pick up a lot of information on topics including:
- Models and generators
- Test-driven development
- ActiveRecord
- Rspec and Capybara
- Partials
- …and plenty more
Assignment 4 - Take The Rails For Zombies Course
I’ve always thought that learning by example is the best (and only) way to learn a language and a framework. A free and incredible course that you must take is Rails For Zombies, from the folks at EnvyLabs. It's interactive, which means that, after watching each video, you'll work through a handful of exercises.
Assignment 5 - Read A Book
Purchase Agile Web Development with Rails.
Up until now, every tool I’ve given you has been free and interactive. Now, you need to purchase the book on Rails: Agile Web Development with Rails. It teaches you Rails by means of building a website from scratch. It goes through the very basics, creating controllers, models, scaffolding and even unit and functional testing, plus some AJAX! Be sure to buy the latest edition though!
Bonus Credit
Here's some more popular Rails books that you might consider.
- Ruby on Rails 3 Tutorial: Learn Rails by Example: Teaches you Rails step by step, in the same way Agile Web Development with Rails does.
- Beginning Rails 3: Kind of the same idea, a tutorial-like book.
- The Rails 3 Way: This book is more a reference than a learning tool, but it's still recommended.
Assignment 6 - Build A Simple Blog
I know it sounds boring (it does to me), but it's a great example and is used everywhere for a reason: it's simple, you can finish that kind of tutorial in under an hour, and you learn the basics very fast. Now, if you read the book from assignment four, you should already have enough knowledge to build something like this. I encourage you to try and build one by yourself, from memory, without checking any tutorials on the subject. You can check some methods, look at how to validate some fields, etc., but the idea is that you need to put your knowledge to the test.
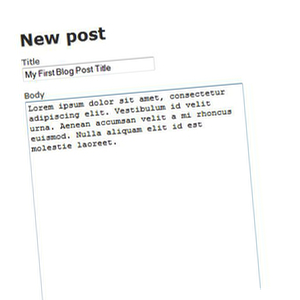
Build a simple blog that has support for comments. You don't need to implement a fancy authentication system; just something simple to get started.
If You Do Get Stuck...
- Active Record Query Interface: Basic and advanced information on Active Record, the database interface.
- Rails Routing from the Outside In: Sometimes routing seems a little hard to understand in Rails. This guide should clarify everything.
- Routing in Rails 3: Complementing the guide above, here's a screencast about routing in Rails 3.
Assignment 7 - Add Some Complexity to Your Blog
Great! You've built yourself a basic blog. It certainly lacks some basic functionality one would expect from a blogging platform, but it's a start. Let's put more work into it.
Add a basic authentication system to your blog. This might sound somewhat complicated, but I won't force you to do this completely on your own. There are a number of tools/gems available that will make the job a lot simpler, but they're too advanced for your current skill level. Plus, we need you to keep learning the inner workings of a Rails application before relying on third-party tools.
Watch this screencast by Ryan Bates, where he covers the entire process of creating a basic authentication system from scratch. Apply that to your blog and make sure only you are able to create and edit posts, and delete comments (but make sure every one can create comments!).
Bonus Credit
- Form validation is equally important, and isn't difficult to implement. Refer to this screencast to make the task easier.
- Refer to this article for more information on model associations in Rails. You can use the techniques outlined to add tagging to your blog.
Assignment 8 - Create Something on Your Own
This is where you need to get creative. For me, learning a language or framework by following tutorials works well up to a point. The first thing I created after I finished my sample blogging applications was an invoicing application. I found a simple design template online and started working on that. That allowed me to build something useful and according to my needs, while having actual fun!
If you want to follow in my footsteps, download the Twitter Bootstrap web app template (if you wish), so that you may spend more time programming than designing, and build yourself an invoicing application. Try to include authentication, clients, invoices (which should let the user apply a discount and taxes), and invoice items (which should include a description, quantity and price). This will teach you various important parts of a Rails application, such as nested forms.
Resources to Get You Started
- Nested Model Form Parts One and Two: You'll need this the moment you create an invoice, since invoice items will be "nested" inside the invoice form. Watch the videos to learn more.
- Simple Invoicing App: This is the invoicing app I created to learn Rails. It's built with Rails 3.0.4 though, so keep that in mind. It might be handy to check the models, associations, and JavaScript files.
Assignment 9 - Stay Up to Date ...
Learning to program well is a never-ending process. That's why you should subscribe to various blogs and Twitter accounts on the subject. Here's a list of influential Rails people for you to follow on Twitter:
- @dhh: The creator of Ruby on Rails. Posts insight on new releases and various tips.
- @rbates: Producer of Railscasts, posts tips and tricks very often.
- @rails: The official Ruby on Rails Twitter account. Follow them if you want insight on release dates, and development.
- @rails_apps: They're posting new Rails example apps pretty often, pretty useful.
And here are some websites you should subscribe to:
- Railscasts: A must! Awesome screencasts about Ruby on Rails, best practices, tips, new gems, etc.
- Asciicasts: If you're not into watching videos, this site mimics Railscasts' tutorials in text. It's not as up-to-date as the first one, but it's excelent.
- Nettuts+: While we're not 100% focused on Ruby and Rails, we're posting more and more applicable content these days!
- The Rails Way: Cool blog with various articles and tutorials.
- Riding Rails: The official Ruby on Rails blog. They don't post many tips or tutorials, but they announce official releases, so it's good to read it often.
- Planet Ruby on Rails: A Ruby on Rails blog aggregator. It's no as filtered as reading one of the blogs I listed above, but it's a good resource to check every once in a while.
Conclusion
This lesson plan will turn you into a Rails developer in no time. As you'll find, Rails is an amazing framework, and it continues to get better every single year. I learned Rails using the same tools I recommended above; you should too!
If you have any questions, feel free to ask them in the comments or tweet me. And feel free to share your experience! Tell us how you learned Rails, what tools you used, and how you’re using it today.

Comments