WooCommerce is quite a versatile plugin which allows you to convert any ordinary website into an online store. With this plugin you can sell your products to customers in the best possible way. The reason is that WooCommerce offers a user-friendly interface to place orders. Customers can complete their checkout process with great ease, without facing any kind of hassle.
Like all other shop owners you will definitely want to keep a record of all the product sales. WooCommerce allows you to track each and every order which is placed by your customers. In today's article I will explain how WooCommerce helps you in managing your product orders.
Orders in WooCommerce
If I talk generally in terms of an online transaction, then any order is considered as 'placed' the moment any customer completes the checkout process. After this every order is assigned with a unique Order ID and is displayed to the online store owners who can view it at the back-end via their site's WordPress dashboard account.
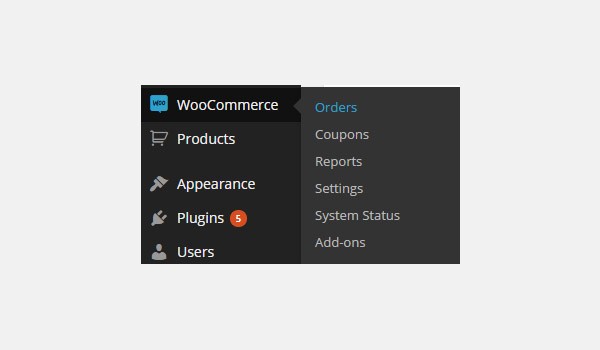
You can view your store orders by going to WooCommerce > Orders.
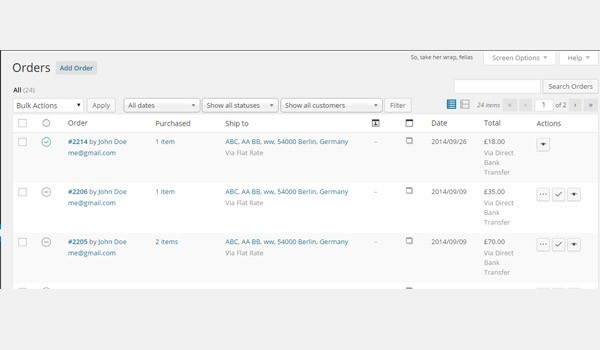
This will lead you to the order management page, which will list all the placed orders so far. You will notice that this page is quite similar to any post management page, with some very similar options.
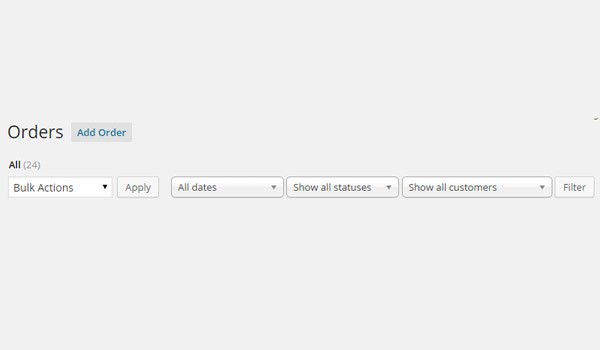
The first row of options allows you to filter the list of displayed orders by date, status and customer. You can also apply a variety of Bulk Actions like Move to Trash, Mark processing, Mark on-hold and Mark completed.
In this section you will notice some columns bearing useful details under which each order is displayed in a separate row. The details which these columns offer are about Order, Purchased, Ship to, Customer Message, Order Notes, Date, Total, and Actions. Like any other post you can edit any order separately by clicking on the order id.
Let's look into the details of these columns separately.
Order
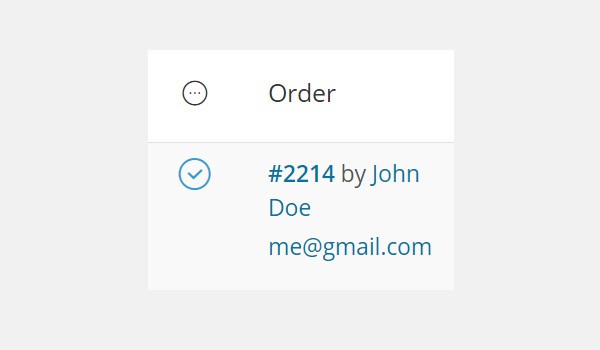
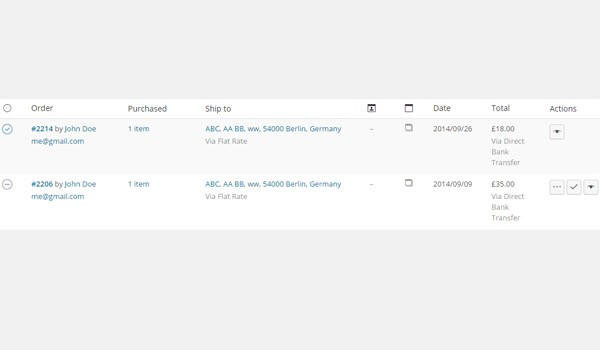
The first column displays the basic details about the order. First of all you will come across an icon which is shown towards the left of the Order ID. If you hover the mouse over this icon, then it will display the current status of the order, i.e. whether it is complete, still processing, etc. Next to this icon are some details which bear an Order ID, the name of the customer who has placed the order, and his or her email address. Order ID is a unique identification code which is non-sequential in nature and is quite similar to the post id.
Purchased
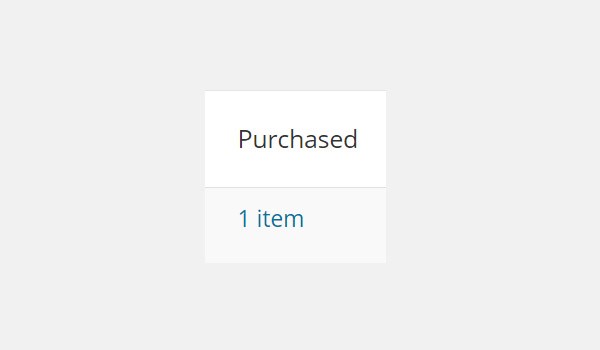
The next column displays the number of items which are purchased in a single order. A customer can purchase multiple items in a single order.
Ship to

The name of this column explains its meaning quite well. It will contain details about the address where the customer wants the order to be shipped. It also displays the details about the method of shipping which the customer chose. The above figure shows that the shipping address is in Germany and the customer has selected the Flat Shipping Rate.
Customer Message
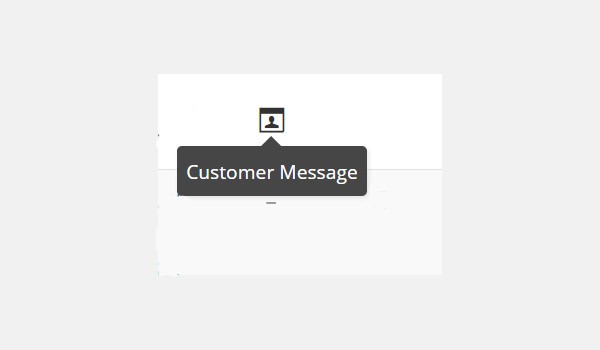
The next option is an icon, and when you hover the mouse over you will get to know that it is for the Customer Message. Any customer can leave a message for the online store owner, and it will be displayed in this column.
Order Notes
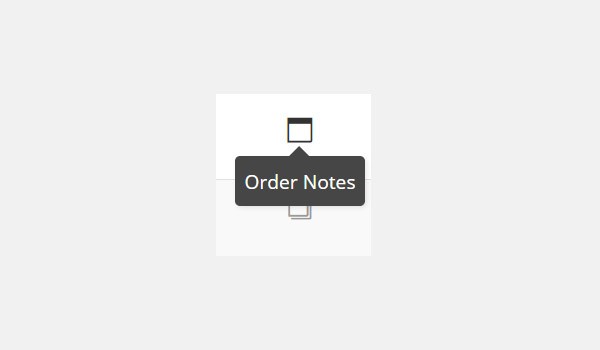
Just like Customer Message, this field is also optional, and it will display Order Notes if any. Both the Customer Message and Order Notes will be displayed to the admins/owner of the online store.
Date
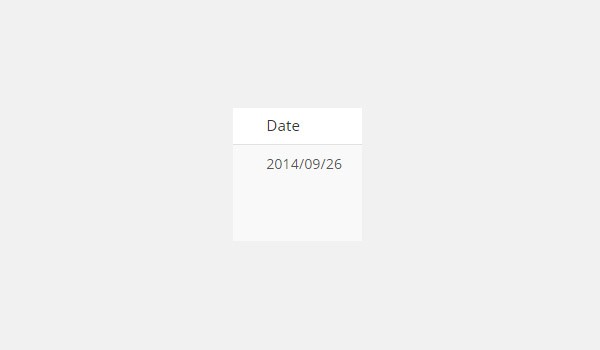
This column will list the exact date when the customer placed the order.
Total
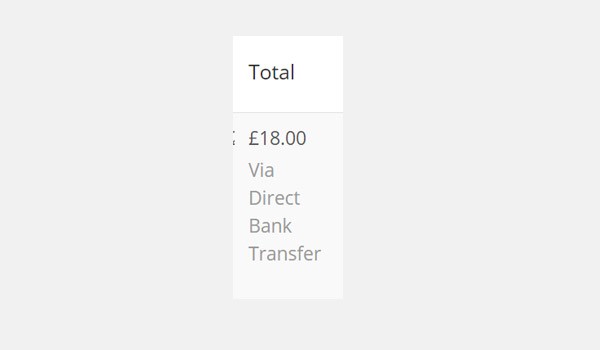
The column for Total displays the total amount of the items that are the part of the order. This will display the total sum no matter how many items there are in a single order. Here you will also find details of which payment gateway has been selected by the customer (in this case it is Direct Bank Transfer).
Actions
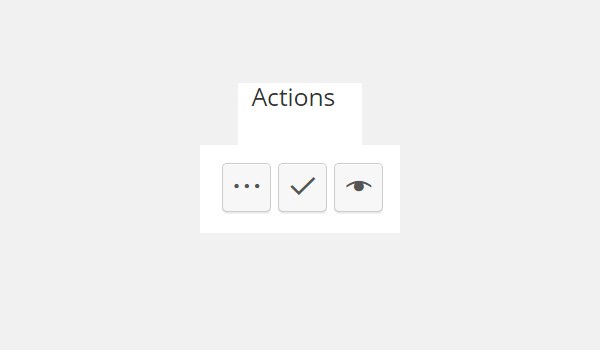
The last column will allow you to perform certain actions on the order placed by a customer. Three different icons are displayed in this column. These are:
- Processing: The first icon is for Processing, which means the order is still being processed.
- Completed: The second icon shows that the order has been completed and supplied to the customer.
- Edit: The third and last option is for Edit, which obviously allows store owners to edit the status of the placed order.
Important Note
An important thing to note is that you can edit the details of any order at any time. This editing is done in the same way as you edit your posts. Simply click the details of the column which you want to change.
As far as managing orders in WooCommerce is concerned, that's about it. In the next article I will explain how you can add a new order. Till then if you have any queries use the comment section to ask.

Comments