In the first part of this three-part tutorial series, we saw how to lay out the template structure in a Flask-based application using Jinja2. We also saw how blocks can be used to leverage the inheritance in templates. In this part, we will cover how to write a custom filter, a custom context processor, and a macro.
Getting Started
I will build upon the catalog application we created in the first part of this series. First I will add a custom Jinja2 context processor to show a descriptive name for each product. Then I will create a custom Jinja2 filter to do the same job as the custom context processor. Then I will demonstrate how to create a custom Jinja2 macro for regular form fields.
Creating a Custom Jinja2 Context Processor
Sometimes, we might want to calculate or process a value directly in the templates. Jinja2 maintains a notion that the processing of logic should be handled in views and not in templates, and thus, it keeps the templates clean. A context processor becomes a handy tool in this case. We can pass our values to a method; this will then be processed in a Python method, and our resultant value will be returned. Therefore, we are essentially just adding a function to the template context (thanks to Python for allowing us to pass around functions just like any other object).
So, let's say we want to add a descriptive name for each product in the format Category / Product-name. For this, a method needs to be added, which has to be decorated with @app.context_processor.
@app.context_processor
def some_processor():
    def full_name(product):
        return '{0} / {1}'.format(product['category'], product['name'])
    return {'full_name': full_name}
Technically, a context is just a Python dictionary that can be modified to add and remove values. Any method with the specified decorator should return a dictionary that would update the current application context.
To use this context processor, just add the following Jinja2 tag in the template.
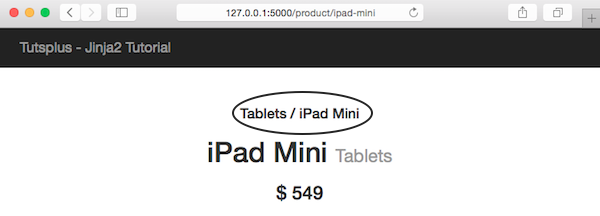
<h4>{{ full_name(product) }}</h4>
If we add this to that flask_app/templates/product.html of our application, it would look like:
{% extends 'home.html' %}

{% block container %}
  <div class="top-pad">
    <h4>{{ full_name(product) }}</h4>
    <h1>{{ product['name'] }}
      <small>{{ product['category'] }}</small>
    </h1>
    <h3>$ {{ product['price'] }}</h3>
  </div>
{% endblock %}
The resulting product page would now look like:
Creating a Custom Jinja2 Filter
After looking at the above example, experienced developers might think that it was stupid to use a context processor for the purpose. One can simply write a filter to get the same result; this will make things much cleaner. A filter can be written to display the descriptive name of the product as shown below.
@app.template_filter('full_name')
def full_name_filter(product):
    return '{0} / {1}'.format(product['category'], product['name'])
This filter can be used just like a normal filter, i.e, by adding a | (pipe) symbol and then the filter name.
{{ product|full_name }}
The above filter would yield the same result as the context processor demonstrated a while back.
To take things to a higher level, let's create a filter which will format the currency based on the current browser's local language. For this, first we need to install a Python package named ccy.
$ pip install ccy
Now we need to add a method for the currency filter.
import ccy
from flask import request

@app.template_filter('format_currency')
def format_currency_filter(amount):
    currency_code = ccy.countryccy(request.accept_languages.best[-2:])
    return '{0} {1}'.format(currency_code, amount)
To use this filter, we need to add the following in our template:
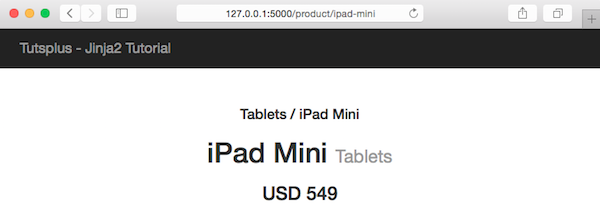
<h3>{{ product['price']|format_currency }}</h3>
Now the product page would look like:
Creating a Custom Jinja2 Macro for Forms
Macros allow us to write reusable pieces of HTML blocks. They are analogous to functions in regular programming languages. We can pass arguments to macros as we do to functions in Python and then use them to process the HTML block. Macros can be called any number of times, and the output will vary as per the logic inside them. Working with macros in Jinja2 is a very common topic and has a lot of use cases. Here, we will just see how a macro can be created and then used after importing.
One of the most redundant pieces of code in HTML is defining input fields in forms. Most of the fields have similar code with some modifications of style and so on. The following is a macro that creates input fields when called. The best practice is to create the macro in a separate file for better reusability, for example, _helpers.html:
{% macro render_field(name, class='', value='', type='text') -%}
    <input type="{{ type }}" name="{{ name }}" class="{{ class }}" value="{{ value }}"/>
{%- endmacro %}
Now, this macro should be imported in the file to be used:
{% from '_helpers.jinja' import render_field %}
Then, it can simply be called using the following:
<fieldset>
    {{ render_field('username', 'icon-user') }}
    {{ render_field('password', 'icon-key', type='password') }}
</fieldset>
It is always a good practice to define macros in a different file so as to keep the code clean and increase code readability. If a private macro that cannot be accessed out of the current file is needed, then name the macro with an underscore preceding the name.
Conclusion
In this tutorial, we have seen how to write a custom filter, a custom context processor and a custom macro for forms. In the next part of this series, we will see how to implement advanced date and time formatting at template level in Jinja2 using moment.js.

Comments