In an earlier tutorial I showed you how to style the categories in your site differently so that if your site has sections for each category of post, you can make them look quite different.
But what if your site is based on static pages? It's not uncommon to see large sites which are based on a hierarchical page structure, so can you use these techniques for a site like this?
The answer is yes. WordPress will give you some CSS classes relating to the page structure of your site which you can use to target styling and create sections for your page-based site which look quite different.
In this tutorial we'll work with a site based on hierarchical pages and style each section of the site using a different color for each section. We'll also look at an alternative technique based on adding categories to pages.
What You'll Need
To follow this tutorial, you'll need:
- a development installation of WordPress
- a code editor
If you already have a theme you want to use this technique on, you'll be working on your theme's stylesheet and functions file. I'm going to create a child theme of the Twenty Fifteen theme and edit the stylesheet and functions file in my child theme.
Your site will probably already be populated with posts; so that my site has some posts I'm going to download the WordPress theme test data.
Creating the Theme
If you're working with your own theme you can skip this section, but where's what you need to do to create a child theme of Twenty Fifteen.
In your site's wp-content/themes folder, create a new folder and give it a name. I'm calling mine tutsplus-style-pages-by-section.
Inside that folder, create an empty CSS file called style.css and add the following to it:
/*
Theme Name:     Tuts+ Style Pages by Section
Theme URI:      http://code.tutsplus.com/tutorials/style-posts-by-category-on-your-main-blog-page--cms-23684
Description:    Theme to support tuts+ tutorial on styling pages differently in each section of a site. Child theme for the Twenty Fifteen theme.
Author:         Rachel McCollin
Author URI:     http://rachelmccollin.co.uk/
Template:       twentyfifteen
Version:        1.0
*/

@import url("../twentyfifteen/style.css");
This tells WordPress everything it needs to know to create a child theme and imports the stylesheet from Twenty Fifteen. You'll probably want to add your own name and details instead of mine, but this gives you an idea.
Now activate your theme.
Importing the Data
If your site already has pages set up you can skip this section, but here's how to import the theme unit test data into your site.
- Go to the Theme Unit Test page in the Codex and download the
xmlfile which is linked to. - In your site, go to Tools > Import. Click on the WordPress link.
- Click on the Choose File button and select the file you've just downloaded. Click the Upload File and Import button.
- Follow the prompts and wait for WordPress to import the data.
By default, WordPress will assign a navigation menu containing all of the blog categories to the primary menu, and it will set the blog page as the home page. As we're working with static pages, you need to change that in the WordPress admin.
- In Settings > Reading, change the front page to a static page and select the 'Front Page' page. Select the 'Blog' page as the posts page.
- In Appearance > Menus, select the 'All Pages' menu and check the 'Primary Menu' checkbox so this is deployed as the main menu in your site.
Identifying Styles to Target
WordPress uses the body_class() template tag to output classes according to the type of page being displayed. You add this tag to your theme's header.php file: it adds classes to the body element according to the type of page being viewed.
If you're working with your own theme and haven't added these template tags yet, you'll need to do so. This tutorial on working with classes and IDs generated by WordPress shows you how.
If you're working with a child of the Twenty Fifteen theme, these tags will already have been added to the Twenty Fifteen theme itself, so you don't need to do anything.
If you open one of your site's pages in a browser and use developer tools to inspect the output HTML, you'll see that the body_class() template tag has added a bunch of classes to your page. Here I've got a child page open:
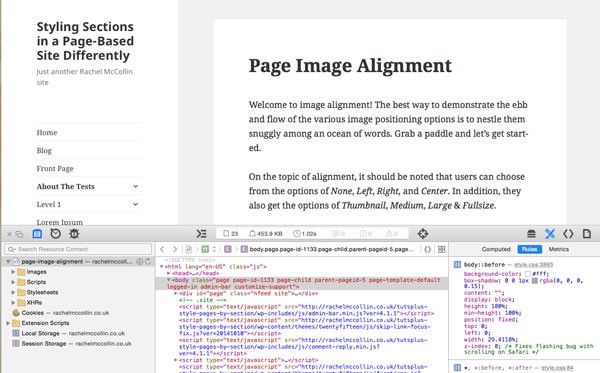
The body element is output with a number of classes:
<body class="page page-id-1133 page-child parent-pageid-5 page-template-default logged-in admin-bar no-customize-support">
These tell the browser that we're on a static page, the ID of the page, the fact that it's a child and what it's a child of, and its page template, among other things.
We're going to use two of these classes to target pages in different parts of the site: the ones relating to page ID and page parent.
Styling Top Level Pages and Their Children
To target pages in a section of a hierarchical site, we use two classes: the page ID for the top level page and the page parent ID for the child pages.
First you need to identify the IDs of your top level pages. Do this by opening each of them in turn in the admin screens and checking the URL for their editing screen. The URL will contain the text 'post=X', where X is the unique ID of the page. Ignore the fact that it says 'post' not 'page' (pages are actually a type of post), and use that ID for targeting your styling.
In my site the IDs of the top level pages with children are 5 and 17, and the pages without children have IDs of 146, 701, 703, 733 and 735. I'm going to use one color for each of the two hierarchical sections and another for the pages with no children. If your pages are all in sections you could use a different color for each section.
Open your theme's stylesheet and add the following CSS to it:
.page-id-5 h1,
.parent-pageid-5 h1 {
    color: #6cd2c8;
}
.page-id-17 h1,
.parent-pageid-17 h1 {
	color: #e5572f;
}
.page-id-146 h1,
.page-id-701 h1,
.page-id-703 h1,
.page-id-733 h1,
.page-id-735 h1 {
	color: #933bbe;
}
Note: you'll need to change the post and parent IDs in line with your own site, and you might want to change the colors to match your design.
Now save your stylesheet and take a look at your site. My site is using the colors in each section. Here's a page without a hierarchy:
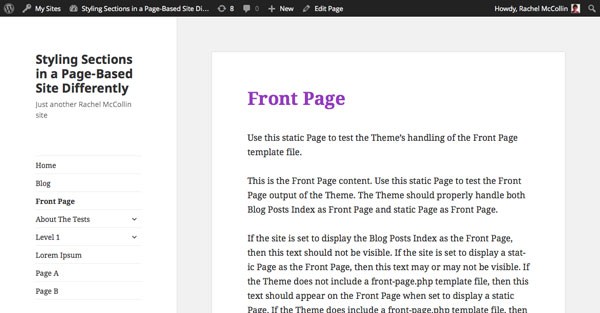
And a top level page:
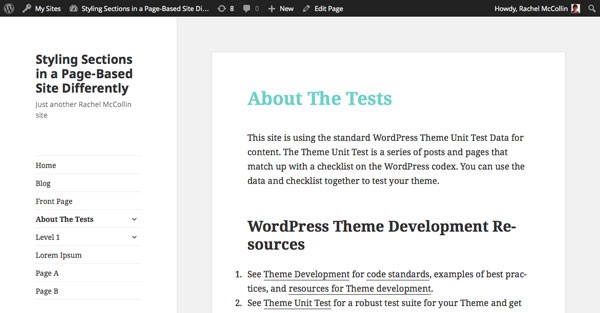
Here's a child of that top level page:
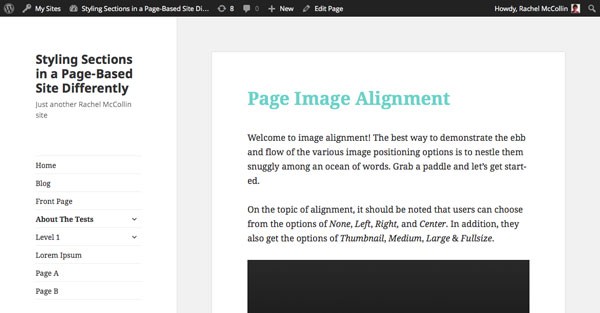
However, there are a couple of problems with this approach. The first is that I had to manually add classes for each of the top level pages, which means that if someone adds more sections or top level pages to my site in future, or moves one of my top level pages to a different place in the hierarchy, there won't be any styling for them. The second is that this only works for direct children of my top level pages. None of my styling is applied to grandchildren of the pages.
This means that if your site has a multilevel hierarchy, this approach will be very difficult to implement, as you'd have to target children of each of the children of your top level pages. Impossible if new pages are being added regularly!
So I'll need an alternative method, which is to use categories.
Styling Pages by Category
By default, WordPress doesn't assign categories to pages, but you can easily add categories to pages with a function. To do this you use the register_taxonomy_for_object_type() function, which is explored in this tutorial on assigning categories to attachments.
Open your theme's functions.php file, or if it doesn't already have one, create one. Add the following to it:
function tutsplus_add_categories_to_pages() {
    register_taxonomy_for_object_type( 'category', 'page' );
}
add_action( 'init' , 'tutsplus_add_categories_to_pages' );
This will add the 'category' taxonomy to the 'page' object type, meaning you can assign categories to pages.
However this doesn't mean that the body_class() tag will output the category as one of the classes on a page with categories, because pages don't have categories by default.
You can change this by writing a function and attaching it to the body_class filter hook. Again in your functions file, add this:
function tutsplus_add_categories_to_body_class( $classes ) {
    if ( is_page() ) {
		$categories = get_the_category( $post->ID );
		foreach ( $categories as $category ) {
			$classes[] = 'category-' . $category->slug;
		}
	}
    return $classes;
}
add_filter( 'body_class','tutsplus_add_categories_to_body_class' );
This creates a function called tutsplus_add_categories_to_body_class() with the variable $classes as its object. It checks if we're on a page and if so, creates a variable called $categories which holds all the categories the page is in. Then for each category, it adds the category slug (prefixed by 'category-' for consistency) to the $classes array and returns those. Finally by hooking the function to the body_class filter, it adds the output array of slugs to the classes output by the body_class() template tag.
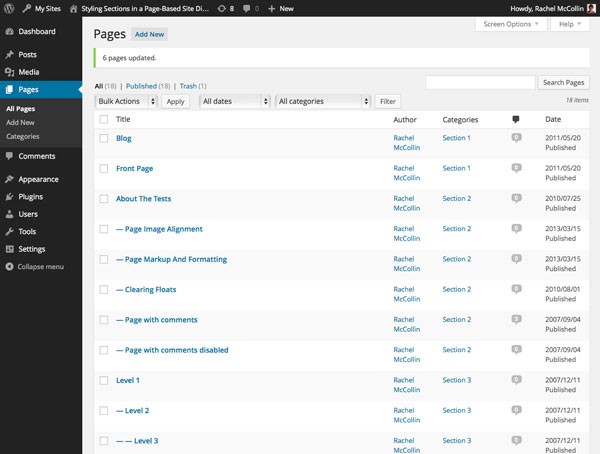
Now try adding some categories to the pages in your site to give it sections. I'm adding a Section 1, Section 2 and Section 3 category. Make sure each page is in just one section.
Here's how my pages look in the admin screens with categories added:
The next step is to add some styling to target pages in each section. I'm not going to change the heading color as I already did that using the page hierarchy. Instead I'll add a border.
In your theme's stylesheet, add the following (or something similar using the slugs for your categories and the colors you're using):
.page.category-section-1 h1 {
    border-bottom: 2px solid #933bbe;
	padding: 0.5em;
}
.page.category-section-2 h1 {
	border-bottom: 2px solid #6cd2c8;
	padding: 0.5em;
}
.page.category-section-3 h1 {
	border-bottom: 2px solid #e5572f;
	padding: 0.5em;
}
Now save your stylesheet and check your pages.
Here's a page in Section 1:
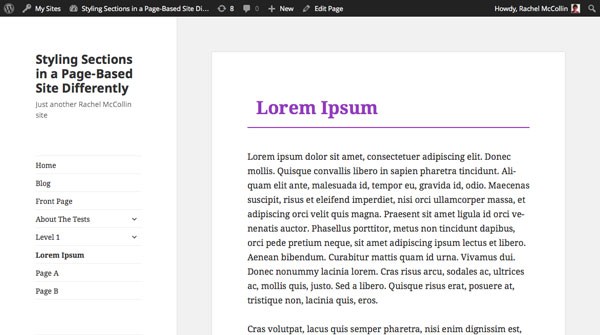
If you check your site you'll find that every page you've assigned one of the categories with targeted styling will have the correct styling, regardless of where it is in the page hierarchy. This gives you finer control over the styling and the ability to style sections of a site with a multi-level hierarchy.
The other advantage of this category-based approach is that you can use it for pages and posts in your site: so if you've already used category-based styling for your blog posts, you can easily apply this to your static pages too.
Summary
If your site is based on a hierarchical structure of pages, then it will probably have sections which you might want to give some distinct identity to.
In this tutorial you've learned two ways to target styling at pages in different sections of your site.
First you used the page hierarchy, which has the advantage of working with default WordPress settings but the disadvantage of not working with a hierarchy more than two levels deep.
Finally you learned how to apply categories to pages, add categories to the body_class() tag for pages, and then write CSS targeting the classes which WordPress outputs.


Comments