It's already a well-established fact that passwords are inherently weak in nature. Thus asking end users to create strong passwords for every application they use simply makes matters worse.
An easy workaround is to let users authenticate via their existing social accounts like Facebook, Twitter, Google, etc. In this article, we are going to do just that and add this social login capability to the sample Node application developed in the first part of this authentication series, so that we will be able to authenticate via our Facebook and Twitter accounts using Passport middleware.
If you have not checked out the previous article, I'd recommend that you go through it, as we will be building upon the foundation laid by that article and adding new strategies, routes and views to it.
Social Login
For the uninitiated, social login is a type of Single Sign-on using existing information from social networking sites like Facebook, Twitter, etc., where users are normally expected to have accounts already created.
Social login mostly relies on an authentication scheme such as OAuth 2.0. To learn more about the different login flows OAuth supports, read this article. We choose Passport to handle social login for us, as it provides different modules for a variety of OAuth providers, be it Facebook, Twitter, Google, GitHub, etc. In this article we will be using the passport-facebook and passport-twitter modules to provide login functionality via existing Facebook or Twitter accounts.
Facebook Authentication
To enable Facebook authentication, we first need to create a Facebook App using the Facebook Developer Portal. Note down the App ID and App Secret, and specify the callback URL by going to Settings and specifying the Site URL in the Website section for the application. Also make sure to enter a valid email address for the Contact Email field. It is required to be able to make this app public and accessible by the public.
Next, go to the Status & Review section and turn the slider to Yes to make the app public. We create a config file, fb.js, to hold this configuration information which will be needed to connect to Facebook.
// facebook app settings - fb.js
module.exports = {
  'appID' : '<your_app_identifier>',
  'appSecret' : '<your_app_secret>',
  'callbackUrl' : 'http://localhost:3000/login/facebook/callback'
}
Facebook Login Strategy
Back in our Node application, we now define a Passport Strategy for authenticating with Facebook using the FacebookStrategy module, utilizing the above settings to fetch the user's Facebook profile and display the details in the view.
passport.use('facebook', new FacebookStrategy({
  clientID        : fbConfig.appID,
  clientSecret    : fbConfig.appSecret,
  callbackURL     : fbConfig.callbackUrl
},

  // facebook will send back the tokens and profile
  function(access_token, refresh_token, profile, done) {
	// asynchronous
	process.nextTick(function() {

	  // find the user in the database based on their facebook id
	  User.findOne({ 'id' : profile.id }, function(err, user) {

	    // if there is an error, stop everything and return that
	    // ie an error connecting to the database
	    if (err)
	      return done(err);

		  // if the user is found, then log them in
	      if (user) {
	        return done(null, user); // user found, return that user
	      } else {
	        // if there is no user found with that facebook id, create them
	        var newUser = new User();

			// set all of the facebook information in our user model
	        newUser.fb.id    = profile.id; // set the users facebook id
	        newUser.fb.access_token = access_token; // we will save the token that facebook provides to the user
	        newUser.fb.firstName  = profile.name.givenName;
	        newUser.fb.lastName = profile.name.familyName; // look at the passport user profile to see how names are returned
	        newUser.fb.email = profile.emails[0].value; // facebook can return multiple emails so we'll take the first

			// save our user to the database
	        newUser.save(function(err) {
	          if (err)
	            throw err;

	          // if successful, return the new user
	          return done(null, newUser);
	        });
	     }
	  });
    });
}));
Configuring Routes
Now we need to add certain routes for enabling login with Facebook and for handling the callback after the user has authorized the application to use his or her Facebook account.
// route for facebook authentication and login
// different scopes while logging in
router.get('/login/facebook',
  passport.authenticate('facebook', { scope : 'email' }
));

// handle the callback after facebook has authenticated the user
router.get('/login/facebook/callback',
  passport.authenticate('facebook', {
    successRedirect : '/home',
	failureRedirect : '/'
  })
);
The login page for our demo application looks like this:

When you click on the Login with Facebook button, it will try to authenticate with Facebook. If you are already logged in to Facebook it will show the below dialog asking for your permission, or else it will ask you to log in to Facebook and then show this dialog.
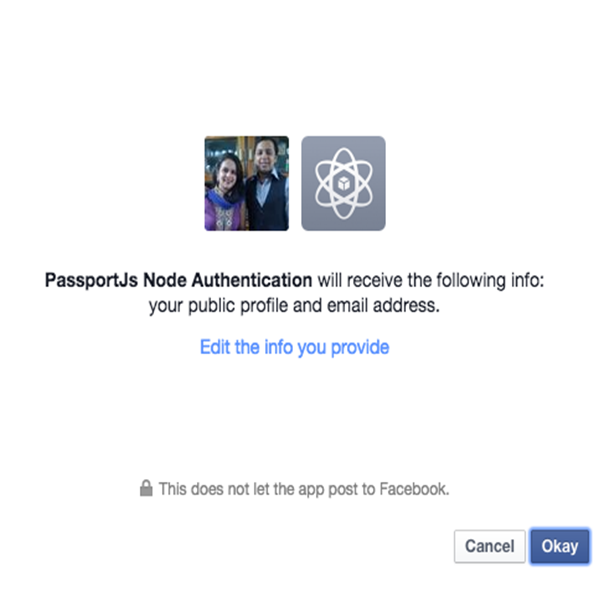
If you allow the app to receive your public profile and email address, then our registered callback function will be called with the user details. We can save these for future reference or display them or simply choose to ignore them, depending on what you want to do with the information. Feel free to jump ahead in time and check out the entire code in this git repo.
It would be good to note that apart from the basic information that this demo app provides, you could use the same authentication mechanism to extract more useful information about the user, like his friends list, by using the appropriate scope and using the Facebook APIs with the access token received with the user profile.
Twitter Authentication
A similar authentication module needs to be wired up for handling authentication via Twitter, and Passport chips in to help with its passport-twitter module.
Firstly, you need to create a new Twitter App using its Application Management interface. One thing to note here is that while specifying the callback URL, Twitter does not seem to work nicely with it if "localhost" is given in the callback URL field. To overcome this limitation while developing, you could use the special loopback address or "127.0.0.1" in place of "localhost". After creating the app, note down the following API key and secret information in a config file as follows:
// twitter app settings - twitter.js
module.exports = {
    'apikey' : '<your_app_key>',
	'apisecret' : '<you_app_secret>',
	'callbackUrl' : 'http://127.0.0.1:3000/login/twitter/callback'
}
Twitter Login Strategy
The login strategy for Twitter is an instance of TwitterStrategy and it looks like this:
passport.use('twitter', new TwitterStrategy({
    consumerKey     : twitterConfig.apikey,
    consumerSecret  : twitterConfig.apisecret,
    callbackURL     : twitterConfig.callbackURL
  },
  function(token, tokenSecret, profile, done) {
    // make the code asynchronous
    // User.findOne won't fire until we have all our data back from Twitter
    process.nextTick(function() {

	  User.findOne({ 'twitter.id' : profile.id },
        function(err, user) {
          // if there is an error, stop everything and return that
		  // ie an error connecting to the database
	      if (err)
	        return done(err);

			// if the user is found then log them in
	        if (user) {
	           return done(null, user); // user found, return that user
	        } else {
	           // if there is no user, create them
	           var newUser                 = new User();

			   // set all of the user data that we need
	           newUser.twitter.id          = profile.id;
	           newUser.twitter.token       = token;
	           newUser.twitter.username = profile.username;
	           newUser.twitter.displayName = profile.displayName;
	           newUser.twitter.lastStatus = profile._json.status.text;

			   // save our user into the database
	           newUser.save(function(err) {
	             if (err)
	               throw err;
	             return done(null, newUser);
	           });
	        }
	     });
	  });
    })
);
Configuring Routes
// route for twitter authentication and login
// different scopes while logging in
router.get('/login/twitter',
  passport.authenticate('twitter')
);

// handle the callback after facebook has authenticated the user
router.get('/login/twitter/callback',
  passport.authenticate('twitter', {
	successRedirect : '/twitter',
	failureRedirect : '/'
  })
);

/* GET Twitter View Page */
router.get('/twitter', isAuthenticated, function(req, res){
  res.render('twitter', { user: req.user });
});
Now to test this, be sure to use http://127.0.0.1:<port> instead of using http://localhost:<port>. As we have already mentioned above, there seems to be an issue while exchanging tokens with Twitter with "localhost" as the host name. On clicking the Login with Twitter button, as expected it asks for the user's consent to allow this application to use Twitter.
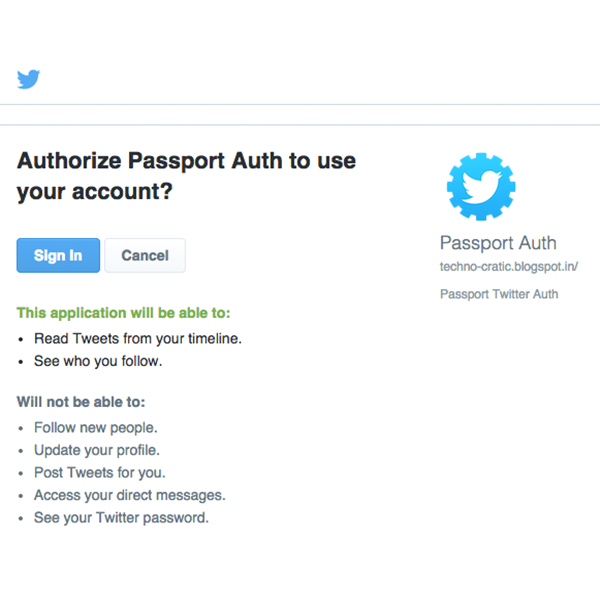
As you allow the application to access your Twitter account and limited information, the callback handler which is registered in the login strategy is called, which is then used to store these details in a back-end database
Conclusion
And there you have it !! We successfully added Facebook and Twitter logins to our sample application without writing a lot of code and handling the intricacies involved with the authentication mechanism by letting Passport do the heavy lifting. Similar login strategies can be written for a variety of providers that Passport supports. The code for the entire application can be found in this git repository. Feel free to extend it and use it in your own projects.

Comments