Before we can start creating iOS applications, we need to set up the development environment. This tutorial will show you how to register as an iOS developer and install the development tools you'll need to get started.
1. Requirements & Prerequisites
The primary focus of this tutorial is getting started with Xcode. Xcode is an outstanding Integrated Development Environment (IDE) developed by Apple and the vast majority of both iOS and OS X developers rely on it for building applications.
Xcode is only compatible with Apple's OS X and I am therefore assuming that you have a Mac capable of installing the software. I will be using Xcode 5 throughout this series. This particular version of Xcode requires OS X 10.8 or higher. Even though it is possible to create iOS applications with an older version of Xcode, I recommend that you also use Xcode 5 to make sure that you don't run into unexpected issues along the way.
2. Join the iOS Developer Program
Registering as an iOS Developer is free. However, if you plan to run applications on a physical device or if you want to submit your applications to the App Store, you are required to enroll for the paid iOS Developer Program. The iOS Developer Program has four enrollment types, individual, company, enterprise, and university. The individual and company enrollment types cost $99 per year, whereas the enterprise program costs $299 per year. The enterprise program is aimed at companies and organizations who intend to deploy in-house applications, that is, applications that are not available in the App Store. Visit Apple's developer website for more information about the iOS Developer Program. You can complete this series without enrolling for the iOS Developer Program, but keep in mind that you won't be able to run applications on a physical device or submit applications to the App Store should you choose to do so.
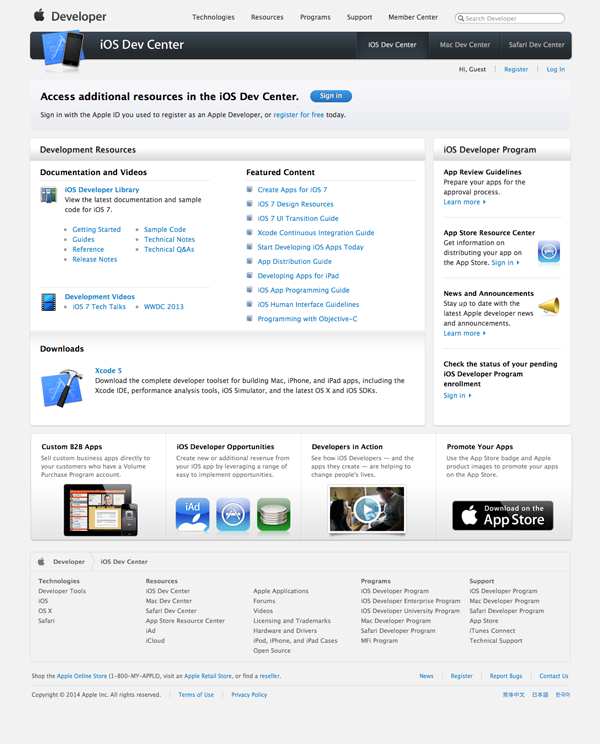
If you aren't a registered iOS developer yet, you'll need to sign up in order to follow along. To start the registration process, head over to the iOS Dev Center. Creating an iOS developer account only takes a few minutes.
If you choose to enroll in the paid iOS Developer Program, then you'll need to take a few extra steps. You can find the necessary information at the iOS Dev Center. The process can take a few days to complete since Apple manually approves each application. For more information, visit Apple's developer support center.
3. Install Xcode
The name Xcode can be somewhat confusing at first. The name Xcode is often used to refer to the entire toolset for iOS and OS X development, and that toolset includes the Xcode IDE, the iOS Simulator for running applications, and the actual iOS and OS X SDKs. However, it's important to understand that the Xcode application itself is just an IDE and when I use the term I'm typically referring to just that.
You can download Xcode in one of two ways, through the iOS Dev Center or through the Mac App Store. The advantage of the Mac App Store is that updating Xcode is much easier. It's also faster thanks to delta updates. The advantage of downloading Xcode through the iOS Dev Center is that you can download developer previews. If you like living on the edge, then you'll like working with the developer previews. However, because you are new to iOS development, I suggest you download and install Xcode through the Mac App Store in order to work with the most recent stable release. Open the Mac App Store, search for Xcode, and start the installation process. Xcode is several gigabytes in size so you may want to grab a cup of coffee or, even better, take a walk.
4. Create Your First Application
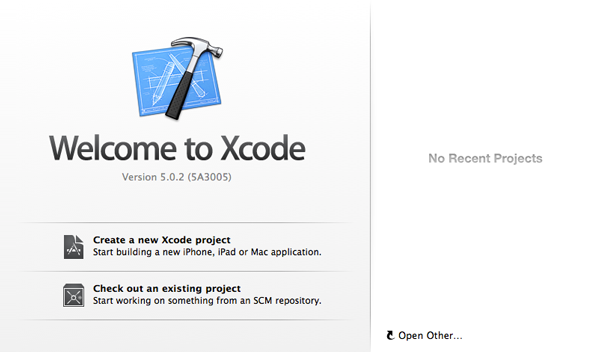
You have barely touched your computer and we are already set up and ready to create iOS applications. Those of you familiar with the process for setting up the Android SDK should appreciate this simplicity. With Xcode installed, it is time to launch it for the first time. If all went well, you should see the Welcome to Xcode window, which contains a few useful links and helps you create a new application. To create your first iOS application, select Create a new Xcode project from the list of options. What is an Xcode project? An Xcode project is a folder or package that contains all the necessary files and components to manage and build your application.
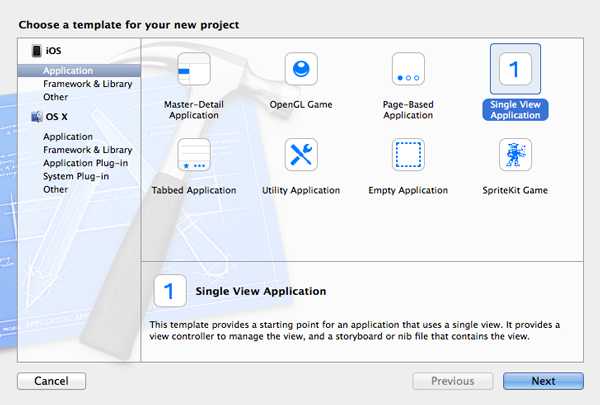
Xcode makes it easy to create a new Xcode project by offering a handful of useful project templates. The Single View Application template is a good choice for your first application. Select it from the list of templates and click Next.
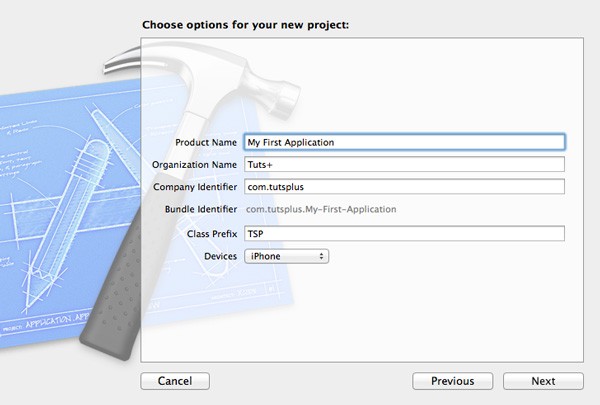
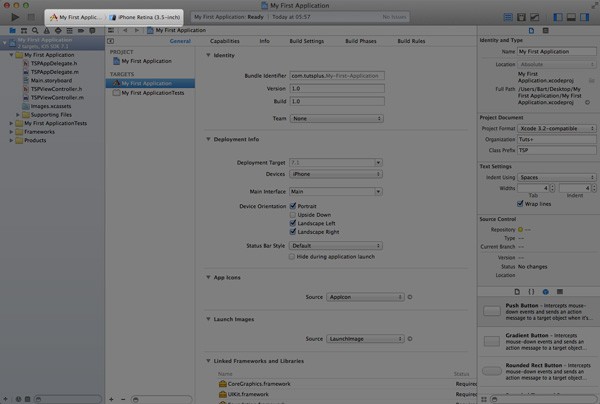
The next window lets you configure your Xcode project. Fill in the fields as shown in the screenshot below and click Next. In an upcoming article in this session, I will explain each of the configuration options in more detail. The focus of this article is getting your first application up and running in the iOS Simulator.
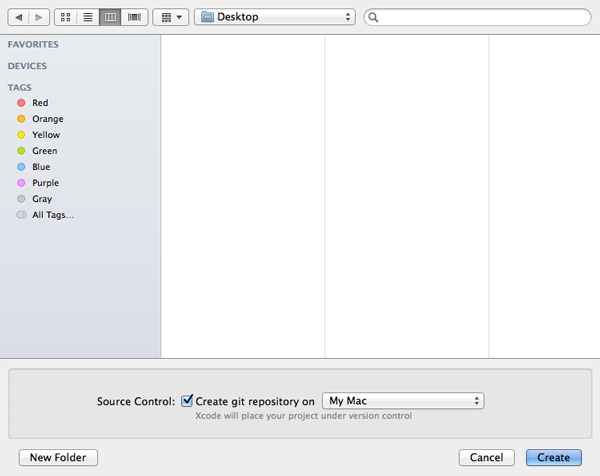
In the final step, Xcode asks you to specify a location for storing your new Xcode project. It doesn't really matter where you save the project as long as you can find it later. You'll also notice that Xcode offers the option to create a local git repository for your project. I highly recommend that you use source control for any type of development. Git is an excellent choice and it is the most popular Source Control Management (SCM) system among iOS and OS X developers.
It is important to get familiar with source control management if this is new to you. Source control is indispensable in software development for various reasons. To begin using Git, you can visit Git's website or read its Wikipedia article. There's also an excellent book by Scott Chacon that discusses Git in more detail.
In the rest of this series on iOS development, I won't bother you with source control management. Even though source control is important, I don't want to overcomplicate this series by adding an extra layer of complexity.
5. Build and Run
You have successfully set up your first Xcode project. Believe it or not, running your application in the iOS Simulator is only one click away. On the far left of the Xcode toolbar, you can see a large play button.

Before you run your application, make sure that the active scheme is set to iPhone Retina (3.5-inch). We will cover schemes in more detail later on in the series. Take a look at the next screenshot to make sure we're on the same page.
Are you ready to build and run your very first iOS application? Click the play button in the top right to build your project and run your application in the iOS Simulator. Alternatively, you can press Command + R or select Run from Xcode's Product menu. If all went well, you should see the iOS Simulator running your application. Of course, your application doesn't do anything useful yet. We'll fix that later in this session.
6. iOS Simulator
The iOS Simulator is a valuable tool in your arsenal. Building and running an iOS application in the simulator is faster than deploying an application on a physical device. There is one caveat, however. The iOS Simulator doesn't perfectly mimic an iOS device for various reasons. For example, the iOS Simulator doesn't have a camera or an accelerometer. Its GPS capabilities are limited to a list of predefined locations and routes, and user interaction is limited to gestures that require one or two fingers. Also keep in mind that the iOS Simulator draws power and resources from the Mac it runs on, which means that the simulator isn't ideal for testing application performance.
The bottom line is that you should always test an applications on a physical device before submitting it to the App Store or distributing it to testers. Even if you only have one device to test with, it is critical to test your applications on a physical device instead of relying solely on the iOS Simulator.
In spite of its shortcomings, the iOS Simulator is a very capable tool. Select the iOS Simulator and take a look at its menu and the various options it provides. The simulator is perfectly suited for testing user interfaces on different form factors, mimicking simple gestures, simulating memory warnings, or taking screenshots for the App Store. You'll find it a very useful tool for iOS development.
7. Physical Devices
As I mentioned earlier, running an application on a physical device is only possible if enroll in the paid iOS Developer Program. In addition, running an application on a physical device involves a few extra steps. These steps include configuring your project and setting up the device you plan to test with. Because this is a fairly complex topic, especially if you are new to iOS development, I will thoroughly explain how to do this in a separate article in this session.
8. Third Party Development Tools
I would like to end this article by listing a handful of third party tools that make iOS development easier and more enjoyable. Note that these applications are by no means required for iOS development. However, knowing that they exist may save you a lot of frustration in the future.
- Tower: Tower is one of the best Mac applications for working with Git. Git is a command line tool and some people prefer to use a graphical user interface over the command line. If you are not a command line superhero, then you'll definitely appreciate what Tower has to offer.
- Dash: Dash is a superb documentation browser and code snippet manager. Dash is a great alternative for Xcode's built-in documentation browser. It supports dozens of languages and frameworks, which means that you can use it for almost any type of development.
- TextExpander: TextExpander is a popular utility for managing text snippets linked to custom keyboard shortcuts. Many developers use it for development, but you can use it wherever you like. It also supports placeholders for even more customizability.
- TestFlight: TestFlight is a great service for distributing test builds to a team of beta testers. It does a lot more than that, though. It collects crash reports, user feedback, and keeps track of user sessions. For more information about TestFlight, check out this tutorial. There are a number of alternatives, such as HockeyApp that you may want to look into as well.
Conclusion
I hope you agree that setting up the development environment for iOS development is easy. With Xcode installed, we can start exploring the iOS SDK. That will be the focus of the rest of this session.

Comments