Introduction
Apple originally introduced push notifications to enable applications to respond to events if the application isn't running in the foreground. However, the operating system and iOS devices have changed significantly during the past few years and applications don't need to rely solely on push notifications to perform tasks in the background.
This doesn't mean that push notifications are no longer useful though. Push notifications are great to notify an application about important events and to keep your application's users engaged. Also, don't forget that an application still isn't allowed to run in the background without restrictions. In other words, the original purpose of push notifications is still valid.
Even the most experienced iOS developers scratch their heads from time to time when they have to deal with application provisioning. Unfortunately, push notifications add to this complexity. With this tutorial, I hope to show you that setting up push notifications shouldn't be a nightmare. Follow along and I promise that you'll be sending push notifications in no time.
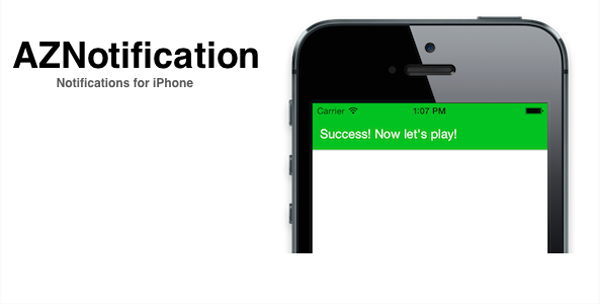
If you're looking for a quick solution, you could try AZNotification: Notifications for iPhone on Envato Market, which allows you to easily create attractive notifications in no time. The notifications drop from the navigation bar and can display informational as well as error messages. Or hire an Envato Studio app developer to help you.
1. Prerequisites
You'll need two things if you'd like to follow along with me. The first thing you need is a physical device to receive push notifications, because the iOS Simulator doesn't support push notifications. The second thing you need is a paid iOS developer account. Only paid accounts can provision applications to run on a physical device.
2. Project Setup
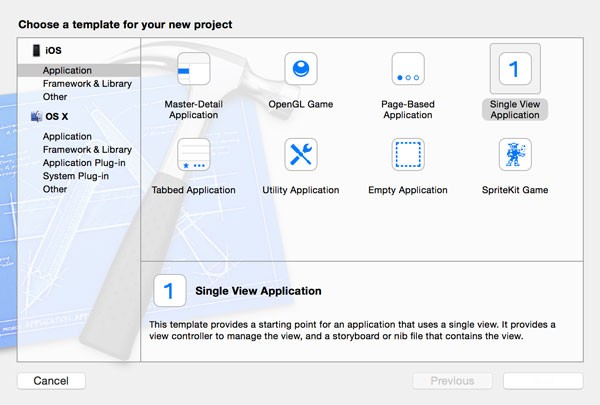
The goal of this tutorial is to build an application that is set up to receive push notifications. Open Xcode and create a new project based on the Single View Application template.
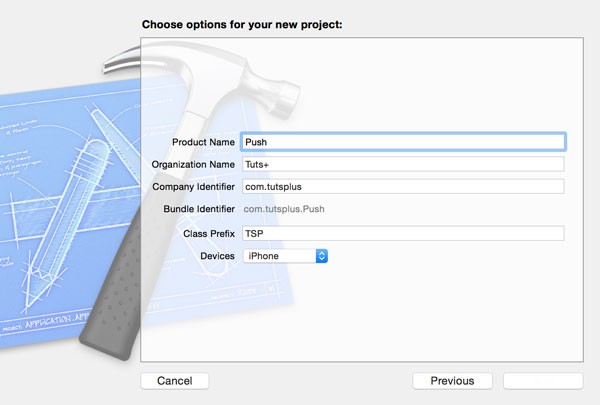
Name the project Push, enter a company identifier and class prefix, and set Devices to iPhone.
3. Registration
Even though I won't discuss the nitty-gritty backend infrastructure of push notifications, it's important that you know and understand what your application needs to do to receive push notifications and why it does this.
Open TSPAppDelegate.m and update the application:didFinishLaunchingWithOptions: as shown below. We call registerForRemoteNotificationTypes: on the application object, passing in the notification types that we're interested in. The operating system now knows that the application is interested in receiving push notifications.
- (BOOL)application:(UIApplication *)application didFinishLaunchingWithOptions:(NSDictionary *)launchOptions {
    // Register for Remote Notifications
    [application registerForRemoteNotificationTypes:(UIRemoteNotificationTypeAlert | UIRemoteNotificationTypeBadge | UIRemoteNotificationTypeSound)];

    return YES;
}
The operating system contacts Apple's servers and obtains a device token to uniquely identify the device the application is running on. This device token is used by your server infrastructure to send push notifications. It does this by sending the device token along with the actual push notification to Apple's servers. Apple's servers are in charge of distributing the push notifications to the appropriate devices.
Note that the device token differs for each application and it can even change over time for the same application. Apple therefore recommends to ask for a device token every time the application is launched and send the device token to your backend to make sure the device token is up to date.
If you're using a service like Parse or Urban Airship, then this is something you don't need to worry about. In that case, you only need to send the backend the device token iOS hands you.
The methods that tell your application whether registering for remote notifications is successful or not are application:didRegisterForRemoteNotificationsWithDeviceToken: and application:didFailToRegisterForRemoteNotificationsWithError: respectively. For now, implement these methods as shown below.
- (void)application:(UIApplication *)application didRegisterForRemoteNotificationsWithDeviceToken:(NSData *)deviceToken {
    NSLog(@"Did Register for Remote Notifications with Device Token (%@)", deviceToken);
}
- (void)application:(UIApplication *)application didFailToRegisterForRemoteNotificationsWithError:(NSError *)error {
    NSLog(@"Did Fail to Register for Remote Notifications");
    NSLog(@"%@, %@", error, error.localizedDescription);

}
Both methods are declared by the UIApplicationDelegate protocol. This protocol also declares another method, application:didReceiveRemoteNotification:, which is invoked when the application receives a remote notification. It's up to you to handle any incoming push notifications. The application:didReceiveRemoteNotification: method hands you the payload of the push notification as an NSDictionary object. Your application needs to decide how it should respond to the push notification.
If you run your application, then the application:didFailToRegisterForRemoteNotificationsWithError: method will be invoked. This isn't surprising since we haven't finished setting up our application for push notifications. As a reminder, remote notifications are not supported by the iOS Simulator. You'll need a physical device to complete this tutorial.
4. SSL Certificate
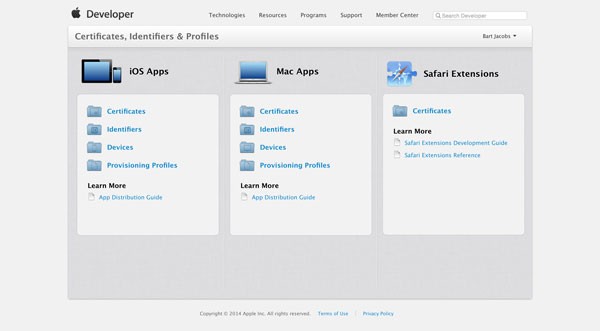
To complete the next step, you need to sign into your iOS developer account at Apple's iOS Dev Center. Choose Identifiers from the iOS Apps sections.
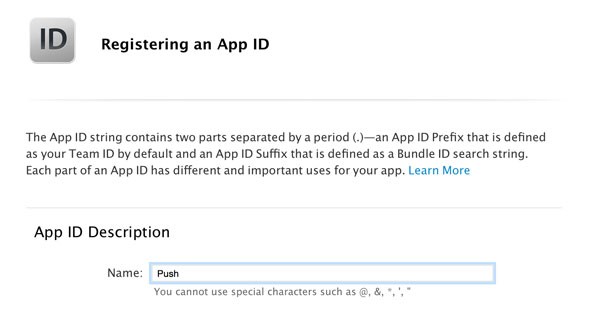
Click the plus button in the top right and enter an App ID Description. This helps you identify the App ID later.
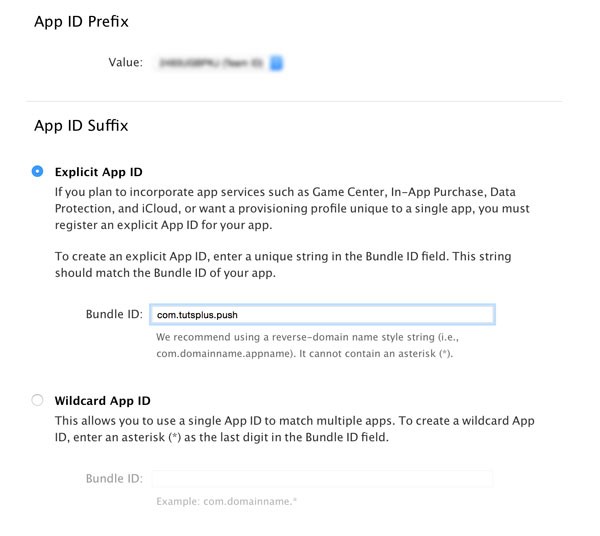
You can leave the App ID Prefix as is, but the App ID Suffix needs to be set to Explicit App ID, instead of Wildcard App ID. If you want an application to receive remote notifications, then you need to use an Explicit App ID, such as com.tutsplus.push, instead of com.tutsplus.*.
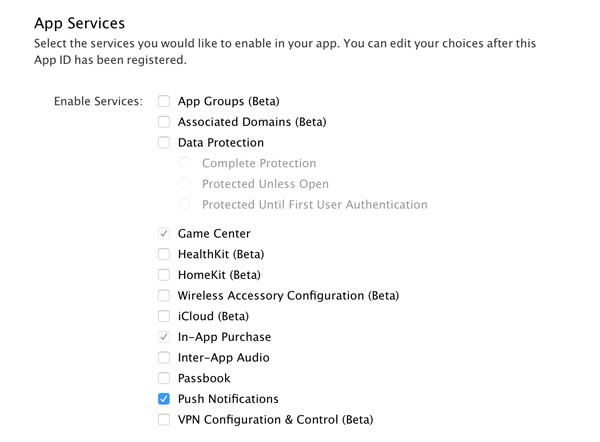
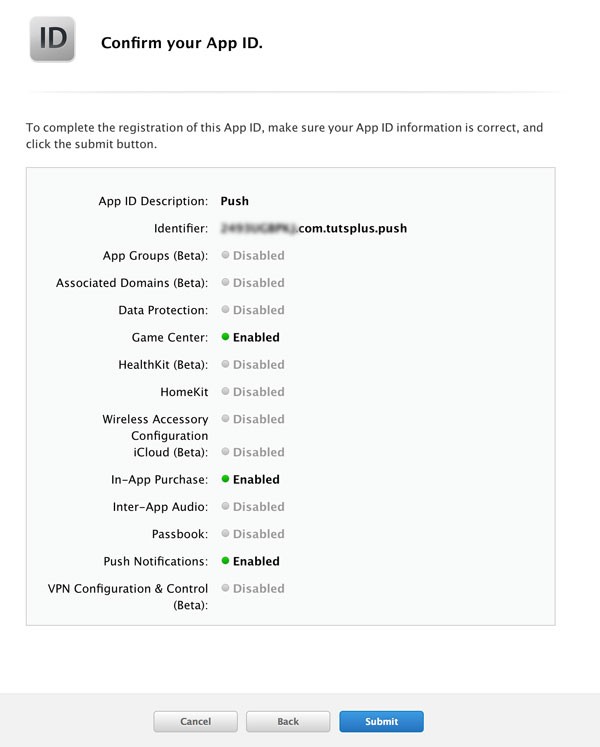
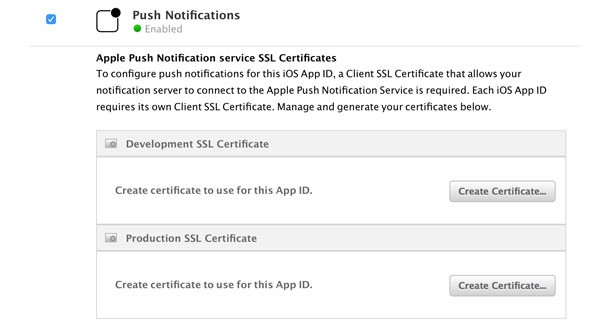
In the section App Services, enable Push Notifications. Click Continue to submit the form and click Submit to create the App ID.
From the list of App IDs, select the one you just created and click the Edit button below it. Scroll down until you see the section that covers push notifications. You should see two buttons labeled Create Certificate... as shown below.
As I mentioned earlier, your backend communicates with Apple's servers to send remote notifications to your application. Your backend sends remote notifications to your application via Apple's servers. For this reason, Apple needs to know that only your servers can connect with their servers. You don't want someone else to send remote notifications to your application.
Apple therefore requires you to create an SSL certificate. Many developers cringe at the words "certificates" and "provisioning", but it's really not that difficult. Follow along and you'll be ready in less than two minutes.
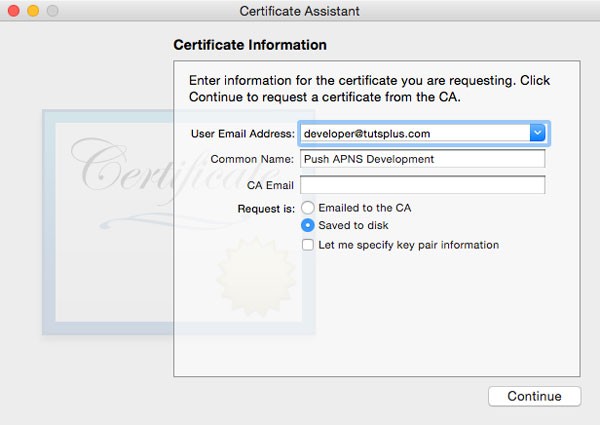
Open Keychain Access on your development machine and select Certificate Assistant > Request a Certificate From a Certificate Authority... from the Keychain Access menu. Double-check that no key is selected in Keychain Access when you select this option.
Enter an email address and a Common Name to identify the certificate later. Leave the CA Email field empty and select Saved to disk. Click Continue and save the certificate signing request to your hard drive.
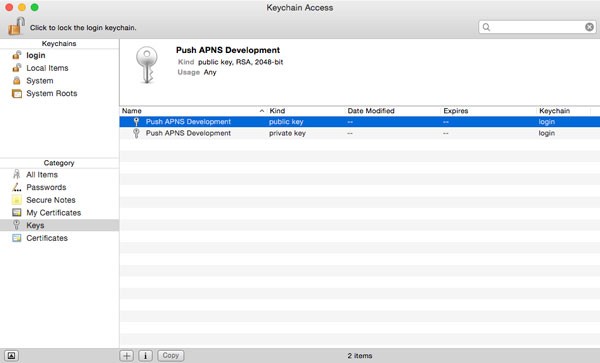
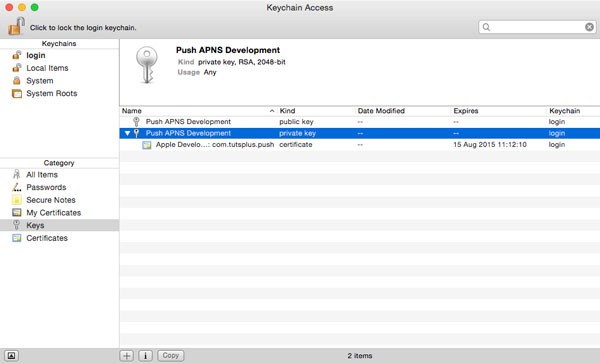
You have created a few things by completing this step. You've created a certificate signing request as well as a public and private key. The keys should be visible in Keychain Access as shown below.
Head back to the iOS Dev Center and click the Create Certificate... button that we saw earlier. Apple tells you which steps you need to take to create the certificate signing request, but we've already completed those. Click Continue, upload the certificate signing request by clicking the Choose File... button, and hit Generate to generate the SSL certificate.
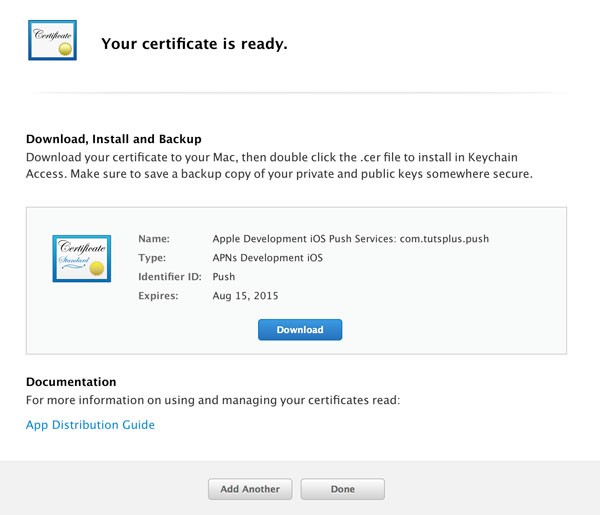
As Apple instructs, download the certificate and double-click it to install it in Keychain Access. Double-check that the certificate is added to Keychain Access and linked to the correct private key.
The next step, application provisioning, is something that trips up many developers. Let me walk you through it.
5. Application Provisioning
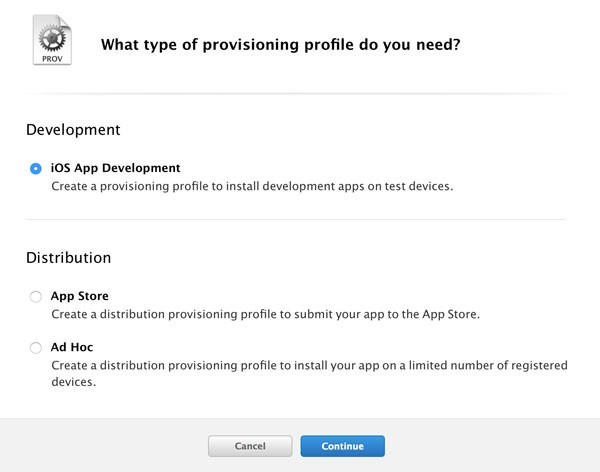
Before we can test our push notifications setup, we need to create a provisioning profile for our application. In the iOS Dev Center, select Development in the Provisioning Profiles section. Click the plus button in the top right and select iOS App Development under the Development section.
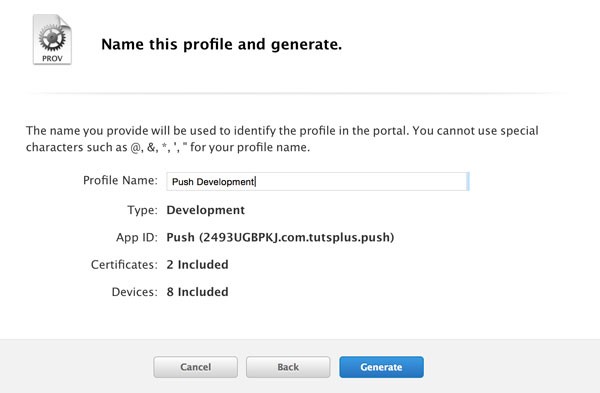
Click Continue and select your App ID from the list. Select the certificates you want to include in the provisioning profile and click Continue. Because we're creating a provisioning profile for development, we also need to specify which devices need to be included in the provisioning profile. Make sure your test device is included. Give the provisioning profile a sensible name and click Generate.
Download the provisioning profile and drag it in Xcode to add it. Update your target's build settings in Xcode to use the new provisioning profile. Build and run your application to make sure that everything works as expected.
If you run into issues, then double-check that the bundle identifier of your application matches that of the App ID. Note that a bundle identifier is case sensitive.
If you've followed the steps outlined in this tutorial, your application should prompt you with the following message.

If you tap OK, your application will ask the operating system for a device token. If this is successful, the application:didRegisterForRemoteNotificationsWithDeviceToken: method of the UIApplicationDelegate protocol is invoked, handing you the device token. Because we added a log statement to this method, the device token should also be logged to the console in Xcode.
Push[2182:60b] Did Register for Remote Notifications with Device Token (<131cec1a 64cf8f4c 80009196 6157311d c774df92 056c74c2 e5538e52 db4848f1>)
6. Sending Push Notifications
To test if any push notifications you send arrive, you need to have a backend in place that your application can send the device token to. That backend can then connect with Apple's servers to send push notifications.
I won't cover this aspect of push notifications in this tutorial, but this is the easy part of push notifications, especially if you're using a service like Parse or Urban Airship.
You can also use Houston, a Ruby gem developed by Mattt Thompson, which makes sending push notifications very easy.
Conclusion
I hope this tutorial has shown you that push notifications aren't as difficult to set up as most developers think. It's true that it takes a bit of fiddling with keys and certificates, but once you understand the moving parts, then it's not that difficult to understand and set up.
The truth is that the hard part is creating keys and certificates. Handling push notifications in your iOS application is very easy and straightforward.

Comments