In the first post in this series I gave a quick overview of Grunt and in the next post I'm going to walk you through the necessary steps as to how using Grunt can improve your WordPress development skills.
Specifically, we'll talk in-depth about the necessary files like package.json and Gruntfile.js, but for now we are going to create a few sample files so that you can run Grunt with your WordPress theme or plugin project.
Creating Your Project Files
Before getting started, it may help to review the content mentioned in the first article of this series.
Once you're all caught up, head back to this article and we'll get started with creating our project files. This will ultimately give us an overview as to what it looks like to have Grunt configured for any given project.
In the next article, we'll take a look at how to do this specifically for WordPress work, but we'll focus on a more generic approach for now.
1. Create a package.json File
The first thing we will do is create a package.json file in the project's root. Inside that new file, add the following:
{ "name": "project-name", "version": "1.0.0", "description": "Awesome project" }
There's no need to add the devDependencies object, as it will get added automatically when we install Grunt tasks via the command line.
2. Install Tasks
To install Grunt tasks, you need to switch over to your command line tool of choice. If you are on a Mac, this would be Terminal or iTerm. If you are on a PC, then I would suggest using PowerShell.
First navigate to your project's root folder (`cd development-folder/project-folder`). Next we are going to install a task to compile LESS files. We are going to install the grunt-contrib-less task, so type in the following into your command line and hit Enter:
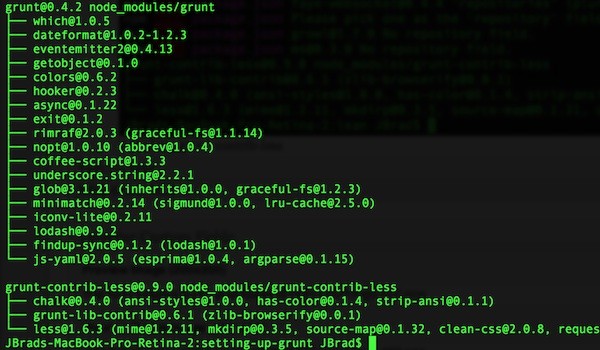
npm install grunt-contrib-less --save-dev
You will start seeing a bunch of lines being printed out as the task and all of its dependencies are being downloaded from npm. Once it's done, you should see something like this:
Now you should be able to go to your package.json file and see grunt-contrib-less added to your `devDependencies` object as well. You will also add the version number next to the name. I could talk about version notation in a whole other post, but for now, know that the tilde refers to the version with which we're currently working.
At this point, you should see the following:
{ "name": "project-name", "version": "1.0.0", "description": "Awesome project", "devDependencies": { "grunt-contrib-less": "~0.9.0" } }
Next up, let's add a task to watch for changes in our `.less` files. We are going to use the grunt-contrib-watch task. Hop back over to the command line and hit Enter:
npm install grunt-contrib-watch --save-dev
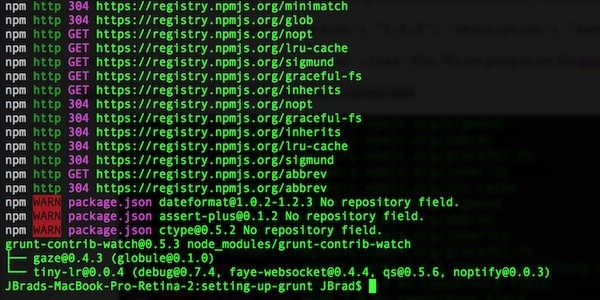
Again you should see some output on the screen and once it's complete, it will be added to your package.json file. It should now look something like this:
{ "name": "project-name", "version": "1.0.0", "description": "Awesome project", "devDependencies": { "grunt-contrib-less": "~0.9.0", "grunt-contrib-watch": "~0.5.3" } }
Hopefully you are now getting the hang of it and you can use the same process to add other Grunt tasks. Just a reminder to always append the `--save-dev`.
Gruntfile.js
Now that we have a couple of Grunt tasks installed, let's start using them. The first thing we are going to need to do is create a Gruntfile.js file in our project's root folder. This is where we are going to specify our tasks and configure them.
To do this, add the following to the file:
module.exports = function(grunt) { }
Tasks
The first thing we need to do is load in our tasks so we can execute them. You do this by adding using the loadNpmTasks function for each task. Please add the following inside the curly braces:
grunt.loadNpmTasks('grunt-contrib-less');grunt.loadNpmTasks('grunt-contrib-watch');
The next thing we need to do is set up the configuration for our installed Grunt tasks. We need to use the initConfig function like this:
grunt.initConfig({ pkg: grunt.file.readJSON('package.json'), });
Now after the comma, we will add our configuration for each task we installed. You will usually find examples of how to configure each task in the README.md file in the project on GitHub. Each task will have different configuration options, so make sure to check out the documentation first.
1. LESS Task
The first task we are going to configure is the grunt-contrib-less task. This one will compile our .less files into .css files for us. You will want to create a new folder for your .less files and create a new one. I usually create a css/less folder and put all of my .less files in there.
Go ahead and add a new file named style.less and add some code in it like so:
a { color: blue; &:hover { color: red; } }
Now, let's go back to our Gruntfile.js file and add the following:
less: {

options: {

paths: 'css/less',

yuicompress: true

},

files: {

'style.css': 'css/less/style.less'

}

}
Once you save the file, you should be able to flip over to the command line and type in grunt less and hit Enter. This will kick off the grunt task and compile our .less file and create a new style.css file in our project's root folder.
2. Watch Task
Now that we have a task for compiling our .less files, let's add a watch task for it. Who wants to go to the command line and run grunt less each time after we make changes to a file, right?
After our previous configuration, add a comma then the following:
watch: {

less: {

files: 'css/less/*.less',

tasks: 'less'

}

}
Once you save the file, flip back over to the command line and type in grunt watch. This should see the following:
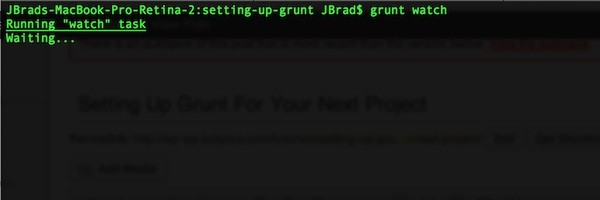
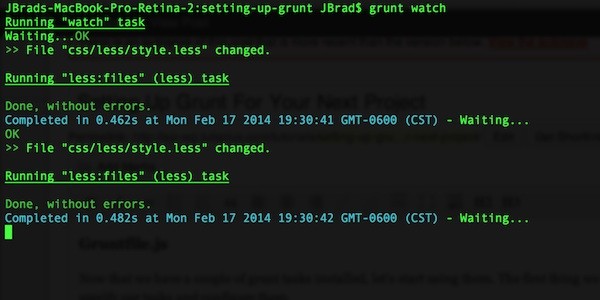
This means that the Grunt watch is waiting for any changes to one of the files you specified in your configuration. Go to your style.less file and make a change like so:
a { color: blue; &:hover { color: green; } }
Once you save the file, the watch task will kick off and compile your .less files into your style.css file. Once it completes, it will keep watching those files and ready for another change.
Since it's running, all you need to do now is make a change in a file, save it, then flip over to your browser to see the changes.
Conclusion
We now have everything in place to use Grunt with your next project. This was quite a simple setup and I'm sure you can see all the possible tasks you can have in your project. Later in the series, I am planning on covering more advanced features with Grunt like custom tasks, nested configuration and other goodies.
But first, we'll take a look at how to incorporate this into our WordPress projects.

Comments