Hello and welcome to a second edition of Setting Up a Mac Dev Machine From Zero to Hero With Dotfiles. Since I wrote the first article, a few things have changed.
This article will go over what's changed, with some added tips and tricks along the way. After reading this article you'll be well on your way to getting a new Mac up and running as efficiently as possible.
Introduction
In the last article I went over each file individually and how to use them. Since writing the article I've had a few questions regarding how I go about performing certain tasks at the very start, with a new Mac that is completely fresh. So in this article I'm going to describe the steps of setting up a completely new Mac and hope to answer these questions along the way.
I'm going to assume you've read my previous article. If you haven't, even though some things are a bit different now I'd recommend at least having a quick skim read over it.
As mentioned in the previous article as well, it'd help if you are familiar with the basics of Git and the command line.
Disclaimer
As with many settings, things are very much down to personal taste. I'll be going over the way I currently set up my Mac. Chances are you won't agree with everything, and chances are that my future self will be inclined to agree with you.
I encourage you to find out what works for you and share your thoughts. GitHub is a great place for this to happen and there are many wonderful dotfiles repositories on there to check out.
OK, Let's Do This!
Once you've switched your Mac on and gone over the initial Mac prompts, the first thing to do is use spotlight to install git. Spotlight is the default app for searching for things on your Mac. We can open it with the shortcut Command-Spacebar or by clicking the magnifying glass icon in the top right of the screen. Now we can search for and open Terminal.
Git
With Terminal open, we can now install git.
$ git
This prompts git to install. With git installed, next we want to grab our dotfiles repository and run it. It's possible to clone this anywhere, as when we run the dotfiles there's a script that will move them to the correct paths.
If you’re on an existing machine, I’d recommend backing up your existing dotfiles first (Finder > Command-Shift-G > ~). If you can’t see your dotfiles, they may be hidden. In Terminal, run defaults write com.apple.finder AppleShowAllFiles YES, and then killall Finder. You should now be able to see all your dotfiles. Copy and paste them to a safe place to back them up. This way if anything unexpected happens, you can always revert to your old dotfiles.
I like to have a GitHub folder so I create this with mkdir GitHub, then cd into it.
After we’ve installed our dotfiles we can improve this step by using a custom alias mkd. mkd not only creates the folder, but will automatically cd into the folder you've just created. Little time savers like this soon add up in a day when you're using them frequently.
Now I’m going to clone the repo into the GitHub folder and run it with:
$ git clone https://github.com/s10wen/dotfiles.git && cd dotfiles && source bootstrap.sh
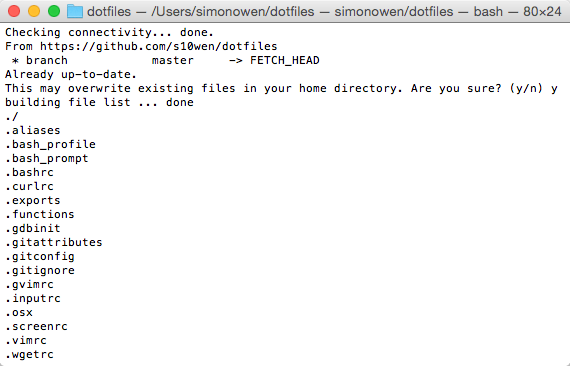
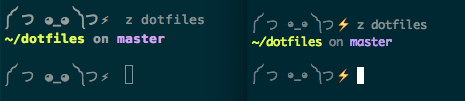
After running this, my Terminal now looks like:

We have two errors, but that's OK, because we'll set these up shortly. You'll also notice I've substituted the default $ with my ASCII art friend with a lightning bolt. The Terminal need not be a scary place.
Something .extra
Next, I grab my .extra file. I keep this separate from my main repo to prevent people accidentally committing with my name. Here's what my .extra looks like:
# Git credentials
# Not in the repository, to prevent people from accidentally committing under my name
GIT_AUTHOR_NAME="Simon Owen"
GIT_COMMITTER_NAME="$GIT_AUTHOR_NAME"
git config --global user.name "$GIT_AUTHOR_NAME"
GIT_AUTHOR_EMAIL="[email protected]"
GIT_COMMITTER_EMAIL="$GIT_AUTHOR_EMAIL"
git config --global user.email "$GIT_AUTHOR_EMAIL"
I have my public dotfiles available on GitHub. Any dotfiles that contain personal information I keep in a private repository on BitBucket.
Move the .extra file to your home directory. As mentioned previously, you can get to your home directory quickly using the Finder shortcut Command-Shift-G > ~.
OK, to recap, we have now cloned our repo, run it, and set up our .extra file.
Fancy a Brew?
As this is a new machine setup, I'm also going to install homebrew. This will allow me to run the brew.sh file which installs all the lovely Homebrew formulae. Mathias has a whole bunch of stuff in this file, and I'm sure it's all very useful, but I personally don't use it all, so anything I'm unsure of I have commented out for now.
Install homebrew with:
$ ruby -e "$(curl -fsSL https://raw.githubusercontent.com/Homebrew/install/master/install)"
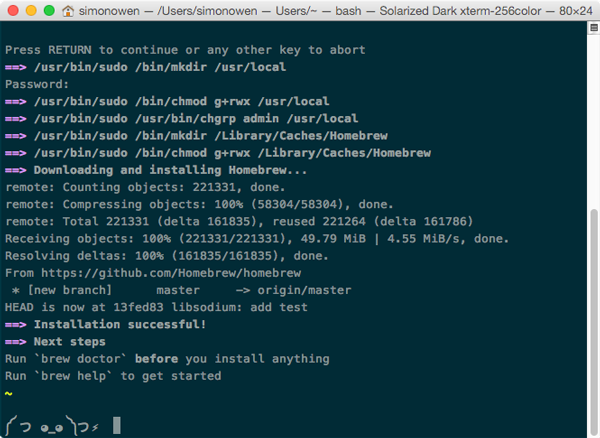
Now that Homebrew is installed, we can run bash brew.sh.
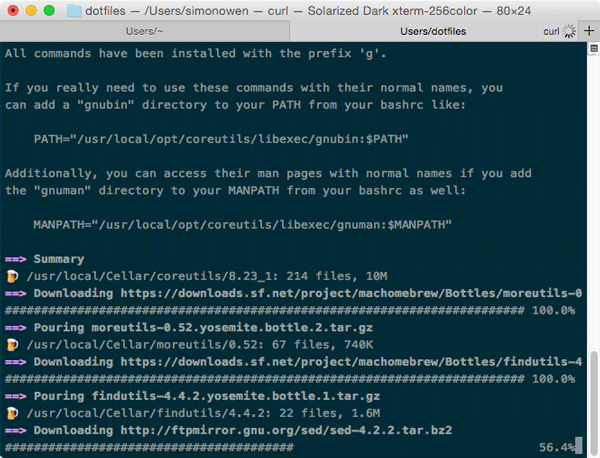
Whilst brew is installing, which can take a few minutes, I download and install my favourite apps.
Apptastic
- iTerm 2
- Alfred
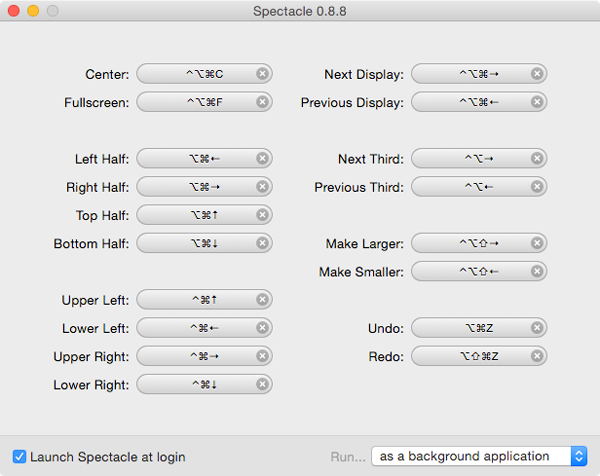
- Spectacle
- Sublime Text 3
- Gitbox
- Chrome
- XtraFinder
- App Store > Xcode
After installing the apps, I then set up the preferences where required. For Spectacle I have this automated in the .osx file.
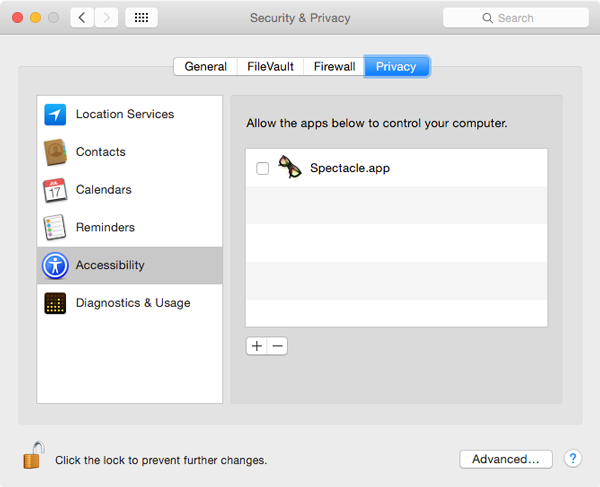
In Yosemite, some apps require an extra Accessibility setting. This can be found in System Preferences > Security & Privacy.
iTerm 2
The default Terminal is good, but iTerm 2 adds some extra features, such as nicer icons.
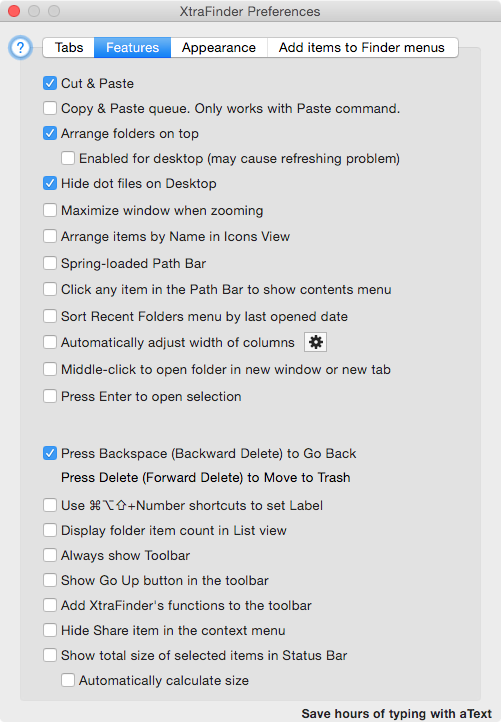
XtraFinder
With XtraFinder I like being able to Copy & Paste and also Arrange folders on top.
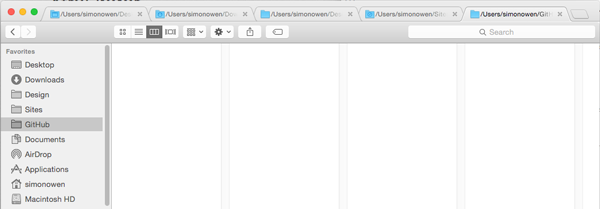
I also like to have consistent Finder favourites, and use XtraFinder to keep the tab order the same.
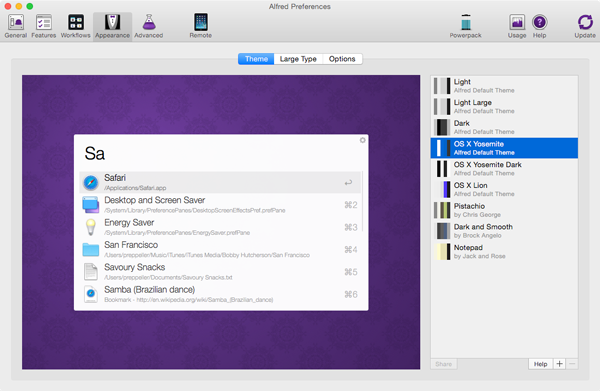
Alfred
I update the Default Results so I can get to folders quickly:
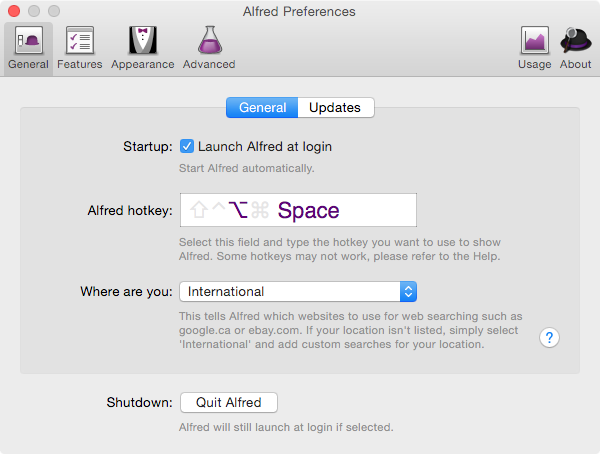
I also hide the UI stuff so it's nice and clean.
Hmm.. interesting... installing Alfred via the App Store you get fewer options. If you install the app from the site, you get the lovely OS X Yosemite theme.
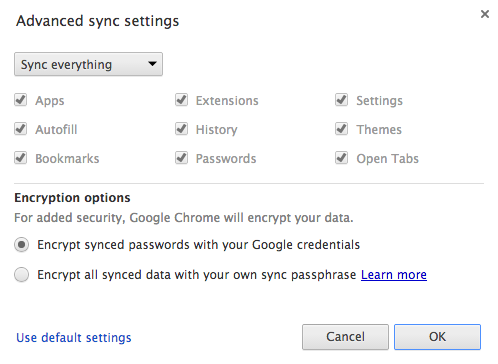
Chrome
As I'd previously set up Chrome to remember my settings, I can simply log in:
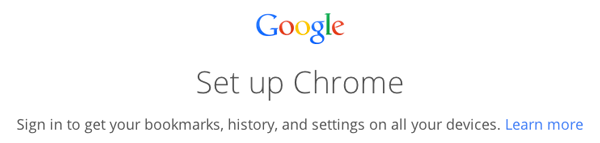
And sync all of my settings. Lovely.
Install All the Things
Next up I run the install-deps.sh file. A few things I do here:
- rupa/z
- jekyll
- symlink Sublime Text
Rupa Z
Mentioned in my previous article.
Jekyll
I use Jekyll for my blog, and I love writing in Markdown. It's quick and efficient, and is used heavily on GitHub.
Sublime Text Symlink
This allows me to open the current folder and files in Sublime Text from the Terminal with s.
If you have trouble setting this up, please see this handy post on Stack Overflow.
OS Sexy
Next up is my favourite file! The mighty .osx file.
Run:
$ bash .osx
On running the command it will ask you for your password once. Enter your password, hit Enter and boom! Let it do its magic.
After it's run all the commands, I like to give the computer a restart to make sure everything in the .osx file took affect.
Now I have all my favourite settings applied and ready to use. Some of my favourites include:
- Check for software updates daily, not just once per week.
- Set a blazingly fast keyboard repeat rate.
- Stop iTunes from responding to the keyboard media keys.
- Save screenshots in PNG format.
- Disable shadow in screenshots.
- Disable the warning before emptying the Trash.
- Disable Dashboard.
- Hide Spotlight tray-icon (and subsequent helper).
- Don’t display the annoying prompt when quitting iTerm.
- Menu bar: Set date and time format, e.g. Sun 11 Aug 16:55.
- Mute all sounds, including volume change feedback.
- Customise hot corners:
- Bottom left → Desktop
- Top right → Mission Control
- Bottom right → Start screen saver
And there you have it! I now have all my custom styles, shortcuts and Mac super powers at my disposal.
Extra Thoughts and Considerations
Taking a first look at an established dotfiles repo may seem daunting at first. I'd recommend small steps. Have a read over a few repos and add some of the things you think will be of most use to you to your own repo.
If you run something and get an error, don't panic. Things do go wrong and break, especially with major releases such as recently with Yosemite.
For example, on the latest run of my dotfiles repo I noticed that the notification icon was still there. Mathias's repo has over 10,000 stars on GitHub and there's a great community there submitting issues and pull requests. I did a quick search, and lo and behold found someone had already reported the issue.
I'm always thinking of ways to improve my dotfiles. If I think of something I'll add it as an issue. It may be that I don't have time to tackle it straight away, but having it there will be a reminder and give me time to think of the best approach. Who knows, someone might even have already done it and submit a pull request!
Conclusion
Hopefully now you'll be well on your way to reducing laborious, time-consuming, mundane tasks, and be able to focus on doing great, exciting things efficiently and quickly.
Please don't hesitate to ask any questions and I'll do my best to answer them. I'd also love to hear from you any things you've particularly found useful. I'm always looking to improve.
Finally, a big thanks again to @mathias for all the hard work he puts into maintaining his dotfile repo and anyone that has contributed.
Till next time, thanks for reading.

Comments