In this Quick Tip, I'll show you how to create a Shapshot Tool that copies part of the stage and saves the result as a PNG image.
Final Result Preview
This is the final result. Just click the stage and then drag the mouse to take a snapshot.
Step 1: Download the as3corelib Class
Create a new folder for this project and give it any name you want. Go to Github and download the latest version of the as3corelib Class. For this Quick Tip I've used version .93. Extract the ZIP file and go to as3corelib-.93 > src.
Copy the com directory to your newly created folder. This package has a very useful PNGEncoder Class that we will use for encoding the
snapshot into a PNG image.
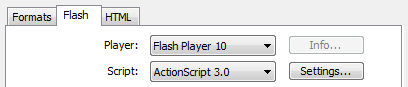
Step 2: Setup your Flash File
Launch Flash and create a new Flash Document. Make sure it's set to publish to Actionscript 3.0 and Flash Player 10. You can check this in the Properties
panel or by selecting Publish Settings... and then clicking on the Flash tab.
Step 3: Content to be Snapped
We need some content in the Flash file to check if the snapshot tool is working properly. We're going to create some circles and place them randomly around the stage. Create a new Document Class called Circles.as and add the following code. Remember to link the Class to the Flash file by writing Circles in the Class field in the the Properties Panel.
package
{
	import flash.display.Shape;
	import flash.display.Sprite;

	public class Circles extends Sprite
	{
		private var _circleCount:int = 20;

		public function Circles()
		{
			makeCircles();
		}

		private function makeCircles():void
		{
			for (var i:int = 0; i < _circleCount; i++)
			{
				var circle:Shape = new Shape();
				circle.graphics.lineStyle(1, 0xCCCCCC, 1);
				circle.graphics.beginFill(0x333333, 0.5);
				circle.graphics.drawCircle(Math.random() * stage.stageWidth, Math.random() * stage.stageHeight, (Math.random() * 40) + 20);
				circle.graphics.endFill();
				addChild(circle);
			}
		}
	}
}
Our snapshot function will work with any stage contents, though, so don't feel that you have to restrict yourself to simple shapes!
Step 4: Create the SnapShot Class
Create a new Class file and give it a name of SnapShot.as. This is the Class that will hold all the methods used to take a snapshot. Add the following code to the Class.
package
{
	import flash.display.Stage;

	public class SnapShot
	{
		private var _stage:Stage;

		public function Snapshot() {}

		public function activate(stage:Stage):void
		{
			_stage = stage;
		}
	}
}
Add the following lines of code to the Circles Class. We use the activate() method to pass a reference to the Stage along to the SnapShot Class. We do this to so we can access the content on the Stage.
package
{
	import flash.display.Shape;
	import flash.display.Sprite;

	public class Circles extends Sprite
	{
		private var _circleCount:int = 20;
		private var _snapshot:SnapShot;

		public function Circles()
		{
			makeCircles();
			_snapshot = new SnapShot();
			_snapshot.activate(stage);
		}

		private function makeCircles():void
		{
			for (var i:int = 0; i < _circleCount; i++)
			{
				var circle:Shape = new Shape();
				circle.graphics.lineStyle(1, 0xCCCCCC, 1);
				circle.graphics.beginFill(0x333333, 0.5);
				circle.graphics.drawCircle(Math.random() * stage.stageWidth, Math.random() * stage.stageHeight, (Math.random() * 40) + 20);
				circle.graphics.endFill();
				addChild(circle);
			}
		}
	}
}
Step 5: Drawing the Boundaries
Expand the SnapShot Class to include the following methods. These methods are used to draw the boundaries frame, which allows users to select which part of the stage will be copied to the snapshot.
package
{
	import flash.display.Shape;
	import flash.display.Stage;
	import flash.events.Event;
	import flash.events.MouseEvent;

	public class SnapShot
	{
		private var _stage:Stage;
		private var _boundary:Shape;
		private var _originX:int;
		private var _originY:int;
		private var _mouseX:int;
		private var _mouseY:int;

		public function SnapShot() {}

		public function activate(stage:Stage):void
		{
			_stage = stage;
			addMouseListeners();
		}

		private function addMouseListeners():void
		{
			_stage.addEventListener(MouseEvent.MOUSE_DOWN, onMouseDown);
			_stage.addEventListener(MouseEvent.MOUSE_UP, onMouseUp);
		}

		private function onMouseDown(e:MouseEvent):void
		{
			_stage.addEventListener(MouseEvent.MOUSE_MOVE, drawBoundaries);

			//These values are used later as a starting point for the boundary.
			_originX = _stage.mouseX;
			_originY = _stage.mouseY;
		}

		private function drawBoundaries(e:MouseEvent):void
		{
			if (_boundary == null) { _boundary = new Shape(); }

			clearBoundaries()

			//This is to make the mouseY value stay within the limits of the Stage.
			_mouseY = Math.max(Math.min(_stage.mouseY,_stage.stageHeight), 0);
			//This is to make the mouseX value stay within the limits of the Stage.
			_mouseX = Math.max(Math.min(_stage.mouseX,_stage.stageWidth), 0);

			_boundary.graphics.lineStyle(2, 0x0, 0.5);
			_boundary.graphics.drawRect(_originX, _originY, _mouseX - _originX, _mouseY - _originY);
			_boundary.graphics.lineStyle(4, 0x0, 0.2);
			//This code makes sure we always draw from the top left point to the bottom right.
			_boundary.graphics.drawRect(Math.min(_originX, _mouseX) - 3, Math.min(_originY, _mouseY) - 3, Math.abs(_mouseX - _originX) + 6, Math.abs(_mouseY - _originY) + 6);
			_stage.addChild(_boundary);
		}

		private function clearBoundaries():void
		{
			_boundary.graphics.clear();
		}

		private function onMouseUp(e:Event):void
		{
			_stage.removeEventListener(MouseEvent.MOUSE_MOVE, drawBoundaries);
			clearBoundaries();
		}
	}
}
We start by checking if the user has clicked on the Stage. When he clicks on the stage we start running the drawBoundaries() method whenever the mouse is moved. This method draws the boundaries; whatever falls within the thin black line will be part of the snapshot. When the user releases the mouse we stop checking for mouse movements.
Step 6: Stage Content to Bitmap
Import the BitmapData and Matrix Classes and add the _content property to the list of private properties.
package
{
	import flash.display.BitmapData;
	import flash.display.Shape;
	import flash.display.Stage;
	import flash.events.Event;
	import flash.events.MouseEvent;
	import flash.geom.Matrix;
	import flash.geom.Rectangle;

	public class SnapShot
	{
		private var _stage:Stage;
		private var _boundary:Shape;
		private var _content:BitmapData;
		private var _originX:int;
		private var _originY:int;
		private var _mouseX:int;
		private var _mouseY:int;
Add the following code to the bottom of the Class:
private function onMouseUp(e:Event):void
{
	_stage.removeEventListener(MouseEvent.MOUSE_MOVE, drawBoundaries);
	clearBoundaries();
	createBitmap();
}

private function createBitmap():void
{
	//We add the -2 to offset for the boundary line.
	_content = new BitmapData(Math.abs(_mouseX - _originX) - 2, Math.abs(_mouseY - _originY) - 2);
	//The -1 is added for the same reason, to keep the line from appearing in the final image.
	var bitmapMatrix:Matrix = new Matrix(1, 0, 0, 1, -Math.min(_originX, _mouseX) - 1, -Math.min(_originY, _mouseY) - 1);
	_content.draw(_stage, bitmapMatrix);
}
The createBitmap() method creates a new BitmapData object with the width and the height of the content area inside the boundary. The matrix variable transitions (moves) the image so that when the draw() method is called it starts copying from the top left corner of the boundary area.
Step 7: Saving the Bitmap
To save the bitmap we need to import several Classes.
- The
ByteArrayClass is used to encode theBitmapDataobject. - The
PNGEncoderClass is used to convert the encoded data into a PNG Image. - The
FileReferenceClass is used to save the image to the users hard drive.
We've also added an _imageCount property which we use to increment the image names.
package
{
	import com.adobe.images.PNGEncoder;
	import flash.display.BitmapData;
	import flash.display.Shape;
	import flash.display.Stage;
	import flash.events.Event;
	import flash.events.MouseEvent;
	import flash.geom.Matrix;
	import flash.geom.Rectangle;
	import flash.net.FileReference;
	import flash.utils.ByteArray;

	public class Snapshot
	{
		private var _stage:Stage;
		private var _boundary:Shape;
		private var _content:BitmapData;
		private var _originX:int;
		private var _originY:int;
		private var _mouseX:int;
		private var _mouseY:int;

		private var _imageCount:int = 1;
Add the following code to the bottom of the SnapShot Class:
private function createBitmap():void
{
	_content = new BitmapData(Math.abs(_mouseX - _originX) - 2, Math.abs(_mouseY - _originY) - 2);
	var bitmapMatrix:Matrix = new Matrix(1, 0, 0, 1, -Math.min(_originX, _mouseX) - 1, -Math.min(_originY, _mouseY) - 1);
	_content.draw(_stage, bitmapMatrix);

	saveBitmap();
}

private function saveBitmap():void
{
	var encodedContent:ByteArray = PNGEncoder.encode(_content);
	var fileWindow:FileReference = new FileReference();
	fileWindow.save(encodedContent, "Image_" + _imageCount + ".png");
	_imageCount++;
}
The saveBitmap method is fairly easy to understand. We encode the BitmapData object and save it to the user's hard drive.
We use the _imageCount property to make it easier for user to save several images in a row.
Conclusion
The Snapshot Tool is now complete and with just three lines of code can be implemented into any project.
Make sure you're running Flash Player 10 and that you have the as3corelib package in the correct directory.
I hope you enjoyed this Quick Tip, thank you for reading!

Comments