Want to learn how to use PhoneGap, but don’t know where to get started? Join us as we put together “Sculder”, not only a tribute to an excellent science fiction TV series, but a fully-fledged native mobile application for the believer in you!
Adding Camera Functionality
We left off in the last tutorial in this series just after getting our application into the Phonegap framework and awaiting to add our final piece of functionality: the device camera. The idea behind this tutorial is to allow the user to take a photo with the camera and then have it uploaded to a server. We will not cover the actual uploading of the image, but will leave the space for the functionality to be added. You can find plenty of examples of various implementations for uploading images via PHP, Ruby, and other server side languages elsewhere online. Instead, this tutorial will focus on taking the picture, displaying the picture taken, and giving the user an alert that the picture has been uploaded (the function that your server might fire when it returns a successful upload message).
The first thing we need to do is add a button onto our page:
<div id="camera">
	<button class="camera-control" onclick="capturePhoto();">Capture Photo</button>

    <div style="text-align:center;margin:20px;">
        <img id="cameraPic" src="" style="width:auto;height:120px;"></img>
    </div>
</div>
Next, we need to add a bit of styling for the button to make it look a bit nicer. As we are developing for decent browsers, we can take advantage of some CSS3 styles.
button.camera-control {
  background-color: #f3f3f3;
  background-image: -webkit-gradient(linear, left top, left bottom, color-stop(0%, #f3f3f3), color-stop(50%, #dddddd), color-stop(50%, #d2d2d2), color-stop(100%, #dfdfdf));
  background-image: -webkit-linear-gradient(top, #f3f3f3 0%, #dddddd 50%, #d2d2d2 50%, #dfdfdf 100%);
  background-image: linear-gradient(top, #f3f3f3 0%, #dddddd 50%, #d2d2d2 50%, #dfdfdf 100%);
  border-right: 1px solid #dfdfdf;
  border-bottom: 1px solid #b4b4b4;
  border-right: 1px solid #dfdfdf;
  -webkit-border-radius: 5px;
  border-radius: 5px;
  -webkit-box-shadow: inset 0 1px 0 0 white, 0 1px 0 0 #d5d5d5, 0 -1px 2px 1px #efefef;
  box-shadow: inset 0 1px 0 0 white, 0 1px 0 0 #d5d5d5, 0 -1px 2px 1px #efefef;
  color: #666;
  display: block;
  font: bold 16px "helvetica neue", helvetica, arial, sans-serif;
  margin: 10px auto;
  padding: 7px 0;
  text-shadow: 0 1px 1px #fff;
  width: 150px;
}
button.camera-control:hover {
    background-color: #e5e5e5;
    background-image: -webkit-gradient(linear, left top, left bottom, color-stop(0%, #e5e5e5), color-stop(50%, #d1d1d1), color-stop(50%, #c4c4c4), color-stop(100%, #b8b8b8));
    background-image: -webkit-linear-gradient(top, #e5e5e5 0%, #d1d1d1 50%, #c4c4c4 50%, #b8b8b8 100%);
    background-image: linear-gradient(top, #e5e5e5 0%, #d1d1d1 50%, #c4c4c4 50%, #b8b8b8 100%);
    -webkit-box-shadow: inset 0 1px 0 0 #f2f2f2, 0 1px 0 0 #c9c9c9, 0 -1px 2px 1px #e3e3e3;
    box-shadow: inset 0 1px 0 0 #f2f2f2, 0 1px 0 0 #c9c9c9, 0 -1px 2px 1px #e3e3e3; }
  button.camera-control:active {
    -webkit-box-shadow: inset 0 0 30px 0 #999999, 0 1px 0 0 white;
    box-shadow: inset 0 0 30px 0 #999999, 0 1px 0 0 white;
}
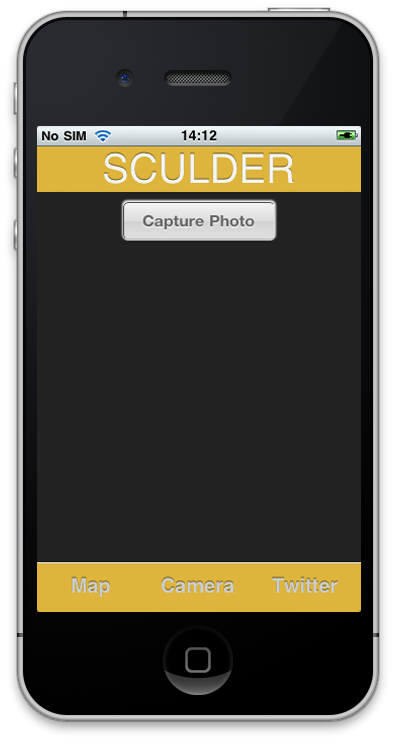
If you now run and test your app (either the simulator or on a device) you should have a page like this:
Now we need to tie in the functionality. First, we start off with the capturePhoto() function that will start up the camera:
function capturePhoto(){
	navigator.camera.getPicture(uploadPhoto,null,{sourceType:1,quality:60});
}
The success function, uploadPhoto, is the next to be written. This function will upload the photo to our server, output the image to the screen, and also give the user a notification that the image has been uploaded. Let's start by outputting the image to the screen:
function uploadPhoto(data){
// this is where you would send the image file to server

//output image to screen
	cameraPic.src = "data:image/jpeg;base64," + data;
}
One of the Phonegap APIs that we didn't really look at before, but we will use here, is the notification API. The Notification API is for alerting the user of an action performed, like the alert() Javascript functionality, but tailored for the specific device that it is running in. It also has the ability to beep, vibrate, or just simply pop-up and alert a dialog message. For this app, we are just going to be using the notification.alert(), which is a dialog box that can accept some customizable options. The basic usage is:
navigator.notification.alert(message, alertCallback, [title], [buttonName])
Within our uploadPhoto function, we are going to use the notification.alert() to display a message that the photo has been uploaded to the server. Our code looks like this:
navigator.notification.alert(
	'Your Photo has been uploaded',	// message
	okay,					        // callback
	'Photo Uploaded',            	// title
	'OK'                  			// buttonName
);
We also need to write the okay function to make sure that we don't run into any errors when we run our code. It can do anything you want it to, but it's better used when tied into the server. At the moment, the function will remain empty.
Our uploadPhoto() function now looks like this:
function uploadPhoto(data){
// this is where you would send the image file to server

	cameraPic.src = "data:image/jpeg;base64," + data;
	// Successful upload to the server
	navigator.notification.alert(
		'Your Photo has been uploaded',  // message
		okay,                           // callback
	    'Photo Uploaded',              // title
	    'OK'                          // buttonName
	);

	// upload has failed Fail

	/*

	if (failedToUpload){

	navigator.notification.alert(
		'Your Photo has failed to upload',
		failedDismissed,
	    'Photo Not Uploaded',
	    'OK'
		);

	}
	*/


}

function okay(){
	// Do something
}
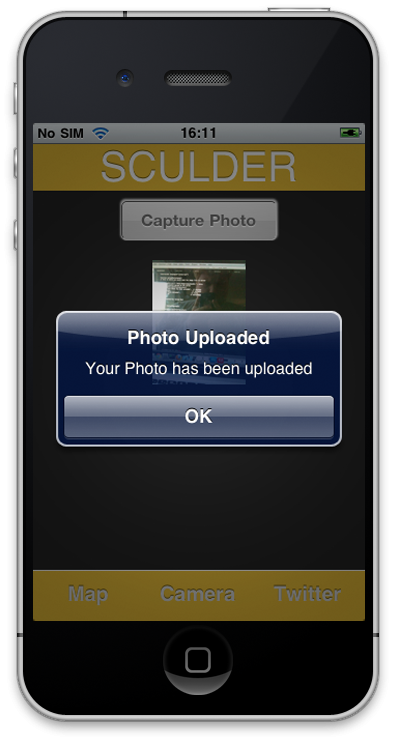
You will now need to run the application on a device, as the simulator has no access to a camera. After taking a picture, you will get the following alert:
Our app is now complete and we are ready to export it as a working application and submit it to the stores!
Exporting for iOS
Please note that in order to distribute an application in the Apple App Store, you must have a paid-for developer certificate from Apple.
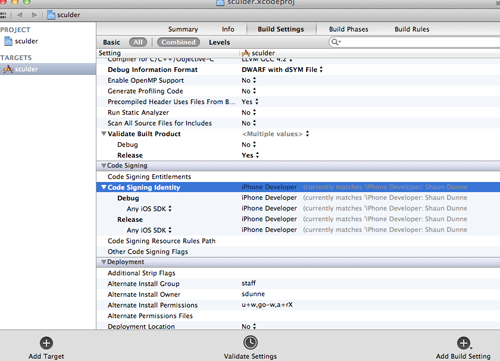
Exporting for the iOS platform can be a bit of a challenge, but as long as you have all your certificates pre-installed and synced up with Xcode (which you would have to have done before you could test on a device) it shouldn't be too challenging after you've done it once. If you double click on your project in Xcode and go to the Build Settings, make sure that your code signing identity is being used for the application.
You now need to go to Product => Archive and send the app to the Archive (Found in the Organizer window). It's possible that you may get an error along the lines of NSAutomaticpool is unavailable, this is due to Automatic Reference Counting (which is new). PhoneGap doesn't support it at the moment, so we just need to switch it off in the build settings for the project. If you go to the build setting and search for -CLANG_ENABLE_OBJC_ARC you will find it and switch it to "no".
Once that is done, you can head to iTunes Connect and begin setting up your app there. Once you have logged in, click on "Manage Applications" and "Add A New App". Go through the Wizard, add the iTunes Icon (512x512px in size) and at least one screenshot of the application. There are some other mandatory fields such as an SKU number (this is a tracking number for yourself. I personally use 0001 to start and continue from there) and a description. Once you have finished filling out the form, click submit.
Once finished you will be presented with the following
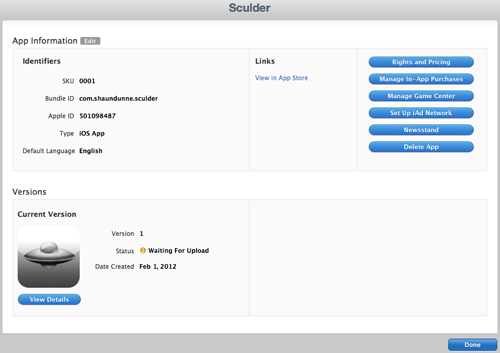
At first, your Applications Status will be "Prepare for Upload", so you need to click "View Details" and then "Binary Upload". Once you've gone through this, your status will now be "Ready for Upload".
Back in Xcode's Organizer we can run the Validate option to check that our app is all good to be submitted to the App Store and hopefully the app will get by with no validation errors.
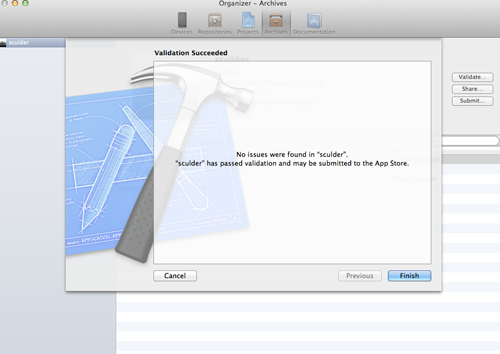
Note: Jumping through all the hoops that Apple presents is not an easy task to master. If you are getting various errors to do with builds failing because provisioning profiles couldn't be found etc, etc, do a quick search on Google and you will find the solution. There are 100 different scenarios with miss-matched certificates that I have faced while trying to build an app for iOS, all solved by using Google. If you are consistently running into issues, feel free to leave a comment below and I will try to help!
Now that our app is valid, we can submit it to the App Store. We click submit, check that our Application and Identity are correct, and then wait for the upload.
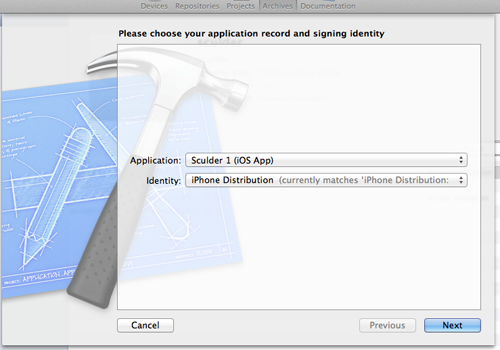
Once done, you can login to iTunes Connect and see that the app is "Waiting for Review". It can often take up to 14 days before your app is in the App Store, so expect to wait for a bit.
Exporting for Android
Thankfully, after all the possible pain you might have gone through with the iOS export, Android is mildly easier. Assuming that you are using Eclipse for your Android development, all you need to do is remove any unused features from the manifest file and then right-click on the project and go down to Android Tools => Export Signed Application Package. Once you have gone through the Wizard to export your package, you need to make sure you create a Keystore. You'll end up with an .apk file, which is what we will upload to the Android market.
Head over to the Android Market publisher's site here and sign in. If this is your first time here you will need to sign up for an account (using your existing Google account), pay $25, and setup a Google wallet account. Once signed up and logged in, you can go ahead and upload your .apk file. It's a much more straightforward process than the iOS route. If you do feel that the form is overwhelming or you're not too sure about something, check out Shane Conder & Lauren Darcey's tutorial here on mobiletuts as they go through it step-by-step. Their entire series on Android development is worth reading if you are at all interested in taking your development further!
Once you're done, it takes no time at all before your app is on the market place and ready to be sold.
Exporting for Other Devices
As stated in the first tutorial of this series, we are going to take advantage of PhoenGap's cloud building system found at build.phonegap.com. In the long run, using this service does cost money, but the other option of running various different SDKs across various operating systems and then porting the app over each one might be more time consuming and hassle than the extra money it costs to use the service is worth.
All we need is a zip file containing our HTML, CSS, and JavaScript. Upload it to the service and you will then be taken to a "Your Apps" screen where you will see your app available in its various formats:

It's a simple click and download to get the right build. To get started for Blackberry, we need to submit our app to their "App World". Head over to the App World here and click "Get Started". Fill in the pretty straightforward form and then wait.
NOTE: Unfortunately, at the moment (2/8/2012), Blackberry apparently has a backlog of "Vendor" applications. I have been waiting since the beginning of January to be approved but have thus far had no such luck. They are currently running a Playbook promotion for those willing to convert their Android apps, which is causing the backlog. If you are at all interested in signing up to be a Blackberry Vendor, sign up ASAP.
For the other devices supported by PhoneGap's cloud build service, it's worth signing up at their relevant development sites: Nokia and webOS. They are very similar and full of documentation for uploading applications to their relevant markets. They follow the same sort of process (Sign Up, Upload App, Upload Marketing Materials, Wait) and are reasonably straightforward to follow.
Conclusion
We have now finished our app, exported it, and uploaded it to the iOS App Store as well as the Android market. We also used PhoneGap's build service to get a version of our app onto the other platforms we might want to support.
Phonegap is going from strength-to-strength at the moment and continuing to grow (version 1.4 was just recently released). It's well worth getting to know this SDK if you are just starting out in mobile development and have no understanding of the native programming languages behind the Android or iOS platforms. Hopefully this tutorial series has shown you how to do just that!

Comments