This chapter is designed to help you acclimate to Objective-C programming style. By the end of this chapter, you will be able to instantiate objects, create and call methods, and declare properties. Remember that the goal is to provide a very brief survey of the major object-oriented aspects of Objective-C, not a detailed description of each component. Later chapters fill in many of the conceptual details omitted from this chapter.
Creating a Class
Included code sample: HelloObjectiveC With Class
Let's dive right in and create a new Objective-C file. In the Xcode IDE, navigate to File > New > File... or use the Cmd+N shortcut to add a file to your project. The next dialog lets you select which kind of file you would like to create. Under the Cocoa Touch category, select Objective-C class.
You're given an opportunity to specify a name for your new class. Let's call our class Person. For the parent class, use NSObject, which is the top-level object from which all Objective-C classes inherit.

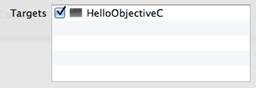
Clicking Next will open a file browser and ask you to enter a Group for your class, as well as a Target. Use the default Group, which should be HelloObjectiveC. Groups are an Xcode-specific mechanism for grouping similar files, but they aren't implemented on the file level. Our new class will appear in the same folder as the rest of the project files, regardless of what group it's in. For Targets, make sure HelloObjectiveC is selected. This ensures the new class is compiled whenever we build the HelloObjectiveC target.
Finally, click Create to create the class. In the Xcode file navigator, you should now find two new classes: Person.h and Person.m. Just like the C programming language, Objective-C uses .h as the extension for header files, which contain the interface for a particular function or class-this is not to be confused with a C# interface, which is called a protocol in Objective-C. The .m file is the corresponding implementation for the Person class.
Separating a class' interface from its implementation makes it possible to hide implementation details from third-party objects. Other files that need to interact with the class import the header file-never the implementation file. This provides the abstract definition necessary to call methods and access properties while being completely independent of the class' implementation.
Components of a Class
In the project navigator, select Person.h to open it in the editor panel. You should see the following Objective-C code:
#import <Foundation/Foundation.h>

@interface Person : NSObject

@end
The #import directive includes another file in the current context. Including a header file gives us access to all of the classes and functions it defines. In this case, we included the Foundation framework. The Foundation framework defines the basic constructs of the Objective-C language-things like strings, arrays, dictionaries, etc.-so it's a necessary part of virtually every Objective-C program.
The @interface directive begins an interface for a class. Next comes the class name, Person, followed by a colon and the parent class, NSObject. As noted earlier, NSObject is the top-level object in Objective-C. It contains the necessary methods for creating and destroying instances, along with some other useful functionality shared by all objects.
Any methods or properties would be declared before the @end directive, but right now, Person.h is an empty interface. We'll change that in a minute, but first let's take a quick glance at the implementation file, Person.m:
#import "Person.h"

@implementation Person

@end
This looks a lot like the header file, but it includes the Person.h header. Implementation files must include their associated header, otherwise they won't be able to find the class that they're trying to implement.
Also notice that this #import directive uses quotation marks instead of angled brackets. Quotation marks should be used to import local headers, while brackets indicate global headers. Global headers reside outside of the project and are linked to the compiler during the build process. Apple's standard frameworks are always included in angled brackets, whereas your project files should be imported with quotation marks.
And of course, the .m file uses the @implementation directive instead of @interface. Note that you don't have to specify the parent class here, since this information is already contained in the header.
Defining Methods
Next, we'll add a method declaration to the Person class. Remember that this is a two-step process: first we have to add it to the interface, and then the implementation. So, change Person.h to the following:
#import <Foundation/Foundation.h>

@interface Person : NSObject

- (void)sayHello;

@end
As you can see, instance methods are declared with a hyphen, the return type in parentheses (void), followed by the method name and a semicolon. Now that we have that in the interface, switch over to Person.m to define the implementation. Note that Xcode added a little yellow triangle next to the @implementation line. If you click it, you'll find a warning message that says Incomplete implementation. This is one of Xcode's numerous debugging features. Let's fix that issue by changing Person.m to the following:
#import "Person.h"

@implementation Person

- (void)sayHello {
	NSLog(@"Hello, my name is HAL.");
}

@end
Like the interface declaration, the implementation for an instance method begins with a hyphen, the return type, and the function name. The implementation itself is defined in the curly braces after the method name, just like a C# method. For sayHello, we just output a message to the console using NSLog().
As you type, Xcode presents some autocompletion options, and it also should have closed your curly braces for you. These behaviors can be changed by navigating to Xcode > Preferences... in the menu bar and clicking the Text Editing icon.
Instantiating Objects
Let's try instantiating our Person class and calling our new sayHello method. Remember that like any C program, main() is the entry point into our HelloObjectiveC application. So, back in main.m, change NSLog(@"Hello, World!"); to the following:
#import <Foundation/Foundation.h>
#import "Person.h"

int main(int argc, const char * argv[]) {
	@autoreleasepool {

		Person *somePerson = [[Person alloc] init];

	}
	return 0;
}
The Person *somePerson expression declares a variable called somePerson and tells the compiler that it's going to hold an instance of the Person class. The asterisk next to the variable name indicates that it's a pointer, which is the most common way to reference objects in Objective-C. We'll discuss pointers in more detail down the road.
Next, the [[Person alloc] init] code creates a new instance of the Person class. The square bracket notation may take some getting used to, but it's conceptually the same as the parentheses used for method calls in C# and other Simula-style languages. The previous code sample is equivalent to the following in C#:
Person somePerson = new Person();
somePerson.init();
The [Person alloc] call allocates the memory required for the new instance, and the init call is used to execute any kind of custom initialization code. Note that there are no "constructor methods" in Objective-C as there are in C# or C++-you must manually call the the init method (or some variant thereof) to set up your object. As a result, virtually all object creation in Objective-C is a two-step process: allocate, and then initialize. You will see this pattern quite often in Objective-C programs.
Calling Methods
Now that we have an object to work with, we can call our sayHello method. Note that the correct terminology in Objective-C is "sending a message," not "calling a method," but for our purposes, we can treat them as synonymous. Add the following line to main.m:
[somePerson sayHello];
Just like the alloc/init methods in the previous example, custom method invocation uses square brackets. Again, this is the same as executing somePerson.sayHello() in C#. Running your program should display Hello, my name is HAL. in the Xcode output panel:

Adding Method Parameters
Aside from the square brackets, Objective-C's method naming conventions are one of the biggest adjustments for developers coming from C#, C++, Java, Python, or pretty much any other language that's not Smalltalk. Objective-C method names are designed to be as descriptive as possible. The idea is to define a method in such a way that reading it aloud literally tells you what it does.
As an example, let's add a name parameter to our sayHello method. First, we need to update the method declaration in the header (Person.h):
- (void)sayHelloToName:(NSString *)aName;
Adding a parameter actually changed the name of the function-the parameter is not an isolated entity as it is in C# (e.g., sayHello(name)). The (NSString *) portion defines the data type of the parameter, and aName is the actual variable that can be accessed in the implementation code, which we'll define now. Change sayHello in Person.m to the code sample that follows. Xcode should autocomplete the new method name when you start typing it.
- (void)sayHelloToName:(NSString *)aName {
	NSLog(@"Hello %@, my name is HAL.", aName);
}
This new NSLog() configuration uses a format string to add the aName argument to the output. We'll cover NSLog() in more detail in the next chapter, but for now all you need to know is that it replaces %@ in the format string with aName. This is roughly equivalent to String.Format() in C#.
Calling the parameter aName might seem redundant with sayHelloToName, but it makes more sense when you read the method as it would be invoked. In main.m, change the sayHello call to:
[somePerson sayHelloToName:@"Bill"];
Now, you should be able to run your program and see Hello Bill, my name is HAL. in the output panel. As you can see, Objective-C method names are verbose, but quite informative. Unlike the C#-style sayHello(name) invocation, Objective-C makes it very hard to accidentally pass the wrong value to a method. Of course, the trade-off is that method names are long, but that's why Xcode provides such a convenient autocompletion feature. We'll see many more verbose (and more practical) examples of Objective-C method names throughout this book.
Defining Properties
Included code sample: With Properties
As with any object-oriented language, Objective-C methods are a means to manipulate the internal state of an object. This state is typically represented as a set of properties attached to an object. For example, we can add a name property to our Person interface to store each instance's name dynamically:
@property (copy) NSString *name;
The @property declaration begins a new property, the (copy) tuple specifies the behavior of the property, and NSString *name defines a property called name that holds a string value. Typically, property declarations are placed before method declarations, but as long as it's somewhere between @interface and @end in Person.h, you'll be fine.
Using @property instead of private attributes gives you access to the @synthesize directive in the implementation file. It lets you automatically create accessor methods for the associated property. For example, in Person.m, add the following (again, property implementations usually come before method implementations):
@synthesize name = _name;
@synthesize is a convenience directive that tells the compiler to generate getter and setter methods for the property. The part after the = sign is used as the instance variable (i.e. private member) for the property, which means we can use _name to access the name property inside of Person.m. For example, try changing the sayHelloToName method to:
- (void)sayHelloToName:(NSString *)aName {
	NSLog(@"Hello %@, my name is %@.", aName, _name);
}
By default, the getter method name is the same as the property name, and the setter has set prepended to the capitalized property name. So, we can dynamically set our Person object's name by changing main.m to the following:
Person *somePerson = [[Person alloc] init];
[somePerson setName:@"HAL 9000"];
[somePerson sayHelloToName:@"Bill"];
Running your program should now produce Hello Bill, my name is HAL 9000.
Summary
This chapter presented the basic components of an Objective-C class. We learned how to separate classes into interface ( .h) and implementation files ( .m), instantiate objects, define and call methods, and declare properties. Hopefully, you're feeling a little bit more comfortable with Objective-C's square bracket notation and other syntactic quirks.
Remember that this chapter was designed to be a quick introduction to Objective-C's OOP constructs, not an in-depth discussion of each component. In the upcoming chapters, we'll take a more detailed look at data types, property declarations, method definitions, as well as the common design patterns of Objective-C programs.
This lesson represents a chapter from Objective-C Succinctly, a free eBook from the team at Syncfusion.

Comments