We're going to look at how to display HTML-formatted text loaded from XML, styled from an external CSS stylesheet with fonts loaded at runtime. We'll also master inline image placement via the HTML <img> embed tag, and adding custom events to HTML text links.
Step 1: Why Use HTML-Formatted Text and External Assets?
It is certainly easy to keep all assets directly in the Flash source file itself, and sometimes that may be the best solution. However, there are some good reasons to keep as much content separate from your Flash document as possible, or even to keep your Flash source solely composed solely of ActionScript.
- Your SWF will load faster. Keeping the content separate from the Flash file allows you to load only the assets you need at runtime, thus delivering your content faster.
- Updates are easier. Instead of requiring a Flash developer to crack open the .fla and republish, all that is necessary is a simple edit to the html or css.
- Multiple applications. The external content is available to use for other applications, such as for creating an HTML5 version of the site for the iPad.
- OOP. Best of all, keeping the content separate from the delivery application is good object-oriented programming. Methods like this are the building blocks for developing systems, templates and components for re-use and rapid development.
Step 2: Set up the Package Directory
Because we will be working with a variety of assets, it is helpful to set up a well-organized file directory structure. First, we create an "HTMLTextBlock" project directory. Within that, add a "source" folder and a "deploy" folder. In deploy, our SWF will reside in the top level along with folders for each type of content. In this demo, we will create a SWF that loads fonts, css, xml and an image. The source folder will contain all our .fla and .as files, which we will create later. For now, your project directory should look like this:

Step 3: Choose Your Fonts
Before you embed fonts on your website, it is important to be aware of font licensing. Just because you have a font installed, even one you have rights to use for print, does not mean that you have permission to use it online. For more information about font licensing, refer to this Themeforest article.
In this tutorial, we will use two fonts, one for the headline and one for the body text. A good place to find high quality, open source fonts is the Google Font Directory. You can't download the font files directly from there, but they can be easily found with a web search. Font Squirrel and Typekit are two more excellent resources for high quality fonts.
When choosing a headline font, look for a style that expresses the personality of your design. For body text, readability is very important, so use a font that displays well at small sizes. Also, be sure to pick a font family with bold, italic and bold italic faces. For this tutorial, we will be using the font Lobster by Pablo Impallari for headlines, and the font family Droid Serif by Steve Matteson for paragraphs.

Quick online searches reveal where we can download the Lobster font and the Droid Serif font family. In our source directory, create a new folder "downloaded fonts" and put the font files there.
Step 4: Creating SWF Files for Runtime Font Embedding
Activate the fonts on your system. Open two new ActionScript 3.0 Flash documents, one for each font, and save to the source directory. We will start with the headline font. From the Library panel, select "New Font..." and in the Family dropdown, select Lobster 1.4. Under name, type "Lobster". For Character ranges, check All. Note, if you are using a font where you know that you will not be using certain characters, you can choose to embed a subset of glyphs from the font, lessening the file size of the SWF.
Next, go to the ActionScript tab. Under Linkage, select Export for ActionScript. When you do, Export in frame 1 will be checked, and the Class and Base Class identifiers will get filled in. Click Done. If you get a warning that the class definition was not found, ignore it.
Next, in the Publish Settings panel, uncheck the HTML checkbox and, in the Flash field, target the fonts folder in the deploy directory by entering "../deploy/fonts/Lobster.swf". This is all that is required to embed a font in a SWF.
However, if we want to be able to load the SWF into another SWF and use its embedded fonts at runtime, we need to register the font. So, in the Actions panel, we must add a line code to frame 1 on the timeline:
Font.registerFont(Lobster);
Now, our font will be available for use in any Flash documents that load the SWF. We could be done here, but we want to check our work, and, more importantly, get the correct font-family name to use in our CSS. Add some more code.
var embeddedFonts:Array = Font.enumerateFonts(false);
for each (var font:Font in embeddedFonts)
{
	trace("Font Embedded: "+font.fontName);
}
Run Publish Preview, and we will see the message below in the output log. Take note of the font name. We will need it later.
Font Embedded: Lobster 1.4
Font Embedded: Lobster 1.4
You might wonder why we are seeing two trace statements. This is due to registerFont() method embedding the font a second time.
Font.registerFont(DroidSerifRegular);
Font.registerFont(DroidSerifBold);
Font.registerFont(DroidSerifItalic);
Font.registerFont(DroidSerifBoldItalic);

var embeddedFonts:Array = Font.enumerateFonts(false);
for each (var font:Font in embeddedFonts)
{
	trace("Font Embedded: "+font.fontName+" "+font.fontStyle);
}
Next, we will create a SWF for the body copy. This time, we are embedding four fonts, one for each style. In our second Flash document, once again, from the Library panel, select New Font... In the Family dropdown, select Droid Serif, and for Style, select Regular. Type "DroidSerifRegular" in the Name field, and remember to set Export for ActionScript. Then, repeat the same steps for the Character ranges and the ActionScript tab. Repeat this process for the bold, italic and italic bold faces. In the actions panel, we will use similar code to what we used for the Lobster font.
Run Publish Preview. This time we will see trace messages for each of the Droid Serif font styles. If you see fewer than eight, check the font settings in the Library panel, because one of the font faces is not being embedded. Once again, take note of the font name from the output log.
Font Embedded: Droid Serif regular
Font Embedded: Droid Serif bold
Font Embedded: Droid Serif italic
Font Embedded: Droid Serif boldItalic
Font Embedded: Droid Serif italic
Font Embedded: Droid Serif bold
Font Embedded: Droid Serif regular
Font Embedded: Droid Serif boldItalic
Now, publish the Droid Serif font to "../deploy/fonts/DroidSerif.swf" and we should now have two font SWFs, Lobster.swf and DroidSerif.swf, in the deploy/fonts directory.
Step 5: Putting HTML into XML
The next asset we will create is an xml file. The XML will consist of one element: a block of HTML-formatted text, composed of a headline and paragraph built with standard HTML tagging.
In order for Flash to read the HTML as one XML element entity, it must be contained inside a CDATA wrapper. CDATA is used within XML documents to indicate a section of content is to be parsed as character data instead of as markup.
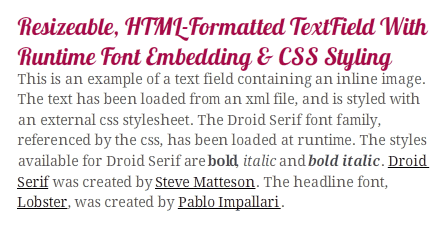
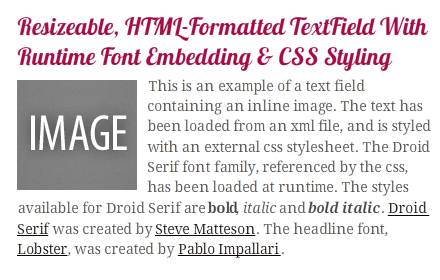
<?xml version="1.0" encoding="UTF-8"?>
<xml>
	<![CDATA[
	<h1>Resizeable, HTML-Formatted TextField With Runtime Font Embedding & CSS Styling</h1>
	<p>This is an example of a text field containing an inline image. The text has been loaded from an xml file, and is styled with an external css stylesheet. The Droid Serif font family, referenced by the css, has been loaded at runtime. The styles available for Droid Serif are <b>bold</b>, <i>italic</i> and <b><i>bold italic</i></b>. <a href="http://code.google.com/webfonts/family?family=Droid+Serif">Droid Serif</a> was created by <a href="http://code.google.com/webfonts/designer?designer=Steve+Matteson">Steve Matteson</a>. The headline font, <a href="http://code.google.com/webfonts/family?family=Lobster">Lobster</a>, was created by <a href="http://code.google.com/webfonts/designer?designer=Pablo+Impallari">Pablo Impallari</a>.</p>
	]]>
</xml>
Save this file as "content.xml" into the xml folder in the deploy directory
Step 6: Create CSS Stylesheet
Now, we will create CSS to style the HTML. Looking at our HTML, we can see that we need to create styling for h1, p and a. The text within the bold and italic tags (b and i) will be styled automatically since those styles are present in our paragraph font family. Note, you should be aware that Flash only supports a subset of CSS properties; refer to the ActionScript 3.0 Reference for more details.
It is especially important that we target the correct font-family name in the CSS. Be sure to use the font name that was displayed in the output log when we published the font documents (Lobster 1.4 and Droid Serif).
h1 {
	font-family:Lobster 1.4;
	font-size:24;
	color:#990033;
}

p {
	font-family:Droid Serif;
	font-size:14;
	color:#333333;
	leading:4;
}

a {
	color:#000000;
	text-decoration:underline;
}
Save this file as "styles.css" into the css folder in the deploy directory
Step 7: Create the Document Class
Create a new Flash file and save as "HTMLTextBlockExample.fla" in the source directory. In the Publish Settings panel, target our deploy folder. For HTML, use "../deploy/index.html" instead of the default name. Create a new .as file - "HTMLTextBlockExample.as" - to be the document class (refer to this quick tip for more on document classes).
package
{
	import flash.display.MovieClip;

	public class HTMLTextBlockExample extends MovieClip
	{
		public function HTMLTextBlockExample():void
		{

		}
	}
}
Step 8: Load the Fonts
Next, we will load the font SWFs we created into our Flash document. Let's create two variables. One will be an Array of the url strings for each font SWF, and the other will be an int that will keep track of how many fonts have loaded. Then we'll create various methods to handle the loading.
package
{
	import flash.display.Loader;
	import flash.display.MovieClip;
	import flash.events.Event;
	import flash.events.IOErrorEvent;
	import flash.net.URLRequest;

	public class HTMLTextBlockExample extends MovieClip
	{
		public var fonts:Array /* of String */ = ["fonts/DroidSerif.swf","fonts/Lobster.swf"];
		public var fontsLoaded:int = 0;

		public function HTMLTextBlockExample():void
		{
			loadFonts();
		}

		private function loadFonts():void
		{
			for each (var fontURL:String in fonts)
			{
				var fontLoader:Loader = new Loader();
				fontLoader.contentLoaderInfo.addEventListener(Event.COMPLETE, onFontLoaded);
				fontLoader.contentLoaderInfo.addEventListener(IOErrorEvent.IO_ERROR, onFontLoadError);
				fontLoader.load(new URLRequest(fontURL));
			}
		}

		private function onFontLoadError(event:IOErrorEvent):void
		{
			trace("ERROR: Could not find font "+event.target.loaderURL);
		}

		private function onFontLoaded(event:Event):void
		{
			fontsLoaded++;
			if (fontsLoaded == fonts.length)
				onFontsLoadComplete();
		}

		private function onFontsLoadComplete():void
		{
			trace(fonts.length + " fonts have been loaded");
		}
	}
}
Run Publish Preview, and see that both fonts are loaded.
Step 9: Load the XML and CSS
Loading the XML and CSS files will be a similar process to loading the fonts. First, we need to import some new classes.
import flash.net.URLLoader;
import flash.text.StyleSheet;
We will also create a new StyleSheet variable that will contain the styling properties parsed from the css file.
public var textStyleSheet:StyleSheet;
Now, we add the methods for loading the assets.
private function onFontsLoadComplete():void
{
	trace(fonts.length + " fonts have been loaded");
	loadCSS();
}

private function loadCSS():void
{
	var loader:URLLoader = new URLLoader();
	loader.addEventListener(Event.COMPLETE, onCSSLoadComplete);
	loader.load(new URLRequest("css/styles.css"));
}

private function onCSSLoadComplete(event:Event):void
{
	textStyleSheet = new StyleSheet();
	textStyleSheet.parseCSS(event.target.data);
	loadXML();
}

private function loadXML():void
{
	var loader:URLLoader = new URLLoader();
	loader.addEventListener(Event.COMPLETE, onXMLLoadComplete);
	loader.load(new URLRequest("xml/content.xml"));
}

private function onXMLLoadComplete(event:Event):void
{
	trace(XML(event.target.data).toXMLString());
}
Run Publish Preview, and you will see the XML printed in the output log.
Step 10: Create an HTMLTextBlock Class
Displaying HTML-formatted text is something you may do often, so let's create a class that we can use over and over again. Open a new ActionScript file and save it as "HTMLTextBlock.as" in the source directory.
package
{
	import flash.display.Sprite;
	import flash.text.StyleSheet;
	import flash.text.AntiAliasType;
	import flash.text.TextField;
	import flash.text.TextFieldAutoSize;

	public class HTMLTextBlock extends Sprite {

		// Width of the htmlTextField. Default is 550 pixels.
		public var blockWidth:int = 550;
		// StyleSheet for the htmlTextField.
		public var textStyleSheet:StyleSheet = new StyleSheet();
		// Contains the html-formatted text.
		private var htmlTextField:TextField = new TextField();

		public function HTMLTextBlock()
		{
			htmlTextField.embedFonts = true;
            htmlTextField.wordWrap = true;
			htmlTextField.multiline = true;
			htmlTextField.condenseWhite = true;
            htmlTextField.antiAliasType = AntiAliasType.ADVANCED;
			addChild(htmlTextField);
		}

		public function setHTML(htmlText:String):void
		{
			htmlTextField.autoSize = TextFieldAutoSize.LEFT;
			htmlTextField.width = blockWidth;
			htmlTextField.styleSheet = textStyleSheet;
			htmlTextField.htmlText = htmlText;
		}
	}
}
As you can see, our class has three variables. The private variable htmlTextField will contain HTML-formatted text. The public variable blockWidth controls the width of htmlTextField, and textStyleSheet contains the CSS styling that gets applied to htmlTextField. In the constructor, we set properties for htmlTextField and add it to the display list. Last, we create setHTML() for putting HTML-formatted text into htmlTextField.
Step 11: Use HTMLTextBlock in our Main Document
Now that we have a custom class for displaying HTML text, let's use it. Start by modifying onXMLLoadComplete() to send XML data as a string to a new method that will use HTMLTextBlock to display the HTML.
private function onXMLLoadComplete(event:Event):void
{
	// get xml from event target data
	var xml:XML = XML(event.target.data);
	// convert the xml to a string
	var xmlString:String = xml;
	// send xml string to the displayHTML method
	displayHTML(xmlString);
}

private function displayHTML(htmlText:String):void
{
	var htmlTextBlock:HTMLTextBlock = new HTMLTextBlock();
	// set the width and styling
	htmlTextBlock.blockWidth = 420;
	htmlTextBlock.textStyleSheet = textStyleSheet;
	// send the html string to the HTMLTextBlock class
	htmlTextBlock.setHTML(htmlText);
	// set position and add to stage
	htmlTextBlock.x = 20;
	htmlTextBlock.y = 10;
	addChild(htmlTextBlock);
}
The result:
Step 12: Add an Inline Image
Next, we will add an image to our block of text. You can use the image in the source files of this tutorial, or create your own.
Open content.xml, and at the beginning of the paragraph, use a basic HTML <img> tag to embed the image. Your XML should now look like this:
<?xml version="1.0" encoding="UTF-8"?>
<xml>
	<![CDATA[
	<h1>Resizeable, HTML-Formatted TextField With Runtime Font Embedding & CSS Styling</h1>
	<p><img src="http://activetuts.s3.amazonaws.com/tuts/208_HTMLtext/tutorial/images/image.png" />This is an example of a text field containing an inline image. The text has been loaded from an xml file, and is styled with an external css stylesheet. The Droid Serif font family, referenced by the css, has been loaded at runtime. The styles available for Droid Serif are <b>bold</b>, <i>italic</i> and <b><i>bold italic</i></b>. <a href="http://code.google.com/webfonts/family?family=Droid+Serif">Droid Serif</a> was created by <a href="http://code.google.com/webfonts/designer?designer=Steve+Matteson">Steve Matteson</a>. The headline font <a href="http://code.google.com/webfonts/family?family=Lobster">Lobster</a> was created by <a href="http://code.google.com/webfonts/designer?designer=Pablo+Impallari">Pablo Impallari</a></p>
	]]>
</xml>
Now, the SWF will look this:
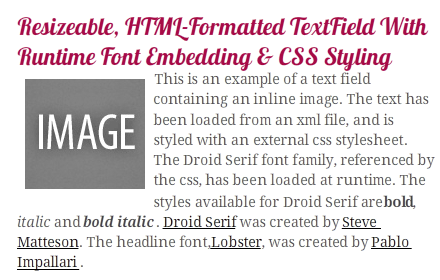
The alignment of the image and the text doesn't seem quite right yet. We will improve that in the steps to come.
Step 13: Give the Image an ID
Coming up in the tutorial, we will be writing methods that target the inline image. In order to do this, we must add an id attribute to our image embed tag that can be referenced in ActionScript. Open content.xml and update the <img> tag as follows:
<![CDATA[<img src="http://activetuts.s3.amazonaws.com/tuts/208_HTMLtext/tutorial/images/image.png" id="image"/>]]>
Step 14: Detect TextField Resize
In order to adjust the alignment of the image, we need to change its x and y values. However, we must do that after the image is added and the text is reflowed. To accomplish this, we will add an event listener to the HTMLTextBlock class.
First, import some additional classes:
import flash.display.DisplayObject;
import flash.display.Loader;
import flash.events.Event;
Next, update the setHTML() method and create an event handler for when htmlTextField is resized.
public function setHTML(htmlText:String):void
{
	htmlTextField.autoSize = TextFieldAutoSize.LEFT;
	htmlTextField.width = blockWidth;
	htmlTextField.styleSheet = textStyleSheet;
	htmlTextField.htmlText = htmlText;
	var loader:Loader = htmlTextField.getImageReference("image") as Loader;
	if (loader)
	{
		// add event listener for when the htmlTextField is resized from adding the image
        htmlTextField.addEventListener(Event.CHANGE, onImageAdded);
	}
	// else, there is no image reference, so don't do anything
}

private function onImageAdded(event:Event):void
{
	// access the image from the image reference in the text field
	var loader:Loader = htmlTextField.getImageReference("image") as Loader;
	var image:DisplayObject = loader.content;
}
Step 15: Adjust the Image Alignment
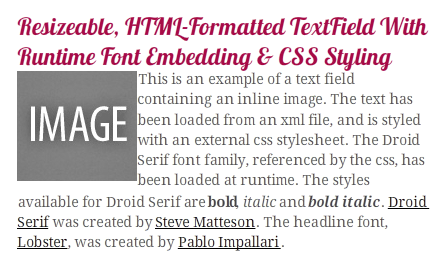
Notice how the image doesn't line up properly with the text? This is because Flash automatically adds horizontal and vertical spacing around the image. We can adjust the amount of spacing by setting the hspace and vspace attributes in the <img> tag.
<![CDATA[<img src="http://activetuts.s3.amazonaws.com/tuts/208_HTMLtext/tutorial/images/image.png" id="image" hspace="0" vspace="0" />]]>
Looking at the SWF, now the image is aligned nicely within the paragraph, but the text is too close to the image.
Looks like we need some spacing after all. Update the image tag attributes to be hspace="5" vspace="2". This gives us better spacing, but once again the image will not be aligned with the left edge of the paragraph. We can fix this by editing the x value of the image in onImageAdded().
private function onImageAdded(event:Event):void
{
	// access the image from the image reference in the text field
	var loader:Loader = htmlTextField.getImageReference("image") as Loader;
	var image:DisplayObject = loader.content;
	// adjust the x position of the image to offset hspace
	image.x -= 5;
}
Step 16: Adjust Paragraph Spacing
The image is aligned nicely, but the paragraph seems a bit too close to the headline. If we were working on an HTML page, we could adjust the padding or margin on the p or h1 tags, but unfortunately Flash doesn't support any CSS styling for vertical alignment between paragraphs. The best solution we have is to create a new CSS style just for line spacing. Open up styles.css and add the following style:
br6 {
	font-size:6;
}
Update content.xml with an empty br6 style tag.
<![CDATA[<br6></br6>]]>
And now, the line spacing between the headline and paragraph alignment has been subtly improved.
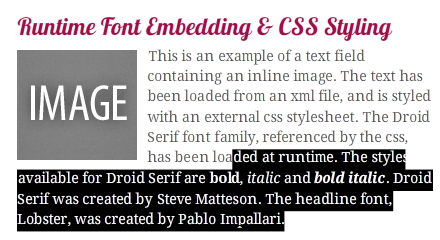
Step 17: Prevent the Scrolling Bug
Open the SWF, and then click and drag down while selecting the text. You may notice something unusual happen. The top line of our headline has disappeared. If you drag back upward, it will reappear. On Windows machines, you can see this same effect occur if you hover over the text and scroll the mousewheel in a browser.
The workaround for this, courtesy of the Destroy Today blog, is to turn off autosizing after the text inside has been changed. First, update the setHTML() method, and then onImageAdded().
public function setHTML(htmlText:String):void
{
	htmlTextField.autoSize = TextFieldAutoSize.LEFT;
	htmlTextField.width = blockWidth;
	htmlTextField.styleSheet = textStyleSheet;
	htmlTextField.htmlText = htmlText;
	var loader:Loader = htmlTextField.getImageReference("image") as Loader;
	if (loader)
	{
		// add event listener for when the htmlTextField is resized from adding the image
        htmlTextField.addEventListener(Event.CHANGE, onImageAdded);
	}
	else
    {
    	// there is no image reference, so turn autosize off
		htmlTextField.autoSize = TextFieldAutoSize.NONE;
	}
}

private function onImageAdded(event:Event):void
{
	// access the image from the image reference in the text field
    var loader:Loader = htmlTextField.getImageReference("image") as Loader;
	var image:DisplayObject = loader.content;
	// adjust the x position of the image to offset hspace
	image.x -= 5;
	// turn autosize off
	htmlTextField.autoSize = TextFieldAutoSize.NONE;
}
Republish, and you will see that our bug fix has created a new problem.

Now, the height of the text field is not large enough to display all the text, and the bottom two lines are not visible. We will fix this in our next step.
Step 18: Adjusting the Height of the TextField
To get all the text to be visible, we need to increase the height of HTMLTextField. If we simply increase the height by 50 pixels after the image gets added, the problem is solved.
htmlTextField.height += 50;
However, this solution does not feel right. What if we use a different size image? Different fonts or styling? The best way to address the problem is adjust the height dynamically, based on the values that Flash is using to determine the height. The obvious tactic would be to use the textHeight parameter. Let's try it.
htmlTextField.height = htmlTextField.textHeight;

That's better, but the bottom line of text is still hidden. In doing some research (e.g. this blog post), we can find that there are two values that need to be added to the height. One is the highest leading value of the text styles we are using. In this case, that would be 4 (from the p style). The other value is htmlTextField.maxScrollV. If we add the total of those values, plus a safety adjustment of 2 pixels, to the height, HTMLTextField will be correctly sized, regardless of what fonts, styling or images are used. Instead of doing this in onImageAdded(), create a new function for locking the height of the text block.
private function onImageAdded(event:Event):void
{
	// access the image from the image reference in the text field
	var loader:Loader = htmlTextField.getImageReference("image") as Loader;
	var image:DisplayObject = loader.content;
	// adjust the x position of the image to offset hspace
	image.x -= 5;
	// lock the height of the text field to prevent scrolling bug
	lockHeight();
}

private function lockHeight():void
{
	// turn autosize off
	htmlTextField.autoSize = TextFieldAutoSize.NONE;
	htmlTextField.height = htmlTextField.textHeight;
	// get height adjustment
	// first, loop through StyleSheet styles to get highest leading value
	var highestLeading:int = 0;
	for each (var style:String in textStyleSheet.styleNames)
	{
		var leading:int = int(textStyleSheet.getStyle(style).leading);
		if (highestLeading < leading)
			highestLeading = leading;
	}
	// now, get the value of the height adjustment
	var heightAdjust:int = htmlTextField.maxScrollV + highestLeading + 2;
	htmlTextField.height += heightAdjust;
}
The setHTML() method also needs to be updated. When no inline image is being loaded into the block of text, the height needs to be locked.
public function setHTML(htmlText:String):void
{
	htmlTextField.autoSize = TextFieldAutoSize.LEFT;
	htmlTextField.width = blockWidth;
	htmlTextField.styleSheet = textStyleSheet;
	htmlTextField.htmlText = htmlText;
	var loader:Loader = htmlTextField.getImageReference("image") as Loader;
	if (loader)
	{
		// add event listener for when the htmlTextField is resized from adding the image
		htmlTextField.addEventListener(Event.CHANGE, onImageAdded);
	}
	else
	{
		// there is no image reference, lock the height of the text field
		lockHeight();
	}
}
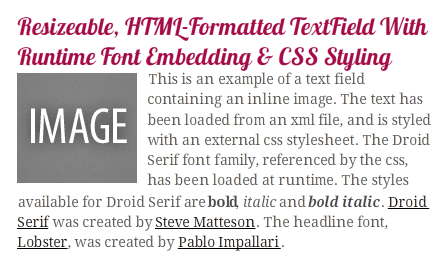
With these last adjustments, all of the text is now visible and will not scroll.
Step 19: Add Custom TextEvent Link
Our last task in this tutorial will be to add a text link that resizes the block of text. To do this, we must first add the link to the HTML text in the content.xml file.
<?xml version="1.0" encoding="UTF-8"?>
<xml>
	<![CDATA[
	<h1>Resizeable, HTML-Formatted TextField With Runtime Font Embedding & CSS Styling</h1>
	<br6></br6>
	<p><img src="http://activetuts.s3.amazonaws.com/tuts/208_HTMLtext/tutorial/images/image.png" hspace="5" vspace="2" id="image"/>This is an example of a text field containing an inline image. The text has been loaded from an xml file, and is styled with an external css stylesheet. The Droid Serif font family, referenced by the css, has been loaded at runtime. The styles available for Droid Serif are <b>bold</b>, <i>italic</i> and <b><i>bold italic</i></b>. <a href="http://code.google.com/webfonts/family?family=Droid+Serif">Droid Serif</a> was created by <a href="http://code.google.com/webfonts/designer?designer=Steve+Matteson">Steve Matteson</a>. The headline font, <a href="http://code.google.com/webfonts/family?family=Lobster">Lobster</a>, was created by <a href="http://code.google.com/webfonts/designer?designer=Pablo+Impallari">Pablo Impallari</a>.</p>
	<br6></br6>
	<p>We can add events to text links. For example, <a href="event:increaseWidth">increase</a> or <a href="event:decreaseWidth">decrease</a> the width of the text field.</p>
	]]>
</xml>
Step 20: Add TextEvent Listener
In our HTMLTextBlock class, add an event listener to detect when a text link is clicked. First, import the TextEvent class.
import flash.events.TextEvent;
In the constructor, add the event listener.
htmlTextField.addEventListener(TextEvent.LINK, textLinkHandler);
Now, create the event handler method.
private function textLinkHandler(event:TextEvent):void
{
	trace(event.text);
}
Run publish preview. When clicking on the text event links, you will see either increaseWidth or decreaseWidth in the output log.
Step 21: Add Function To Change Width
Create a new method that will change the width of htmlTextField.
private function changeWidth(newWidth:int):void
{
	blockWidth = newWidth;
    // unlock the height of the text field
	htmlTextField.autoSize = TextFieldAutoSize.LEFT;
    // change the width
	htmlTextField.width = blockWidth;
    // re-lock the height
	lockHeight();
}
Step 22: Update the Text Link Handler
Update the text link handler to call changeWidth().
private function textLinkHandler(event:TextEvent):void
{
	if (event.text == "increaseWidth")
		changeWidth(blockWidth + 10);
	if (event.text == "decreaseWidth")
		changeWidth(blockWidth - 10);
}
Clicking on the increase/decrease text links will now adjust the width of the block of text by 10 pixels.
Conclusion
As seen in the tutorial, using HTML-formatted, CSS-styled content in Flash can be more difficult than it first may seem. Now that we have learned the basics, you can apply this knowledge in your own projects. Here are some suggestions for continued development:
- Use code from the tutorial to create building blocks for Flash sites and components.
- Extend the HTMLTextBlock to incorporate properties of the CSS Box Model.
- Load, parse and display HTML loaded from external sources, such as an RSS feed.
- By keeping them separate from the Flash document, you can use the content assets to build non-Flash sites and applications, such as for the iPad or iPhone.
Thanks for reading this tutorial, and I hope you will find it useful in your future Flashing!

Comments