When you are new to front-end development
and start mastering HTML5, CSS and JavaScript, the obvious next step is to put
your hands on tools that most
developers use to stay sane in this complex space. You too deserve to have more
flexibility and features while writing your CSS sheets by using Less. You too
deserve to optimize bandwidth by minifying your JS code. You too deserve to be
able to automatically check that your JS code is good using JSHint.
You deserve all this good stuff.
So you start to use all these great tools by hand, running more and more command lines manually. Sometimes, you forget to run the Less compiler… Sometimes you forget to run JSHint and a bug is shipped…
And suddenly you find yourself wondering: is there any solution to automate all these tools? How can you create a repeatable workflow to prevent you from making mistakes?
Obviously a solution exists, and two tools in particular are waiting for you to get started: Grunt and Gulp.
As a newbie using these tools, you are wondering how they work and which one to use, aren’t you? Well, perfect then, you are reading the right article!
1. The Sample We Will Use
I will give you the basis for using Grunt and Gulp using a really simple example that you can download from GitHub.
It is a simple web site composed of three files:
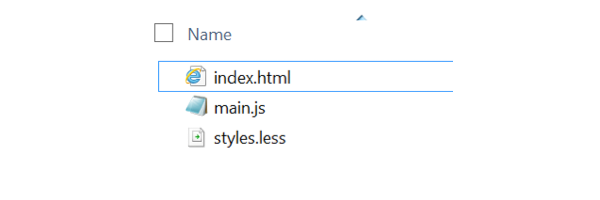
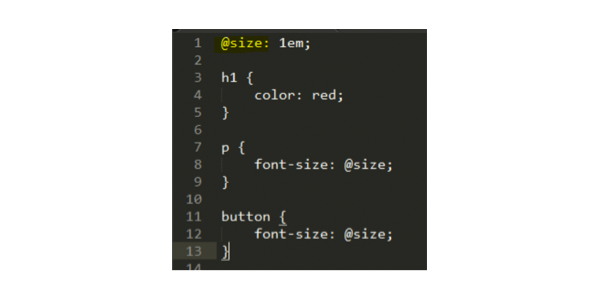
Styles.less defines the CSS sheet in a richer manner than is possible using a standard CSS file. In the end we use the Less compiler to create a styles.css file. Using Less, we are able for instance to use variables in the CSS file:
Get more information about Less in this Getting Started guide.
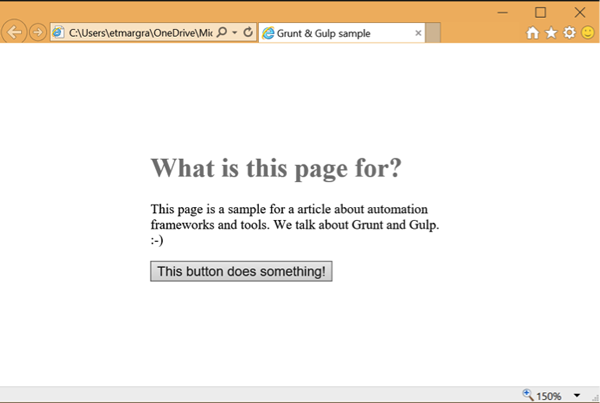
The JavaScript and HTML code are really simple. The page should look like this:
2. Understanding Node.js Package Manager
You need to understand first how Node.js Package Manager (npm) works.
Npm is the tool provided with Node.JS. It is used to get tools and frameworks while automatically resolving their dependencies.
For instance, to use Less and compile it into a web usable CSS file, you first need to install Less using this command:
npm install -g less
Note: To get the npm command line, you have to install Node.js from the Node website.
Once this is done, you can run this command to compile .less files into .css:
lessc styles.less > styles.css
Npm uses a file that it creates and stores in the local folder it is working in: package.json.
This file uses the JavaScript Object Notation (JSON) format to let npm know
which tool and version is installed and the frameworks used by the current project (which is represented by the
current folder).
This file is important for Grunt and Gulp because it will contain the list of plugins that have been downloaded and are usable in your automation workflow.
To create an empty package.json file you can use the following npm command:
npm init
You will go through some questions that you can answer using the default option, and then you will be all set to start.
In this file you will have two kinds of dependencies:
- the ones needed for the execution of your web app or Node.js app
- the ones needed for the development phase (like Less) and which are used to compile or check your code
Npm basically gives you three ways to install packages:
- globally on your machine using
the
–gor-globaloption - for execution purpose, locally on your project folder using no options (only npm install [tools or framework])
- for dev purpose, locally on
your project folder using the
--save-devoption
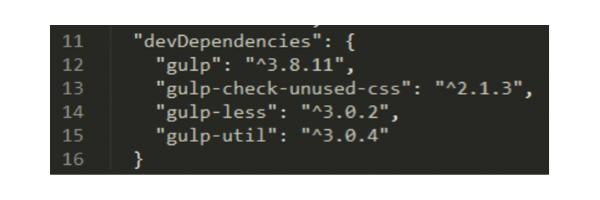
The third one will create a devDependencies section / property
inside the package.json file.
3. Grunt
What Is Grunt?
Grunt is a pioneer in the JavaScript automation workflow area. There are a lot of known Grunt users like Twitter, jQuery and Modernizr.
The basic principle for Grunt is to give us an easy way to run tasks. A task is a set of code files
and configuration files already created for you. You can get new tasks by
installing Grunt plugins that you will get using npm. You can find a plugin for
pretty much every tool you might use, such as Less and JSHint.
To run Grunt, you have to create a Gruntfile in which you specify
which tasks you want to run and the configuration for each of them. Once this
is done, you only have to run the grunt
command line specifying the task you want to run (default or a specific one)
and it will do it automatically.
Now let’s go through a step-by-step guide to set all this up.
Step 1. Create the Package.json File
Use npm to init the file:
npm init
You will have to answer a few questions like the project name and what is the default .js file. You can also choose to create the file manually and set its content to:
{
  "name": "project-name",
  "devDependencies": {},
  "dependencies": {}
}
Step 2. Install Grunt Globally and Locally
You need to install Grunt globally to get the command line and locally to initialize everything needed for the project.
Run:
npm install -g grunt
Then run it locally:
npm install grunt --save-dev
Note: Do not forget the
–dev part for it to be specified as one of the devDependencies in the package.json file.
Step 3. Create the GruntFile.js
Grunt works using a file named gruntFile.js. This file contains everything needed by Grunt, that is to say:
- configuration for tasks
- custom tasks
- task loading
Grunt expects the file to export a single function which takes one parameter named “grunt”. You will use this object to perform all Grunt relative actions.
Here is a minimal gruntfile that only reads the package.json file
and creates a default task which runs nothing.
Note: place the file in the project folder, side by side with the package.json file.
module.exports = function(grunt) {

  // Project configuration.
  grunt.initConfig({
    pkg: grunt.file.readJSON('package.json'),
  });

  // Default task(s).
  grunt.registerTask('default', []);

};
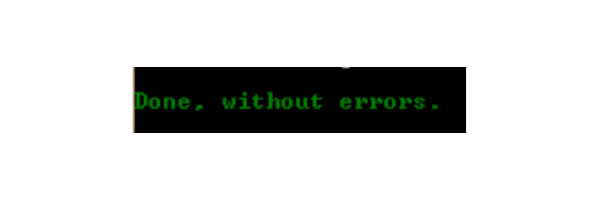
You can execute it to be sure everything is configured correctly.
To do that, open a command prompt on the project folder and run:
grunt
You should see something like this:
Step 4. Add Your First
Task: JSHint
Now that your Gruntfile is ready, the next step is to add a plugin and use it. All plugins can be found in the listing on the Grunt website. One of the common tasks performed in a Gruntfile is checking if the JavaScript syntax is correct. To do that, we usually use JSHint.
Let’s add this to your grunt workflow.
If you search for JSHint on the grunt plugins page, you will find grunt-contrib-jshint, which corresponds to what we need!
In the project folder, run:
npm install grunt-contrib-jshint --save-dev
One this is done, you have to add it in your Gruntfile.js. There are two simple steps for that:
- Load the plugin.
- Configure the task.
To load the plugin, use the loadNpmTasks
function:
// Load the plugin that provides the "jshint" task
grunt.loadNpmTasks('grunt-contrib-jshint');
The
configuration is done in the initConfig function
where you have to add a new property to the object given in the parameter. This
has to be the name of the task you want to add and is related to the plugin
you use. The best way to know that name and the list of available options for
the task is to have a look at the plugin documentation. You will always find a
well-documented sample.
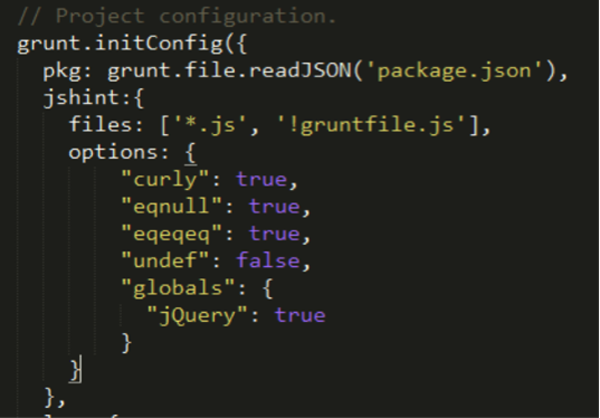
For instance, in
our sample we want to check all the JavaScript files except gruntfile.js.
We also want to activate a set of rules to check in the JavaScript files like eqeqeq to ensure we use triple equals when needed.
Here is the
initConfig function modified:
You can run your task by using the
following command line (where you specify the task name as a parameter for grunt):
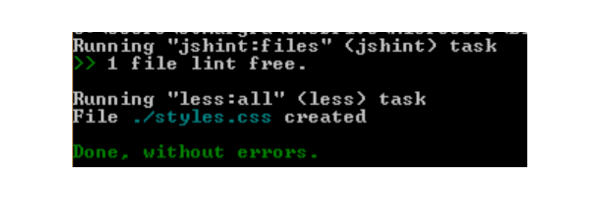
grunt jshint
The result is here:
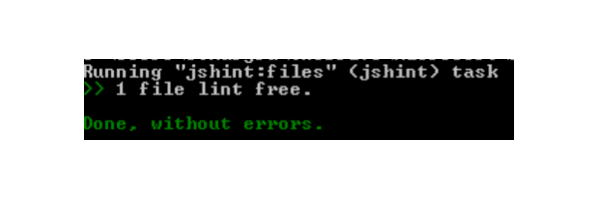
You just have to run that command and it will automatically prompt you for any errors it encounters.
Congratulations, you now have a task automated in your grunt workflow!
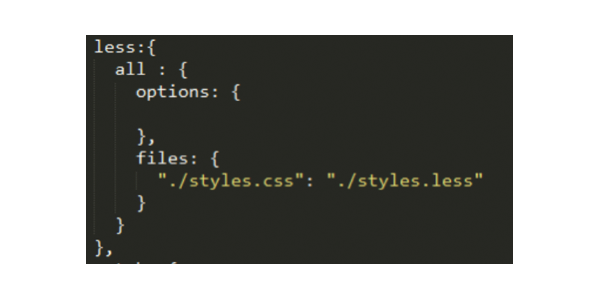
Step 5. Add a Second Task: Less Compilation
Your JSHint task works well, but it is a little bit alone in the workflow. Usually, we use tools like Grunt to run more than one task.
It is really easy to add more of them, as you just have to follow the same steps. Let’s say you now want to add the compilation for your less file inside the automated process. If you search in the Grunt plugins, you will find a grunt-contrib-less plugin that you can install in your project folder:
npm install grunt-contrib-less --save-dev
As with the JSHint task, you have to add the configuration:
Then, load the task:

You can now run Grunt and specify the less task: this will launch only Less.
That is OK, but you want to run all the tasks, right? That is the role of the default task.
When you just run grunt without specifying any task, it will search for a default task and run all the tasks specified in its array. You can modify it to run less and jshint. Note
that to add a group of tasks like default, you need to call the registerTask function:

From now, when you run grunt, it will run jshint, and then less:
You can add any task you want, and you can
also specify other group of tasks like default
and call them by passing their name as an argument to the grunt command line.
Easy, right?
Step 6. Use Watch So You Do Not Have to Run Grunt Manually
Now, you are a happy developer. All your repetitive tasks are automated inside a grunt workflow, and you just have to run grunt for them to execute. But it can be done even more easily. It can be done automatically.
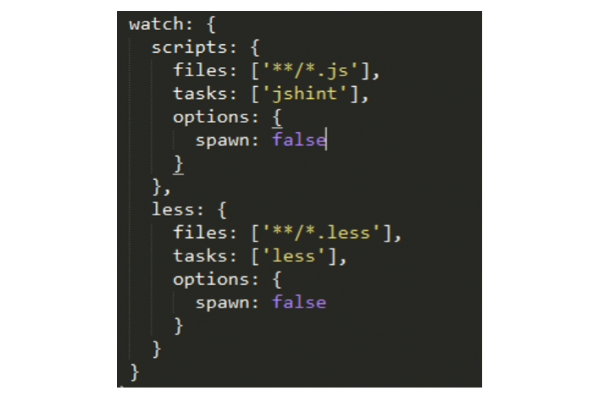
To do that, you can add a specific task named watch. This task will constantly inspect your working folder and,
based on rules, when a file is modified, grunt will run an associated task.
First, install watch in your project folder:
npm install grunt-contrib-watch --save-dev
Load it like all other tasks using the loadNpmTasks function, and configure it. The config part is a bit
different here because you need to specify a configuration for each task you
want to cover using watch.
For more information, you can read the full documentation for this task.
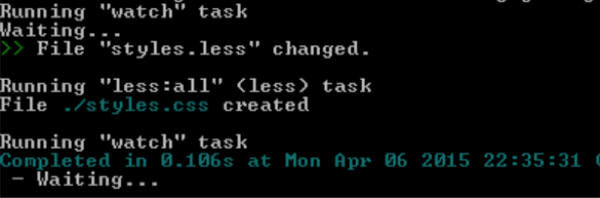
When you want to activate watch, you only have to run the following command:
grunt watch
And it will execute tasks each time a file is changed and this file is in the scope of watched files for the specific task.
And that’s it! You now know everything to create automated workflow using grunt.
4. Gulp
What Is Gulp?
Gulp is an alternative to grunt. It is a bit more recent and has a reputation as being more flexible than grunt. Before choosing which one you will use, let’s have a look at how gulp works.
Gulp is a workflow
automation tool. Like grunt, it works using npm and the package.json file. All available
plugins will also be downloaded using npm and added as devDependencies in the
package.json file.
One of the main differences is that Gulp uses streams. A stream is a set of functions through which a file will go and be modified in memory. The file will be written on the disk only at the end of the process, so it is more efficient. Grunt tasks, on the other hand, work as silos and cannot be chained.
Let’s have a quick look at how Gulp works by following a few easy steps.
Step 1. Create the Package.json File
Similar to Grunt, you first have to create the package.json file. You can use exactly the same technique as you used for the grunt sample.
Step 2. Install Gulp and Gulp-Util Globally and Locally
Once the package.json file is created, install gulp globally and locally using:
npm install -g gulp
and
npm install gulp --save-dev
This will install the gulp command line and everything needed to run a gulp workflow.
You then have to install gulp utils, which contains common functions shared by other plugins:
npm install gulp-util --save-dev
Finally, create the minimum gulp file, which will look like this:
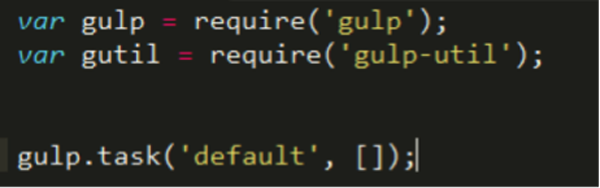
As you can see, it is a bit different from the grunt syntax. In
gulp, plugins are loaded using the require syntax as you might be used to if
you are a Node.js developer. There is also a default task defined using the gulp.task function.
If you run the gulp command
line using a command prompt in the project folder, you should see a result like
this:

Step 3. Using Your First Task: Less Compilation
To use a plugin in gulp, you use the same function as the one we
used to create the default task.
This is because you do not have to use a specific name to create a task. You
just call gulp.task, set the name you want, and give it a JavaScript function as
a second parameter. When gulp runs the task, it will run this function.
To use a plugin, you call it using the name you chose when requiring it. Usually, you call it as
part of a streaming workflow which generally starts with a selection of files.
This is done with the gulp.src
function. It will select a bunch of files and return a stream that can be used
by another function using pipe. That
is how you can chain multiple actions without writing them to the disk. You
just pass the stream from one plugin to another.
Here is a basic sample for Less:

We first require (‘gulp-less’)
to load the less plugin for gulp. (We got it using npm install gulp-less --save-dev).
Then gulp.src will
select all the .less files, we
‘pipe’ it to the less() function and
it finally is ‘piped’ to gulp.dest which
indicates where to write the result. As gulp.src can select more than one file,
gulp.dest specifies a folder.
Once you understand the piping model, you can easily get the same result as the one we got using grunt.
The power of gulp is that you can create custom tasks in which you call more than one plugin and where you can associate them the way you want.
Note: there is obviously
also a gulp-watch plugin you can use
to automate the launch of your workflow!
Conclusion: Which One to Choose?
I hope that you have now a clearer understanding of why you need an automation workflow and how you can use Grunt or Gulp to get it.
Choosing one of them is more related to the task you want to achieve.
Grunt is easy to use. You do not have to understand the piping system, and achieving simple tasks will be more straightforward. It is a really mature tool, used by a lot of known editors and developers, and there are a lot of plugins available.
That said, the way Gulp is designed can give you a lot of flexibility. It has existed for quite some time now, and even if you won’t find as many plugins as you will for Grunt, all the classic ones are available for Gulp.
If you are using a really standard workflow with common steps like JSHint, uglifying, CSS validating, etc., Grunt is a good choice. If you are up to more complicated tasks, Gulp will be a good wingman.
More Information
More Hands-On With JavaScript
Microsoft has a bunch of free learning on many open source JavaScript topics, and we’re on a mission to create a lot more with Microsoft Edge. Here are some to check out:
- Microsoft Edge Web Summit 2015 (a complete series of what to expect with the new browser, new web platform features, and guest speakers from the community)
- Best of //BUILD/ and Windows 10 (including the new JavaScript engine for sites and apps)
- Advancing JavaScript Without Breaking the Web (Christian Heilmann’s recent keynote)
- Hosted Web Apps and Web Platform Innovations (a deep-dive on topics like manifold.JS)
- Practical Performance Tips to Make your HTML/JavaScript Faster (a seven-part series from responsive design to casual games to performance optimization)
- The Modern Web Platform Jump Start (the fundamentals of HTML, CSS, and JavaScript)
And some free tools to get started: Visual Studio Code, Azure Trial, and cross-browser testing tools—all available for Mac, Linux, or Windows.
This article is part of the web dev tech series from Microsoft. We’re excited to share Microsoft Edge and the new EdgeHTML rendering engine with you. Get free virtual machines or test remotely on your Mac, iOS, Android, or Windows device @ http://dev.modern.ie/.

Comments