The previous chapter introduced the basic workflow of iOS application development, but we worked within the confines of a single-view application. Most real-world applications, however, require multiple scenes to present data hierarchically. While there are many types of organizational patterns used for managing multi-scene apps, this chapter looks at one of the most common patterns: the master-detail application.
The minimal master-detail application consists of a “master” scene, which presents a list of data items to choose from, and a “detail” scene, which displays an item’s details when the user selects it from the master scene. Open the Mail app on your iPhone and you’ll find a good example of a master-detail application. The inbox lists your messages, making it the master scene, and when you select one of them, a detail scene is used to display the contents of the message, the sender, any attachments, etc.
For the most part, multi-scene applications use the same workflow discussed in the previous chapter. We’ll still create layouts by adding UI components through the Interface Builder and connect them to our code with actions, outlets, and delegates. However, having multiple scenes means that we’ll have multiple view controllers, so we’ll need to use the new UINavigationController class to organize their interaction. We’ll also learn how to configure scene transitions using segues.
Creating a Master-Detail Project
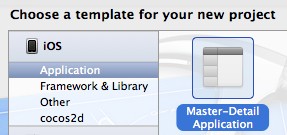
The example project for this chapter will be a simple contact list that lets users manage a list of their friends, along with their respective contact information. To create the example project, select File > New > Project and choose the Master-Detail Application. This will give us the opportunity to explore new navigation components and organizational structures, as well as how to handle transitions from one scene to another.
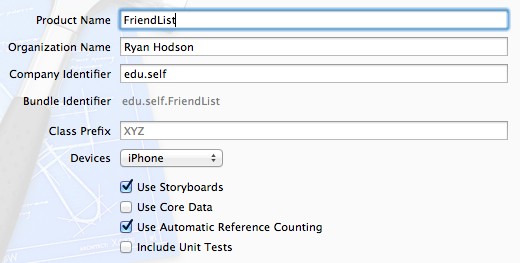
Use FriendList for the Product Name field, whatever you like for the Organization Name, and edu.self for the Company Identifier. Like the previous app, make sure that iPhone is the selected Device and Use Storyboards and Use Automatic Reference Counting are selected:
You can save the project wherever you like.
Template Overview
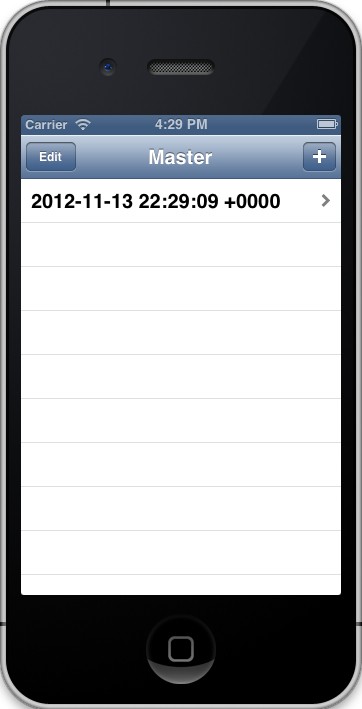
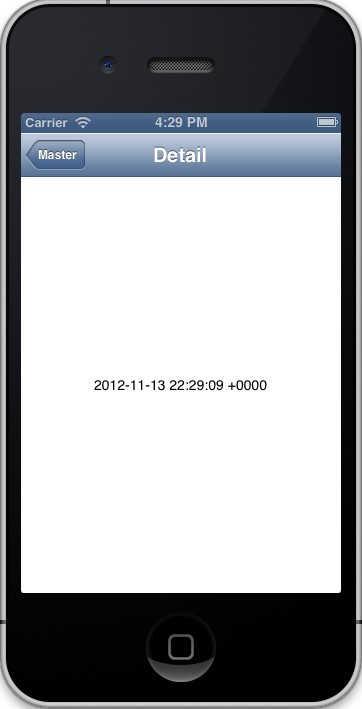
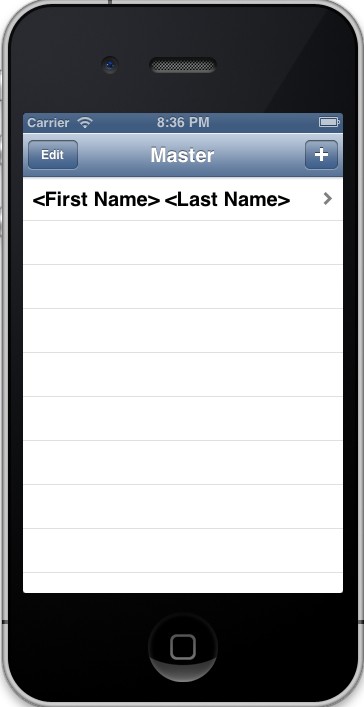
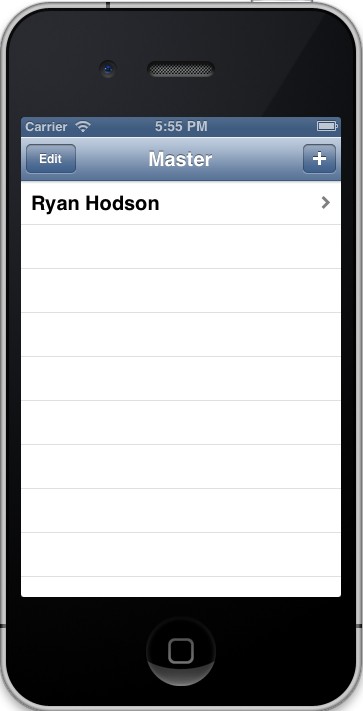
We’ll be building on the template’s existing code, so let’s take a quick look at the default application. Click the Run button in the upper-left corner of Xcode or press Cmd+R to compile the application and launch it in the iOS Simulator. You should see an empty list entitled Master with an Edit button and an Add button (a plus sign) in the navigation bar. Clicking the Add button will insert a new item into the list, and selecting that item will transition to the detail scene. Both scenes are shown in the following figure.
The default data items used by the template are dates, but we’re going to change the master scene to display a list of names and the detail scene to display their contact information.
We’ll be discussing the details behind each source file as we build up the example project, but it will help to have a basic overview of the default classes before we start editing them.
The Application Delegate
As in the previous chapter, the AppDelegate class lets you react to important events in the application’s life cycle. We don’t need any custom startup behavior for our friend list application, so we won’t be editing this class at all.
The View Controllers
Instead of a single ViewController, this template has two view controller classes: a MasterViewController and a DetailViewController. These manage the master scene and detail scene, and their viewDidLoad methods serve as the entry point into their respective scenes. The MasterViewController’s viewDidLoad method should look like the following:
- (void)viewDidLoad {
    [super viewDidLoad];
    self.navigationItem.leftBarButtonItem = self.editButtonItem;

    UIBarButtonItem *addButton = [[UIBarButtonItem alloc]
        initWithBarButtonSystemItem:UIBarButtonSystemItemAdd
                             target:self
                             action:@selector(insertNewObject:)];
    self.navigationItem.rightBarButtonItem = addButton;
}
This creates the Edit and Add buttons that you see at the top of the master scene, and it sets the insertNewObject: method as the action for the latter. The insertNewObject: method adds a new NSDate instance to the private _objects variable, which is a mutable array containing the master list of data items, and all of the methods after the #pragma mark - Table View directive control how that list is displayed in the scene. The prepareForSegue:sender: method is called before transitioning to the detail scene, and it is where the necessary information is transferred from the master scene to the detail scene.
The DetailViewController class is a little bit simpler. It just declares a detailItem property to store the selected item and displays it through the detailDescriptionLabel outlet. We’re going to be changing this default implementation to display a person’s contact information.
The Storyboard
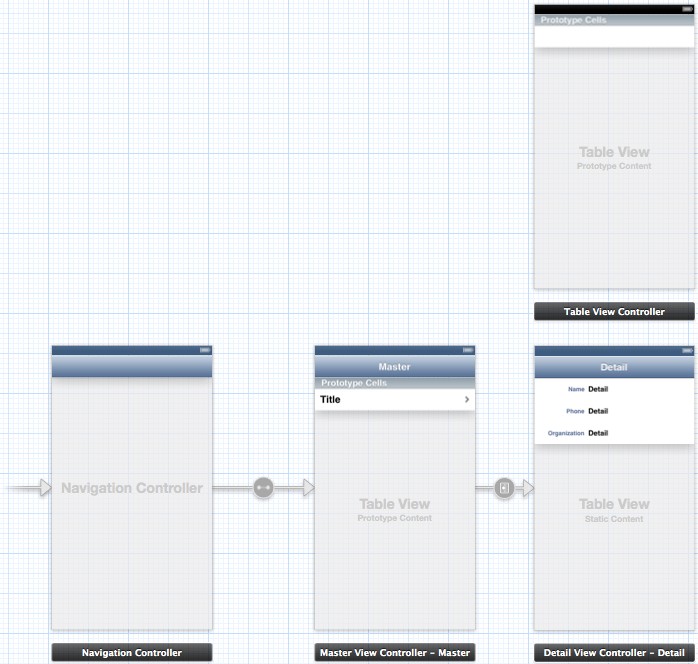
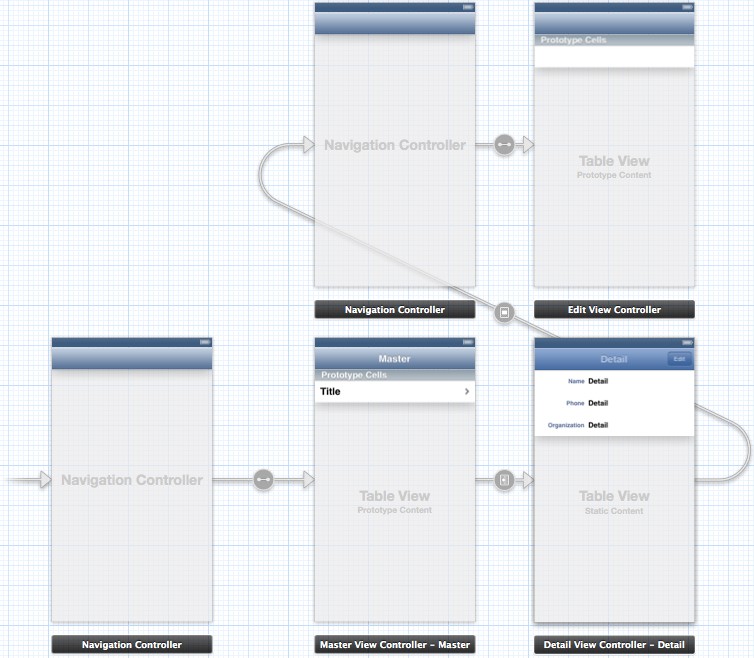
The storyboard is perhaps the most drastic change from the previous example. If you open MainStoryboard.storyboard, you should see the following:

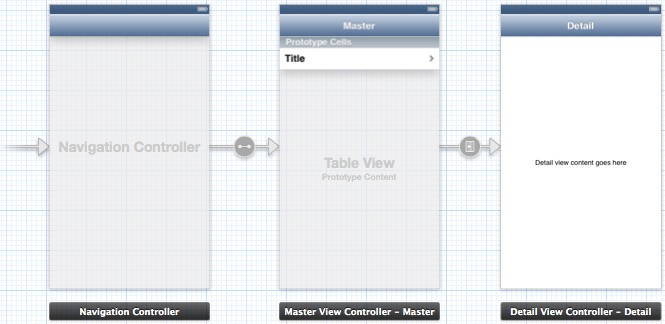
Instead of a single view controller, the Interface Builder now manages three controllers. This might seem odd considering our application only has two scenes, but both the MasterViewController and the DetailViewController are embedded in a UINavigationController instance. This navigation controller is why we see a navigation bar at the top of the app, and it’s what lets us navigate back and forth between the master and detail scenes. We’ll talk more about configuring navigation controllers throughout the chapter.
This template should also clarify why the MainStoryboard.storyboard file is called a “storyboard”— it visualizes not only the scenes themselves, but the flow between those scenes. As in the previous chapter, the arrow pointing into the navigation controller shows that it is the root controller. But, we also see another arrow from the navigation controller to the MasterViewController and from the MasterViewController to the DetailViewController. These arrows define the relationships and transitions between all of the view controllers in an application.
The Model Data
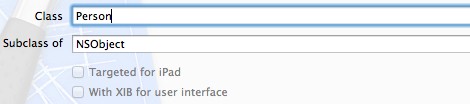
Unlike the previous chapter, this application will use a dedicated class to represent its model data. We’ll use the Person class to store the contact information of each friend. In Xcode, create a new file, select Objective-C class, and enter Person for the Class field, like so:

Next, we need to declare a few properties to record the name, organization, and phone number of each contact. Open Person.h, and change it to the following:
#import <Foundation/Foundation.h>

@interface Person : NSObject

@property (copy, nonatomic) NSString *firstName;
@property (copy, nonatomic) NSString *lastName;
@property (copy, nonatomic) NSString *organization;
@property (copy, nonatomic) NSString *phoneNumber;

@end
Of course, we also need to synthesize these properties in Person.m.
#import "Person.h"

@implementation Person

@synthesize firstName = _firstName;
@synthesize lastName = _lastName;
@synthesize organization = _organization;
@synthesize phoneNumber = _phoneNumber;

@end
That’s all we need to represent the data behind our application. Instances of this class will be passed around between the MasterViewController and DetailViewController scenes, which will display them using various UI components.
The Master Scene
Next, we’ll configure the master scene to display a list of Person objects. Defining a scene’s behavior requires careful interaction between the underlying view controller’s source code and the visual representation in the Interface Builder. Before we do any coding, let’s take a closer look at the template’s master scene in the storyboard.
Relationships
In our storyboard, a relationship defines the connection between a navigation controller and another scene. The Interface Builder visualizes the relationship as an arrow from the navigation controller to the other scene with a link icon on top of it. Selecting this icon will highlight the navigation controller, as shown in the following screenshot:

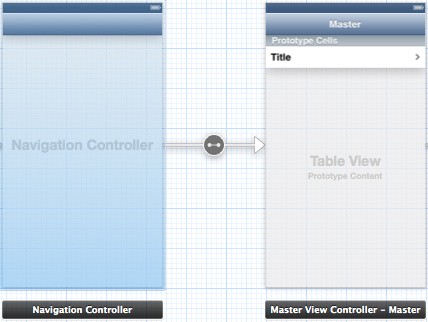
The template set up this relationship for us, but it’s important to be able to configure it on your own. So, go ahead and delete the navigation controller by selecting it and pressing Delete. To re-create the relationship, select the yellow View Controller icon in the master view controller, and then navigate to Editor in Xcode’s menu bar and select Embed In > Navigation Controller. A new navigation controller should appear, and you should be back to where you started.
It’s important to understand that the relationship arrow does not signify a transition between the navigation controller and the master controller. Rather, embedding our master scene into a navigation controller in this fashion creates a view controller hierarchy. It says that the master scene belongs to the navigation controller. This makes it possible to switch between scenes using the navigation controller’s built-in transitions and navigation buttons. For example, the Master button that appears at the top of the detail scene is automatically added by the navigation controller:


The built-in functionality for switching between scenes makes navigation controllers an easy way to configure the flow of complex applications. The next section discusses how to define transitions between a navigation controller’s scenes.
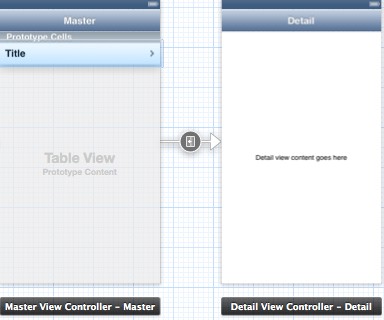
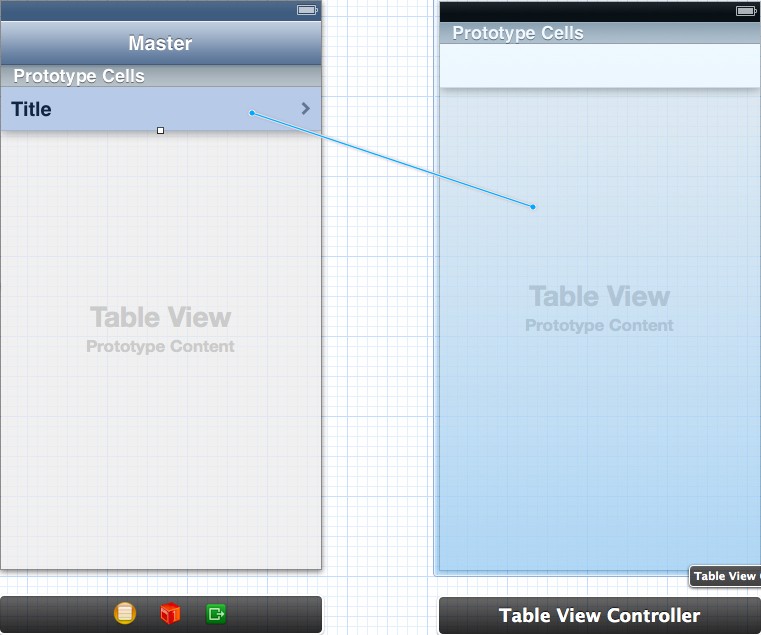
Segues
A segue represents a transition from one scene to another. Like relationships, it is visualized as an arrow from the source scene to the destination scene, but it uses a different icon. Notice that when you click the segue icon, only a single table cell is highlighted. This tells us that the segue is attached to individual table cells instead of the entire master scene.

Again, our template created this segue for us, but it’s important to be able to create one from scratch. So, select the segue icon and press Delete to remove it from the storyboard. To re-create it, control-drag from the table cell to the detail scene.

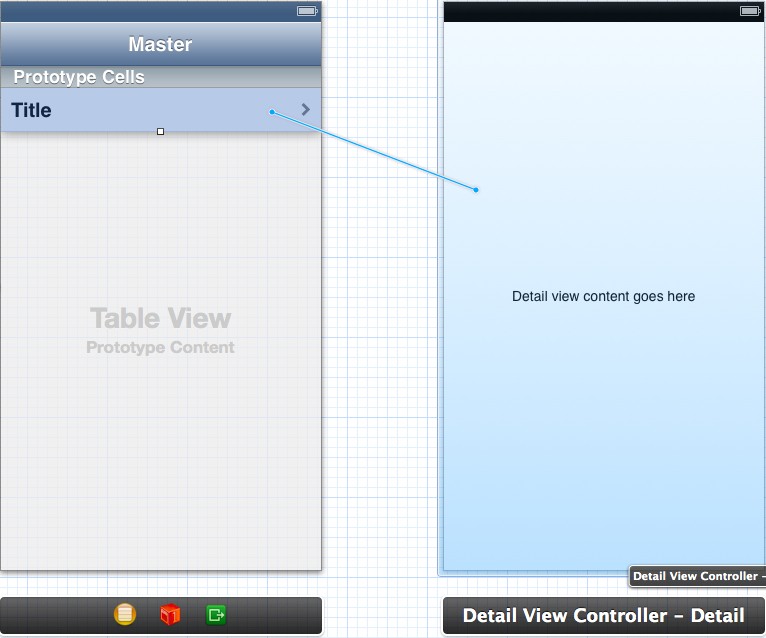
This will open a menu prompting you for the Selection Segue/Accessory Action type. We want our segue to occur when the user selects the table cell, so choose push under the Selection Segue group.

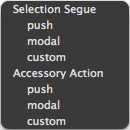
The parent UINavigationController manages its scenes through a navigation stack, and its pushViewController:animated: and popViewControllerAnimated: methods let you add or remove view controller instances from the stack. For example, pushing a detail view controller object onto the navigation stack is how you drill down to the detail scene, and clicking the Master button in the detail scene’s navigation bar pops it from the navigation stack. Selecting push from the menu in Figure 40 tells the segue to call the pushViewController:animated: method to transition from the master scene to the detail scene.
In addition to a type, each segue must also have a unique identifier so that it can be accessed from your source code. You can edit a segue’s ID by selecting the segue icon and opening the Attributes inspector panel. Our segue should have an identifier of showDetail, and you should also see the Push segue type in the Style field:

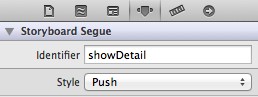
The other Style option is Modal, which presents another scene on top of an existing scene, completely independent of the parent navigation controller. You should leave this segue’s Style as Push (we’ll create a modal segue toward the end of this chapter).
Tables
One of the main differences between our master scene and the ViewController from the previous chapter is the fact that it inherits from UITableViewController instead of UIViewController. A table view controller manages a UITableView instance. Table views are composed of a single column of rows, possibly grouped into sections. This makes them well suited to presenting lists of data.
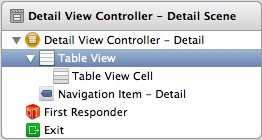
Since table views are graphical containers, it can be hard to select them in the scene editor. The easiest way to select it is from the document outline to the left of the scene editor. The document outline is a tree containing all the elements managed by the Interface Builder, and you should find a Table View item under the Master View Controller, as shown in the following figure.


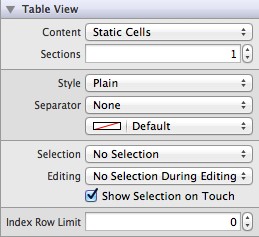
When you select the table view, everything under the navigation bar in the master scene should be highlighted in the scene builder. This gives you the chance to edit the table view properties in the Attributes inspector. The most important option is the Content field, which determines how you will interact with the table from your code:

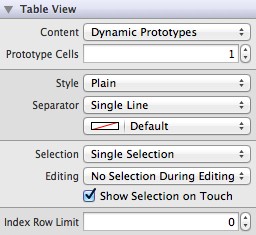
If you set the Content field to Dynamic Prototypes, you can create new cells by duplicating a prototypical cell designed in the Interface Builder. Static cells, on the other hand, cannot be duplicated, resulting in a static table. This means that you should use Dynamic Prototypes when you want to insert or delete rows on the fly, and use Static Cells when your table always shows the same amount of information. Keep the master scene’s table dynamic. We’ll use a static table for the detail scene.
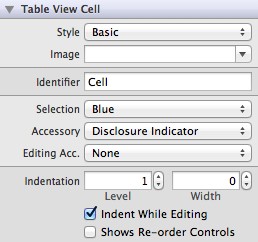
When you use prototype cells, you need to give each prototype a unique identifier so that it can be accessed from your source code (just like a segue ID). To edit a prototype cell’s ID, select the cell in either the scene editor or the interface builder and open the Attributes inspector. The identifier for that particular prototype can be set in the Identifier field, as shown in the following figure. Since we’re only going to have one prototypical cell in this application, you can leave the default Cell value, but for real applications you should give each prototype a descriptive identifier.

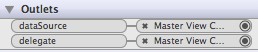
It’s also worth taking a look at the Connections inspector for the UITableView (not the prototype cell). You should see a dataSource and a delegate outlet, and both of them should specify the MasterViewController class for their destination.

A table view’s data source is a special kind of delegate that provides the information for each row in the table. In addition to the raw data, a table view delegate is necessary to define the behavior of the table and the appearance of each row. As with application and text field delegates, these are implemented through protocols called UITableViewDataSource and UITableViewDelegate, respectively.
In this case, the MasterViewController class acts as both the data source and the delegate, which is why the master-detail template included methods like tableView:cellForRowAtIndexPath: and tableView:canEditRowAtIndexPath: in MasterViewController.m. In the next section, we’ll alter these methods to change the appearance of the friend list.
Coding the Master View Controller
Now that we have a better handle on what’s going on in the storyboard, we’re ready to start customizing our MasterViewController class. Right now, the master scene is displaying a list of NSDate objects, but we want to change those to Person objects. Of course, this means we’ll need access to the Person class, so import the header in MasterViewController.m:
#import "Person.h"
Remember that the viewDidLoad: method tells the master scene’s Add button to call the insertNewObject: method whenever the user taps it. Instead of adding a date object to the _objects array, we need insertNewObject: to add a Person object. Change it to the following:
- (void)insertNewObject:(id)sender {
    if (!_objects) {
        _objects = [[NSMutableArray alloc] init];
    }
    Person *friend = [[Person alloc] init];
    friend.firstName = @"<First Name>";
    friend.lastName = @"<Last Name>";
    friend.organization = @"<Organization>";
    friend.phoneNumber = @"<Phone Number>";
    [_objects insertObject:friend atIndex:0];
    NSIndexPath *indexPath = [NSIndexPath indexPathForRow:0 inSection:0];
    [self.tableView insertRowsAtIndexPaths:@[indexPath]
                    withRowAnimation:UITableViewRowAnimationAutomatic];
}
This instantiates a new Person object and populates it with some dummy values, and then adds it to the front of the _objects array with insertObject:atIndex:. The NSIndexPath instance is a simple data object representing the index of a particular cell, and the insertRowsAtIndexPaths:withRowAnimation: adds a new cell at the specified location.
Notice that this last method doesn’t actually create the new cell—it just adds an item to the _objects array and tells the table that it should have one more row in it. This prompts the table to create a new cell, which is prepared by the tableView:cellForRowAtIndexPath: data source delegate method. It should look like the following:
- (UITableViewCell *)tableView:(UITableView *)tableView
         cellForRowAtIndexPath:(NSIndexPath *)indexPath {
    UITableViewCell *cell = [tableView
                             dequeueReusableCellWithIdentifier:@"Cell"
                             forIndexPath:indexPath];
    Person *friend = _objects[indexPath.row];
    cell.textLabel.text = [NSString stringWithFormat:@"%@ %@",
                           friend.firstName, friend.lastName];
    return cell;
}
This method is called every time the table needs to render a given cell, and it should return a UITableViewCell object representing the corresponding row. First, we fetch a prototype cell using the identifier defined in the storyboard, and then we use the NSIndexPath instance to find the associated Person object. Finally, we display the person’s name through the textLabel property of the cell.
Now, you should be able to add, view, and delete Person objects from the master scene:
That covers the basic list functionality for the master scene, but we still have one more task before we move on to the detail scene. When a user selects one of the items in the master list, we need to pass that object to the detail scene.
Remember that the UINavigationController and the push segue handles the transition for us, but it gives us the opportunity to send data from the source view controller to the destination view controller by calling the prepareForSegue:sender: method right before it switches to the detail view. Change prepareForSegue:sender: in MasterViewController.m to the following (the only real change is to use a Person object instead of an NSDate instance):
- (void)prepareForSegue:(UIStoryboardSegue *)segue sender:(id)sender {
    if ([[segue identifier] isEqualToString:@"showDetail"]) {
        NSIndexPath *indexPath = [self.tableView indexPathForSelectedRow];
        Person *friend = _objects[indexPath.row];
        [[segue destinationViewController] setDetailItem:friend];
    }
}
This method is how we pass data between the master scene and the detail scene. It is called for every segue associated with a particular controller, so our first step is to check the segue ID, which was defined in the Interface Builder. Then, we use the indexPathForSelectedRow method to get the index of the selected row (aren’t Objective-C naming conventions great), and we use that index to find the corresponding data item from the _objects array. Finally, we pass this object off to the detail scene by setting its detailItem property.
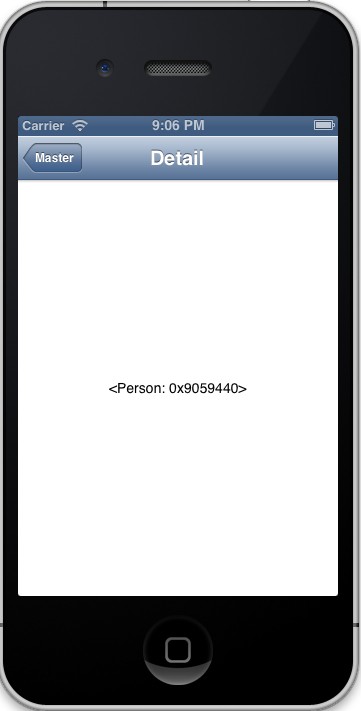
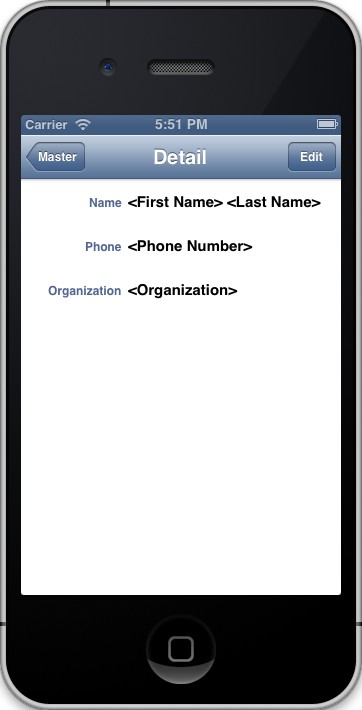
Now when you select an item from the master list, you should see a Person object instead of an NSDate instance. The default detail scene uses the description method to convert the object to a string, which is why we see a memory address in Figure 47 instead of any meaningful information. We’ll change that in the next section.
To summarize our master scene: we have a relationship connection that embeds it in a UINavigationController instance, a segue defining the transition to the detail scene, a prototype cell that we use as a template for new table rows, an Add button that adds dummy instances to the master list of data items, and a prepareForSegue:sender: method that passes the selected item off to the detail scene.
The Detail Scene
Next, we need to configure the detail scene to display the selected friend. A single Person object always has the same amount of information (a name, an organization, and a phone number), so we’ll use three static cells to format the output instead of dynamic prototypes. Just like the master scene, we’re going to configure the Interface Builder first, and then code the functionality after we have the UI components laid out.
Switching to a Table View Controller
The master-detail template uses a plain ViewController for the detail scene, so our first task is to replace it with a UITableViewController. In the Interface Builder, select the detail scene and press Delete to remove it from the storyboard. Then, drag a Table View Controller object from the Objects Library onto the scene editor.


The segue was deleted along with the old detail scene, so the new table view isn’t a part of the navigation controller hierarchy yet. Re-create the segue by dragging from the master scene’s prototype cell to the new detail scene, and then select push to create a push segue. After that, be sure to change the ID of the segue back to showDetail.

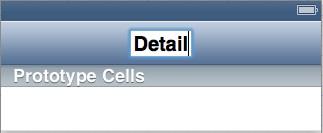
This integrates the Table View Controller with the navigation hierarchy, and the Interface Builder reflects this by adding a navigation bar to the top of the detail scene. However, that navigation bar is now blank. Let’s fix that by double-clicking in the center of the empty navigation bar and entering Detail as the title of the scene, like so:

We also need to connect the new scene to our DetailViewController class. Before changing the class in the interface builder, we need to make DetailViewController inherit from UITableViewController. Change the interface declaration in DetailViewController.h to the following:
@interface DetailViewController : UITableViewController
Then, open the storyboard again, select the yellow icon in the Table View Controller’s dock, open the Components inspector, and change the Class to DetailViewController.


Now we’re back to where we started, but we have a Table View Controller instead of a normal View Controller. Remember that we’re going to use a static table to lay out the selected Person object’s information. So, select the detail scene’s detail view from the document outline.

Then, change the Content field to Static Cells in the Attributes inspector. You can also change Separator to None and Selection to No Selection. This removes the line between the cells and prevents users from selecting them.

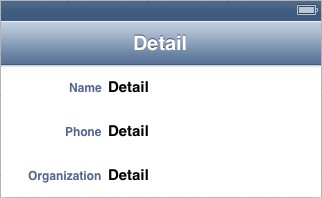
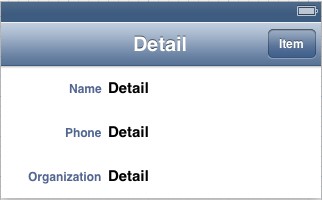
You should now see three blank cells in the detail scene. Select all of them by holding Shift and clicking them, and then change their Style to Left Detail in the Attributes inspector. This adds a Title and a Detail label to each of the cells. Change the title labels to Name, Phone, and Organization so that your detail scene looks like the following:

After we add a few properties to the DetailViewController class, we’ll turn the remaining detail labels into outlets and use them to display the selected Person’s information.
Coding the Detail View Controller
That’s about all we can do in the Interface Builder for now. Let’s add a few properties to DetailViewController so that we can access the detail labels that we just added. Change DetailViewController.h to the following:
#import <UIKit/UIKit.h>

@interface DetailViewController : UITableViewController

@property (strong, nonatomic) id detailItem;
@property (weak, nonatomic) IBOutlet UILabel *nameLabel;
@property (weak, nonatomic) IBOutlet UILabel *organizationLabel;
@property (weak, nonatomic) IBOutlet UILabel *phoneNumberLabel;

@end
Recall from the previous chapter that the IBOutlet modifier is what makes these properties available to the Interface Builder. Next, synthesize these properties in DetailViewController.m:
#import "DetailViewController.h"
#import "Person.h"

@implementation DetailViewController

@synthesize detailItem = _detailItem;
@synthesize nameLabel = _nameLabel;
@synthesize organizationLabel = _organizationLabel;
@synthesize phoneNumberLabel = _phoneNumberLabel;
Then, change the configureView method to set the value of the detail labels based on the Person object passed in from the master scene:
- (void)configureView {
    if (self.detailItem &&
        [self.detailItem isKindOfClass:[Person class]]) {
        NSString *name = [NSString stringWithFormat:@"%@ %@",
                          [self.detailItem firstName],
                          [self.detailItem lastName]];
        self.nameLabel.text = name;
        self.organizationLabel.text = [self.detailItem organization];
        self.phoneNumberLabel.text = [self.detailItem phoneNumber];
    }
}
Also notice that we use the isKindOfClass: method to ensure that the detail item is in fact a Person object. This is a best practice step when using dynamically typed variables like detailItem.
Outlet Connections
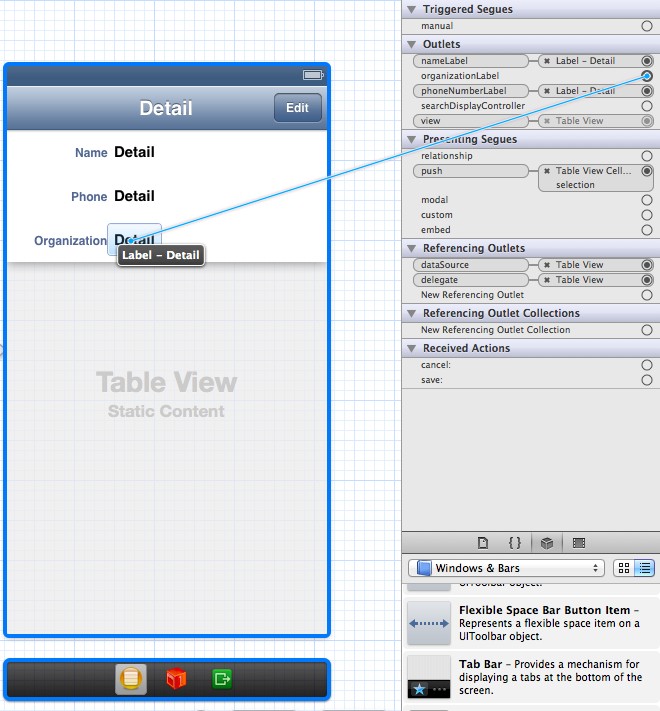
Our last step for the detail scene is to connect the nameLabel, organizationLabel, and phoneNumberLabel fields to their corresponding UILabel components in the storyboard. This can be accomplished by selecting the yellow icon in the detail scene’s dock and dragging from the circles in the Connections inspector to the label components in the scene editor. Be sure to drag each outlet to the corresponding labels.

When you compile the app, you should be able to select items from the master list and view their details in the detail scene. Note that we can only display details; we can’t edit them yet.

To summarize the changes to our detail scene: we replaced the default controller with a Table View Controller component, changed DetailViewController to inherit from UITableViewController, re-created the segue from the master scene to the detail scene, and declared several properties that served as outlets from the DetailViewController to UILabel instances. The goal of all of this was to display the properties of the Person instance that was selected in the master scene.
The Edit View Controller
Our final job for this chapter will be to add another scene that lets us edit the selected item. Instead of a push segue, we’re going to implement this new scene using a modal segue. A modal segue presents the destination scene “on top of” the existing scene, much like a pop-up window in a desktop computer. This does not affect the navigation hierarchy, so instead of a parent UINavigationController taking responsibility for navigating between the scenes, the modally-presented scene dismisses itself when necessary.
For our example, we’ll add a modal segue between our existing detail scene and a new edit scene, then we’ll use an unwind segue to get back to the original scene. This gives us a new tool for controlling the flow of our application, and it presents the opportunity to get a little bit more comfortable with navigation bars, too.
Creating the Edit Scene
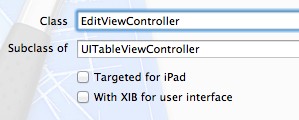
Before we can create a modal segue, we need an edit scene to work with. This scene will work almost exactly like the detail scene, except it will have UITextField components instead of UILabels so that the user can edit each property. First, create a new class called EditViewController and use UITableViewController for the superclass:

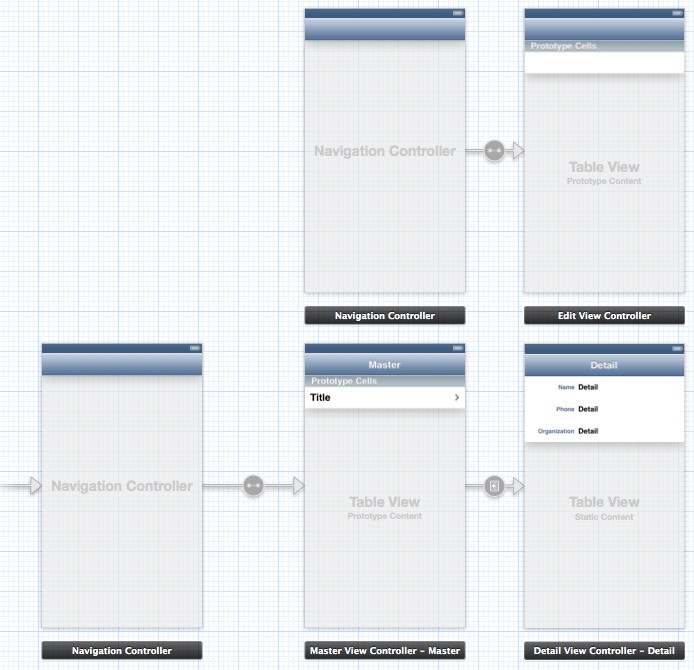
Next, open the Interface Builder and drag another Table View Controller from the Object Library into the scene editor. Position it above the detail scene, like so:

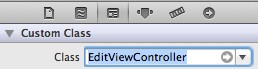
This new controller needs to be connected to the EditViewController class that we just created, so select it in the Interface Editor, open the Identity inspector and change the Class field to EditViewController.

Navigating to the Edit Scene
Our edit scene will use a navigation bar to present Cancel and Save buttons. We could embed it in the root UINavigationController, but remember that we want to present it modally—not by pushing it onto the existing view controller stack. To give it its own navigation bar, all we need to do is embed it in its own navigation controller. Select the Edit View Controller in the Interface Builder and select Editor > Embed In > Navigation Controller from the Xcode menu.

Whereas push segues let the containing navigation controller add navigation buttons for you, we need to add our own buttons for the modal segue. The UIKit Framework uses a special category of controls for use in navigation bars. We’re looking for a bar button item, which you can find in the Windows & Bars section of the Object Library.

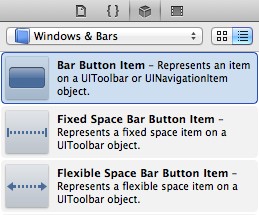
Drag a Bar Button Item from the Object Library onto the right side of the detail scene’s navigation bar. It should snap into place and have a default value of Item, as shown in the following screenshot:

This button will launch the edit scene, so we should probably change the text to Edit. You could do this by manually changing the text in the scene editor, but the preferred way is to select one of the predefined button types from the Attributes inspector. Select the Bar Button Item and change its Identifier field from Custom to Edit.

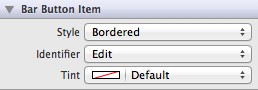
These predefined types let you access the default system icons which provide a consistent user experience across applications. This isn’t a huge deal for the Add, Edit, Done, and other text-based buttons, but can make quite a difference for the iconic types like Compose:


Next, we need to make our new edit button transition to the edit scene. This uses the same process as the push segue from the master table cell to the detail scene. Control-drag from the edit button to the new navigation controller, and select Modal for the Action Segue. You should see a new segue connection with a modal icon on it:

As with all segues, our new modal segue needs a unique identifier. Select the modal segue’s icon and enter editDetail in the Identifier field of the Attributes inspector.
You should now be able to compile the project (with a few warnings) and launch an empty edit scene by tapping the Edit button in the detail scene. Our next task will be to add some UI components to the edit scene, along with a Cancel and Save button.
Designing the Edit Scene
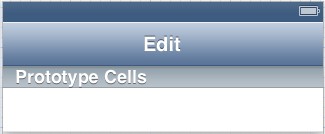
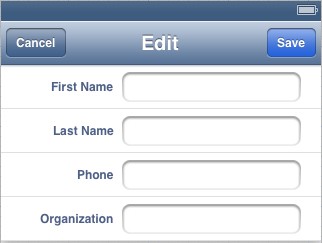
Next, we’re going to design the edit scene. It will look a lot like the detail scene, except it will have text fields instead of labels. Our first task is to add a title to the navigation bar. Double-click the center of the edit scene’s navigation bar and type Edit. The scene should look like the following afterwards:

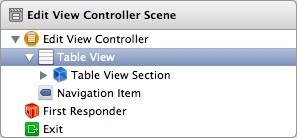
Next, we need to change the Table View from a dynamic table to a static one. Select the edit scene’s Table View object from the Document Outline, as shown in the following figure:

Then, change the Content field of the Attributes inspector to Static Cells. Delete all but one of the static cells that appear in the scene editor. It’s also a good idea to change the Selection field to No Selection since we’re only using the table for layout purposes.
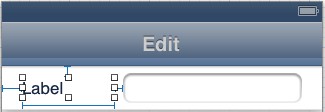
Now, we can’t use any of the default Style values for the cells since none of them use text fields. Instead, we’ll create the cell from scratch. First, drag a Label and a Text Field object onto the remaining cell and use the guidelines to make sure they are centered vertically. You should also resize both the label and the text field so that they look something like the following:

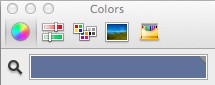
For the detail scene, we specified Left Detail for the cell Style. This automatically defined the style, font, and alignment of the components, but since we’re creating a custom cell, we need to do this ourselves. All of these settings can be defined in the Attributes inspector for the UILabel and UITextField objects. For the label, change the text to First Name, and then set the color to the same as the title labels in the detail scene. One way to do this is to open the Colors panel for the edit scene’s label, selecting the magnifying glass (which really acts more like a dropper), and selecting the color from the detail scene’s title label. The selected color should be the one in the following figure:

Finally, change the font to System Bold with a size of 12 and change the alignment to Right. The final settings are shown in the following screenshot:


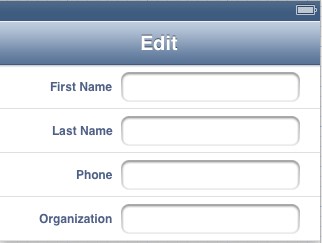
All you need to do for the text field is change the Capitalization to Words. To create the cells for the other fields, copy and paste the existing cell three times, and change their labels to Last Name, Phone, and Organization. This will give you the following table:

You should also change the Keyboard field for the Phone text field to Number Pad to display a number pad instead of a QWERTY keyboard. That covers the edit scene’s table, but if you try to compile the project right now, you’ll notice that all of these cells disappear. This is because the EditViewController.m provided by the class template defines several data source methods that treat the table as a prototype cell. We’ll delete these in the next section.
But before we do that, let’s add two buttons to the navigation bar so that users can choose whether they want to cancel or save their edits. Drag two bar button items from the Object Library onto either side of the navigation bar. Change the left button’s Identifier field to Cancel and the right one to Save.

Notice how the Save button is bright blue as per the iOS UX conventions. Again, these default Identifiers help ensure a consistent user interface across applications.
Coding the Edit View Controller
In this section, we’ll code the functionality behind the UI components we just added to the storyboard. The two main tasks are to prepare outlets for the text fields so that we can access them from the EditViewController class, and implement a text field delegate so users can dismiss the text field. This should all be a review from the previous chapter. First, let’s add a few properties to the header file:
// EditViewController.h
#import <UIKit/UIKit.h>

@interface EditViewController : UITableViewController

@property (strong, nonatomic) id detailItem;

@property (weak, nonatomic) IBOutlet UITextField *firstNameField;
@property (weak, nonatomic) IBOutlet UITextField *lastNameField;
@property (weak, nonatomic) IBOutlet UITextField *phoneNumberField;
@property (weak, nonatomic) IBOutlet UITextField *organizationField;

@end
The implementation looks a lot like DetailViewController.m. All it does is make sure that the text fields are updated when the detailItem property is changed:
// EditViewController.m
#import "EditViewController.h"
#import "Person.h"

@implementation EditViewController

@synthesize detailItem = _detailItem;
@synthesize firstNameField = _firstNameField;
@synthesize lastNameField = _lastNameField;
@synthesize phoneNumberField = _phoneNumberField;
@synthesize organizationField = _organizationField;

- (void)setDetailItem:(id)detailItem {
    if (_detailItem != detailItem) {
        _detailItem = detailItem;
        [self configureView];
    }
}

- (void)configureView {
    if (self.detailItem && [self.detailItem isKindOfClass:[Person class]]) {
        self.firstNameField.text = [self.detailItem firstName];
        self.lastNameField.text = [self.detailItem lastName];
        self.phoneNumberField.text = [self.detailItem phoneNumber];
        self.organizationField.text = [self.detailItem organization];
    }
}

- (void)viewDidLoad {
    [super viewDidLoad];
    [self configureView];
}

- (void)didReceiveMemoryWarning {
    [super didReceiveMemoryWarning];
}

@end
Next, we need to prepare the text field delegate. In EditViewController.h, tell the class to adopt the UITextFieldDelegate protocol with the following line:
@interface EditViewController : UITableViewController <UITextFieldDelegate>
As in the previous chapter, we can dismiss the keyboard by implementing the textFieldShouldReturn: method. Add the following to EditViewController.m:
- (BOOL)textFieldShouldReturn:(UITextField *)textField {
    if ((textField == self.firstNameField) ||
        (textField == self.lastNameField) ||
        (textField == self.phoneNumberField) ||
        (textField == self.organizationField)) {
        [textField resignFirstResponder];
    }
    return YES;
}
Recall that the prepareForSegue:sender: method is called on the source scene right before iOS switches to the destination scene. Just as we did in the master scene, we’ll use this to send the selected item to the edit scene. In DetailViewController.m, add the following method:
- (void)prepareForSegue:(UIStoryboardSegue *)segue sender:(id)sender {
    if ([[segue identifier] isEqualToString:@"editDetail"]) {
        NSArray *navigationControllers = [[segue destinationViewController] viewControllers];
        EditViewController *editViewController = [navigationControllers objectAtIndex:0];
        [editViewController setDetailItem:self.detailItem];
    }
}
Remember that the edit scene is embedded in a navigation controller, so the modal segue points to the navigation controller, not the edit scene itself. This intervening navigation controller adds an extra step that we didn’t need to worry about in the master scene’s prepareForSegue:sender: method. To get the edit scene, we need to query the navigation controller’s viewControllers property, which is an array containing its navigation stack. Since the edit scene is the only child view controller, we can access it via the objectAtIndex:0 call. Once we have the EditViewController instance, we simply forward the selected item from the detail scene to the edit scene.
Outlet and Delegate Connections
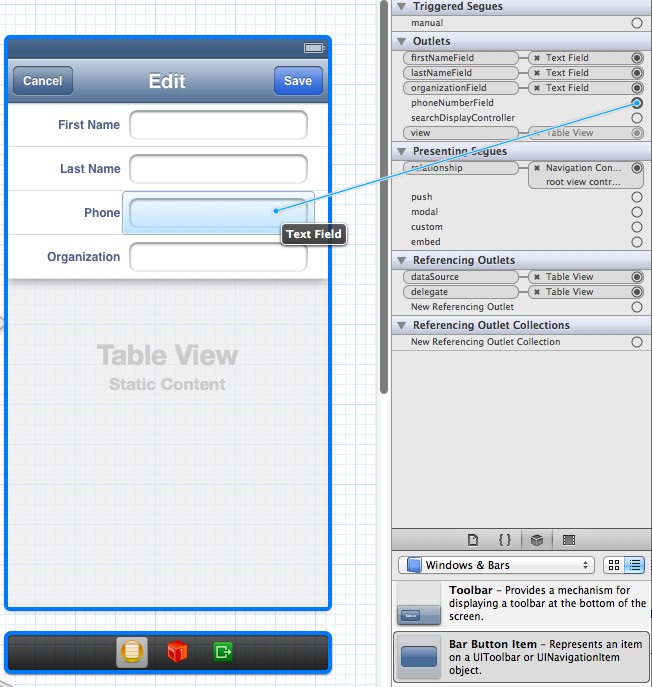
Back in the storyboard, let’s connect the outlets and delegates that we just exposed. For the outlets, select the yellow icon in the edit scene’s dock, open the Connections inspector, and drag from the firstNameField, lastNameField, organizationField, and phoneNumberField circles to the corresponding text fields in the scene.

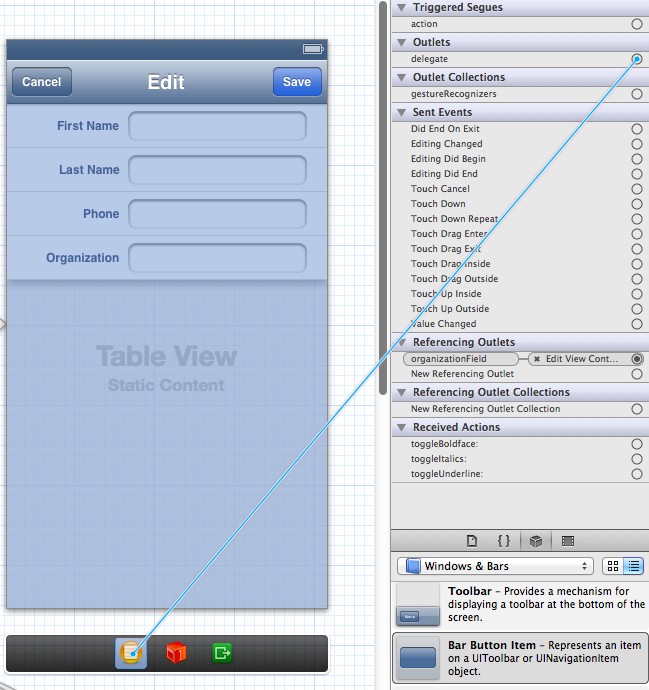
To set the EditViewController as the delegate for the text fields, select each text field, open the Connections inspector, and drag from the delegate circle to the yellow icon in the dock, as shown in the following screenshot. Do this for each text field.

When you compile the project, you should be able to launch the edit scene and see the text fields populated with the selected Person object’s properties. Hopefully by now, you’re relatively comfortable making these kinds of outlet and delegate connections on your own.
You can edit the values, but since we haven’t implemented the Cancel or Save buttons yet, you won’t be able to alter the underlying Person object or even navigate away from the edit scene.
Unwind Segues
Remember that Master button that automatically appeared in the detail scene’s navigation bar? The navigation controller for the master/detail scenes set up this “back” button for us, but since we’re using a modal segue, we need to manually dismiss the modally presented edit scene. We’ll use what’s called an unwind segue to return to the detail scene.
The main difference between an unwind segue and other segues is that the former uses an existing scene as the destination, whereas modal and push segues create a new instance of their destination scene. This is important to keep in mind if you’re doing a lot of transitioning back and forth.
The process of unwinding a scene is also a little bit different than initiating a push segue. It uses the target-action design pattern, which we discussed in the previous chapter. In addition to calling the prepareForSegue:sender: method on the source scene, an unwind segue calls an arbitrary method on the destination scene (DetailViewController). Let’s go ahead and declare a cancel and a save action in DetailViewController.h:
- (IBAction)save:(UIStoryboardSegue *)sender;
- (IBAction)cancel:(UIStoryboardSegue *)sender;
In a moment, we’re going to attach these methods to the Cancel and Save buttons in the edit scene. But first, we need to implement them. Add the following methods to DetailViewController.m:
- (IBAction)save:(UIStoryboardSegue *)segue {
    if ([[segue identifier] isEqualToString:@"saveInput"]) {
        EditViewController *editController = [segue sourceViewController];
        [self.detailItem setFirstName:editController.firstNameField.text];
        [self.detailItem setLastName:editController.lastNameField.text];
        [self.detailItem setPhoneNumber:editController.phoneNumberField.text];
        [self.detailItem setOrganization:editController.organizationField.text];
        [self configureView];
    }
}

- (IBAction)cancel:(UIStoryboardSegue *)segue {
    if ([[segue identifier] isEqualToString:@"cancelInput"]) {
        // Custom cancel handling can go here.
    }
}
These are pretty straightforward. The save: method updates the detailItem’s properties based on the text field values from the edit scene, and then updates its labels by calling configureView. The cancel: method simply ignores anything that happened in the edit scene.
Now, we can create an unwind segue to dismiss the edit scene and call the appropriate method. Configuring unwind segues is similar to creating push segues: you control-drag from the UI component that initiates the segue to the green Exit icon in the dock. This icon is dedicated solely to creating unwind segues.

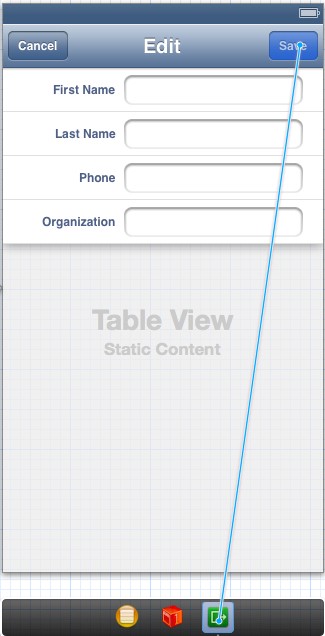
So, control-drag from the Save button in the edit scene to the Exit icon in the dock, as shown in the following figure:

A menu will pop up asking you to associate an action with the segue:

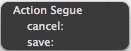
Of course, you’ll want to choose save:. That’s all you need to do to create the unwind segue. After repeating the process for the Cancel button, you should see both unwind segues in the document outline:

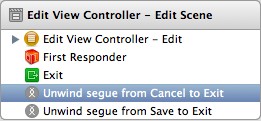
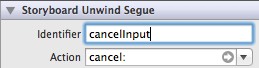
Unlike push and modal segues, unwind segues have no visual representation in the interface builder, so the document outline is the only way you can select them. Our last step will be to add unique identifiers to both of these segues via the Attributes inspector. Use cancelInput for the Cancel button and saveInput for the Save button (note that these are the identifiers we checked against in the cancel: and save: methods, respectively). Again, since our example app is so simple, adding segue identifiers is more of a best practice step than a necessity.

You can think of an unwind segue as a combination of a transition and a button. The segue takes care of dismissing the scene (i.e. transitioning to the parent scene), but since it’s initiated by a button press, you can also attach a method to it using the target-action pattern.
Our edit scene is now complete, and you should be able to compile the project, enter values into the edit scene’s text fields, and choose to cancel or save your changes. Since the save: method calls configureView after saving the new values, the detail scene will update to reflect the edits. However, we never told the master scene to update itself, so your changes will not be reflected in the master list.
Updating the Master List
The final thing we have to go over in this chapter is updating the master scene’s table to reflect any changes in the underlying data. There are a number of ways to do this, but the easiest (though not necessarily the most efficient) is to reload the table each time the master scene is displayed.
UIViewController defines a method called viewWillAppear: and calls it right before the associated scene is displayed. This is different than viewDidLoad:, which gets the first time the view is displayed. Since the parent navigation controller displays the same instance of the master scene each time the user navigates to it, we need to use the viewWillAppear: method instead of viewDidAppear:. In MasterViewController.m, add the following method:
- (void)viewWillAppear:(BOOL)animated {
    [super viewWillAppear:animated];
    UITableView *view = (UITableView *)self.view;
    [view reloadData];
}
First, we pass the method along to super, and then we fetch the controller’s root UIView instance through the view property. We can assume this is a UITableView because MasterViewController inherits from UITableViewController, but we still need to cast it to prevent the compiler from complaining. The UITableView’s reloadData method regenerates the table cells based on the underlying data set (the _objects array), and the master list should now reflect any changes you saved from the edit scene.

Summary
In this chapter, we learned how to manage multiple scenes within a single app. We experimented with UITableViewControllers, UINavigationControllers, and all sorts of segues. One of the most important concepts to take away from this chapter is how we transferred data between each scene: via the prepareForSegue:sender: method and the save: and cancel: methods for the unwind segue. Most applications are really just user-friendly editors for complex data structures, so understanding how that data is passed around goes a long way toward efficiently organizing iOS projects.
The previous two chapters covered everything you need to know to create simple user interfaces. For the rest of this series, we’ll explore other iOS frameworks for accessing media assets, localizing resources, and playing UI sound effects.
This lesson represents a chapter from iOS Succinctly, a free eBook from the team at Syncfusion.

Comments