This quick tip will introduce you to some of the powerful features available for testing & debugging apps with Xcode and the iOS Simulator.
Tip #1: Go Anywhere with Custom Coords
For years, developers struggled with debugging CoreLocation based applications in the simulator due to lack of built-in Simulator support for custom coordinates. While projects like FTLocationSimulator were a great help, many of us were still left envying Android developers who could easily set the location of the Android simulator using the bundled DDMS tools.
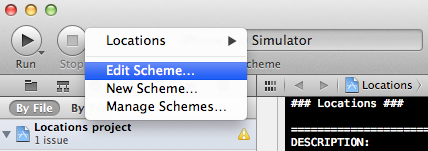
Fortunately, those days of quiet envy have been gone for awhile. With the release of Xcode 4.2, iOS Developers were able to simulate a default device location for a number of worldwide cities. This approach still exists, and can be done by selecting "Edit Scheme":
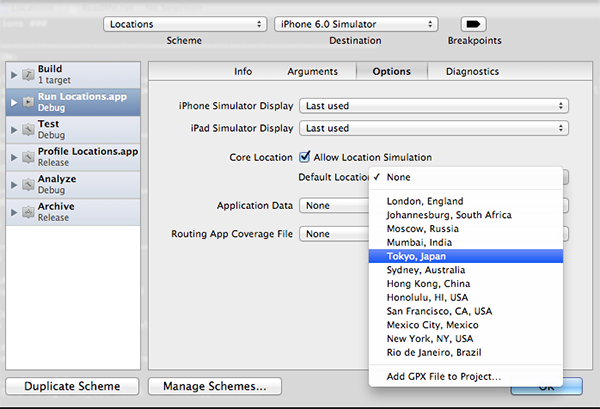
And then navigating to the "Options" tab of the popup window:
However, recent versions of the iOS Simulator have made it even easier to change the simulated location, and you can now accomplish this at run-time.
After you've launched the Simulator, selecting Debug > Location will produce the following menu options:

As you can see, you can now easily set your own coordinates using the "Custom Location" option:
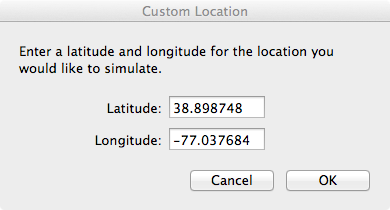
Of course, this does require that you actually know the exact coordinates of the location you want to simulate, and not just the street address. The process of generating latitude and longitude coordinates from an address is referred to as geocoding, and there are a number of free web sites and iOS apps that will generate coordinates from a street address for you. The free iOS App Geocode Something as well as the geocoder.us web site are both worth mentioning, and this geocoder mashup is a quick and easy way to pull coordinates directly from Google Maps.
The simulator also comes with a number of pre-defined locations and paths that you can use for testing your own applications. A brief description of each is provided below.
Apple Headquarters
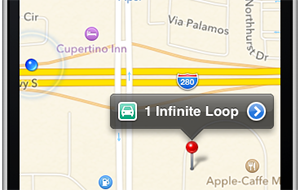
Selecting "Apple" from the Location menu will set the current location to Apple HQ at 1 Infinite Loop, Cupertino, CA. For users of early versions of Xcode, you'll recognize this as the only location originally supported by the Simulator.

City Bicycle Ride
If you select the "City Bicycle Ride" option, the CoreLocation framework will start generating coordinates that follow a preset path close to Apple HQ. The bicycle option will cause updates to occur with a speed of about 5 - 7 meters per second.
City Run
The "City Run" option is just like the "City Bicycle Ride" setting, with the exception that updates occur with a tracking speed setting of about 3 - 4 meters per second.
Freeway Drive
The "Freeway Drive" option differs from the previous two in both the path followed and the speed in meters per second. The path moves along the Junipero Serra Freeway just north of Apple HQ, and the speed generally seems to be between 20 - 35 meters per second.
Apple Stores
In theory, this option should generate coordinates tied to Apple Store locations. However, with the iOS 6.0 Simulator and Xcode 4.5, this option seems to be badly broken. In my experience testing this, the coordinates always seem to start around approximately 33.7718 N, 112.9031 W, and then gradually increase in both the North and West readings, moving the current location on a diagoal path to nowhere. I have submitted this as a bug report to Apple, so if others are experiencing the same issue, hopefully it will be resolved soon!
Because the Apple Maps app can run in the simulator, testing out any of the above options is easy. Just launch the iOS Simulator as you normally would, set your simulated location, and then launch the Maps application.
With the iOS 6 SDK you can now run applications that use Maps directly in the simulator!
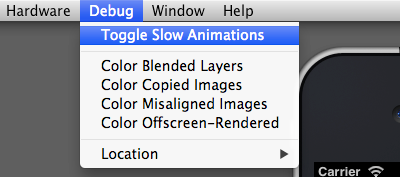
Tip #2: Bend Time with Slow Motion
Another great feature of the iOS Simulator is the ability to place animations in slow-motion with the Debug > Toggle Slow Animations menu option.
Doing so can be extremely helpful when you're trying to create a custom UIKit animation and need to make sure each frame looks just right.
Perhaps a more practical use of this feature is to slow-down the animations that occur when rotating the device in order to polish the orientation change animations (see Session 517 from WWDC 2012 for more information on how you can polish orientation animations).
Tip #3: Dynamically Color Views
The Debug menu option also provides the incredibly useful ability to color views in realtime:
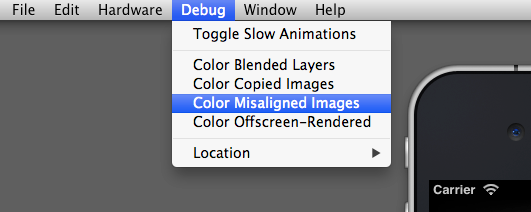
You can use these options to visually identify blended layers, copied images, misaligned images, and views rendered offscreen.
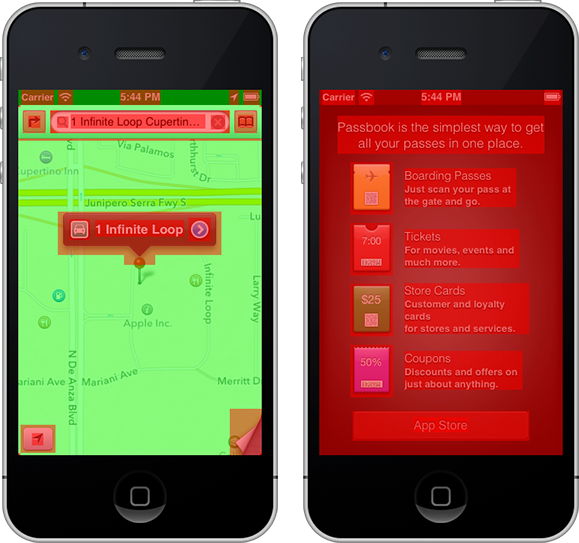
This is a helpful feature for debugging your own applications, and it can also be insightful for examining the default applications on the Simulator. The following screenshot shows the Maps app and the Passbook app with the "Color Blended Layers" option selected:
Tip #4: Simulate Hardware/Software Events
While nothing will replace the experience of testing applications on real hardware, the simulator has come a long way in the past few years with real-world event emulation. In fact, some events, like toggling an "in-call" status bar or generating memory warnings, are likely easier to debug in the simulator than with an actual device.
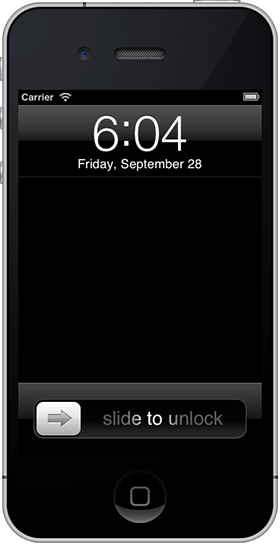
SIMULATED LOCK SCREEN
A look at the Hardware menu will reveal the following event options:
- Rotate Left
- Rotate Right
- Shake Gesture
- Home Button Press
- Lock Screen Press
- Simulate Memory Warning
- Toggle In-Call Status Bar
- Simulate Hardware Keyboard
- TV Out
Most of these are self-explanatory, but a few deserve further note.
The "Simulate Hardware Keyboard" option is mainly for debugging iPad applications where the user is likely to have a physical Keyboard connected via Bluetooth or the dock connector. Testing with the hardware keyboard option should be an important part of iPad app beta testing.
The "TV Out" option allows you to simulate VGA/HDMI connections by creating a new window that can have a resolution as low as 640x480 or as high as 1920x1080 (i.e. 1080p).
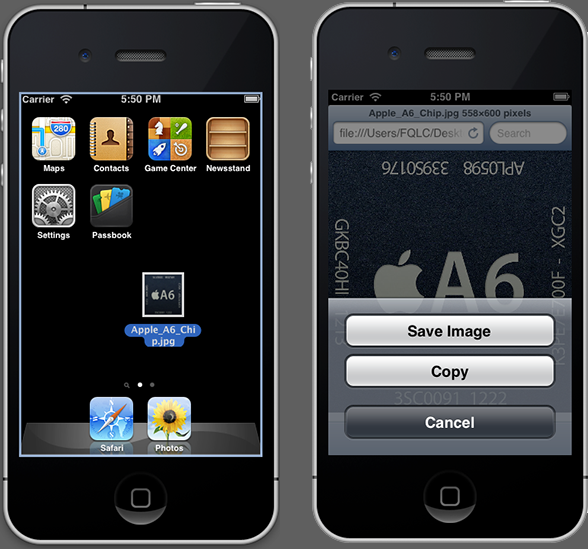
Tip #5: Adding Simulator Photos
The easiest way to add photos to the iOS Simulator is to simply drag-and-drop them individually from the OS X Finder window onto the Simulator Window.
However, if you need to add many different photos for testing, this process quickly becomes inefficient. When you need to add a lot of images at once, you might consider writing a simple iOS application that can loop through your photo list and add each image to the Photo Library with the UIImageWriteToSavedPhotosAlbum function. To see how this is done, take a look at Step 6 in my Build a Photo App with GPUImage tutorial.
Another approach would be to add the image files to the Simulator filesystem directly, but the steps for accomplishing this seem to change with each new version of iOS. Building your own importer might be a more reliable approach long-term (know of a better way to achieve this? Leave a comment below!).
Bonus: Download the 5.0/5.1 Simulators
For my own iOS applications, I always try to deploy for both the current version of iOS and one prior version. However, by default, Xcode only includes a Simulator for the current iOS version. Fortunately, there's an easy method for getting the Simulator for the previous iOS release as well.
With Xcode open, select Xcode > Preferences from the menubar, and then navigate to the "Downloads" tab. From here you will have the option to install prior iOS Simulators as well as the Command Line Tools package. I recommend installing all three of the options shown:

After the install completes, you'll be able to select the 5.0/5.1 iOS simulators when building and running your applications.
How Do You Use the Simulator?
What tips or tricks do you have for working with the iOS Simulator? Leave your feedback in the comments section below!

Comments