This iOS SDK Beginner's tutorial will teach you how to build a simple interface that consists of a username and password UITextField. We will cover both how to add a text field in Interface Builder and how to create one programmatically. Additionally, we will explore the UITextFieldDelegate protocol methods and demonstrate a few handy techniques for working with user input.
Creating Elements Programmatically
Creating elements, such as a text field, can be done in one of two ways. You can create it in Interface Builder or your can code it yourself programmatically. While it may be more convenient to create an element in Interface Builder, many programmers prefer to create elements programmatically. This tutorial will briefly explain both options.
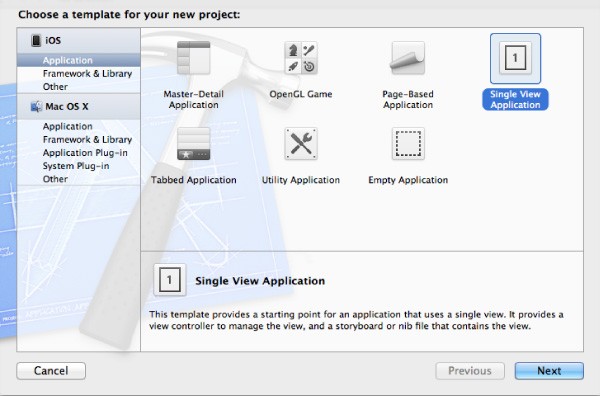
Step 1: Create a New Xcode Project
Launch Xcode and click File > New > Project. Click "Application" under the iOS pane on the left. Click on the icon titled "Single View Application" and click "Next."
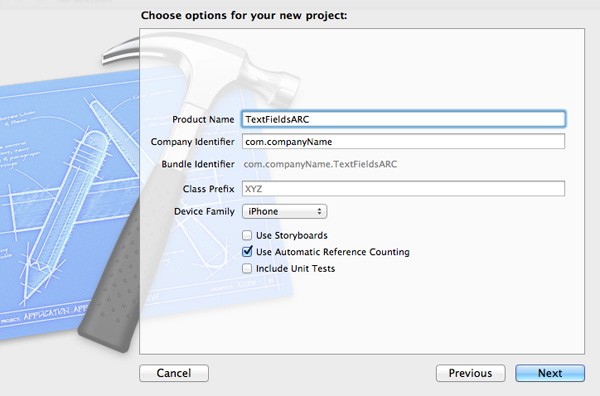
In the "Product Name" field, type "TextFieldARC" and enter a name for your Company Identifier, such as "com.companyName." Choose "iPhone" from the "Device Family" menu. Make sure to uncheck "Use Storyboards" and "Include Unit Tests," and check "Use Automatic Reference Counting" before clicking "Next." Choose a location to store your project and click "Create."
Step 2: Creating a UITextField
Programmatically
Click on the "ViewController.m" file and type the following code within the viewDidLoad method.
CGRect passwordTextFieldFrame = CGRectMake(20.0f, 100.0f, 280.0f, 31.0f);
UITextField *passwordTextField = [[UITextField alloc] initWithFrame:passwordTextFieldFrame];
passwordTextField.placeholder = @"Password";
passwordTextField.backgroundColor = [UIColor whiteColor];
passwordTextField.textColor = [UIColor blackColor];
passwordTextField.font = [UIFont systemFontOfSize:14.0f];
passwordTextField.borderStyle = UITextBorderStyleRoundedRect;
passwordTextField.clearButtonMode = UITextFieldViewModeWhileEditing;
passwordTextField.returnKeyType = UIReturnKeyDone;
passwordTextField.textAlignment = UITextAlignmentLeft;
passwordTextField.contentVerticalAlignment = UIControlContentVerticalAlignmentCenter;
passwordTextField.tag = 2;
passwordTextField.autocapitalizationType = UITextAutocapitalizationTypeNone;
[self.view addSubview:passwordTextField];
Notice that the text field's tag property is set to "2." Setting the tag property is one way to keep track of which text field is active in your program.
With Interface Builder
Click on the "ViewController.xib" file in the "Navigator" panel of your Xcode project. Click on the "View" in the "Document Outline" pane on the left. Click View > Utilities > Show Object Library. Scroll the Object library in the bottom left corner until you find a "Text Field" object. Click to select it, then drag-and-drop the text field on to the view.
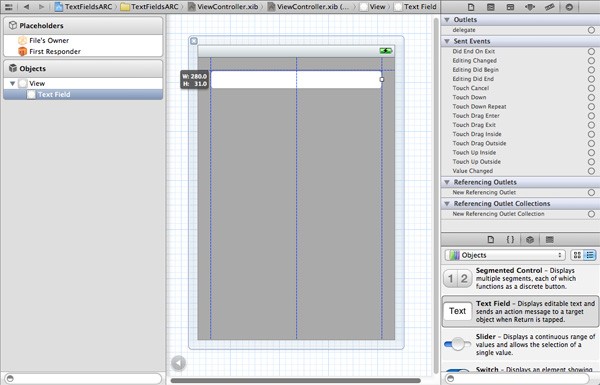
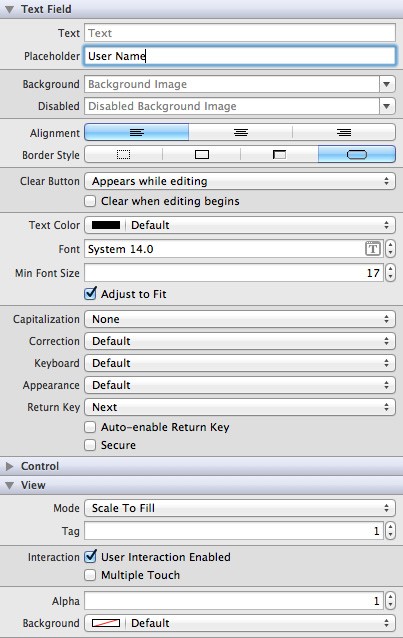
Adjust the text field so that it stretches across the top of the view. With the text field selected, click View > Utilities > Show Attributes Inspector. Look for the "Placeholder" field in the "Attributes Inspector" pane under "Text Field," and change it to "Username." Click the "Clear Button" drop-down menu and choose "Appears while editing." Click the "Return Key" drop down and choose "Next." Finally, scroll down to the "Tag" field under "View" and change it to "1." Click File > Save.
If you run your program now, you should have a UITextField object on the screen that can receive input! You can access the value of the object with the text property (i.e. passwordTextField.text).
However, using the TextField at this point will present one notable problem. There is no default method for removing the keyboard from the view. So, for our next trick...
Step 3: Removing the Keyboard
Resigning the keyboard when the background is tapped can be accomplished in different ways. The code below is an example of one technique. Click on the "ViewController.m" file and add the following method implementation:
- (void)touchesBegan:(NSSet *)touches withEvent:(UIEvent *)event{
    NSLog(@"touchesBegan:withEvent:");
    [self.view endEditing:YES];
    [super touchesBegan:touches withEvent:event];
}
Run the project again and you should now be able to dismiss the keyboard simply by tapping on the screen.
Step 4: Delegate Protocol Methods
Delegation is a design pattern that essentially allows two objects to communicate with each other. A UITextField object messages the appropriate UITextFieldDelegate method when certain events occur, such as when the text field begins editing. When a message is sent to one of the methods, you have an opportunity to perform customized actions. The object receiving the delegate messages can be any object that conforms to the delegate protocol, in this case UITextFieldDelegate. However, in the most common scenario, the object receiving the UITextField delegate messages will be the same UIViewController object that contains the UITextField as a subview.
Click on the "ViewController.m" file. In the viewDidLoad method where we programmatically created the text field above, add the following code:
passwordTextField.delegate = self; // ADD THIS LINE
[self.view addSubview:passwordTextField];
By setting the textField delegate property to self, the ViewController object becomes the delegate of the text field and is able to implement the UITextFieldDelegate methods.
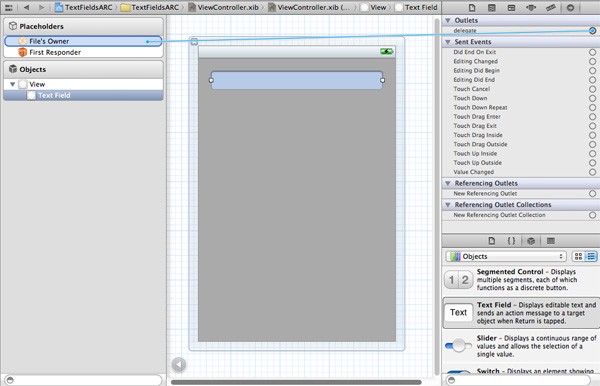
To set the delegate for the text field created in Interface Builder, click on "ViewController.xib." Click on the text field in the view, and click View > Utilities > Show Connections Inspector. Look for "delegate" under "Outlets" in the "Connections Inspector" pane on the right. Click the circle adjacent to it and drag and drop it on to "File's Owner" in the "Document Outline" pane on the left. This wires up the text field so that the ViewController object is set as the text field's delegate. Click File > Save.
Finally, click on "ViewController.h," and type the following code to conform the class to the UITextFieldDelegate protocol:
@interface ViewController : UIViewController <UITextFieldDelegate>
The following UITextFieldDelegate protocol methods are all optional, meaning they don't have to be implemented by the delegate. However, we're going to implement them all for the sake of learning about them. Let's discuss the methods as we type them in.
textFieldShouldBeginEditing: and textFieldDidBeginEditing:
Click on "ViewController.m" and add the following code.
- (BOOL)textFieldShouldBeginEditing:(UITextField *)textField{
    NSLog(@"textFieldShouldBeginEditing");
    textField.backgroundColor = [UIColor colorWithRed:220.0f/255.0f green:220.0f/255.0f blue:220.0f/255.0f alpha:1.0f];
    return YES;
}

- (void)textFieldDidBeginEditing:(UITextField *)textField{
    NSLog(@"textFieldDidBeginEditing");
}
textFieldShouldBeginEditing: is called just before the text field becomes active. This is a good place to customize the behavior of your application. In this instance, the background color of the text field changes when this method is called to indicate the text field is active. textFieldDidBeginEditing: is called when the text field becomes active.
textFieldShouldEndEditing: and textFieldDidEndEditing:
Add the following code below the previous methods.
- (BOOL)textFieldShouldEndEditing:(UITextField *)textField{
    NSLog(@"textFieldShouldEndEditing");
    textField.backgroundColor = [UIColor whiteColor];
    return YES;
}

- (void)textFieldDidEndEditing:(UITextField *)textField{
    NSLog(@"textFieldDidEndEditing");
}
These two methods are similar to the methods that are called when the text field begins editing. textFieldShouldEndEditing: is called just before the text field becomes inactive, and textFieldDidEndEditing: is called when the text field becomes inactive. Inside textFieldShouldEndEditing:, the background color is changed back to white so that the text field can go back to its original color. Again, these methods give you a chance to customize the behavior of the application as the text field becomes inactive.
textField:shouldChangeCharactersInRange:replacementString
Add the following code below the previous methods.
- (BOOL)textField:(UITextField *)textField shouldChangeCharactersInRange:(NSRange)range replacementString:(NSString *)string{
    NSLog(@"textField:shouldChangeCharactersInRange:replacementString:");
    if ([string isEqualToString:@"#"]) {
        return NO;
    }
    else {
        return YES;
    }
}
textFieldShouldChangeCharactersInRange: replacementString: is called each time the user types a character on the keyboard. In fact, this method is called just before a character is displayed. If you are looking to restrict certain characters from a text field, this is the method for you. As you can see in our example, we added some logic to disallow the "#" symbol.
textFieldShouldClear:
Add the following code below the previous methods.
- (BOOL)textFieldShouldClear:(UITextField *)textField{
    NSLog(@"textFieldShouldClear:");
    return YES;
}
textFieldShouldClear: is called when the user presses the clear button, the gray "x," inside the text field. Before the active text field is cleared, this method gives you an opportunity to make any needed customizations.
textFieldShouldReturn:
Add the following code below the previous methods.
- (BOOL)textFieldShouldReturn:(UITextField *)textField{
    NSLog(@"textFieldShouldReturn:");
    if (textField.tag == 1) {
        UITextField *passwordTextField = (UITextField *)[self.view viewWithTag:2];
        [passwordTextField becomeFirstResponder];
    }
    else {
        [textField resignFirstResponder];
    }
    return YES;
}
textFieldShouldReturn: is called when the user presses the return key on the keyboard. In the example, we find out which text field is active by looking at the tag property. If the "Username" text field is active, the next text field, "Password," should become active instead. If the "Password" text field is active, "Password" should resign, resigning the keyboard with it.
Step 5: Testing the Text Fields
Click Build > Run, or click the "Run" arrow in the top left corner. With the console open, play around with the text fields. The NSLog placed in each of the delegate protocol methods earlier helps to see the circumstances in which each delegate method is called.
Conclusion
The UITextFieldDelegate protocol methods provide a great opportunity to customize the behavior of a UITextField. This tutorial is focused on some of the more common tasks relating to UITextField, such as resigning the keyboard and moving to the next text field, but the possibilities for customizing behavior are endless. Once you begin to understand the delegate design pattern, it is easier to branch out to other pre-built objects that use delegates, such as UITableView or UIScrollView. Keep your old pal NSLog in your back pocket as your begin exploring other delegates and it will help you understand the inner workings of the delegate.

Comments