In today's quick tip, you'll learn about the NSNotification class while building a demo project to monitor changes in the device orientation. Let's get started!
Ordering from a food cart is a lot like working with an NSNotification. You walk up to the counter, place your order, get a number, and wait for your number to be called. You usually stand around with five other people who are waiting for their number to be called, too. And when the chef is finished preparing your meal, the person behind the counter calls your number, and you sit down to eat. With NSNotification, you become an observer for "your number," and when the object posting the notification is done "making your food," NSNotificationCenter calls your number so you can come get your "food". In this tutorial, instead of waiting for food, we're going to wait for the device to rotate and then send the current orientation to the observer. We'll talk about how to register to receive a notification, post a notification, and pass a string object along with the notification using userInfo.
Step 1: Set Up Your Project
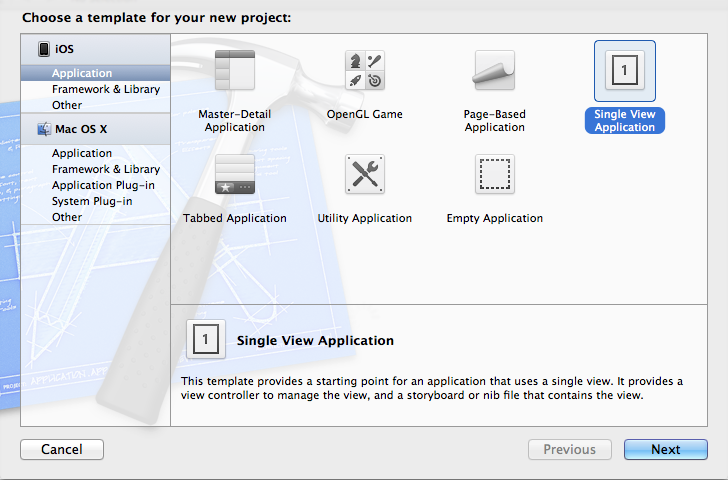
Launch Xcode and click File > New > Project. Select an iOS Single View Application and click "Next". Name your product "Notifications" and enter a name for your Company Identifier, such as "com.companyName.notifications." Choose the iPhone device family and click "Next." Choose a location to store your project and click "Create."
Step 2: Register to Receive a Notification
Declare the methods used to post and receive the notification by typing the following code in the "ViewController.m" file.
@interface ViewController ()
    - (void)postNotificationWithString:(NSString *)orientation;
    - (void)useNotificationWithString:(NSNotification*)notification;
@end
Receiving the Notification
Now we can register the ViewController object to receive notifications. Type the following code into the viewDidLoad method.
NSString *notificationName = @"MTPostNotificationTut";

[[NSNotificationCenter defaultCenter]
    addObserver:self
    selector:@selector(useNotificationWithString:)
    name:notificationName
    object:nil];
There are four important parts of the NSNotificationCenter method addObserver:selector:name:object:. The argument for addObserver: is the object that wants to know when a certain notification happens. The argument for selector: is the method that gets called when the notification happens. The argument for name: is the title of the notification the observer wants to know about; it must be unique. The final piece of the method is object:. Its argument is the object attached to the notification and is often nil depending on the context of the notification.
Step 3: Post a Notification
Next we'll generate the logic for posting a notification. Type the following code in the "ViewController.m" file. The custom method postNotificationWithString: that was declared earlier takes one argument that represents the orientation of the device.
- (void)postNotificationWithString:(NSString *)orientation //post notification method and logic
{
    NSString *notificationName = @"MTPostNotificationTut";
    NSString *key = @"OrientationStringValue";
    NSDictionary *dictionary = [NSDictionary dictionaryWithObject:orientation forKey:key];
    [[NSNotificationCenter defaultCenter] postNotificationName:notificationName object:nil userInfo:dictionary];
}
There are three important parts of the NSNotificationCenter method postNotificationName:object:userInfo:. The argument for postNotificationName: is the title of the notification that was registered in the previous addObserver:selector:name:object: method. The argument for object:, again, is the object posting the notification and in this case is nil. The argument for userInfo is an NSDictionary that can be used to send additional information with the notification. userInfo can be nil, but in this instance we want to know the orientation of the device. In order to send it with the notification the information is packaged inside a dictionary.
Getting the Device's Orientation
In order to get the device's orientation, override the UIViewController method willAnimateRotationToInterfaceOrientation:duration: by typing the following code inside the braces. Each time the device is rotated, the method postNotificationWithString: is called and passes in either "Portrait" or "Landscape" depending on the device's orientation.
- (void)willAnimateRotationToInterfaceOrientation:(UIInterfaceOrientation)interfaceOrientation duration:(NSTimeInterval)duration
{
    if (interfaceOrientation == UIInterfaceOrientationPortrait) {
        [self postNotificationWithString:@"Portrait"];
    }
    else {
        [self postNotificationWithString:@"Landscape"];
    }
}
Using the Notification
The custom method useNotificationWithString: was declared earlier and registered as the selector to be called when the notification happens. Type the following code which gets the device orientation string from userInfo. By using NSLog to display its value, each orientation change logs that another notification has been posted.
- (void)useNotificationWithString:(NSNotification *)notification //use notification method and logic
{
    NSString *key = @"OrientationStringValue";
    NSDictionary *dictionary = [notification userInfo];
    NSString *stringValueToUse = [dictionary valueForKey:key];
    NSLog(@"Device orientation --> %@",stringValueToUse);
}
Memory Management
Lastly, the observer must be removed when the object is deallocated. Type the following code in the dealloc method:
- (void)dealloc {
    [[NSNotificationCenter defaultCenter] removeObserver:self];
}
If you are not using ARC, you'll need to explicitly call [super dealloc] as well, like so:
- (void)dealloc {
    [[NSNotificationCenter defaultCenter] removeObserver:self];
    [super dealloc];
}
Step 4: Run the Project
Click Product > Run, or click the "Run" arrow in the top left corner. If you are using the iOS Simulator, click Hardware > Rotate Left to simulate device rotation. Notice that "Device orientation --> Landscape" is logged to the console.
Conclusion
Triggering methods in disconnected objects would require some hefty coding without notifications and the NSNotificationCenter. By adding observers to listen for specific posts to the notification center, your objects can communicate and pass data easily.

Comments