Touch Screens have become the foundation of modern smartphone user interaction. In this tutorial, you will learn how to be notified when the user interacts with the touch screen, and how to use touch events in a practical manner.
The iOS SDK provides a vast library of controls to help get you started on building your user interface without having to deal with individual touches. Sometimes these controls may not implement the functionality you are looking for and you may need to process touch events yourself.
Using the UIKit framework you can gain access to touch events in two classes, UIView, and UIViewController, both of which subclass, UIResponder which implements touch events.
Using four of UIResponder's methods you can implement your own code on touch events. These four methods are:
-
touchesBegan:withEvent:- Sent when fingers are touched down. -
touchesEnded:withEvent:- Sent when fingers are touched up. -
touchesMoved:withEvent:- Sent when fingers move on the touch screen. -
touchesCancelled:withEvent:- Sent when a touch was interrupted by a an event such as a telephone call.
Detecting Touches Tutorial
Now, let's create a simple demonstration of these touch events. Create a new XCode Project. Select “View Based Application" hit next and fill in your Company Identifier and “Touches" as the Project Name.
In TouchesViewController.m, import Quartz Core by adding the following line:
#import <QuartzCore/QuartzCore.h>
We'll need Quartz Core to make circles appear on the screen where the touches happen.
Now, in the same file, replace the viewDidLoad method with the following:
- (void)viewDidLoad
{
    [super viewDidLoad];
    [self.view setMultipleTouchEnabled:YES];
}
This will enable multi-touch in our view, so a touch event will contain multiple touches for us to use.
Now we can finish off with the core of our application using the touchesBegan:withEvent: event. Add the following method under viewDidLoad:.
-(void)touchesBegan:(NSSet *)touches withEvent:(UIEvent *)event {
    // Remove old red circles on screen
    NSArray *subviews = [self.view subviews];
    for (UIView *view in subviews) {
        [view removeFromSuperview];
    }

    // Enumerate over all the touches and draw a red dot on the screen where the touches were
    [touches enumerateObjectsUsingBlock:^(id obj, BOOL *stop) {
        // Get a single touch and it's location
        UITouch *touch = obj;
        CGPoint touchPoint = [touch locationInView:self.view];

        // Draw a red circle where the touch occurred
        UIView *touchView = [[UIView alloc] init];
        [touchView setBackgroundColor:[UIColor redColor]];
        touchView.frame = CGRectMake(touchPoint.x, touchPoint.y, 30, 30);
        touchView.layer.cornerRadius = 15;
        [self.view addSubview:touchView];
        [touchView release];
    }];
}
This method simply takes the set of touches that is passed to it, loops over each touch, and draws a red circle where the touch occurred on screen.
If you build and run your application you should now see a final product that resembles something like this:
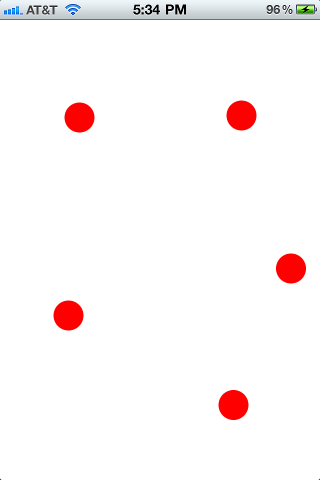
And that's it, that's all it takes to implement custom touch handling in your next iOS project. Thanks for reading and if you have any questions/comments you can leave a comment below.

Comments