UIKit is the framework that you'll user most often when developing iOS applications. It defines the core components of an iOS application, from labels and buttons to table views and navigation controllers. In this article, not only will we start our exploration of the UIKit framework, we will also explore the internals of an iOS project and the basic building blocks of iOS applications.
What Is the UIKit Framework?
While the Foundation framework defines classes, protocols, and functions for both iOS and OS X development, the UIKit framework is exclusively geared towards iOS development. It's the equivalent of the Application Kit or AppKit framework for OS X development.
Like Foundation, UIKit defines classes, protocols, functions, data types, and constants. It also adds additional functionality to various Foundation classes, such as NSObject, NSString, and NSValue through the use of Objective-C categories.
Objective-C categories are a convenient way to add extra methods to existing classes without the need for subclassing. They are similar to Swift extensions. Read this tutorial by Aaron Crabtree if you want to learn more about Objective-C categories.
Instead of exploring the key classes of UIKit, like we did for the Foundation framework, we're going to create and journey through a new iOS project, exploring the classes we encounter. By taking this approach, it will quickly become clear in what context a class is used, how each class fits into the broader scheme of an iOS application, and what role it plays.
A New Beginning
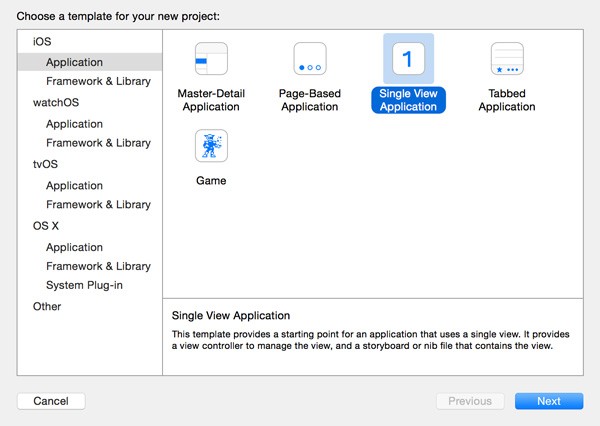
Launch Xcode and create a new project by selecting New > Project... from the File menu. In the iOS section on the left, select the Application category. From the list of project templates, choose the Single View Application template.
The Single View Application template contains the basic building blocks of an iOS application, which makes it a good place to start our journey.
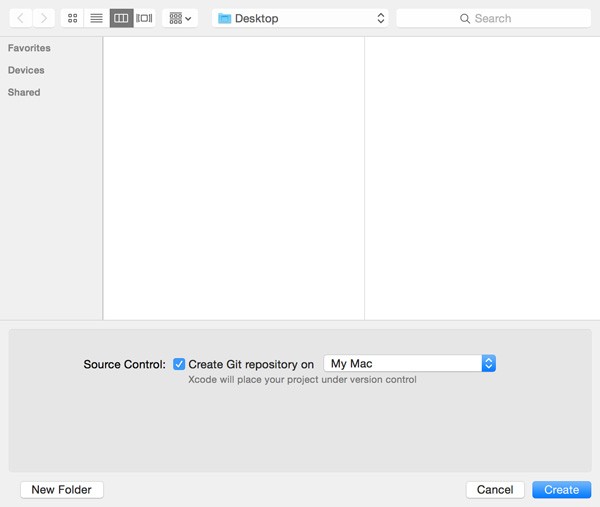
Name the project FirstSteps and enter an organization name and identifier. Set Language to Swift and set Devices to iPhone. Leave the checkboxes at the bottom unchecked.

Tell Xcode where you want to save the new project and make sure to put the project under version control by checking the checkbox labeled Create Git repository on My Mac. Revisit this article for more information about version control and its benefits.
Files and Folders
We have learned quite a few new things since the last time we created an iOS project from scratch so it's a good idea to explore the various files and folders of our new project to see if they ring a bell.
In the Project Navigator, you should see two folders at the root of the project:
- Products
- a folder with your project's name, FirstSteps in this example
Let's take a look at the contents of each of these folders.
Products
The Products folder currently contains one item. It bears the name of the project and has an extension of .app. The Products folder contains the application—or applications—created by the project after compilation of the source code.
Have you noticed that FirstSteps.app is highlighted in red? Whenever Xcode is unable to locate a file, it highlights the file in red. Don't worry, though. Because the project hasn't been compiled yet, Xcode hasn't created the product yet.
Project Folder
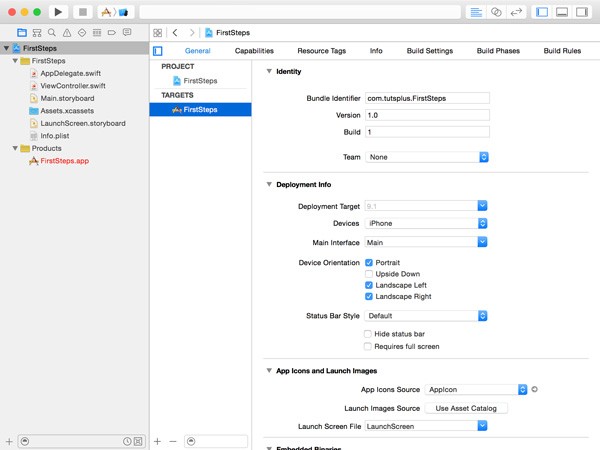
Most of your time is spent in the project folder, which currently contains six files. The first two files, AppDelegate.swift and ViewController.swift, are source files. These files contain the source code of the application.
Main.storyboard contains the user interface of the application. We've already worked with storyboards earlier in this series. Notice that there's a second storyboard, LaunchScreen.storyboard. This storyboard is used by the operating system when the application is being launched. Instead of showing an empty view, the operating system uses this storyboard to dynamically create a launch image, which is shown to the user when the application is loading.
Info.plist, commonly referred to as the "info-dot-plist" file of a project, is a property list that contains various configuration settings. Most of these settings can also be modified by selecting the project in the Project Navigator, choosing the target in the Targets list, and opening the General, Capabilities, and Info tabs.
Assets.xcassets is a special type of folder for storing your project's assets, such as images.
Application Components
Now that we know what the different files and folders in our project are for, it's time to explore the different components of an iOS application. As we continue our journey, we will come across several classes that belong to UIKit. Each class that belongs to the UIKit framework starts with the class prefix UI. Remember that Foundation classes are prefixed with NS.
The Model-View-Controller Pattern
Before we start exploring the UIKit framework, I want to talk about the Model-View-Controller (MVC) pattern. The MVC pattern is one of the most widespread patterns in object-oriented programming. It promotes code reusability and has close ties with the concept of separation of responsibilities or concerns. One of the main objectives of the MVC pattern is the separation of an application's business logic from the presentation layer.
Cocoa Touch embraces the MVC pattern, which means it's important to understand what it is and how it works. In other words, by understanding the MVC pattern, it will be much easier to grasp how the different components of an iOS application work together.
In the MVC pattern, the model layer is in control of the business logic of an application. Interacting with a database, for example, is the responsibility of the model layer. The view layer presents the data that is managed by the model layer to the user. The view layer manages the user interface and user input.
The controller is the glue between the model layer and the view layer. While the model layer and the view layer don't know about each other's existence, the controller knows about both.
Because the controller knows about model and view, it's often the least reusable piece of an application. The less an object knows about its environment and the objects it interacts with, the easier it is to reuse.
UIApplication
Even though the UIApplication class is a key component of every iOS application, you won't interact with it very often and you will rarely, if ever, feel the need to subclass UIApplication.
When an application launches, a singleton of this class is created. Do you remember what a singleton object is? It means that only one object instance of the UIApplication class is created during an application's lifetime.
The UIApplication instance is the entry point for user interaction and it dispatches events to the appropriate target objects. The exact meaning of this will become clear in a few minutes when we take a look at view controllers.
In iOS applications, the UIApplication instance has a delegate object associated with it. Whenever you create an iOS project using one of the provided templates, Xcode will create an application delegate class for you. Take a look at the names of the source files in the project folder in the Project Navigator. The first file is named AppDelegate.swift.
The instance of this class is the delegate of the UIApplication singleton. Before taking a closer look at the AppDelegate class, we need to understand what the delegate pattern is.
Ole Begemann wrote an excellent article about the launch sequence of a typical iOS application. In his article, Ole talks about the various components involved and their role during the application launch sequence. I highly recommend reading this article if you want to get a better understanding of the role of the UIApplication class.
The Delegate Pattern
The delegate pattern is used extensively in Cocoa and Cocoa Touch. In a future article of this series, in which we explore the ins and outs of table views, you'll discover that table views rely heavily on the delegate (and data source) pattern.
Like the MVC pattern, delegation is common in object-oriented programming. The delegate pattern in Cocoa Touch, however, is slightly different, because it makes use of a delegate protocol to define the behavior of the delegate object.
Let's jump ahead and take a look at table views. If you've spent any amount of time with an iPhone or iPad, then the UITableView class should be familiar to you. It presents an ordered list of data to the user and it does this job very well.
How does a table view know what to do when a row is tapped? Is this behavior included in the UITableView class? Certainly not, because this behavior varies from application to application. If we were to include this behavior in the UITableView class, it would not be very reusable.
The table view outsources this responsibility to a delegate object. Put differently, it delegates this task to another object, a delegate object. Take a moment to inspect the class reference of the UITableView class. It has two properties named dataSource and delegate. The delegate is notified by the table view when the user taps a row. It is the responsibility of the delegate object to respond to that touch event.
The data source of the table view is similar. The main difference is that the table view asks the data source object for something, the data that it needs to display.
Delegate and data source objects, such as the table view's delegate and dataSource objects, are almost always custom classes. In most cases, it's up to the developer to create and implement these classes, because their implementation is specific to each application.
The Application Delegate
Now that we know what delegation is, it's time to explore the AppDelegate class Xcode created for us. At application launch, the application creates an instance of the AppDelegate class. This AppDelegate instance is then set as the delegate of the UIApplication instance the operating system created for your application. You never explicitly instantiate an application delegate object.
Open AppDelegate.swift to examine the implementation of the AppDelegate class. Ignoring the comments at the top, the first line imports the UIKit framework so we can work with its classes and protocols.
import UIKit
On the next line we see something we haven't covered yet, an attribute. Attributes in Swift start with an @ symbol and can be seen as instructions for the compiler. The @UIApplicationMain attribute tells the compiler that AppDelegate is the class that should be used as the application delegate. That is all you need to know about this attribute for now.
@UIApplicationMain
The next line should look familiar. This is the start of the declaration of the AppDelegate class. It specifies the name of the class and the class's parent class, UIResponder.
It also tells the compiler that AppDelegate conforms to the UIApplicationDelegate protocol. This isn't surprising since we already know that AppDelegate serves as the application's delegate.
class AppDelegate: UIResponder, UIApplicationDelegate {
    ...
}
The next line is a property declaration for the window property. Note that the property is a variable of type UIWindow?. The UIWindow class is a subclass of UIView, the base class for views on iOS.
var window: UIWindow?
The most interesting part of the interface of the AppDelegate class is the UIApplicationDelegate protocol. Take a look at the reference of the UIApplicationDelegate protocol for a complete list of the methods the protocol defines.
The protocol defines dozens of methods and I encourage you to explore a few of them to get an idea of the protocol's capabilities. The method that's most interesting to us at this point is application(_:didFinishLaunchingWithOptions:).
When the UIApplication object has finished preparing the application for launch, it notifies its delegate, the AppDelegate object, that the application is about to launch.
Why does it notify the application delegate of this event? The UIApplication instance notifies its delegate about this event so that it has an opportunity to prepare for application launch. The implementation of application(_:didFinishLaunchingWithOptions:) is pretty short as you can see below.
func application(application: UIApplication, didFinishLaunchingWithOptions launchOptions: [NSObject: AnyObject]?) -> Bool {
    // Override point for customization after application launch.
    return true
}
It provides a reference to the UIApplication instance and a dictionary of options. You can ignore the dictionary of options for the time being. To make sure the application is launched by the operating system, we return true.
Storyboard
The Xcode project contains another interesting file, Main.storyboard. The storyboard defines what the user interface of your application looks like. By default, the storyboard is named Main.storyboard. Select the storyboard to open it.
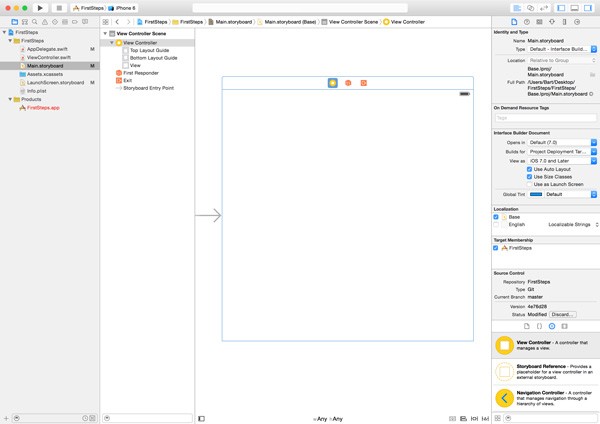
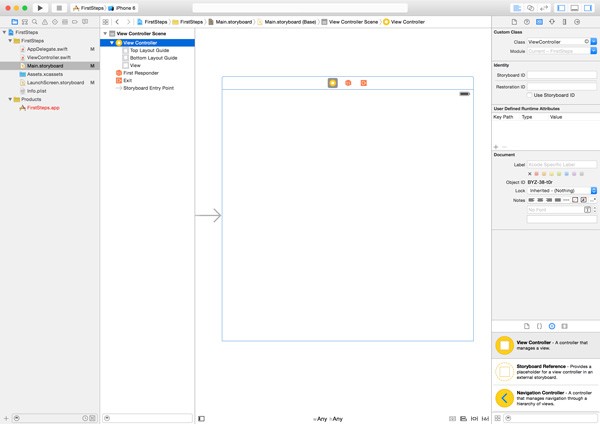
The storyboard currently contains one view in the central workspace. On the right of the Project Navigator you can see a list of items, which are the objects you see in the view. The top item, View Controller Scene, contains one child item, View Controller.
The View Controller object also has a number of child items, but there is one that is of special interest to us, the object named View. Remember the discussion about the MVC pattern. You can now see the MVC pattern in action. The model is missing at the moment, but we do have a view, the View object, and a controller, the View Controller object.
When the application launches, the storyboard is used to create the application's user interface. The view controller is automatically instantiated and so is the view controller's view. The View object in the storyboard is managed by the view controller.
Wait a minute. Where can I find the class of the view controller in the storyboard? How can I change its behavior to create a unique application? Select the View Controller object on the left and open the Identity Inspector on the right.
The Identity Inspector tells you everything you need to know. At the top, in the section Custom Class, you can see the name of the view controller's class, ViewController. Have you noticed that the file we haven't talked about yet bears the same name? We'll explore this file in a few moments.
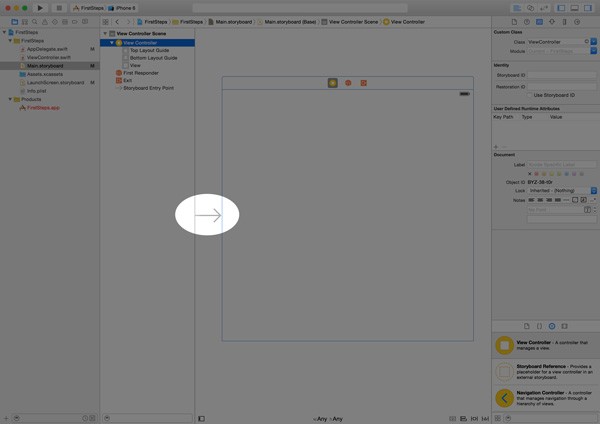
The view controller is instantiated for us, because it is the initial view controller of the storyboard. This is indicated in the storyboard by the arrow pointing to the View Controller Scene.
UIViewController
If you open ViewController.swift, you'll notice that the ViewController class is a subclass of UIViewController. Like AppDelegate, the UIViewController class is a subclass of UIResponder. View controllers, or subclasses thereof, fall in the controller category of the MVC pattern. As the name implies, they control a view, an instance of the UIView class, which belongs to the view category of the MVC pattern.
As we'll see later, a view controller manages a view and its subviews. To do this, the view controller needs to know about the view. In other words, it needs to have a reference to the view.
The view controller in the storyboard has a reference to the view. You can verify this by selecting the view controller in the storyboard and opening the Connections Inspector on the right.
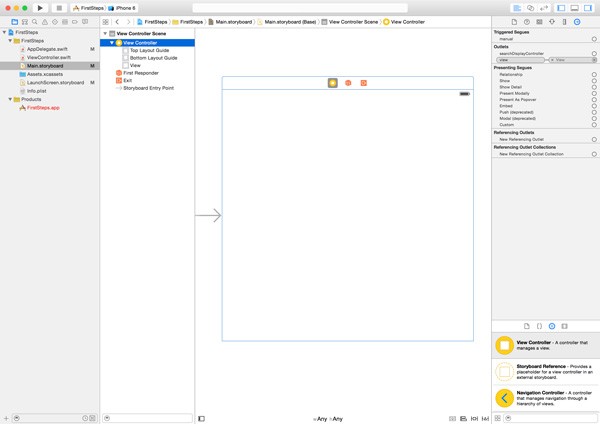
In the Connections Inspector, you should see a section named Outlets. The term outlet is a fancy word for a property that you can set in the storyboard. Hover with your mouse over the outlet named view and observe how the view in the workspace is highlighted. That is the connection between the view controller and the view.
UIView
Even though your application can only have one instance of UIWindow, it can have many views. The UIView class is an important component of the UIKit framework, because many classes inherit from it—directly or indirectly.
Revisit Main.storyboard by selecting it and take a look at the Object Library at the bottom of the Inspector.
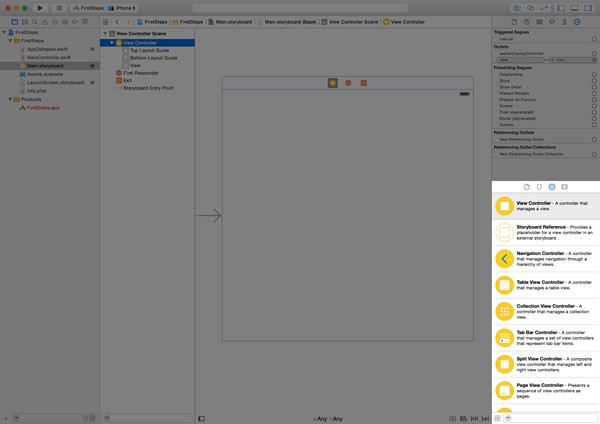
Browse the Object Library and drag a label and a button to the view in the workspace. It doesn't matter where you position them in the view as long as they are in the view controller's view.
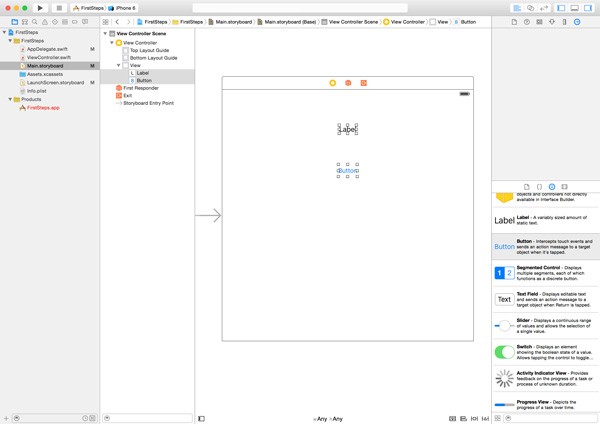
Notice that two new objects have been added to the Objects section on the left. Both the label (UILabel) and the button (UIButton) inherit from UIView. Have you noticed that the Label and Button objects are slightly indented compared to the View object? This indicates that the Label and Button objects are subviews of the View object. A view can have one or more subviews that it manages.
As I mentioned earlier, the UIView class is an important component of UIKit. A view manages a rectangular area or frame on the screen. It manages the contents of the area, the subviews, and any interactions with the view's contents. The UIView class is a subclass of UIResponder. You'll learn much more about views over the course of this series.
Outlets
Let's take a look at an example to illustrate the relationship between the storyboard, the view it contains, and the view controller. These three components are important and I want to make sure that you understand just how they work together.
A few moments ago, you added a label and a button to the view controller's view. How does the view controller know about these objects? At the moment, they don't appear in the Connections Inspector, but we can change that by telling the view controller about them. Open ViewController.swift and add a property for the label and one for the button.
import UIKit

class ViewController: UIViewController {

    @IBOutlet var myLabel: UILabel!
    @IBOutlet var myButton: UIButton!

    ...

}
By adding the @IBOutlet attribute to the property declaration, the properties appear in the Connections Inspector in the storyboard and that's what we want.
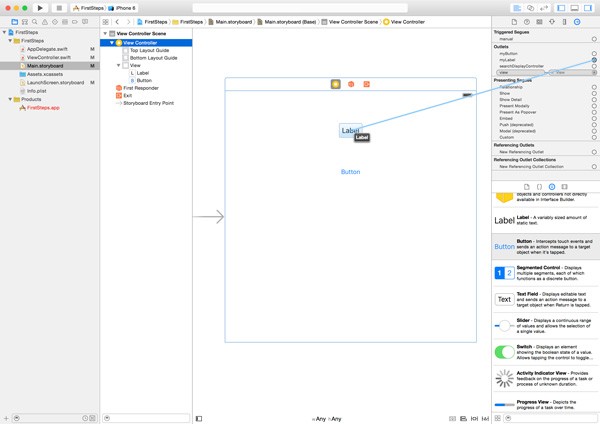
Head back to the storyboard, select the View Controller object in the View Controller Scene, and open the Connections Inspector on the right. The new properties are now listed in the list of Outlets. However, the view controller hasn't made the connection between the new properties and the objects in the storyboard yet.
This is easy to remedy. Drag from the empty circle on the left of the myLabel outlet to the label in the workspace. This will create the connection. The view controller now knows about the label. Repeat this step for the button.
Even though we can change the text of the label in the storyboard, let's do this in the view controller to illustrate that the view controller has access to the label and button in the storyboard.
Open ViewController.swift and look for theviewDidLoad() method. Modify the viewDidLoad() method to reflect the implementation below. Comments have been omitted for clarity.
override func viewDidLoad() {
    super.viewDidLoad()

    myLabel.text = "This is an instance of a UILabel."
}
We can send messages to the label property by accessing the view controller's myLabel property. We can change the text of the label by setting the label's text property, using a string literal.
myLabel.text = "This is an instance of a UILabel."
The viewDidLoad() method is automatically invoked when the view controller has loaded its view. The override keyword indicates that we are overriding a method that is defined by a class higher up in the inheritance tree. The UIViewController class, the parent class of the ViewController class, implements this method.
Also note that we invoke viewDidLoad() on super. What is super? Just like self refers to the current instance, super refers to the parent class, UIViewController. In other words, we invoke the viewDidLoad() method on the superclass. This is often important when overriding a method in a subclass, because the superclass may be carrying out important tasks in its own implementation and we don't want to break anything.
Run your application in the simulator by clicking the Run button in the top left. Notice that the label's text has been updated. Don't worry about the position of the label and button. That's something we'll fix in the next tutorial.
Actions
We've explored a lot of new things in this article. I want to end this installment by talking about actions. Just like outlets, actions are nothing more than methods that you can access in the storyboard.
Let's see how this works. Open ViewController.swift and add the following method below the viewDidLoad() method.
@IBAction func changeColor(sender: UIButton) {
    print(sender.classForCoder)
    print(sender.superclass)

    let r = CGFloat(arc4random() % 255)
    let g = CGFloat(arc4random() % 255)
    let b = CGFloat(arc4random() % 255)

    let color = UIColor(red: (r/255.0), green: (g/255.0), blue: (b/255.0), alpha: 1.0)

    view.backgroundColor = color
}
Don't be confused by the @IBAction attribute. This attribute indicates that the method is an action and, therefore, accessible in the storyboard. If we take a closer look at the changeColor(_:) action, we can see that it takes one argument of type UIButton.
As the argument name implies, the argument of the method or action is the object that sent the message to the view controller. I will explain this in more detail in just a bit.
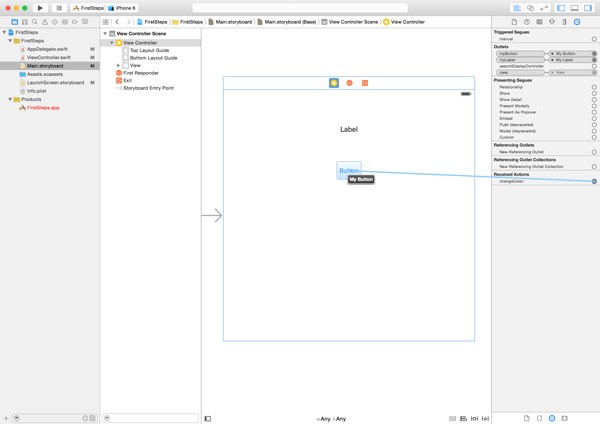
Revisit the storyboard, select the View Controller object in the View Controller Scene, and open the Connections Inspector. A new section has appeared in the Connections Inspector, Received Actions, and the action we just added is listed in this section.
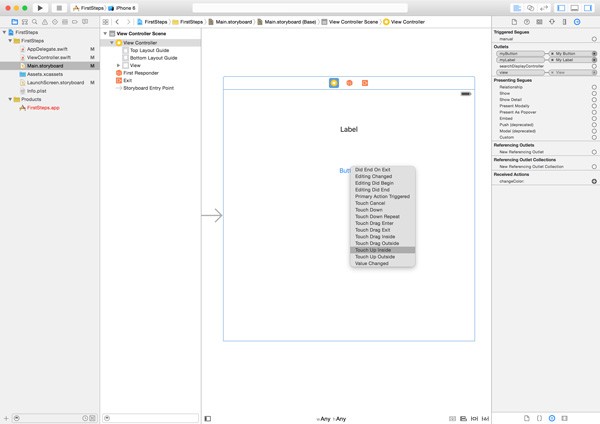
Drag from the empty circle on the left of the action to the button in the workspace. A pop up menu with a list of options should appear. The list contains all the possible events that the button can respond to. The one that interests us is Touch Up Inside. This event is triggered when a user touches the button and lifts her finger within the bounds of the button.
Run your application one more time and tap the button. The view controller's view should change color every time you tap the button. We added two print statements to the changeColor(_:) action. Let's see what the output looks like when you tap the button.
UIButton
Optional(UIControl)
The first line displays the class of the sender, an instance of UIButton. This proves that it is the button that's triggering this method on the view controller. It's sending a message of changeColor(_:) to the view controller.
The second line displays the superclass of the sender. Remember that not every class has a superclass. That's the reason we get back an optional. The output tells us that the parent class of UIButton is UIControl.
The method itself is pretty simple. We generate three random integers between 0 and 255, pass these values to init(red:green:blue:alpha:) to generate a random color, and update the background color of the view controller's view with the randomly generated color. Note that view references the view that the view controller manages.
Conclusion
In this article, we explored a few classes of the UIKit framework and we took a close look at the various components of an iOS application. We'll explore and work with the UIKit framework in more detail in the rest of this series. If you don't fully understand the various concepts and patterns, then I'm sure that you will as the series progresses.
If you have any questions or comments, you can leave them in the comments below or reach out to me on Twitter.

Comments