In the previous tutorial, we discussed how a navigation controller enables the user to navigate hierarchical content or complex data by managing a stack of view controllers. Tab bar controllers also manage an array of view controllers. The difference is that the view controllers of a tab bar controller don't necessarily have a relation to one another. In this tutorial, we will explore tab bar controllers in more detail by creating a tabbed application from scratch.
Introduction
UITabBarController is another UIViewController subclass. While navigation controllers manage a stack of related view controllers, tab bar controllers manage an array of view controllers that have no explicit relation to one another.
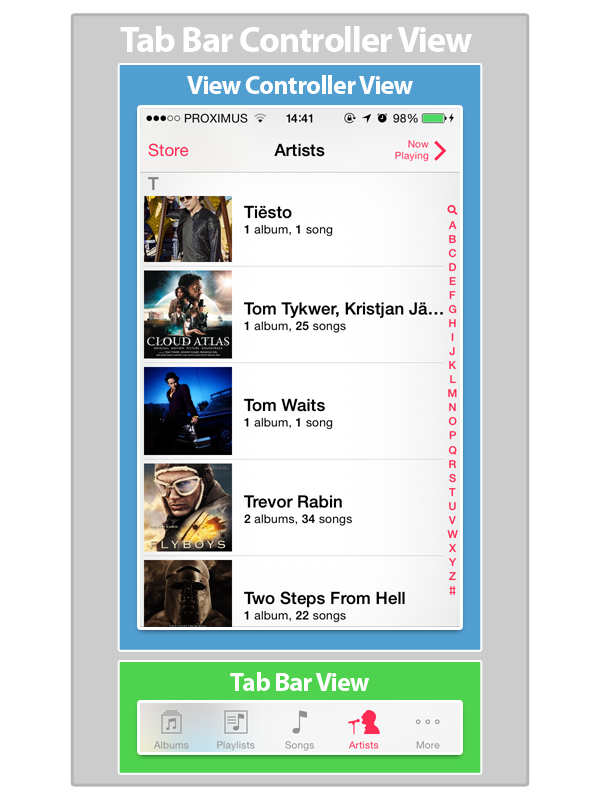
The Clock and Music applications on iOS are two prime examples of tab bar controllers. Just like any other UIViewController subclass, a tab bar controller manages a UIView instance.

The view of a tab bar controller is composed of two subviews:
- the tab bar at the bottom of the view
- the view of one of the view controllers the tab bar controller manages
Before We Start
There are a few caveats to be aware of when working with tab bar controllers. Even though instances of UITabBar can only display five tabs, UITabBarController can manage more view controllers. If a tab bar controller manages more than five view controllers, the tab bar's last tab is titled More.
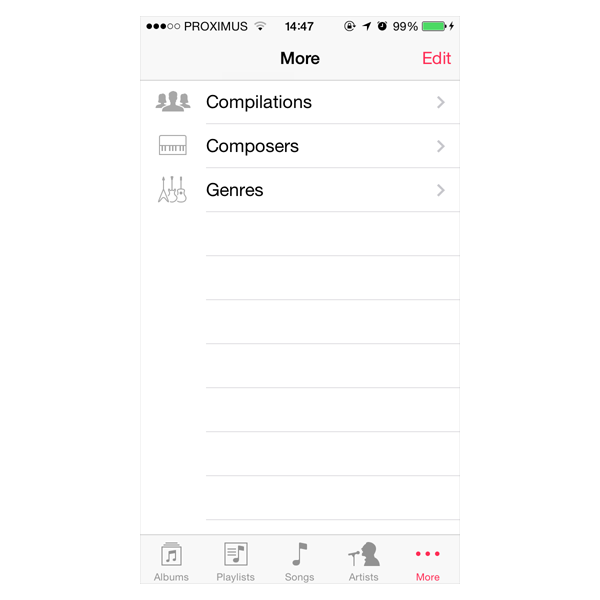
The additional view controllers can be accessed via this tab and it is even possible to edit the position of the tabs in the tab bar.
Even though tab bar controllers manage a view, your application isn't supposed to directly interact with a tab bar controller's view. The tab bar controller is required to be the root view controller of the application window. In other words, the root view of the application window is always the tab bar controller's view. A tab bar controller should never be installed as a child of another view controller. This is one of the key differences with navigation controllers.
Tabbed Library
In this article, we revisit the Library application that we built in the previous article. Doing so will let us reuse several classes and get up to speed faster. In addition, it will show you that navigation controllers and tab bar controllers are quite different and that they are used in different situations and use cases.
Because the application we build in this lesson is based on the UITabBarController class, it is going to give a very specific look and feel to the application, allowing for little flexibility in terms of user interface and experience. Tab bar controllers are incredibly useful, but you have to accept that they put constraints on your application's user interface to some extent.
Open Xcode, create a new project (File > New > Project...), and select the Single View Application template.
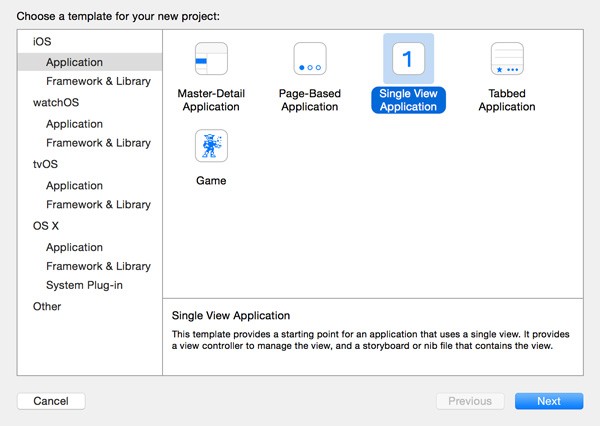
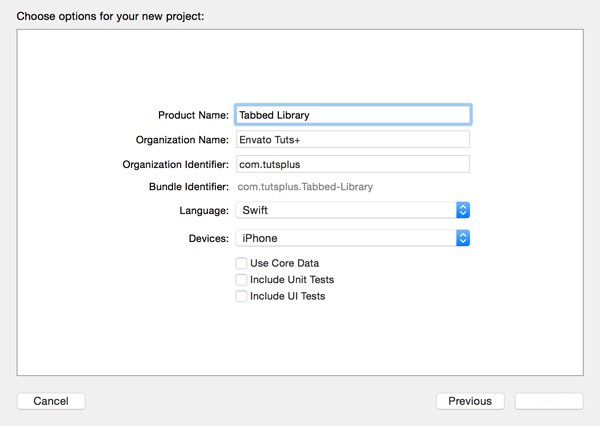
Name the project Tabbed Library, assign an organization name and identifier, set Language to Swift, and set Devices to iPhone. Tell Xcode where you want to save the project and click Create.
Even though Xcode includes a Tabbed Application template, I prefer to start with a basic application template so you understand how the various pieces of the puzzle fit together. You'll notice that tab bar controllers aren't that complicated.
Taking a Head Start
When the Tabbed Library application is finished, the tab bar controller of the application will manage six view controllers. Instead of creating every view controller class from scratch, we're going to cheat a little by reusing the view controller classes we created in the previous article. In addition, we'll create several instances of the same view controller class to save us some time. The goal of this article is not to create a bunch of view controller classes. At this point, you should be pretty familiar with how that works.
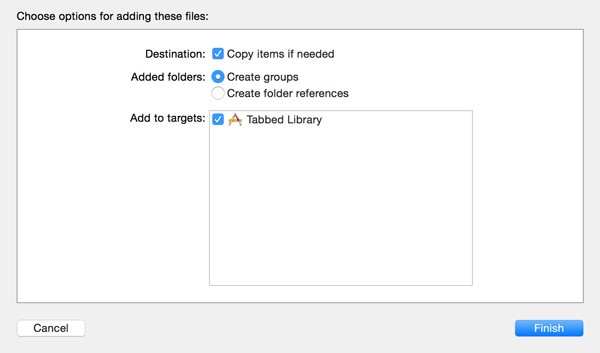
Download the source code from the previous article and open the Xcode project that's included in the source files in a new Finder window. Find the AuthorsViewController, BooksViewController, and BookCoverViewController classes and drag them to your new project. Make sure to copy the files to the new project by checking the checkbox Copy items if needed and don't forget to add the files to the Tabbed Library target.
In addition to these three classes, we also need to copy the folder of resources, containing Books.plist and the image files, to our new project. Drag the folder named Resources to our project and use the same settings that we used to copy the class files. We're now ready to instantiate the application's tab bar controller and populate it with its first view controller.
Adding a Tab Bar Controller
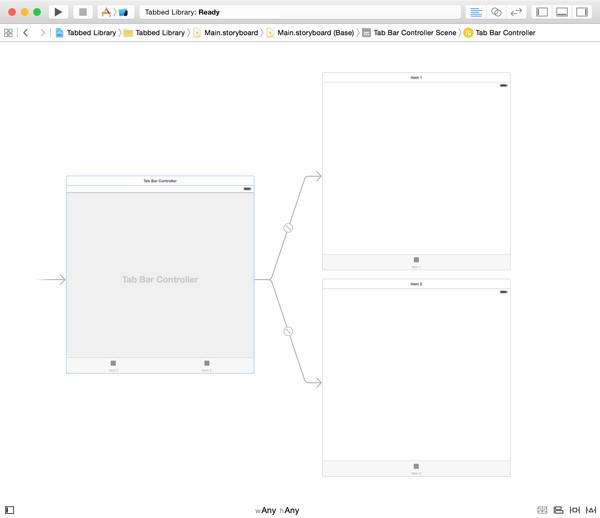
If you open Main.storyboard, you'll notice that the storyboard contains an instance of the ViewController class. Select the view controller and press delete or backspace. Open the Object Library on the right and drag a tab bar controller to the workspace.
Xcode automatically adds two child view controllers to the tab bar controller. Because I want to show how you how to manually add child view controllers to a tab bar controller, we're going to delete the ones Xcode has created for us. Select the child view controllers and press delete or backspace to delete them.
Select the tab bar controller, open the Attributes Inspector, and check the checkbox Is Initial View Controller. If we don't set the tab bar controller as the initial view controller, the application will crash on launch.
If you run the application in the simulator, you should see a tab bar at the bottom and a black background. This may seem unimportant, but it shows how the tab bar controller works. The tab bar controller manages an array of view controllers, similar to how a navigation controller manages a stack of view controllers.
We need to add a few view controllers to the storyboard and add them to the viewControllers property of the tab bar controller. Let's see how this works.
Adding View Controllers
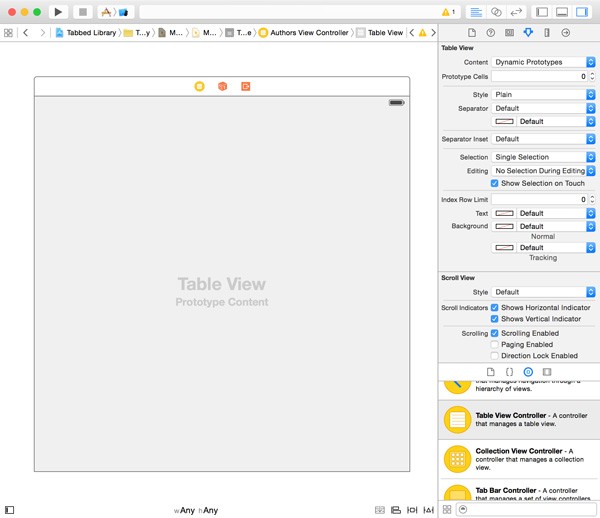
Drag a UITableViewController instance from the Object Library to the workspace and set its class to AuthorsViewController in the Identity Inspector. Select the view controller's table view and set Prototype Cells to 0 in the Attributes Inspector.
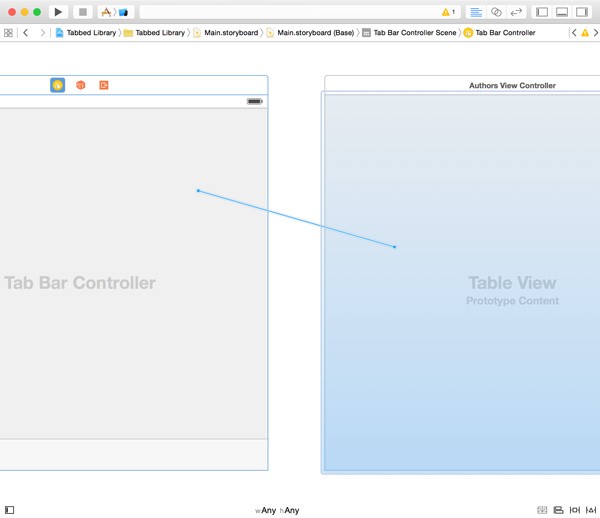
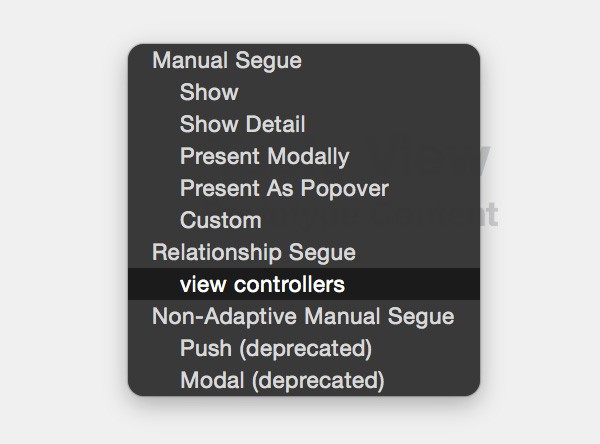
To add the authors view controller to the tab bar controller's array of view controllers, drag from the tab bar controller to the authors view controller, holding down the Control key. Select Relationship Segue > view controllers from the menu that appears.
A tab bar controller with one tab isn't that useful so let's add another view controller to the mix. Drag another UITableViewController instance from the Object Library, set its class to BooksViewController, and set Prototype Cells to 0. Create the relationship segue as we did for the authors view controller.
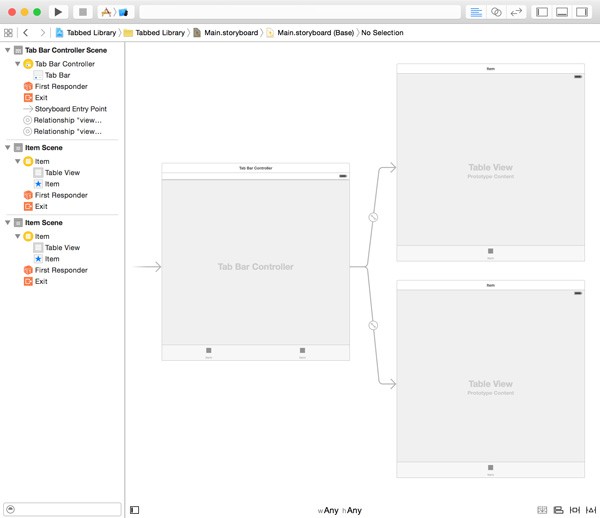
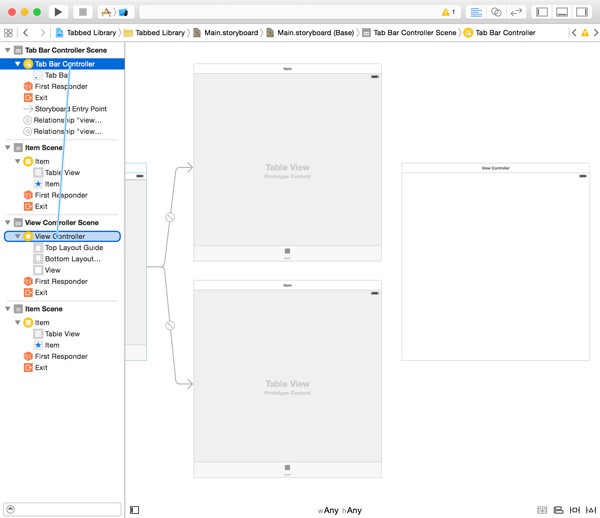
Add a UIViewController instance to the workspace and set its class to BookCoverViewController in the Identity Inspector. Add a UIImageView instance to the view controller, connect it with the bookCoverView outlet of the view controller, and apply the necessary layout constraints. Create the relationship segue with the tab bar controller like we did for the table view controllers.
A storyboard can sometimes become a bit cluttered. If you're having trouble creating segues between view controllers, know that you can also create connections, such as segues, in the navigator on the left. This is often much easier and less clunky.
Build and run the application. At this point, the tab bar contains three tabs. Tapping the second or third tab crashes the application. Why is that? It's time for some debugging.
Fixing Bugs
Fixing the Authors View Controller
When you tap an author's name in the authors view controller, the application crashes. The first thing you should do when you're faced with a crash is inspect Xcode's console. This is what it tells me.
Tabbed Library[1141:54864] *** Terminating app due to uncaught exception 'NSInvalidArgumentException', reason: 'Receiver (<Tabbed_Library.AuthorsViewController: 0x7fde3943d050>) has no segue with identifier 'BooksViewController''
The message that Xcode displays in the console is not difficult to decipher. We tell the view controller to perform a segue with identifier BooksViewController, but that segue doesn't exist. The result is a crash.
This bug is easy to fix by embedding the authors view controller in a navigation controller, creating a segue to the BooksViewController instance, and naming the segue BooksViewController. I leave that up to you as an assignment since we already did this in the previous article. The source files of this tutorial contain the solution.
The more important issue in this example is understanding that the three view controllers that are linked to the tab bar controller don't communicate with one another. The idea behind a tab bar controller and a navigation controller is very different. A navigation controller maintains an array of view controllers, the navigation stack. The view controllers in the navigation stack have an implicit relation with one another in the sense that they are part of the same navigation stack.
A tab bar controller also manages an array of view controllers, but the view controllers don't know about each other. They cannot communicate with each other through the tab bar controller. In the previous article, we passed data from the authors view controller to the books view controller when the user tapped an author. This pattern isn't applicable in a tab bar controller. Of course, we could implement a solution to show the user the books view controller when an author is tapped in the authors view controller, but it's important that you understand that that isn't the goal of a tab bar controller.
The Clock and Music applications on iOS are good examples of how a tab bar controller should be used. The view controllers the tab bar controller manages in the Music application have no relation to one another apart from the fact that they show songs.
Before you continue, make sure that you understand the concepts of a navigation controller and a tab bar controller. They are important later in this series.
Fixing the Books View Controller
When you tap the second tab of the tab bar controller, the application also crashes. This is what I see in Xcode's console.
fatal error: unexpectedly found nil while unwrapping an Optional value
This isn't surprising either since we don't set the author property of the books view controller. Let's update the books view controller so that it shows every book in Books.plist.
We need to make three changes. Let's start with the easiest change first. Open BooksViewController.swift and change the type of the author property to [String: AnyObject]?. The author property is now an optional instead of a forced unwrapped optional.
var author: [String: AnyObject]?
For the second change, we need to update the implementation of viewDidLoad(). We display the name of the author if author is not nil. If author is nil, we set title to "Books".
override func viewDidLoad() {
    super.viewDidLoad()

    if let author = author, let name = author["Author"] as? String {
        title = name
    } else {
        title = "Books"
    }

    tableView.registerClass(UITableViewCell.classForCoder(), forCellReuseIdentifier: CellIdentifier)
}
The last change is a bit more involved. We turn the computed books property into a lazy stored property. A lazy stored property is initialized the first time it is accessed. In other words, the property isn't initialized when the view controller is initialized. This is what the implementation looks like.
lazy var books: [AnyObject] = {
    // Initialize Books
    var buffer = [AnyObject]()

    if let author = self.author, let books = author["Books"] as? [AnyObject] {
        buffer += books

    } else {
        let filePath = NSBundle.mainBundle().pathForResource("Books", ofType: "plist")

        if let path = filePath {
            let authors = NSArray(contentsOfFile: path) as! [AnyObject]

            for author in authors {
                if let books = author["Books"] as? [AnyObject] {
                    buffer += books
                }
            }
        }
    }

    return buffer
}()
Lazy stored properties are marked by the lazy keyword. Instead of assigning an ordinary value to the property, we assign a closure. But note that the closure ends with two parentheses, (). This indicates the closure is executed when books is accessed for the first time. This is very similar to anonymous functions in other languages, such as JavaScript.
In the closure, we create an empty array of type [AnyObject]. If author isn't nil, we load the books from the author property. If author doesn't have a value, we load Books.plist and add every book from every author to buffer. Note that we return the array of books at the end of the closure. Run the application to see if this fixes the crash caused by the books view controller.
If you open the second tab of the application and tap a book from the list, the application crashes for the same reason the authors view controller caused a crash earlier. You can remedy this by embedding the books view controller in a navigation controller and creating a segue with identifier BookCoverViewController to the BookCoverViewController instance.
Fixing the Book Cover View Controller
When you tap the third tab, the application also crashes. The solution is similar to the one we applied to the BooksViewController class. Start by making the book property of the BookCoverViewController an optional.
var book: [String: String]?
We declare another lazy stored property, bookCoverImage of type UIImage?. In bookCoverImage we select a random book from the books stored in Books.plist if the book property has no value. If book has a value, we display the book cover of that book.
lazy var bookCoverImage: UIImage? = {
    var image: UIImage?

    if self.book == nil {
        // Initialize Buffer
        var buffer = [AnyObject]()

        let filePath = NSBundle.mainBundle().pathForResource("Books", ofType: "plist")

        if let path = filePath {
            let authors = NSArray(contentsOfFile: path) as! [AnyObject]

            for author in authors {
                if let books = author["Books"] as? [AnyObject] {
                    buffer += books
                }
            }
        }

        if buffer.count > 0 {
            let random = Int(arc4random()) % buffer.count

            if let book = buffer[random] as? [String: String] {
                self.book = book
            }
        }
    }

    if let book = self.book, let fileName = book["Cover"] {
        image = UIImage(named: fileName)
    }

    return image
}()
In viewDidLoad(), we use the bookCoverImage property to update the image view of the book cover view controller.
override func viewDidLoad() {
    super.viewDidLoad()

    if let bookCoverImage = bookCoverImage {
        bookCoverView.image = bookCoverImage
        bookCoverView.contentMode = .ScaleAspectFit
    }
}
If you've implemented the above changes, you should now be able to run the application without seeing any crashes. If you have an eye for detail, you may have noticed that the title of the second and third tab only appears when the tab is selected. Can you guess why that is?
Tab Bar Items
The cause of this odd quirk is actually quite simple. In general, a view isn't loaded into memory until it's absolutely necessary. This usually means that a view is loaded into memory when it's about to be shown to the user.
When the Tabbed Library application is launched, the first tab is selected by default. As long as the second or third tab isn't selected—by the user or programmatically—there's no need to load the view of that view controller. As a result, viewDidLoad() isn't called until the tab is selected. This means that the title is not set until the tab is selected.
The solution is simple. Every UIViewController instance (or a subclass thereof) has a tabBarItem property of type UITabBarItem!. This property is used by the tab bar controller to configure the tabs in its tab bar. The title of a view controller's tab is fetched from the view controller's tabBarItem property.
To fix the above issue, we need to set the title property of the tabBarItem property when the view controllers of the tab bar controller are initialized. Let's see how this works for the BooksViewController class.
Open BooksViewController.swift and add the following initializer. Before we take a look at the implementation, I'd like to point out three interesting details about the initializer. In Swift, initializers are a special type of function.
required init?(coder aDecoder: NSCoder) {
    super.init(coder: aDecoder)

    // Initialize Tab Bar Item
    tabBarItem = UITabBarItem(title: "Books", image: UIImage(named: "icon-books"), tag: 1)
}
- The
requiredkeyword indicates that this initializer is required to be implemented by every subclass. However, it is not necessary to implement a required initializer if the subclass satisfies the requirements with an initializer it inherits by its parent class. Initialization is a pretty complex topic in Swift that causes a fair bit of confusion among developers. Because of its complexity, I won't cover it in much detail in this series. - The question mark after the
initkeyword indicates that initialization may fail. This is better known as a failable initializer. If the view controller cannot be instantiated for one reason or another, the initializer returnsnilinstead of an instance of the class. - You also may have noticed that the initializer doesn't use the
funckeyword. Thefunckeyword isn't used for initializers.
In the initializer, we invoke the initializer of the parent class. The super keyword refers to the superclass. We then create a tab bar item and assign it to the tabBarItem property. To create the tab bar item, we invoke init(title:image:tag:), passing in the title of the tab bar item, a UIImage instance, and a tag. The tag is used to identify the tab bar item.
Note that you can omit the extension of the file name. Even though we use an image with name icon-authors.png, the value we pass to the UIImage initializer is "icon-authors". The images I've used are included in the source files on GitHub and you can also find them on GraphicRiver if you'd like to use them in your own projects.
For every image, there are two files, icon-authors.png and [email protected]. The operating system selects the first file for devices that don't have a retina screen. The second file is used for devices with a retina screen. Note that you don't need to include the @2x specifier in the string you pass to the UIImage initializer. The operating system is clever enough to figure this out.
You can include a third file with a @3x specifier for iPhone 6/6S Plus. The pixel density of this file should be trice that of the first one. Take a look at the following example to better understand how this work in practice.
- icon-authors.png: 30px x 30px
- [email protected]: 60px x 60px
- [email protected]: 90px x 90px
Let's also create a tab bar item for the AuthorsViewController and BookCoverViewController classes.
// Authors View Controller
required init?(coder aDecoder: NSCoder) {
    super.init(coder: aDecoder)

    // Initialize Tab Bar Item
    tabBarItem = UITabBarItem(title: "Authors", image: UIImage(named: "icon-authors"), tag: 0)
}
// Book Cover View Controller
required init?(coder aDecoder: NSCoder) {
    super.init(coder: aDecoder)

    // Initialize Tab Bar Item
    tabBarItem = UITabBarItem(title: "Cover", image: UIImage(named: "icon-cover"), tag: 2)
}
Tab bar items can also have a badge. If you're building an email client, for example, you could badge a tab with the number of unread emails. You can add a badge to a tab bar item by setting its badgeValue property. Update the initializer of the books view controller as shown below.
required init?(coder aDecoder: NSCoder) {
    super.init(coder: aDecoder)

    // Initialize Tab Bar Item
    tabBarItem = UITabBarItem(title: "Books", image: UIImage(named: "icon-books"), tag: 1)

    // Configure Tab Bar Item
    tabBarItem.badgeValue = "8"
}
This is what the result should look like when you run the application in the simulator.
In the previous lesson, I wrote that every view controller on a navigation stack keeps a reference to the navigation controller managing the stack. The same is true for view controllers that are managed by a tab bar controller. A view controller managed by a tab bar controller keeps a reference to the tab bar controller in its tabBarController property, which is of type UITabBarController?.
When working with tab bar controllers, keep in mind that it's the root view controller of each tab that determines how the tab bar item of the respective tab looks. For example, if a tab bar controller manages a navigation controller with a number of view controllers, it's the tab bar item of the navigation controller's root view controller that is used by the tab bar controller's tab bar. The UITabBarItem class has a few other methods to further customize the look and feel of a tab bar item.
More View Controllers
Before ending this article, I'd like to show you how the tab bar looks when the tab bar controller manages more than five view controllers. As I mentioned earlier, only five tabs are displayed at any one time, but the tab bar controller provides support for managing more than five child view controllers.
Open the main storyboard and add two UITableViewController instances and one UIViewController instance. In the Identity Inspector, set the class of these view controllers to AuthorsViewController, BooksViewController, and BookCoverViewController respectively. Run the application to see the result. If you tab the first tab from the right, you should see the two view controllers that couldn't fit on the tab bar.
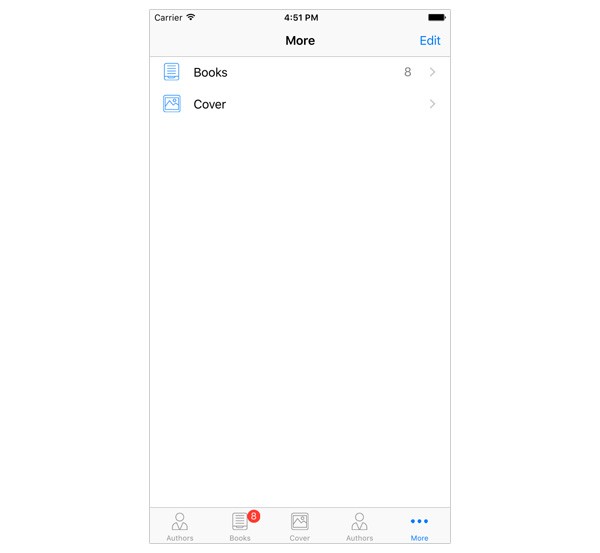
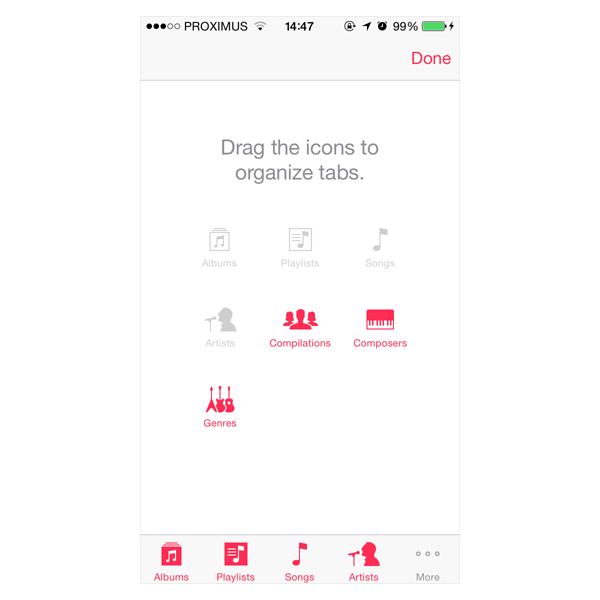
You can even modify the position of the tab bar items by tapping the Edit button in the top right.
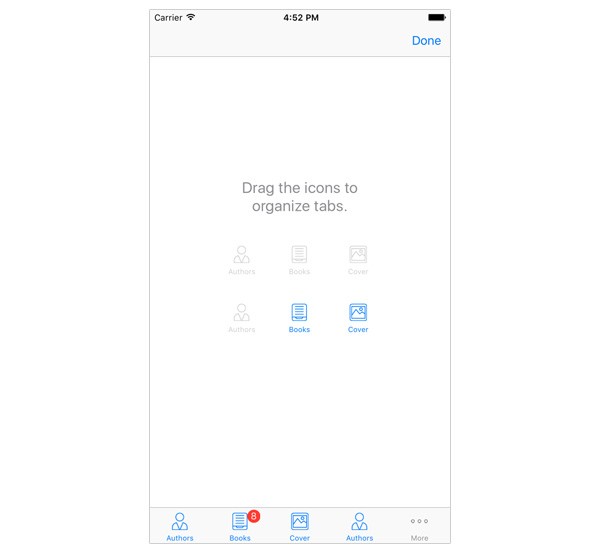
The extra view controllers we added aren't very useful, but they show how a tab bar controller manages more than five child view controllers.
Conclusion
It's important to understand that UITabBarController and UINavigationController each represent a unique user interface paradigm. In this article, you learned that tab bar controllers aren't difficult to master once you understand the components involved. In the next article, we'll take a look at data persistence on iOS and the options you have as a developer.
If you have any questions or comments, you can leave them in the comments below or reach out to me on Twitter.

Comments