In the previous lessen, we laid the foundation for the shopping list application. In the first part of this lesson, we further refine the application by enabling the user to edit and delete items from the list. Later on, we add the ability to select items from the list to create the shopping list.
1. Deleting Items
Deleting items from the list is an important addition in terms of user experience and overall usability. Adding this ability involves:
- removing the item from the view controller's
itemsproperty - updating the table view
- saving the changes to disk
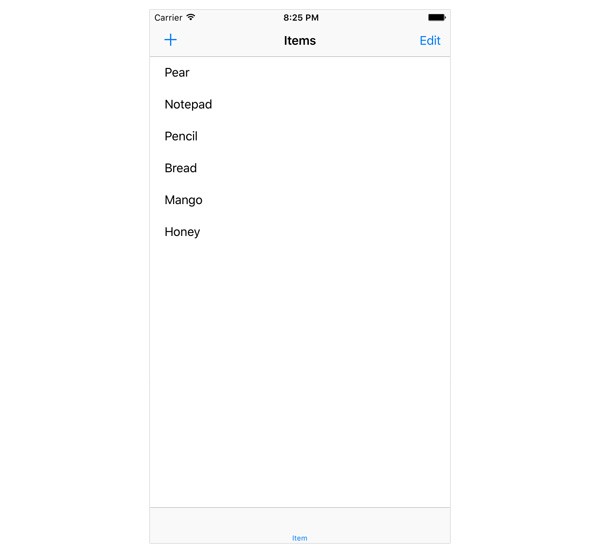
Let's see how this works in practice. We first need to add an edit button to the navigation bar. In the view controller's viewDidLoad() method, create an instance of UIBarButtonItem and assign it to the rightBarButtonItem property of the view controller's navigationItem property.
As we did in the previous lesson, we create a bar button item by invoking init(barButtonSystemItem:target:action:), passing in .Edit, a member value of UIBarButtonSystemItem, self as the target, and "editItems:" as the selector.
override func viewDidLoad() {
    super.viewDidLoad()

    // Register Class
    tableView.registerClass(UITableViewCell.classForCoder(), forCellReuseIdentifier: CellIdentifier)

    // Create Add Button
    navigationItem.leftBarButtonItem = UIBarButtonItem(barButtonSystemItem: .Add, target: self, action: "addItem:")

    // Create Edit Button
    navigationItem.rightBarButtonItem = UIBarButtonItem(barButtonSystemItem: .Edit, target: self, action: "editItems:")
}
The implementation of editItems(_:) is only one line of code as you can see below. Whenever the user taps the edit button, the table view is toggled into or out of edit mode. We do this by using a little trick. We ask the table view whether or not it is in edit mode, which returns a Bool value, and inverse the returned value (true becomes false and vice versa). The method we call on the table view is setEditing(_:animated:), a specialized setter that accepts an animation parameter.
func editItems(sender: UIBarButtonItem) {
    tableView.setEditing(!tableView.editing, animated: true)
}
If you run the shopping list application in the simulator and tap the edit button, you should see the table view being toggled into and out of edit mode.
Two methods of the UITableViewDataSource protocol are important for enabling editing in a table view:
tableView(_:canEditRowAtIndexPath:)tableView(_:commitEditingStyle:forRowAtIndexPath:)
If the user taps the edit button, the table view asks its data source which rows are editable by sending the data source a message of tableView(_:canEditRowAtIndexPath:). If true is returned for a particular index path, the table view instructs the corresponding table view cell that it needs to toggle into or out of edit mode, depending on the table view's edit mode. This translates to the table view cell showing or hiding its editing controls. Implement tableView(_:canEditRowAtIndexPath:) method as shown below to see how this works in practice.
override func tableView(tableView: UITableView, canEditRowAtIndexPath indexPath: NSIndexPath) -> Bool {
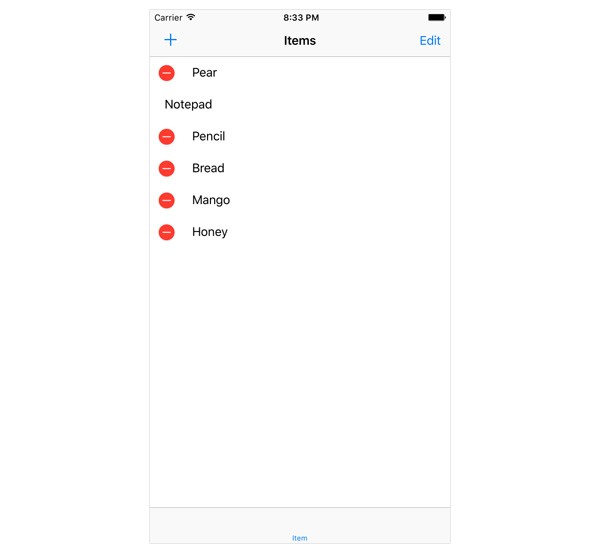
if indexPath.row == 1 {
return false
}
return true
}
The above implementation of tableView(_:canEditRowAtIndexPath:) enables the user to edit every row in the table view with the exception of the second row. Run the application in the simulator and give it a try.
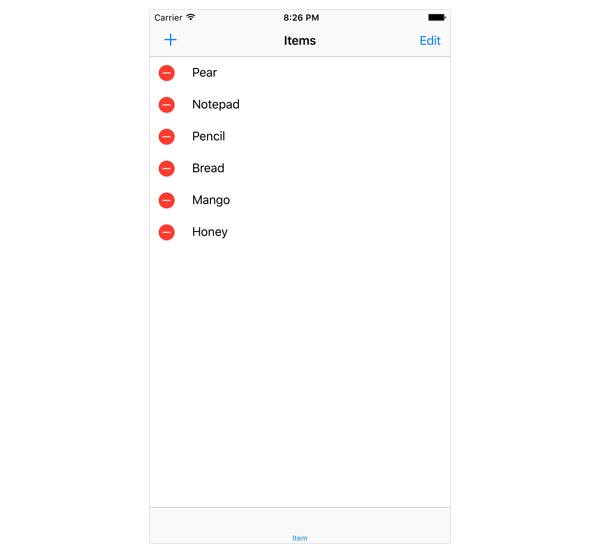
For the shopping list application, the user should be able to edit every row in the table view. This means that tableView(_:canEditRowAtIndexPath:) should always return true.
override func tableView(tableView: UITableView, canEditRowAtIndexPath indexPath: NSIndexPath) -> Bool {
    return true
}
You may have noticed that nothing happens when you try to delete a row in the table view. The puzzle isn't finished yet. Whenever the user taps the delete button of a row, the table view sends its data source a message of tableView(_:commitEditingStyle:forRowAtIndexPath:). The second argument of the corresponding method denotes what type of action the user has performed, inserting or deleting a row. For the shopping list application, we're only going to implement support for deleting rows from the table view.
Deleting rows from a table view involves:
- deleting the corresponding item from the view controller's
itemsproperty - updating the table view by deleting the corresponding row
Let's inspect the implementation of tableView(_:commitEditingStyle:forRowAtIndexPath:). The method starts by checking whether the editing style is equal to .Delete (a member value of UITableViewCellEditingStyle), because we only want to allow the user to delete rows from the table view.
If the editing style is equal to .Delete, the corresponding item is removed from the items property, the corresponding row is deleted from the table view, and the updated list of items is saved to disk.
override func tableView(tableView: UITableView, commitEditingStyle editingStyle: UITableViewCellEditingStyle, forRowAtIndexPath indexPath: NSIndexPath) {
    if editingStyle == .Delete {
        // Delete Item from Items
        items.removeAtIndex(indexPath.row)

        // Update Table View
        tableView.deleteRowsAtIndexPaths([indexPath], withRowAnimation: .Right)

        // Save Changes
        saveItems()
    }
}
Run the application in the simulator and delete a few items. Don't forget to quit and relaunch the application to verify that the items are permanently deleted from the list.
2. Editing Items
We could reuse the AddItemViewController class for editing items. However, because using a single view controller for adding and editing items can often overcomplicate the implementation, I generally end up creating a separate class for editing items. This may initially result in us repeating ourselves, but it will give us more flexibility down the road.
Step 1: Creating the Editing View Controller
Create a new UIViewController subclass and name it EditItemViewController. The interface of the AddItemViewController and EditItemViewController classes are very similar.
import UIKit

protocol EditItemViewControllerDelegate {
    func controller(controller: EditItemViewController, didUpdateItem item: Item)
}

class EditItemViewController: UIViewController {

    @IBOutlet var nameTextField: UITextField!
    @IBOutlet var priceTextField: UITextField!

    var item: Item!

    var delegate: EditItemViewControllerDelegate?

    ...

}
The differences are the addition of a property, item, to store a reference to the item that's being edited and the definition of the method of the EditItemViewControllerDelegate protocol. Note that item is of type Item!, a forced unwrapped optional. Because the edit item view controller is of no use without an item to edit, we expect the item property to always have a value.
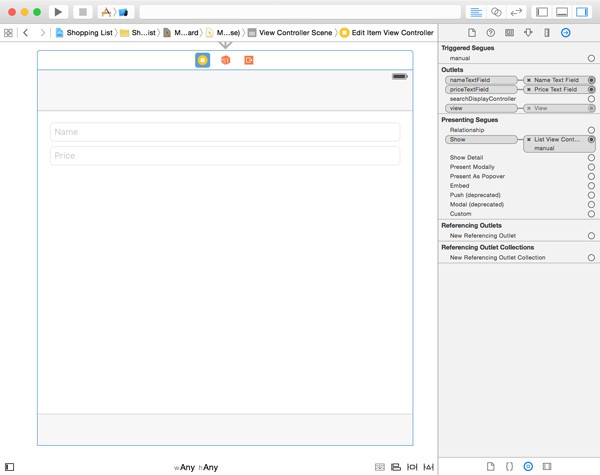
Open Main.storyboard, drag a UIViewController instance from the Object Library, set its class to EditItemViewController, and create a manual show segue from the list view controller to the edit item view controller. Set the segue's identifier to EditItemViewController.
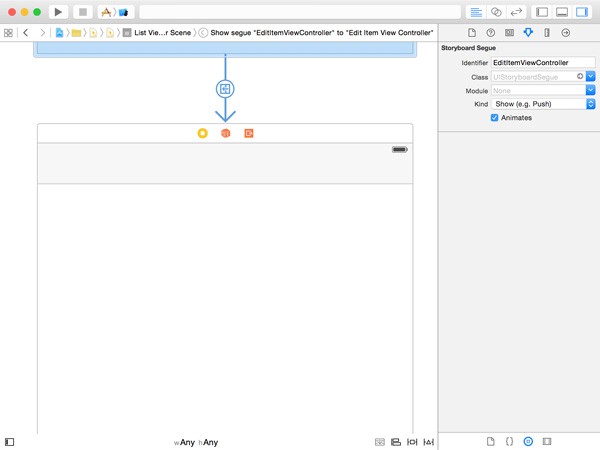
Drag text fields from the Object Library to the view controller's view and position them as shown in the figure below. Select the top text field, open the Attributes Inspector, and enter Name in the Placeholder field. Select the bottom text field and, in the Attributes Inspector, set its placeholder text to Price and set Keyboard to Number Pad. Select the view controller object, open the Connections Inspector, and connect the nameTextField and priceTextField outlets with the corresponding text field in the user interface.
In the view controller's viewDidLoad() method, create the save button like we did in the AddItemViewController class.
// MARK: -
// MARK: View Life Cycle
override func viewDidLoad() {
    super.viewDidLoad()

    // Create Save Button
    navigationItem.rightBarButtonItem = UIBarButtonItem(barButtonSystemItem: .Save, target: self, action: "save:")
}
The implementation of the save(_:) action is very similar to the one we implemented in the AddItemViewController class. There are a few subtle differences I want to point out, though.
// MARK: -
// MARK: Actions
func save(sender: UIBarButtonItem) {
    if let name = nameTextField.text, let priceAsString = priceTextField.text, let price = Float(priceAsString) {
        // Update Item
        item.name = name
        item.price = price

        // Notify Delegate
        delegate?.controller(self, didUpdateItem: item)

        // Pop View Controller
        navigationController?.popViewControllerAnimated(true)
    }
}
Instead of passing the name and price values to the delegate, we directly update the item and pass the updated item to the view controller's delegate. Because the view controller is a child view controller of a navigation controller, we dismiss the view controller by popping it from the navigation stack.
Step 2: Showing the Edit Item View Controller
In a few minutes, we'll implement the functionality that enables the user to select items from the list view controller to add them to the shopping list. The user will be able to do this by tapping a row in the list view. The question is how the user will be able to edit an item if tapping a row is reserved for adding an item to the shopping list?
The UIKit framework provides a detail disclosure button for exactly this use case. A detail disclosure button is positioned at the right of a table view cell. To add a detail disclosure button to a table view cell, we need to revisit tableView(_:cellForRowAtIndexPath:) in the list view controller and amend it as shown below.
override func tableView(tableView: UITableView, cellForRowAtIndexPath indexPath: NSIndexPath) -> UITableViewCell {
    // Dequeue Reusable Cell
    let cell = tableView.dequeueReusableCellWithIdentifier(CellIdentifier, forIndexPath: indexPath)

    // Fetch Item
    let item = items[indexPath.row]

    // Configure Table View Cell
    cell.textLabel?.text = item.name
    cell.accessoryType = .DetailDisclosureButton

    return cell
}
Every table view cell has an accessoryType property. In tableView(_:cellForRowAtIndexPath:), we set it to .DetailDisclosureButton, a member value of UITableViewCellAccessoryType. You may have noticed the engineers at Apple don't like short names.
How does the table view notify its delegate when the detail disclosure button is tapped? Unsurprisingly, the UITableViewDelegate protocol defines the tableView(_:accessoryButtonTappedForRowWithIndexPath:) method for this purpose. Take a look at its implementation.
// MARK: -
// MARK: Table View Delegate Methods
override func tableView(tableView: UITableView, accessoryButtonTappedForRowWithIndexPath indexPath: NSIndexPath) {
    // Fetch Item
    let item = items[indexPath.row]

    // Update Selection
    selection = item

    // Perform Segue
    performSegueWithIdentifier("EditItemViewController", sender: self)
}
We fetch the correct item from the items property and store it in selection, a property of the list view controller that we'll declare in a moment. We then perform the segue with identifier EditItemViewController.
Before we update the implementation of prepareForSegue(_:sender:), we need to declare the property for storing the selected item. We also need to conform the ListViewController class to the EditItemViewControllerDelegate protocol.
import UIKit

class ListViewController: UITableViewController, AddItemViewControllerDelegate, EditItemViewControllerDelegate {

    let CellIdentifier = "Cell Identifier"

    var items = [Item]()
    var selection: Item?

    ...

}
The updated implementation of prepareForSegue(_:sender:) is pretty simple as you can see below. We get a reference to the edit item view controller and set its delegate and item properties. Because the selection property is of type Item?, we bind it to the item constant to safely unwrap it.
override func prepareForSegue(segue: UIStoryboardSegue, sender: AnyObject?) {
    if segue.identifier == "AddItemViewController" {
      ...

    } else if segue.identifier == "EditItemViewController" {
        if let editItemViewController = segue.destinationViewController as? EditItemViewController, let item = selection {
            editItemViewController.delegate = self
            editItemViewController.item = item
        }
    }
}
The implementation of EditItemViewController is almost complete. In its viewDidLoad() method, we populate the text fields with the data of the item property. Because the text property of a text field is of type String?, we use string interpolation to create a string from the Float value of the item's price property. String interpolation is quite powerful in Swift.
override func viewDidLoad() {
    super.viewDidLoad()

    // Create Save Button
    navigationItem.rightBarButtonItem = UIBarButtonItem(barButtonSystemItem: .Save, target: self, action: "save:")

    // Populate Text Fields
    nameTextField.text = item.name
    priceTextField.text = "\(item.price)"
}
Step 3: Adopting the Delegate Protocol
Adopting the EditItemViewControllerDelegate protocol means implementing the controller(_:didUpdateItem:) method as shown below. It might surprise you that we don't update the data source of the table view. All we do in the delegate method is reload one row of the table view.
// MARK: -
// MARK: Edit Item View Controller Delegate Methods
func controller(controller: EditItemViewController, didUpdateItem item: Item) {
    // Fetch Index for Item
    if let index = items.indexOf(item) {
        // Update Table View
        tableView.reloadRowsAtIndexPaths([NSIndexPath(forRow: index, inSection: 0)], withRowAnimation: .Fade)
    }

    // Save Items
    saveItems()
}
The reason that we don't need to update the table view's data source, the items array, is that the updated item was passed by reference to the edit item view controller. In other words, the object that the edit item view controller updated is the same object that is contained in the items array. This is one of the nice benefits of working with class instances. They are passed by reference.
Don't forget to save the list of items to make sure the edits are written to disk. Run the application to test the editing functionality.
3. Creating the Shopping List View Controller
Before we explore the data source of the shopping list view controller, let's create some scaffolding to work with. Create a new UITableViewController subclass and name it ShoppingListViewController.
Open ShoppingListViewController.swift and add two properties of type [Item]:
-
items, which will contain the complete list of items -
shoppingList, which will only contain the items of the shopping list
import UIKit

class ShoppingListViewController: UITableViewController {

    var items = [Item]()
    var shoppingList = [Item]()

    ...

}
The idea is to load the list of items every time a change is made to the list, parse the list of items, and extract only those items that have their inShoppingList property set to true. Those items are then added to the shoppingList array.
Another option would be to store the shopping list in a separate file. The downside of this approach would be that we have to keep the items in the list view controller and the items in the shopping list synchronized. This is asking for trouble if you ask me.
Step 1: Adding Property Observers
Property observers are a great way to respond to changes of a property's value. Let's see how we can leverage property observers to update the shoppingList property whenever the value of items changes.
var items = [Item]() {
    didSet {
        buildShoppingList()
    }
}
The syntax is easy enough to understand. Property observers are wrapped in a closure. There are two types of property observers:
-
willSet, which is invoked before the new value of the property is set -
didSet, which is invoked after the new value of the property is set
In the above example, we invoke buildShoppingList() whenever a new value is assigned to items. This is what the implementation of buildShoppingList() looks like.
// MARK: -
// MARK: Helper Methods
func buildShoppingList() {
    shoppingList = items.filter({ (item) -> Bool in
        return item.inShoppingList
    })
}
We filter the elements of the items array, including only items for which inShoppingList is set to true. The result is assigned to shoppingList.
We also create a didSet property observer for the shoppingList property. In this property observer, we update the table view to reflect the contents of shoppingList, the data source of the table view.
var shoppingList = [Item]() {
    didSet {
        tableView.reloadData()
    }
}
Step 2: Displaying the Shopping List
Implementing the methods of the UITableViewDataSource protocol should be child's play by now. Take a look at the below implementation.
// MARK: -
// MARK: Table View Data Source Methods
override func numberOfSectionsInTableView(tableView: UITableView) -> Int {
    return 1
}

override func tableView(tableView: UITableView, numberOfRowsInSection section: Int) -> Int {
    return shoppingList.count
}

override func tableView(tableView: UITableView, cellForRowAtIndexPath indexPath: NSIndexPath) -> UITableViewCell {
    // Dequeue Reusable Cell
    let cell = tableView.dequeueReusableCellWithIdentifier(CellIdentifier, forIndexPath: indexPath)

    // Fetch Item
    let item = shoppingList[indexPath.row]

    // Configure Table View Cell
    cell.textLabel?.text = item.name

    return cell
}
Don't forget to declare the cell reuse identifier and register the UITableViewCell class like we did in the ListViewController class.
import UIKit

class ShoppingListViewController: UITableViewController {

    let CellIdentifier = "Cell Identifier"

    ...

}
// MARK: -
// MARK: View Life Cycle
override func viewDidLoad() {
    super.viewDidLoad()

    // Register Class
    tableView.registerClass(UITableViewCell.classForCoder(), forCellReuseIdentifier: CellIdentifier)
}
Step 3: Loading Items
As I explained earlier, the key advantage of using the list of items to store and build the shopping list is that the application stores each item in only one place. This makes updating items in the list and in the shopping list less of a headache. The loadItems() and pathForItems() methods are identical to the ones we implemented in the ListViewController class.
private func loadItems() {
    if let filePath = pathForItems() where NSFileManager.defaultManager().fileExistsAtPath(filePath) {
        if let archivedItems = NSKeyedUnarchiver.unarchiveObjectWithFile(filePath) as? [Item] {
            items = archivedItems
        }
    }
}
private func pathForItems() -> String? {
    let paths = NSSearchPathForDirectoriesInDomains(.DocumentDirectory, NSSearchPathDomainMask.UserDomainMask, true)

    if let documents = paths.first, let documentsURL = NSURL(string: documents) {
        return documentsURL.URLByAppendingPathComponent("items").path
    }

    return nil
}
When you find yourself duplicating code, you should hear an alarm bell ringing. Duplicating code isn't problematic while you're implementing a new feature. Afterwards, however, you should consider refactoring your code to minimize the amount of duplication in the application's code base. This is a very important concept in software development and is often referred to as DRY, Don't Repeat Yourself. Chris Peters wrote a great article on Envato Tuts+ about DRY programming.
Before we put the ShoppingListViewController class to use, we need to update the class's viewDidLoad() method. In addition to setting the title of the view controller, we also load the list of items, which automatically populates the shoppingList array as we saw earlier.
override func viewDidLoad() {
    super.viewDidLoad()

    // Set Title
    title = "Shopping List"

    // Load Items
    loadItems()

    // Register Class
    tableView.registerClass(UITableViewCell.classForCoder(), forCellReuseIdentifier: CellIdentifier)
}
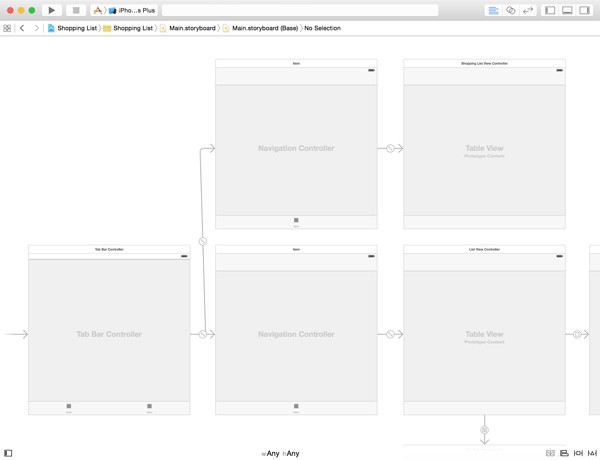
The final step is to initialize the shopping list view controller by updating the storyboard. This involves adding a UITableViewController instance, settings its class to ShoppingListViewController, embedding it in a navigation controller, and creating a relationship segue between the tab bar controller and the navigation controller. Select the table view of the shopping list view controller and set the number of prototype cells to 0.
Run the application to see if everything is working properly. Of course, the shopping list is currently empty and we don't have a way to add items to the shopping list. Let's remedy that in the next step.
4. Adding Items to the Shopping List
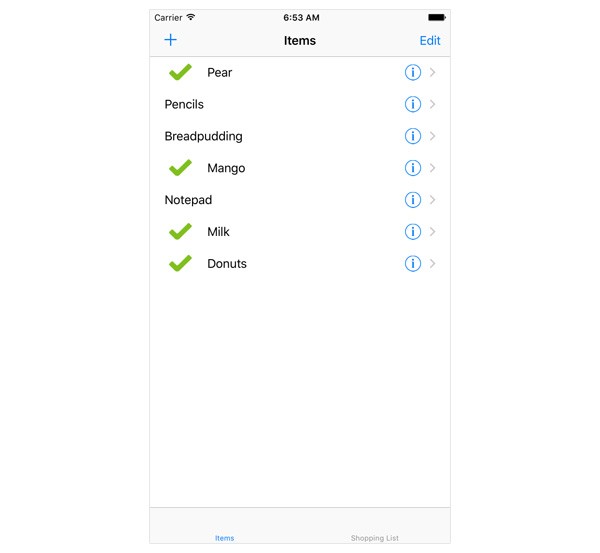
As I wrote earlier, the idea is to add an item to the shopping list when it is tapped in the list view controller. To improve the user experience, if an item is present in the shopping list, we show a green checkmark to the left of the item's name. If an item that is already in the shopping list is tapped, it is removed from the shopping list and the green checkmark disappears. This means that we need to take a look at the tableView(_:didSelectRowAtIndexPath:) method of the UITableViewDelegate protocol.
Before we implement tableView(_:didSelectRowAtIndexPath:), download the source files of this lesson. In the folder named Resources, find the files named checkmark.png and [email protected]. Add both of these files to the project, because we need them in a few moments.
In the first line of tableView(_:didSelectRowAtIndexPath:), we send the table view a message of deselectRowAtIndexPath(_:animated:) to deselect the row the user tapped. Whenever a row is tapped, it should only be highlighted for an instant hence this addition. Next, we fetch the item that corresponds with the user's selection and update the inShoppingList property of the item (true becomes false and vice versa).
override func tableView(tableView: UITableView, didSelectRowAtIndexPath indexPath: NSIndexPath) {
    tableView.deselectRowAtIndexPath(indexPath, animated: true)

    // Fetch Item
    let item = items[indexPath.row]

    // Update Item
    item.inShoppingList = !item.inShoppingList

    // Update Cell
    let cell = tableView.cellForRowAtIndexPath(indexPath)

    if item.inShoppingList {
        cell?.imageView?.image = UIImage(named: "checkmark")
    } else {
        cell?.imageView?.image = nil
    }

    // Save Items
    saveItems()
}
Based on the value of the item's inShoppingList property, we either show or hide the green checkmark. We show the checkmark by setting the image property of the table view cell's imageView property. A table view cell includes an image view on its left (an instance of the UIImageView class). By setting the image view's image property to nil, the image view is blank, showing no image.
The implementation of tableView(_:didSelectRowAtIndexPath:) ends by saving the list of items to disk to make sure that the changes are permanent.
How does the shopping list know when an item in the list view controller is tapped by the user? The shopping list view controller will not update its table view automatically if a change was made to the list of items in the list view controller. To prevent tight coupling, we don't want the list view controller and the shopping list view controller to communicate directly to one another.
One solution to this problem is the use of notifications. Whenever the list view controller makes a change to the list of items, it posts a notification with a specific name to the notification center, an object that manages notifications. Objects that are interested in certain notifications can add themselves as observers of those notifications, which means that they can respond when those notifications are posted to the notification center.
How does all this work? There are three steps involved:
- the shopping list view controller starts by telling the notification center that it is interested in receiving notifications with a name of
ShoppingListDidChangeNotification - the list view controller posts a notification to the notification center whenever it updates the list of items
- when the shopping list view controller receives the notification from the notification center, it updates its data source and table view in response
Before we implement the three steps I just described, it's a good idea to take a closer look at the NSNotificationCenter class.
In a nutshell, the NSNotificationCenter manages broadcasting of notifications. Objects in an application can register with a notification center to receive notifications using addObserver(_:selector:name:object:) where:
- the first argument is the object that will receive the notifications (the observer)
-
selectoris the action that is called on the observer when it receives the notification -
nameis the name of the notification -
objectis the object that triggers the sending of the notification
If the last argument is set to nil, the observer receives every notification with the specified name.
Step 1: Receiving Notifications
Revisit the viewDidLoad() method of the ShoppingListViewController class and add the view controller instance as an observer to receive notifications with a name of ShoppingListDidChangeNotification.
override func viewDidLoad() {
    super.viewDidLoad()

    // Set Title
    title = "Shopping List"

    // Load Items
    loadItems()

    // Register Class
    tableView.registerClass(UITableViewCell.classForCoder(), forCellReuseIdentifier: CellIdentifier)

    // Add Observer
    NSNotificationCenter.defaultCenter().addObserver(self, selector: "updateShoppingList:", name: "ShoppingListDidChangeNotification", object: nil)
}
The action triggered when the view controller receives a notification with that name is updateShoppingList(_:). The last parameter, object, is nil, because it doesn't matter which object sent the notification.
Step 2: Responding to Notifications
The method that's triggered when the observer receives a notification has a specific format as you can see below. It accepts one argument, the notification object which is of type NSNotification.
The notification object keeps a reference to the object that posted the notification and it can also contain a dictionary with additional information. The implementation of the updateShoppingList(_:) method is quite simple. We call loadItems() on the view controller, which means that the list of items is loaded from disk. The rest happens automatically thanks to the property observers we implemented earlier.
// MARK: -
// MARK: Notification Handling
func updateShoppingList(notification: NSNotification) {
    loadItems()
}
Step 3: Sending Notifications
The third piece of the puzzle is posting a notification whenever the list of items is changed by the list view controller. We can do this in the saveItems() method of the ListViewController class.
private func saveItems() {
    if let filePath = pathForItems() {
        NSKeyedArchiver.archiveRootObject(items, toFile: filePath)

        // Post Notification
        NSNotificationCenter.defaultCenter().postNotificationName("ShoppingListDidChangeNotification", object: self)
    }
}
We first ask for a reference to the default notification center by calling defaultCenter() on the NSNotificationCenter class. Next, we call postNotificationName(_:object:) on the default notification center, passing in the name of the notification, ShoppingListDidChangeNotification, and the object posting the notification.
Before you build the project, make sure to amend tableView(_:cellForRowAtIndexPath:) in ListViewController.swift as shown below to display a green checkmark for items that are already present in the shopping list.
override func tableView(tableView: UITableView, cellForRowAtIndexPath indexPath: NSIndexPath) -> UITableViewCell {
    // Dequeue Reusable Cell
    let cell = tableView.dequeueReusableCellWithIdentifier(CellIdentifier, forIndexPath: indexPath)

    // Fetch Item
    let item = items[indexPath.row]

    // Configure Table View Cell
    cell.textLabel?.text = item.name
    cell.accessoryType = .DetailDisclosureButton

    if item.inShoppingList {
        cell.imageView?.image = UIImage(named: "checkmark")
    } else {
        cell.imageView?.image = nil
    }

    return cell
}
Run the shopping list application to give it a spin. Have you noticed that edits to an item are automatically reflected in the shopping list?
Ready for Publication?
Great. Where is the button to publish the shopping list application to the App Store? We are not quite done yet. Even though we have laid the foundation of the shopping list application, it isn't ready for publication. There are also a few things to consider.
Scalability
The shopping list application is a modest implementation of a shopping list. If the application were to contain hundreds or thousands of items then it would be pertinent to add search capabilities as well as sections to sort the items alphabetically (as we did earlier in this series). It is important to realize that the list of items is written to disk in its entirety every time an item is updated. This is no problem when the list is small, but it will be if the list grows over time to hundreds or thousands of items.
Relationships
Also, users may want to save more than one shopping list. How would you deal with that? One option is to store each shopping list in a separate file, but how would you deal with changes made to items? Are you going to update every shopping list that contains the item? When you start dealing with relationships, it is better to choose for a SQLite data store.
Core Data is a great companion if you choose to go down that road. It is a powerful framework and sports many features that make a lot of the code in our shopping list application obsolete. It is true that Core Data brings a bit more overhead with it so it is key to first consider if Core Data is suitable for your application, in other words, if it is worth the overhead.
Additional Features
There is also a lot of potential for additional features. The price property of the items remains unused in the current implementation of the shopping list application. Also, it would be nice if the user could check off an item from the shopping list by tapping the item. As you can see, the current implementation of the shopping list application is only a modest start.
Conclusion
Even though the shopping list application isn't quite ready for the App Store, you can't deny that it works as planned and it has shown you several new aspects of Cocoa development, such as notifications and implementing a custom delegate protocol.
You now know what to expect from the iOS SDK and what iOS development is like. It is up to you to decide if you want to continue your journey and become a skilled iOS developer. If you do choose to continue with iOS development, then I will provide you with some great resources in next and final installment of this series.
If you have any questions or comments, you can leave them in the comments below or reach out to me on Twitter.

Comments