Mobile apps and viewing content on the web are ubiquitous now. For years, iOS developers have been charged with either creating their own web viewing experience inside their app or handing off the URL to Safari. Both of these approaches bring inherent disadvantages that were previously unavoidable.
That's all changed with iOS 9 and the introduction of the SFSafariViewController class. With it, you can now provide a full web viewing experience inside your app without having to spend important development time providing it.
1. Demo Overview
Before we begin, I'm going to lay out the approach I've taken with the demo app that goes along with this tutorial. As you'll see later, there really isn't much code involved with using the safari view controller. The real value of the safari view controller comes from understanding when to use it and, more importantly, why.
Options for Showing Web Content
As of iOS 9, developers have three options to display web content to a user:
-
Safari: Use
openURL(_:)to show the page inside of safari, forcing the user to leave your application. -
Custom Viewing Experience: You can leverage
WKWebVieworUIWebViewto create a browsing experience from scratch. -
SFSafariViewController: WithSFSafariViewController, you can use nearly all of the benefits of viewing web content inside Safari without forcing users to leave your app.
Before iOS 9, the first two options were the only options for developers. Knowing when you had to use one or the other depended on the context of the presented content. While working on the demo application, we are going to use all three options.
Now that we know how content can be displayed, let's cover why it might be displayed in an app. On iOS, there are two major use cases for viewing web content.
- Custom Web Content: This is content not meant for browsing. This could be a report or something similar generated from an API or server. Here, the user is looking at one piece of content and not doing much else.
- Viewing Websites: This is the most common scenario. The user needs to browse the web momentarily to either log in to a service or navigate a website.
Also keep in mind that there is a third use case, web-based authentication. For this tutorial, we aren't going to focus on that scenario.
Custom Web Content
If the extent of your user's web experience inside of your app falls into the first use case, the safari view controller is probably not what you need. In those cases, you are displaying content that you own and control, and may need to extensively customize.
If you find your app fits into this scenario, then use WKWebView. It's the successor to UIWebView and includes several enhancements, such as utilizing the Nitro JavaScript engine. This approach lets you build the entire user interface from scratch. You also have other affordances, such as loading files securely and using WKWebsiteDataStore for querying cookies.
Viewing Websites
The majority of apps, however, just need to provide a generalized web viewing experience. This is the perfect scenario for the safari view controller. Before iOS 9, developers spent time creating their own user interface for web browsing, which could lead to problems for users.
The browsing experience is inconsistent across different apps, which may confuse the user. Some interfaces may also lack the things users expect, such as a progress bar indicating how much of the page is loaded.
Further, you don't have access to all of Safari's features. This includes the reader view, the iCloud keychain for autofill capabilities, and more. If you wanted to have those features before iOS 9, you were forced to have the user leave your app entirely by opening the content inside Safari. The SFSafariViewController class solves every one of these problems.
2. Run the Demo App
To begin, build and run the demo application. You'll be presented with a very minimal user interface that has three options. Each option corresponds to one of the methods mentioned earlier to present web content.
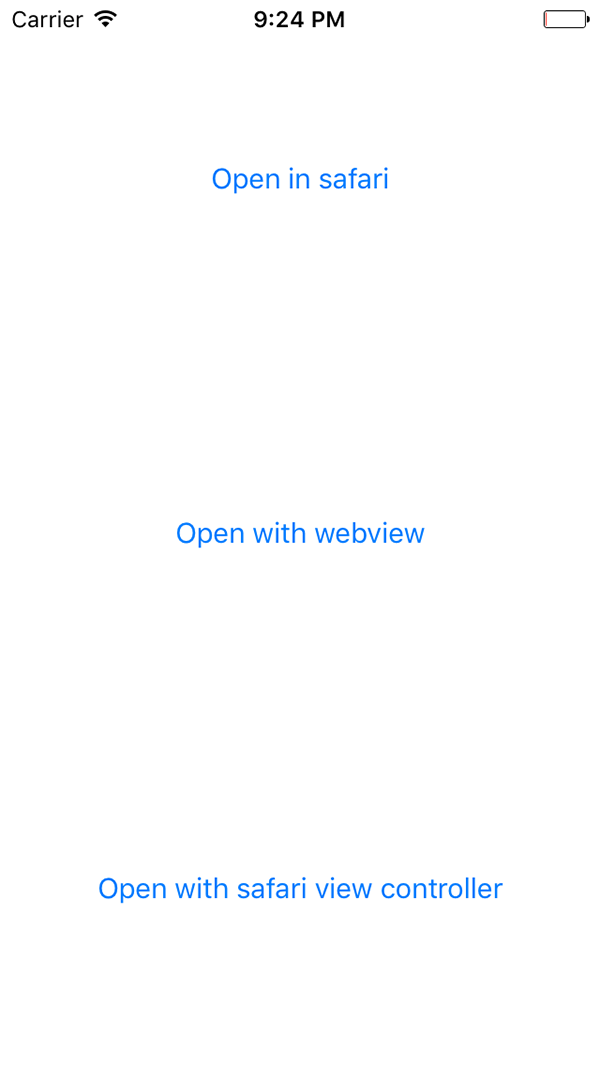
3. Opening Content in Safari
The first option we'll demonstrate is the more traditional route, which is handing off the URL to Safari. Open ViewController.swift and notice the urlString property at the top of the file. This will define what's presented in the coming examples, so feel free to set it to whatever you desire.
private var urlString:String = "https://google.com"
One important thing to note is that in iOS 9, TLS 1.2 is enforced by default. If the server you are trying to reach doesn't support this, you may see the following error in the console:

There are ways around this, such as adding a key to your app's Info.plist file. This was a change made by Apple to increase security around the web browsing experience. Moving on, add the following code to the openInSafari(_:) action:
@IBAction func openInSafari(sender: AnyObject)
{
    let url = NSURL(string: self.urlString)!
    UIApplication.sharedApplication().openURL(url)
}
Build and run the app. When you tap the top button, "Open in safari", the operating system will leave your app and open the URL in Safari.
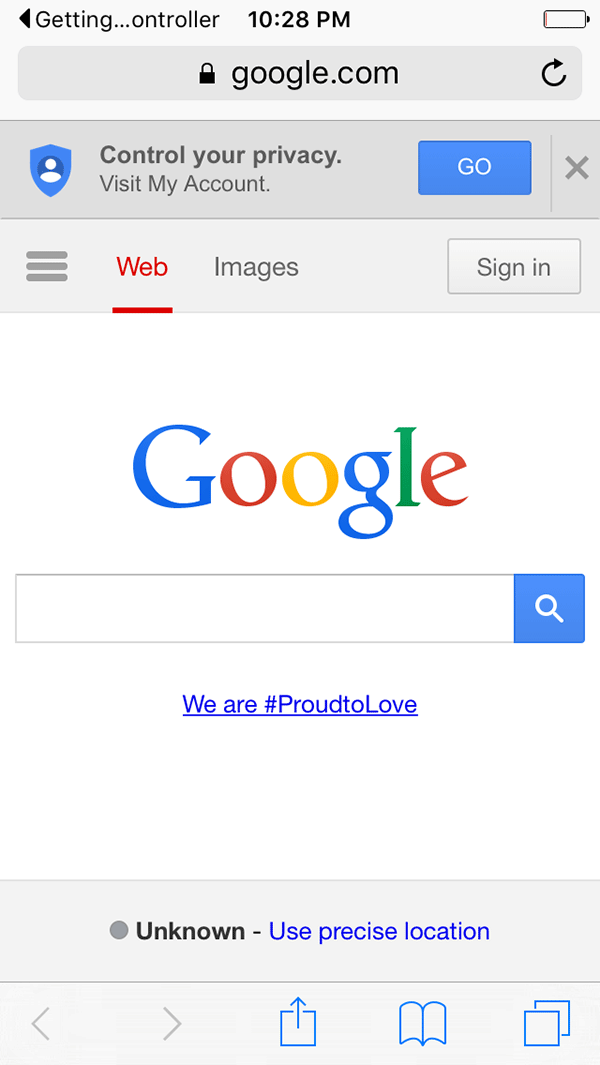
While this option is certainly viable, we've forced the user to leave our app. As developers, ideally we want the experience to stay contained within our app. One improvement iOS 9 has made with this approach, however, is the small back button in the top left:

Tapping this button will take the user back to the app that handed off the URL to Safari. To fix the issue of the user being forced to leave our app, let's move on to the next approach.
4. Opening Content in Webkit or WebView
We'll now open the same URL inside our app. To do this, we'll use an embedded UIWebView. The logic for this simple web browser is found in the CustomWebViewController class.
Since we don't need any of the advanced features of WebKit, we'll just open the page inside a web view. In the ViewController class, replace the code in prepareForSegue(_:sender:) as follows:
override func prepareForSegue(segue: UIStoryboardSegue, sender: AnyObject?)
{
    if let navVC = segue.destinationViewController as? UINavigationController
    {
        let cwvc = navVC.topViewController as! CustomWebViewController
        cwvc.urlString = self.urlString
    }
}
Go ahead and run the app. Tap the middle button, "Open with webview", and the page should now load inside the app.
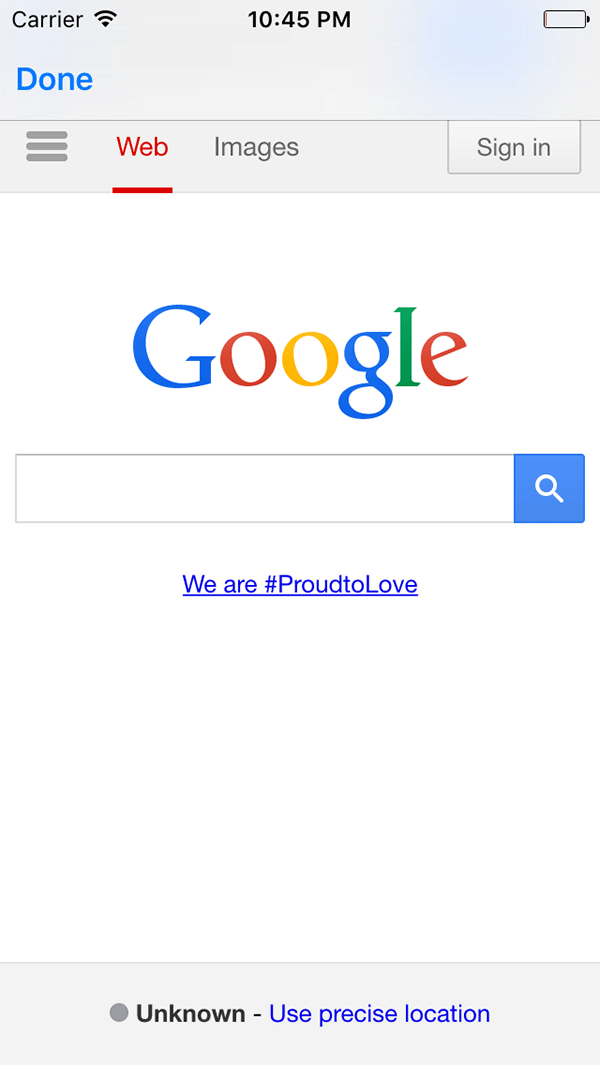
Even though the user stays in the app, the disadvantages with this approach are obvious. Without more development work on our end, there is no loading indication, URL address bar, and other things users expect when browsing the web. Let's now use the SFSafariViewController class to solve those issues.
5. Opening Content in Safari View Controller
Before we can use the SFSafariViewController class, we need to import Safari Services. At the top of ViewController.swift, add the following import statement below the import statement for UIKit:
import SafariServices
Next, update the implementation of openWithSafariVC(_:) as shown below:
@IBAction func openWithSafariVC(sender: AnyObject)
{
    let svc = SFSafariViewController(URL: NSURL(string: self.urlString)!)
    self.presentViewController(svc, animated: true, completion: nil)
}
Run the app and tap the bottom button, "Open with safari view controller", to see the content now being displayed inside a SFSafariViewController instance.
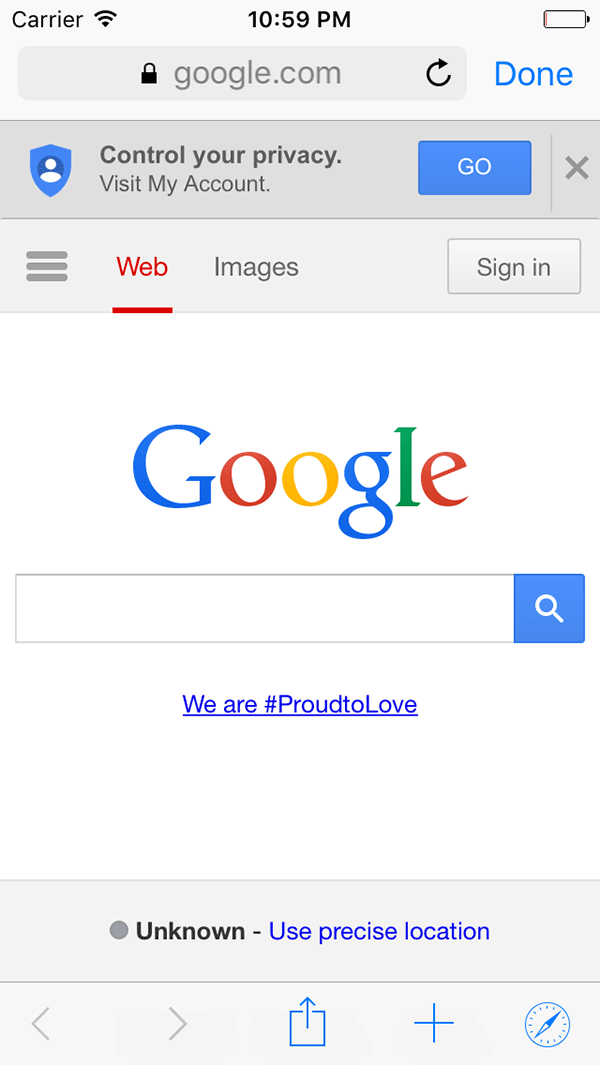
We've now let the user stay inside of our app and they have all the advantages of Safari. Share sheets are available from the tab bar along with the option to add the page as a favorite or open the content in Safari.
There are a number of interesting configurations to take advantage of. For instance, we could let the user easily launch the browser in reader mode by passing true to entersReaderIfAvailable.
@IBAction func openWithSafariVC(sender: AnyObject)
{
    let svc = SFSafariViewController(URL: NSURL(string: self.urlString)!, entersReaderIfAvailable: true)
    self.presentViewController(svc, animated: true, completion: nil)
}
Additionally, the Safari view controller respects tint color. This makes it easy to keep the branding of your app present while still keeping Safari's familiar user interface intact.
However, one issue we need to resolve is that the user currently can't dismiss the view controller. Let's fix that now.
6. SFSafariViewControllerDelegate Protocol
To dismiss the view controller, we need to conform to the SFSafariViewControllerDelegate protocol. Open ViewController.swift and make the ViewController class conform to the SFSafariViewControllerDelegate protocol.
class ViewController: UIViewController, SFSafariViewControllerDelegate
{
    ...
}
Next, add the following delegate method to the ViewController class:
func safariViewControllerDidFinish(controller: SFSafariViewController)
{
    controller.dismissViewControllerAnimated(true, completion: nil)
}
This delegate method is called when the user taps the Done button in the Safari view controller. It should be used to dismiss the view controller and return to your app.
The only thing left to do is assign our view controller to be the delegate of the Safari view controller. Update the implementation of the openWithSafariVC(_:) method as shown below:
@IBAction func openWithSafariVC(sender: AnyObject)
{
    let svc = SFSafariViewController(URL: NSURL(string: self.urlString)!)
    svc.delegate = self
    self.presentViewController(svc, animated: true, completion: nil)
}
If you run the app and open the Safari view controller, you'll see that you can now dismiss the Safari view controller by tapping the Done button in the top right.
Conclusion
The Safari view controller is incredibly easy to use. In fact, it's one of the smallest APIs I've seen with only two initializers and two delegate methods. Even so, it brings all of the features users expect from Safari over to your app.
What's perhaps just as exciting is that developers will no longer have to spend time creating custom web browsers. Bringing a first class web browsing experience to your app takes a few lines of code with the SFSafariViewController class.

Comments