Introduction
ReplayKit is a new framework that was introduced alongside iOS 9. It allows game developers to give players the ability to easily record and share gameplay. In addition to recording and sharing, ReplayKit also includes a fully functional user interface that players can use to edit their video clips.
The recordings produced by ReplayKit are of high-definition and are created with minimal power usage and performance loss. ReplayKit's features are available to every device with an A7, A8, or A9 system-on-chip (every device that supports Metal), running iOS 9 or later.
Prerequisites
This tutorial requires that you are running Xcode 7+ on OS X Yosemite or later. If you want to test the sample project on a device, then you also need a device that support ReplayKit. You will also need to download the starter project from GitHub.
1. Initiating Recordings
Recording gameplay with ReplayKit begins with the RPScreenRecorder class and the sharedRecorder() available to your app. This recorder is responsible for checking the device's ability to record, starting, stopping, and discarding recordings as well as optionally enabling the device's microphone to allow players to add their own live voice commentary over the game's audio.
Open up the starter project that you downloaded from GitHub and go to GameViewController.swift. At the top of this file, add an import statement for the ReplayKit framework.
import ReplayKit
Next, implement the startRecording(_:) method in the GameViewController class. This method is invoked when the user taps the Start Recording button.
func startRecording(sender: UIButton) {
    if RPScreenRecorder.sharedRecorder().available {
        RPScreenRecorder.sharedRecorder().startRecordingWithMicrophoneEnabled(true, handler: { (error: NSError?) -> Void in
            if error == nil { // Recording has started
                sender.removeTarget(self, action: "startRecording:", forControlEvents: .TouchUpInside)
                sender.addTarget(self, action: "stopRecording:", forControlEvents: .TouchUpInside)
                sender.setTitle("Stop Recording", forState: .Normal)
                sender.setTitleColor(UIColor.redColor(), forState: .Normal)
            } else {
                // Handle error
            }
        })
    } else {
        // Display UI for recording being unavailable
    }
}
Let's run through this method step by step. We access the RPScreenRecorder instance available to our app through the sharedRecorder() method and we check if recording is available for the device.
If recording is available, we start a recording by calling the startRecordingWithMicrophone(_:handler:) method on the shared recorder object. The parameters for this method are a boolean, indicating whether or not you want to use the microphone of the device, and a completion handler. The completion handler has access to an optional error object that is returned to you by the ReplayKit framework if something goes wrong. If the framework didn't throw an error, we adjust the button's target and appearance so that the user can stop recording when ready.
Build and run your application and try out the app by tapping the green button. You will see that a particle system in the scene generates particles while the green button is being pushed. If you tap Start Recording, you should see the following alert:
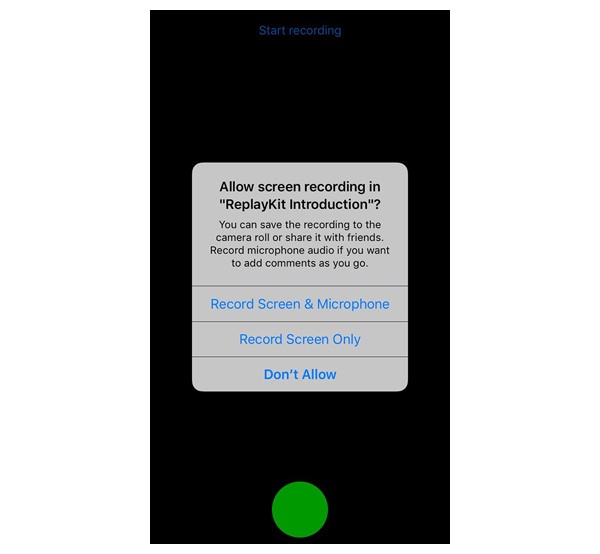
Note that this alert will appear every time you start recording in your app. Once a user has selected one of these options, however, their preference will be remembered and none of these alerts will show up for the next eight minutes.
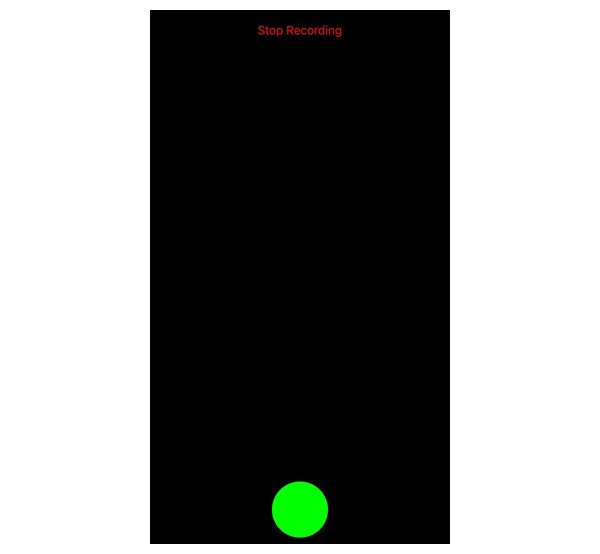
After you have selected one of these options from the alert, the Start Recording button should turn into a red Stop Recording button.
2. Stopping, Discarding, and Editing Recordings
Now that our app is capable of starting ReplayKit recordings, it is time to learn how to handle these recordings when finished. Implement the stopRecording(_:) method in the GameViewController class.
func stopRecording(sender: UIButton) {
    RPScreenRecorder.sharedRecorder().stopRecordingWithHandler { (previewController: RPPreviewViewController?, error: NSError?) -> Void in
        if previewController != nil {
            let alertController = UIAlertController(title: "Recording", message: "Do you wish to discard or view your gameplay recording?", preferredStyle: .Alert)

            let discardAction = UIAlertAction(title: "Discard", style: .Default) { (action: UIAlertAction) in
                RPScreenRecorder.sharedRecorder().discardRecordingWithHandler({ () -> Void in
                    // Executed once recording has successfully been discarded
                })
            }

            let viewAction = UIAlertAction(title: "View", style: .Default, handler: { (action: UIAlertAction) -> Void in
                self.presentViewController(previewController!, animated: true, completion: nil)
            })

            alertController.addAction(discardAction)
            alertController.addAction(viewAction)

            self.presentViewController(alertController, animated: true, completion: nil)

            sender.removeTarget(self, action: "stopRecording:", forControlEvents: .TouchUpInside)
            sender.addTarget(self, action: "startRecording:", forControlEvents: .TouchUpInside)
            sender.setTitle("Start Recording", forState: .Normal)
            sender.setTitleColor(UIColor.blueColor(), forState: .Normal)
        } else {
            // Handle error
        }
    }
}
Once again, let's go through this method step by step. We call the stopRecordingWithHandler(_:) method on the shared recorder object. In this completion handler, we verify whether the recording finished successfully by checking if the previewController exists.
We create a UIAlertController with two actions, one to discard the recording and one to view the recording. If the user chooses to discard the recording, we invoke discardRecordingWithHandler(_:). Note that this method can only be called successfully once a recording has finished. If you call this method while a recording is in-progress, no error is thrown, but no recording data is discarded either.
If the user chooses to view the recording, we present the previewController, an instance of the RPPreviewController class, handed to us by the stopRecordingWithHandler(_:) method where the user can preview, edit, and share their recording. The preview controller is the only object that has access to the video file generated by ReplayKit and is responsible for saving/sharing that recording.
Lastly, we revert the button back to its original state so that another recording can be made if the user wants to.
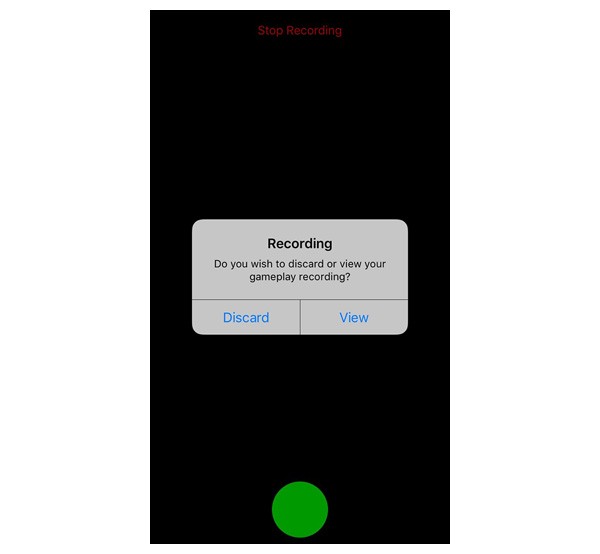
Build and run your app again and start a recording. Once you then press the Stop Recording button you should see the following alert:
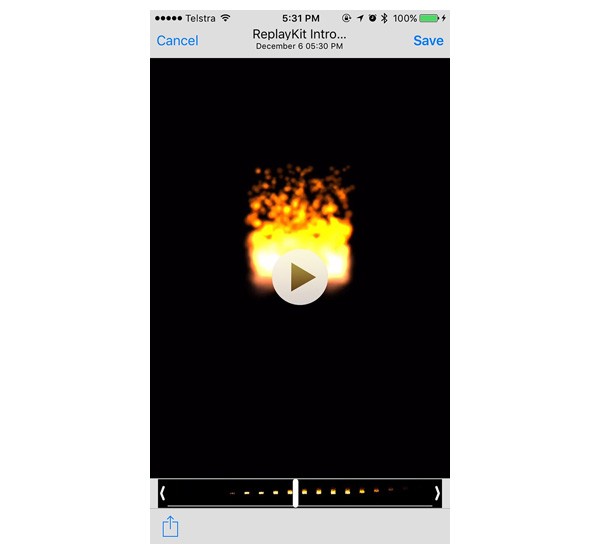
If you then press on the View option, the following view controller is presented.
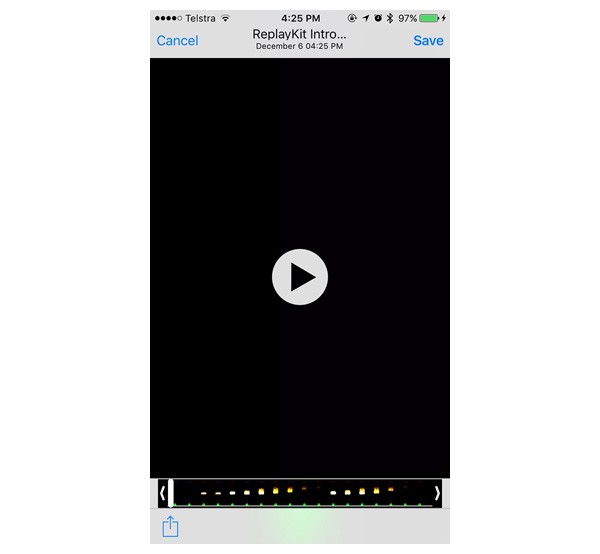
From this screen, you can edit your video and save it to your device's camera roll by pressing the Save button. You can also share it by pressing the button in the bottom left corner.
Note that at the time of writing this tutorial, either by design or due to a bug in the ReplayKit framework, there is no confirmation once a recording has been saved to the camera roll.
3. Excluding Interface Elements
You may have noticed that the top and bottom buttons are also visible in the recordings made by the application. They are included in the final video. When ReplayKit records your application, it records everything in your app's main UIWindow instance. Fortunately, ReplayKit automatically excludes any incoming notifications and user input from being recorded.
To exclude user interface elements from the recording, you need to place them in their own separate UIWindow instance. Let's see how that works. Add a property, buttonWindow of type UIWindow!, to the GameViewController class.
var buttonWindow: UIWindow!
Next, replace the current implementation of the addButtons(_:) method of the GameViewController class with the following implementation:
func addButtons(buttons: [UIButton]) {
    self.buttonWindow = UIWindow(frame: self.view.frame)
    self.buttonWindow.rootViewController = HiddenStatusBarViewController()
    for button in buttons {
        self.buttonWindow.rootViewController?.view.addSubview(button)
    }

    self.buttonWindow.makeKeyAndVisible()
}
In addButtons(_:), we create a new UIWindow object, add the buttons to it, and make it visible. Note that the HiddenStatusBarViewController class is a custom one which I have added to the starter project. It ensures that the status bar stays hidden in the new window.
Lastly, replace the implementation of the stopRecording(:_) method with the following implementation:
func stopRecording(sender: UIButton) {
    RPScreenRecorder.sharedRecorder().stopRecordingWithHandler { (previewController: RPPreviewViewController?, error: NSError?) -> Void in
        if previewController != nil {
            let alertController = UIAlertController(title: "Recording", message: "Do you wish to discard or view your gameplay recording?", preferredStyle: .Alert)

            let discardAction = UIAlertAction(title: "Discard", style: .Default) { (action: UIAlertAction) in
                RPScreenRecorder.sharedRecorder().discardRecordingWithHandler({ () -> Void in
                    // Executed once recording has successfully been discarded
                })
            }

            let viewAction = UIAlertAction(title: "View", style: .Default, handler: { (action: UIAlertAction) -> Void in
                self.buttonWindow.rootViewController?.presentViewController(previewController!, animated: true, completion: nil)
            })

            alertController.addAction(discardAction)
            alertController.addAction(viewAction)

            print(self.buttonWindow.rootViewController)
            self.buttonWindow.rootViewController?.presentViewController(alertController, animated: true, completion: nil)

            sender.removeTarget(self, action: "stopRecording:", forControlEvents: .TouchUpInside)
            sender.addTarget(self, action: "startRecording:", forControlEvents: .TouchUpInside)
            sender.setTitle("Start Recording", forState: .Normal)
            sender.setTitleColor(UIColor.blueColor(), forState: .Normal)
        } else {
            // Handle error
        }
    }
}
The only difference is that we make the view controller in the new, topmost window handle all of the presentations. This ensures that everything is displayed correctly and the user interface can be interacted with.
Run your app one more time and make a new recording. You will see that the buttons are no longer visible in the video:
4. Delegate Protocols
While not used in this tutorial, there are two protocols and a total of four methods associated with ReplayKit. Let's take a look how en when you should use them.
The RPScreenRecorderDelegate protocol defines the following methods:
-
screenRecorder(_:didStopRecordingWithError:previewViewController:): This method is called whenever an error occurs during recording. If ReplayKit can recover from this error and finish your recording, a preview view controller will also be given to you, which you can present to your user. -
screenRecorderDidChangeAvailability(_:): This method is called whenever a recording becomes available or unavailable due to another action. This can happen, for example, when you connect to or disconnect from AirPlay.
The RPPreviewViewControllerDelegate protocol defines the following methods:
-
previewViewControllerDidFinish(_:)is called as soon as the user dismisses theRPPreviewViewControllerinstance. -
previewViewController(_:didFinishWithActivityTypes:)is called at the same time aspreviewViewControllerDidFinish(_:), but it provides an extraUIActivityparameter.
Note that, if you implement either of the RPPreviewViewControllerDelegate methods, then you become responsible for dismissing the preview view controller at the appropriate time.
5. Important Notes
To finish off, I am going to tell you a few key things to keep in mind when working with ReplayKit.
- Only one recording can be stored at any one time per app. As soon as you start a new recording, if a previous recording exists it will be discarded automatically and no longer available.
- Discard recordings as soon as possible. To ensure that a device's local storage doesn't remain filled with unnecessary video data, discard recordings as soon as you know that the user won't or can't access their recording at a later point. In this tutorial, we followed this best practice by discarding the recording as soon as we knew the user didn't want to view it.
- Display recording indicators. As we did in this tutorial, showing a recording indicator is essential to an good user experience when using ReplayKit, particularly when using the microphone of the device.
- Carefully select which user interface elements to exclude from recordings. When choosing which interface elements to place in a separate window, choose any items that aren't important or detract from the gameplay itself. This includes things like recording indicators, virtual controls, and menu buttons.
- You don't have direct access to the final video file. Only ReplayKit holds a reference to your app's recordings in storage and makes these visible to the user via the
RPPreviewViewController. For privacy reasons, ReplayKit recordings are never directly accessible by your app. If you want to upload the gameplay recording to your own servers, for example, you will have to create a share extension that shows up in the share sheet that's presented by the preview view controller. - ReplayKit supports parental controls. Even if your app is running on a compatible device with no other apps running in the background, starting a recording could still be prevented due to parental controls. This means that you always need to check whether recording video is available.
- Lastly, even though Apple has geared ReplayKit towards game developers in order to allow gamers to share gameplay, nothing is stopping you from using ReplayKit in a regular application. ReplayKit is available to every application built with Xcode 7 and the iOS 9 SDK. If you have a use for it in your app, I encourage you to utilize this great framework.
Conclusion
You should now be comfortable utilizing the new ReplayKit framework to make recordings of your app's screen, which can be edited and shared by your users. Overall, ReplayKit is a very compact yet powerful framework that enables developers to easily create recordings within their applications that be shared by their users.
As always, be sure to leave any comments or feedback in the comments below.

Comments