The Core Bluetooth (CB) framework provides the resources your iOS apps need to communicate with devices that are equipped with Bluetooth low energy (BTLE) technology. This tutorial will guide you through the evolution of CB from iOS 5 to iOS 7. Additionally, you will learn how to configure a Core Bluetooth central and peripheral, how to communicate between them, and inherent best programming practices when working with CB.
Introduction
The Core Bluetooth tutorials are divided in two parts. The first one covers the theoretical aspect of Core Bluetooth, while this tutorial is a complete practical lesson. You will find the complete source code attached to this post.
1. Download the Sample Source Code
This tutorial's objective is to teach you how to use the Core Bluetooth framework. We prepared a sample source code that will make your life easier, and bypass the project creation and views configuration. You should download the sample code at the beginning of this page.
We assume that you know the basics of Xcode and iOS since we will only focus on the Core Bluetooth data. The sample code contains the following:
- An application that uses the navigation controller, three views, and the inherent controllers.
- The initial view controller
ViewControllerwith two buttons - A
CBCentralManagerViewControllerthat creates a custom iBeacon - A
CBPeripheralViewControllerthat receives the iBeacon and inherent information - A
SERVICESheader file with some variables to use across the app.
All views are already in place and properly defined. You just need to add the code for the Core Bluetooth process. Open the project, run it, and play with the objects to familiarize yourself with the code.
The SERVICES.h file contains two unique UUIDs. Those were generated using the terminal command uuidgen. You should generate them to your app, or you can use them.
Note that this lesson needs two iOS devices to work properly. Run the project and you'll see an interface similar to this:

2. Programming a Central Role
In this tutorial, you will center the CBCentralManagerViewController class. The first step is to add the two protocols that support the CBCentralManager and CBPeripheral. The declaration of those protocols define methods (more on that later). Your interface should be like this:
@interface CBCentralManagerViewController : UIViewController < CBCentralManagerDelegate, CBPeripheralDelegate>
Now, you must define three properties: CBCentralManager, CBPeripheral, and NSMutableData. The first two are obvious, and the last one is used to store information that is shared between devices.
@property (strong, nonatomic) CBCentralManager *centralManager;
@property (strong, nonatomic) CBPeripheral *discoveredPeripheral;
@property (strong, nonatomic) NSMutableData *data;
At this point, you can swap to the implementation file. You will see a warning, but before solving that, you should initiate the centralManger and the data objects. You should start the centralManager with a self delegate and without any queue. You should use the viewDidLoad method and the result should be similar to this:
    _centralManager = [[CBCentralManager alloc] initWithDelegate:self queue:nil];
    _data = [[NSMutableData alloc] init];
To resolve the warning issue you must add the - (void)centralManagerDidUpdateState:(CBCentralManager *)central method.
It is a required protocol method. It checks the state of the device and acts accordingly. There are several possible states and in your application you should always check for them. The states are:
- CBCentralManagerStateUnknown
- CBCentralManagerStateResetting
- CBCentralManagerStateUnsupported
- CBCentralManagerStateUnauthorized
- CBCentralManagerStatePoweredOff
- CBCentralManagerStatePoweredOn
For instance, if you run this application in a non Bluetooth 4.0 device you will get the CBCentralManagerStateUnsupported code. Here you will go for the CBCentralManagerStatePoweredOn and when it occurs you will start scanning for devices. For that, use the scanForPeripheralsWithServices method. If you pass nil as the first argument, the CBCentralManager starts to look for any service. Here you will use the UUID stored in the SERVICES.h.
The complete method is:
- (void)centralManagerDidUpdateState:(CBCentralManager *)central {
    // You should test all scenarios
    if (central.state != CBCentralManagerStatePoweredOn) {
        return;
    }

    if (central.state == CBCentralManagerStatePoweredOn) {
        // Scan for devices
        [_centralManager scanForPeripheralsWithServices:@[[CBUUID UUIDWithString:TRANSFER_SERVICE_UUID]] options:@{ CBCentralManagerScanOptionAllowDuplicatesKey : @YES }];
        NSLog(@"Scanning started");
    }
}
At this moment, your app will look for other devices. But despite the fact that any or none are available, you will not get any information. We can fix that. You should add the - (void)centralManager:(CBCentralManager *)central didDiscoverPeripheral:(CBPeripheral *)peripheral advertisementData:(NSDictionary *)advertisementData RSSI:(NSNumber *)RSSI method. It will be called whenever a device is discovered. However, you will program it to react only to peripherals that are advertising the TRANSFER_SERVICE_UUID.
Additionally, we will use the new cache system and store the device for future reference and faster communication. The complete source code is as follows:
- (void)centralManager:(CBCentralManager *)central didDiscoverPeripheral:(CBPeripheral *)peripheral advertisementData:(NSDictionary *)advertisementData RSSI:(NSNumber *)RSSI {

    NSLog(@"Discovered %@ at %@", peripheral.name, RSSI);

    if (_discoveredPeripheral != peripheral) {
        // Save a local copy of the peripheral, so CoreBluetooth doesn't get rid of it
        _discoveredPeripheral = peripheral;

        // And connect
        NSLog(@"Connecting to peripheral %@", peripheral);
        [_centralManager connectPeripheral:peripheral options:nil];
    }
}
The connection to that device can fail. We need to deal with that scenario using a specific method called: - (void)centralManager:(CBCentralManager *)central didFailToConnectPeripheral:(CBPeripheral *)peripheral error:(NSError *)error. Add it and inform the user about that error.
- (void)centralManager:(CBCentralManager *)central didFailToConnectPeripheral:(CBPeripheral *)peripheral error:(NSError *)error {
    NSLog(@"Failed to connect");
    [self cleanup];
}
You will notice a warning, since the cleanup method is not yet declared. Let's declare it! At this point, you may find the method source code to be complicated. However, we will explain it later on. You should return to it at the end of the tutorial for a complete understanding.
This method cancels any subscriptions to a remote device (if there are any), or straight disconnects if not. It loops along the services, then the characteristics, and removes the binds to them. The complete method is:
- (void)cleanup {

    // See if we are subscribed to a characteristic on the peripheral
    if (_discoveredPeripheral.services != nil) {
        for (CBService *service in _discoveredPeripheral.services) {
            if (service.characteristics != nil) {
                for (CBCharacteristic *characteristic in service.characteristics) {
                    if ([characteristic.UUID isEqual:[CBUUID UUIDWithString:TRANSFER_CHARACTERISTIC_UUID]]) {
                        if (characteristic.isNotifying) {
                            [_discoveredPeripheral setNotifyValue:NO forCharacteristic:characteristic];
                            return;
                        }
                    }
                }
            }
        }
    }

    [_centralManager cancelPeripheralConnection:_discoveredPeripheral];
}
Taking into consideration that we successfully connected to the device, we now need to discover the services and characteristics of it. You must declare the - (void)centralManager:(CBCentralManager *)central didConnectPeripheral:(CBPeripheral *)peripheral. After the connection is established, stop the scanning process. Then clear the data that we may have received. Then make sure you get the discovery callbacks, and finally search for services that match your UUID (TRANSFER_SERVICE_UUID). Here's the code:
- (void)centralManager:(CBCentralManager *)central didConnectPeripheral:(CBPeripheral *)peripheral {
    NSLog(@"Connected");

    [_centralManager stopScan];
    NSLog(@"Scanning stopped");

    [_data setLength:0];

    peripheral.delegate = self;

    [peripheral discoverServices:@[[CBUUID UUIDWithString:TRANSFER_SERVICE_UUID]]];
}
At this point, the peripheral starts to notify its delegate with several callbacks. One of that callbacks is the - (void)peripheral:(CBPeripheral *)peripheral didDiscoverServices:(NSError *)error. It is used to discover the characteristics for a given service. Not that you should always check if that method returns an error. If no error is found, you should find the characteristics you need, in this case the TRANSFER_CHARACTERISTIC_UUID. Here is the complete method:
- (void)peripheral:(CBPeripheral *)peripheral didDiscoverServices:(NSError *)error {
    if (error) {
        [self cleanup];
        return;
    }

    for (CBService *service in peripheral.services) {
        [peripheral discoverCharacteristics:@[[CBUUID UUIDWithString:TRANSFER_CHARACTERISTIC_UUID]] forService:service];
    }
    // Discover other characteristics
}
At this point if everything is correct, the transfer characteristic was discovered. Once again, a delegate method is called: - (void)peripheral:(CBPeripheral *)peripheral didDiscoverCharacteristicsForService:(CBService *)service error:(NSError *)error. Once this has been found, you want to subscribe to it, which lets your CBCentralManager receive the data of that peripheral.
Once again, you should deal with errors (if any). You can do a leap of faith and directly subscribe to the characteristic. However, you should loop through the characteristics array and check if the characteristic is the proper one. If it is, then subscribe to it. Once this is complete, you just need to wait for the data to come in (another method). The complete method is below.
- (void)peripheral:(CBPeripheral *)peripheral didDiscoverCharacteristicsForService:(CBService *)service error:(NSError *)error {
    if (error) {
        [self cleanup];
        return;
    }

    for (CBCharacteristic *characteristic in service.characteristics) {
        if ([characteristic.UUID isEqual:[CBUUID UUIDWithString:TRANSFER_CHARACTERISTIC_UUID]]) {
            [peripheral setNotifyValue:YES forCharacteristic:characteristic];
        }
    }
}
Every time the peripheral sends new data, the peripheral delegate uses the - (void)peripheral:(CBPeripheral *)peripheral didUpdateValueForCharacteristic:(CBCharacteristic *)characteristic error:(NSError *)error method. The second argument contains the characteristic that you can read.
Initially, you will create a NSString to store the characteristic value. Then, you will check if the data received is complete or if more will be delivered. Simultaneously, you will update your textview as soon as new data is received. After all data is completed, you can disconnect from the characteristic and disconnect from the device (although you can stay connected).
Note that, after the incoming data you can either disconnect or wait for other data. This callback lets us know if more data has arrived via notification on the characteristic. The complete source is below:
- (void)peripheral:(CBPeripheral *)peripheral didUpdateValueForCharacteristic:(CBCharacteristic *)characteristic error:(NSError *)error {
    if (error) {
        NSLog(@"Error");
        return;
    }

    NSString *stringFromData = [[NSString alloc] initWithData:characteristic.value encoding:NSUTF8StringEncoding];

    // Have we got everything we need?
    if ([stringFromData isEqualToString:@"EOM"]) {

        [_textview setText:[[NSString alloc] initWithData:self.data encoding:NSUTF8StringEncoding]];

        [peripheral setNotifyValue:NO forCharacteristic:characteristic];

        [_centralManager cancelPeripheralConnection:peripheral];
    }

    [_data appendData:characteristic.value];
}
Additionally, there is a method that ensures that the CBCentral knows when a notification state for a given characteristic changes. It is very important to track it in order to understand when a characteristic state changes (update app values). The method is: - (void)peripheral:(CBPeripheral *)peripheral didUpdateNotificationStateForCharacteristic:(CBCharacteristic *)characteristic error:(NSError *)error. You should check if the characteristic notification has stopped. If it has, you should disconnect from it:
- (void)peripheral:(CBPeripheral *)peripheral didUpdateNotificationStateForCharacteristic:(CBCharacteristic *)characteristic error:(NSError *)error {

    if (![characteristic.UUID isEqual:[CBUUID UUIDWithString:TRANSFER_CHARACTERISTIC_UUID]]) {
        return;
    }

    if (characteristic.isNotifying) {
        NSLog(@"Notification began on %@", characteristic);
    } else {
        // Notification has stopped
        [_centralManager cancelPeripheralConnection:peripheral];
    }
}
If the disconnection between devices occurs, you need to clean up your local copy of the peripheral. For that use the - (void)centralManager:(CBCentralManager *)central didDisconnectPeripheral:(CBPeripheral *)peripheral error:(NSError *)error method. This method is simple and sets the peripheral to zero. Additionally, you can re-start the device scanning or leave the app (or another). In this example, you will re-start the scanning process.
- (void)centralManager:(CBCentralManager *)central didDisconnectPeripheral:(CBPeripheral *)peripheral error:(NSError *)error {
    _discoveredPeripheral = nil;

    [_centralManager scanForPeripheralsWithServices:@[[CBUUID UUIDWithString:TRANSFER_SERVICE_UUID]] options:@{ CBCentralManagerScanOptionAllowDuplicatesKey : @YES }];
}
Finally, one additional step is required. Every time the view disappears, you should stop the scanning process. In the viewWillDisappear:(BOOL)animated method you should add:
[_centralManager stopScan];
You can Run the app, however you need the peripheral app to receive some data. The next image presents the final interface of the CBCentralManager.

3. Programming a Peripheral Role
In this tutorial, you will center the CBPeripheralViewController class. The first step is to add two protocols: CBPeripheralManagerDelegate and UITextViewDelegate. Your interface should now look like:
@interface CBPeripheralViewController : UIViewController < CBPeripheralManagerDelegate, UITextViewDelegate>
You must now define four properties: CBPeripheralManager, CBMutableCharacteristic, NSData, and NSInterger. The first two represent the peripheral manager and its characteristics, while the third is the data that will be sent. The last one represents the data index.
@property (strong, nonatomic) CBPeripheralManager *peripheralManager;
@property (strong, nonatomic) CBMutableCharacteristic *transferCharacteristic;
@property (strong, nonatomic) NSData *dataToSend;
@property (nonatomic, readwrite) NSInteger sendDataIndex;
Now switch to the implementation file. Our first step is to initiate the _peripheralManager and configure it to start advertising. The service advertisement should initiate with the aforementioned service UUID. Your viewDidLoad should look like this:
- (void)viewDidLoad {
    [super viewDidLoad];

    _peripheralManager = [[CBPeripheralManager alloc] initWithDelegate:self queue:nil];

    [_peripheralManager startAdvertising:@{ CBAdvertisementDataServiceUUIDsKey : @[[CBUUID UUIDWithString:TRANSFER_SERVICE_UUID]] }];
}
You should see a warning. To fix it, declare the - (void)peripheralManagerDidUpdateState:(CBPeripheralManager *)peripheral protocol method. Similar to CBCentralManager you should control and test all app states. If the state is CBPeripheralManagerStatePoweredOn you should build and define your service and characteristics (one of the true features of iOS 7).
Each service and characteristic must be identified by a unique UUID. Note that the third argument of the init method is at nothing. Doing so declares that the data to be exchanged will be defined later on. This is usually done when you want to create the data dynamically. If you want to have a static value to transmit, then you can declare it here.
The properties determines how the characteristic value can be used, and there are several possible values:
- CBCharacteristicPropertyBroadcast
- CBCharacteristicPropertyRead
- CBCharacteristicPropertyWriteWithoutResponse
- CBCharacteristicPropertyWrite
- CBCharacteristicPropertyWrite
- CBCharacteristicPropertyNotify
- CBCharacteristicPropertyIndicate
- CBCharacteristicPropertyAuthenticatedSignedWrites
- CBCharacteristicPropertyExtendedProperties
- CBCharacteristicPropertyNotifyEncryptionRequired
- CBCharacteristicPropertyIndicateEncryptionRequired
For a complete understanding of those properties, you should check the CBCharacteristic Class Reference.
The last argument of the init is the read, write, and encryption permissions for an attribute. Again, there are several possible values:
- CBAttributePermissionsReadable
- CBAttributePermissionsWriteable
- CBAttributePermissionsReadEncryptionRequired
- CBAttributePermissionsWriteEncryptionRequired
After the characteristic defined it, it is now time to define the service using the CBMutableService. Note that the service must be defined with the TRANSFER_CHARACTERISTIC_UUID. Add the characteristic to the service and then add it to the peripheral manager. The complete method is below:
- (void)peripheralManagerDidUpdateState:(CBPeripheralManager *)peripheral {
    if (peripheral.state != CBPeripheralManagerStatePoweredOn) {
        return;
    }

    if (peripheral.state == CBPeripheralManagerStatePoweredOn) {
        self.transferCharacteristic = [[CBMutableCharacteristic alloc] initWithType:[CBUUID UUIDWithString:TRANSFER_CHARACTERISTIC_UUID] properties:CBCharacteristicPropertyNotify value:nil permissions:CBAttributePermissionsReadable];

        CBMutableService *transferService = [[CBMutableService alloc] initWithType:[CBUUID UUIDWithString:TRANSFER_SERVICE_UUID] primary:YES];

        transferService.characteristics = @[_transferCharacteristic];

        [_peripheralManager addService:transferService];
    }
}
Now that we have the service and its characteristics (one in this case), it is now time to detect when a device connects to this one and reacts accordingly. The - (void)peripheralManager:(CBPeripheralManager *)peripheral central:(CBCentral *)central didSubscribeToCharacteristic:(CBCharacteristic *)characteristic method catches when someone subscribes to our characteristic, then starts sending them data.
The app sends the data available at the textview. If the user changes it, the app sends it to them in real time to the central subscribed. The method calls a custom method called sendData.
- (void)peripheralManager:(CBPeripheralManager *)peripheral central:(CBCentral *)central didSubscribeToCharacteristic:(CBCharacteristic *)characteristic {

    _dataToSend = [_textView.text dataUsingEncoding:NSUTF8StringEncoding];

    _sendDataIndex = 0;

    [self sendData];
}
The sendData is the method that deals with all logic regarding the data transfer. It can do several actions such as:
- Send data
- Send the end of communication flag
- Test if the app sent the data
- Check if all data was sent
- React to all of the previous topics
The complete source code is presented below. Several comments were left purposefully in order to facilitate its understanding.
- (void)sendData {

    static BOOL sendingEOM = NO;

    // end of message?
    if (sendingEOM) {
        BOOL didSend = [self.peripheralManager updateValue:[@"EOM" dataUsingEncoding:NSUTF8StringEncoding] forCharacteristic:self.transferCharacteristic onSubscribedCentrals:nil];

        if (didSend) {
            // It did, so mark it as sent
            sendingEOM = NO;
        }
        // didn't send, so we'll exit and wait for peripheralManagerIsReadyToUpdateSubscribers to call sendData again
        return;
    }

    // We're sending data
    // Is there any left to send?
    if (self.sendDataIndex >= self.dataToSend.length) {
        // No data left.  Do nothing
        return;
    }

    // There's data left, so send until the callback fails, or we're done.
    BOOL didSend = YES;

    while (didSend) {
        // Work out how big it should be
        NSInteger amountToSend = self.dataToSend.length - self.sendDataIndex;

        // Can't be longer than 20 bytes
        if (amountToSend > NOTIFY_MTU) amountToSend = NOTIFY_MTU;

        // Copy out the data we want
        NSData *chunk = [NSData dataWithBytes:self.dataToSend.bytes+self.sendDataIndex length:amountToSend];

        didSend = [self.peripheralManager updateValue:chunk forCharacteristic:self.transferCharacteristic onSubscribedCentrals:nil];

        // If it didn't work, drop out and wait for the callback
        if (!didSend) {
            return;
        }

        NSString *stringFromData = [[NSString alloc] initWithData:chunk encoding:NSUTF8StringEncoding];
        NSLog(@"Sent: %@", stringFromData);

        // It did send, so update our index
        self.sendDataIndex += amountToSend;

        // Was it the last one?
        if (self.sendDataIndex >= self.dataToSend.length) {

            // Set this so if the send fails, we'll send it next time
            sendingEOM = YES;

            BOOL eomSent = [self.peripheralManager updateValue:[@"EOM" dataUsingEncoding:NSUTF8StringEncoding] forCharacteristic:self.transferCharacteristic onSubscribedCentrals:nil];

            if (eomSent) {
                // It sent, we're all done
                sendingEOM = NO;
                NSLog(@"Sent: EOM");
            }

            return;
        }
    }
}
Finally, you must define a callback that is called when the PeripheralManager is ready to send the next chunk of data. This ensures that packets arrive in the order they are sent. The method is the - (void)peripheralManagerIsReadyToUpdateSubscribers:(CBPeripheralManager *)peripheral and it only calls the sendData method. The complete version is below:
- (void)peripheralManagerIsReadyToUpdateSubscribers:(CBPeripheralManager *)peripheral {
    [self sendData];
}
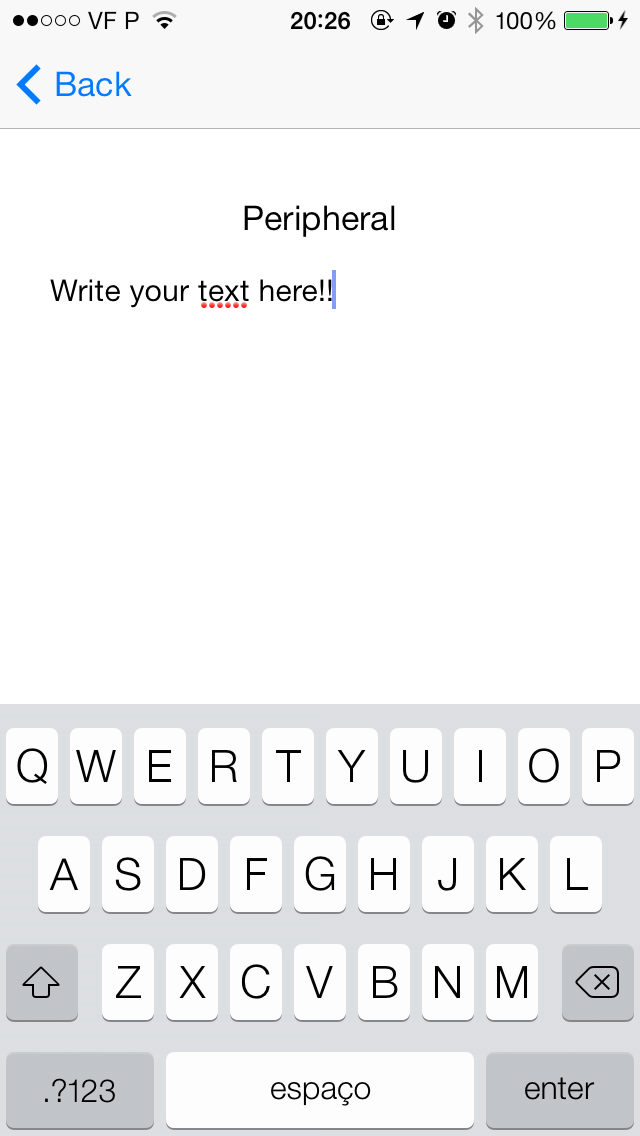
You can now finally Run the app and test the Bluetooth communication. The next image shows the interface of the CBCentralManager.
Conclusion
At the end of this tutorial, you should understand the Core Bluetooth framework specifications. You should also be able to define and configure a CBCentralManager and a CBPeripheral role, and understand and apply some best practices when developing with Core Bluetooth.
If you have any questions or comments, please leave them below!
If you work with the iOS SDK often, have a look at Envato Market to find hundreds of useful and time-saving iOS app templates.

Comments