This tutorial will introduce you to the fundamentals of developing for the WebOS 3.0 platform by demonstrating how to build a simple application. You will learn how to install the development environment, create a "Hello-World" styled application, and run the application to test your work.
What is WebOS 3.0?
WebOS is HP’s new operating system to develop apps for the HP touch pad. The name WebOS is pretty apt as applications are written in a combination of HTML, CSS and JavaScript. Yes, if you are familiar with these things, you really can start right away!
Coding in Enyo is very simple and clear and can greatly increase the efficiency of the development process. Although the framework does not currently target any platforms outside of the touchpad, it is still a groundbreaking innovation that is worth examining. Okay, so let’s get our hands dirty with HP’s newest mobile operating system: WebOS 3.0.
Setup The Environment
The first thing to do is to get your copy of the WebOS 3.0 SDK development kit from developer.palm.com. Be sure to sign up for an account as a member of the developer community.
Download the latest SDK. Go through the step-by-step procedure of installing the SDK posted on Palm’s site. You can go through the same steps given to install WebOS 2.1 (Mojo) and make changes if any are needed.
In addition to the SDK, you will also need to install any web-kit based browser like Google Chrome or Safari (used in this tutorial) and a text editor like Notepad++. You can use any text editor you like, but this tutorial will use Notepad++. Now we have all the tools required for development.
Setting Up the App
Before writing the code we have to create a specific folder structure that is especially suited for Enyo. The folder structure can be created either manually or from the command line.
If you are using the command line to generate your app folder, use palm-generated commands from the command line. In general, path variables will be automatically set when you installed SDK, if not, you will need to set your OS path variables manually if you want the Palm commands to work.
Palm-generate myapp
This creates a folder named “myapp”. The folder “myapp” typically contains these files:
- appinfo.json
- depends.js
- myapp.js
- myapp.css
- index.html
- icon.png
You can create all of these files manually with any text editor except for one: icon.png. This is your application icon and is obviously an image file.
1. appinfo.json
The appinfo.json file contains general meta-data about the application:
<pre name=”code” class=”js”>
{
    "id": "com.yourname.myapp",
    "version": "1.0.0",
    "vendor": "yourname",
    "type": "web",
    "main": "index.html",
    "title": "myapp",
    "icon": "icon.png"
}
</pre>
- id: This should be an ID unique to your app.
- version: The version number of your app.
- vendor: Your name or the name of the company you work for.
- main: This is an HTML file first loaded when the app starts.
- title: The title for your application.
- icon: An icon image for your application.
2. depends.js
This file contains paths for all *.js and *.css files in the application:
<pre name=”code”class=”js”>
enyo.depends(
    "myapp.js",
    "myapp.css",
);</pre>
3. index.html
This file is where our program execution starts. It contains code which looks very similar to the listing shown below:
<pre name=”code”class=”js”><!doctype html>
<html>
<head>
<title>myapp</title>
<script src="../../../../framework/enyo.js" type="text/javascript"></script>
</head>
<body>
<script type="text/javascript">
new myapp().renderInto(document.body);
</script>
</body>
</html>
</pre>
Let’s try to build an app where the user will write his name in an input box and we will display it in a popup window. Until now we haven't written anything in myapp.js. Copy the text below into myapp.js and save it:
<pre name=”code”class=”js”>
enyo.kind({
            name: "myapp",
            kind:enyo.Control,
            content:"Hi This is my first WebOS application"
            });</pre>
Here we are creating a kind named "myapp". A kind can be a mix of controls. Here we are just displaying some text: "Hi This is my first WebOS application".
To display this text we used a kind called enyo.Control, a Component that can receive UI events and can hold other controls.
In index.html we wrote one <script> tag within the <body> tag in order to create an object of myapp application by writing "new myapp()", which will be rendered into the document body.
Now we have some minimum stuff that we will see as the output of our program. Let’s run it!
Run the Application
There are two ways to see the output of what we have done up to this point.
- With the help of a web-kit browser (e.g. Chrome, Safari, etc.).
- With the help of the Palm emulator.
Browser: To work within a browser, the <script> tag should refer to the location of the Enyo framework. We have to modify the path such that it refers to the enyo.js file where we installed Enyo. Now, open index.html in the browser. If everything works fine you will see output like the picture below:
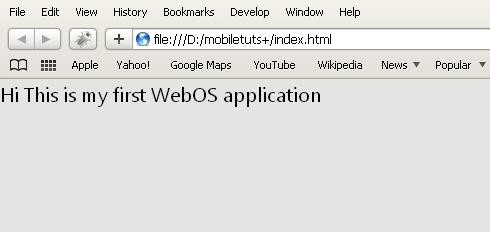
If you are seeing nothing other than a normal white background you may have a problem with setting the path to the enyo.js file in your <script> tag. If you are seeing a grey background with nothing displayed on it, that’s most likely a problem with the syntax, so be sure to go through the above steps to see if you've missed anything!

Comments