In the first part of this two-part series, we explored what Android Wear is, how it works, and delved into the new user interface the Android team developed specifically for Android Wear. I also shared some best practices to bear in mind when you're developing for the world of Android wearables.
In the second part of this series, you'll put your new Android Wear knowledge into practice by creating two sample apps that integrate with Android Wear in different ways.
The first app demonstrates the easiest way to start developing for Android Wear, take a regular handheld app and extend its notifications so they appear and function perfectly on a paired Android Wear device.
In the second sample, you'll create a full-screen wearable app by creating a Hello World project that consists of a handheld and a wearable component. After you've created this barebones project, you'll have everything in place to continue working and develop it into a full-blown wearable app.
This tutorial uses Android Studio. If you don't already have it installed, you can download the IDE from the official Android Developers website.
1. Download, Install & Update Your Software
Before you can develop anything for the wearable platform, you need to prepare your development environment by installing and updating all the packages you'll need, ensuring your Android Studio IDE is up to date.
To check you're running the latest version of Android Studio, launch the IDE, click Android Studio in the toolbar, and select Check for Updates. This tutorial requires Android Studio version 0.8 or higher, but ideally you should have the latest version installed, so you can benefit from the very latest features and fixes.
Next, open the Android SDK Manager and check you have the latest versions of the following three packages:
- SDK Tools
- Platform tools
- Build tools
Download and install any available updates. Once these packages are up to date, two new packages will appear in the SDK Manager:
- Android L Developer Preview
- Android 4.4W (API 20)

Download and install both packages.
If you've just updated your SDK Tools, Platform Tools, and/or Build Tools packages, but still don't see the Android L and Android 4.4.W packages, then close and relaunch the SDK Manager. This should force the two new packages out of hiding.
If you haven't already installed the Android Support Library, do so now. You'll find it in the SDK Manager's Extras category.
2. Create a Wearable AVD
Regardless of whether you're building a wearable app or a handheld app that generates wearable-ready notifications, you'll need a way to test the wearable parts of your project. This is fairly straightforward thanks to the familiar AVD Manager, which has everything you need to emulate a wearable device.
Even if you own a physical Android Wear smartwatch, you'll need a way to test your project across the different Android Wear screens, so you still need to create at least one AVD. At the moment, this just means testing your project on a round and a square screen, but this list is likely to grow as more Android Wear devices are released.
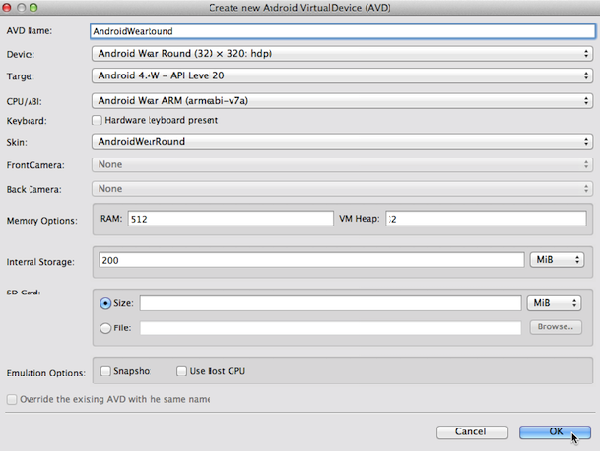
To create an Android Wear AVD, launch the AVD Manager and click Create. Give your AVD a name, and enter the following settings:
- Device: Select either Android Wear Round or Android Wear Square, depending on the screen you want to emulate.
- Target: Choose Android L Preview.
- Skin: Select either AndroidWearRound or AndroidWearSquare, depending on the type of screen you want to emulate.
Once you've created your AVD, launch it, and leave it running in the background.
Although you're now emulating an Android Wear device, what you aren’t emulating is the connection that exists between a physical wearable and a paired smartphone or tablet.
If you're going to accurately test your project's wearable components, you need to emulate this connection. This is where the Android Wear companion app comes in. It is available on Google Play.
3. Connect Your Handheld to the Emulator
Once you've installed the Android Wear companion app on your smartphone or tablet, this handheld device gains the ability to communicate with a wearable AVD in the same way a paired handheld device communicates with a physical wearable.
Step 1
On your handheld device, open the Google Play store and install the official Android Wear app.
Step 2
Enable USB debugging on your smartphone or tablet, and use the USB cable to connect your handheld device to your computer.
Step 3
Before your Android Wear AVD can communicate with your handheld, you need to open TCP port 5601 on your computer. Launch Terminal on OS X or the Command Prompt on Windows, and change the directory so it's pointing to your platform-tools folder:
cd Users/jessica/Downloads/adt-bundle/sdk/platform-tools
Note that the above command will vary depending on where the Android SDK is located on your development machine.
Step 4
Now the Terminal or Command Prompt is pointing at the correct location, open the necessary port by issuing an adb command as shown below.
./adb -d forward tcp:5601 tcp:5601
Step 5
On your handheld device, launch the Android Wear companion app. Tap the watch icon in the app's toolbar (highlighted in the below screenshot), and wait for Connected to appear in the toolbar.

Whenever you want to connect your handheld to a wearable AVD, you'll need to repeat this process. Save yourself some time by leaving the emulator running in the background and your smartphone or tablet plugged into your computer while you work your way through this tutorial.
Before you move onto the next step, it's worth taking some time to explore how a handheld and a wearable interact, particularly if this is your first hands-on experience with Android Wear.
When you connect a wearable AVD to a handheld device, the AVD automatically starts pulling notifications from the connected smartphone or tablet, and displays them as cards in its emulated Context Stream. A good way to familiarize yourself with Android Wear is to spend some time swiping through these personalized notification cards.
To perform a swiping action, use your mouse to drag the notification cards up and down. You can also view a notification card's action buttons, plus any additional pages, by swiping/dragging the card to the left.
You can explore additional notification cards, by sending a selection of demo cards to your AVD. To send a demo card, open the companion app and tap the three-dotted menu icon in its upper-right corner. Select Demo cards and choose a card from the list. The demo card will then appear in your AVD's Context Stream. Once a demo card arrives on the AVD, it functions exactly the same as a regular notification card.
4. Sample App 1: Wearable-Ready Notifications
Android Wear takes a proactive approach to pulling notifications from paired Android smartphones or tablets, and displaying them as cards in the Context Stream. However, if your app doesn't explicitly support Android Wear, there's no guarantee its notifications will display and function correctly on an Android Wear device.
To provide the best possible experience for any Android Wear users who may come into contact with your app, you need to create handheld notifications that can seamlessly extend to a paired wearable device, if the need arises. Over the next few sections, I'll show you how to create a sample handheld app that can trigger a wearable-ready notification.
Step 1: Project Setup
This sample app will live on the user's smartphone or tablet, so start by creating a basic Android project. Open Android Studio’s File menu and select New Project. Give your project a name and click Next. Select Phone and tablet, choose the minimum SDK your app will support, and click Next. Select Blank Activity and click Next. Give your activity a name. For the purposes of this tutorial, I’m using MyActivity. Click Finish to let Android Studio create the project.
Step 2: Update Gradle Build File
In order to create a wearable-ready notification, your project needs access to the Support Library. Open your project's build.gradle file and add the Support Library to the dependencies section as shown below.
dependencies {
    compile fileTree(dir: 'libs', include: ['*.jar'])
    compile 'com.android.support:support-v4:20.0+'
}
At this point, Android Studio should prompt you to synchronize the changes you've made to the build.gradle file, so click the Sync now message when it appears. If the IDE doesn't prompt you, you should still synchronize your changes by opening Android Studio's File menu and clicking Synchronize.
Step 3: Create User Interface
This sample app will consist of a button that triggers the notification. To create this simple user interface, open the app > src > main > res > layout > activity_my.xml file, and enter the following:
<LinearLayout
  xmlns:android="http://schemas.android.com/apk/res/android"
  xmlns:tools="http://schemas.android.com/tools"
  android:layout_width="match_parent"
  android:layout_height="match_parent"
  android:orientation="vertical"
  tools:context=".MyActivity">
  <Button
    android:layout_width="wrap_content"
    android:layout_height="wrap_content"
    android:text="@string/notify"
    android:id="@+id/wearButton"
    android:layout_gravity="center_horizontal" />
</LinearLayout>
This user interface references a string resource, so open the Values > strings.xml file and add the following to it:
<string name="notify">Notify Wearable</string>
Step 4: Create a Notification
You're now ready to create your wearable-ready notification. Open app > src > main > java > MyActivity and import the classes you'll use to create your app. The first few should already be familiar.
import android.app.Activity;
import android.os.Bundle;
import android.view.View;
import android.widget.Button;
Since you're going to create a notification that supports wearables, you'll also need to import some classes from the Support Library as shown below.
import android.support.v4.app.NotificationCompat;
import android.support.v4.app.NotificationManagerCompat;
Now it's time to create your notification using the NotificationCompat class. Take a look at the implementation of the MyActivity class shown below.
package com.example.jessica.myapplication;

import android.app.Activity;
import android.os.Bundle;
import android.support.v4.app.NotificationCompat;
import android.support.v4.app.NotificationManagerCompat;
import android.view.View;
import android.widget.Button;

public class MyActivity extends Activity {
    @Override
    protected void onCreate(Bundle savedInstanceState) {
        super.onCreate(savedInstanceState);
        setContentView(R.layout.activity_my);

        Button wearButton = (Button)findViewById(R.id.wearButton);
        wearButton.setOnClickListener(new View.OnClickListener() {
            @Override
            public void onClick(View v) {
                int notificationId = 001;

                NotificationCompat.Builder notificationBuilder =
                        new NotificationCompat.Builder(MyActivity.this)
                                .setSmallIcon(R.drawable.ic_launcher)
                                .setContentTitle("Title")
                                .setContentText("Android Wear Notification");

                NotificationManagerCompat notificationManager =
                        NotificationManagerCompat.from(MyActivity.this);

                notificationManager.notify(notificationId, notificationBuilder.build());
            }
        });

    }
}
Step 5: Testing Notifications
The next step is to test your project across the handheld and wearable platforms. If you haven't already, launch your wearable AVD and connect it to your handheld device before continuing.
Open the Run menu and select Run 'app'. In the Choose Device window, select your handheld device. After a few seconds, your app will appear on the connected smartphone or tablet.
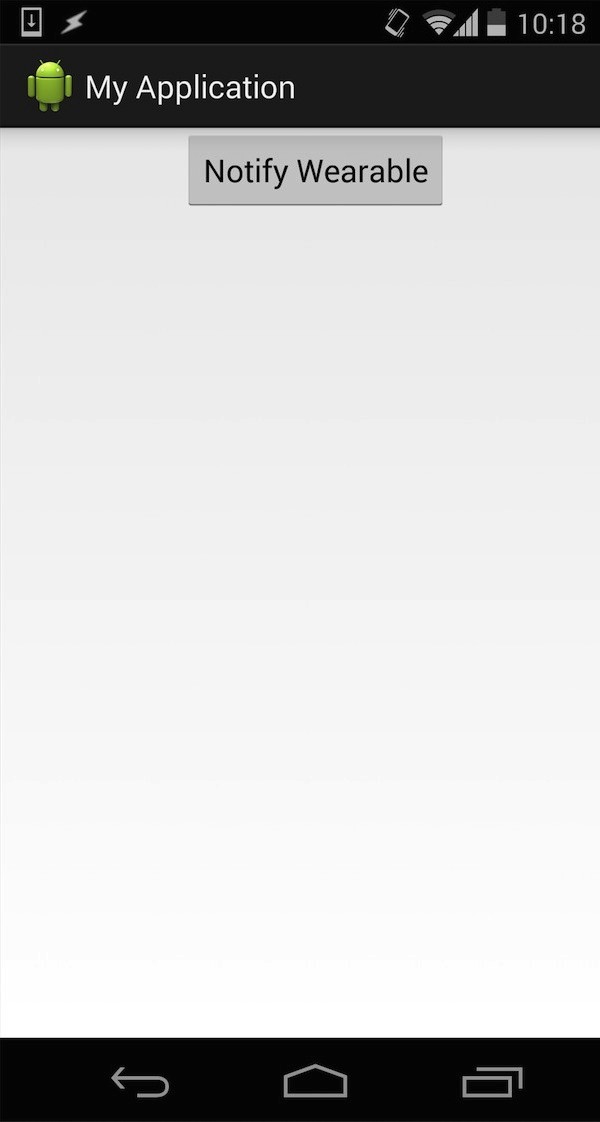
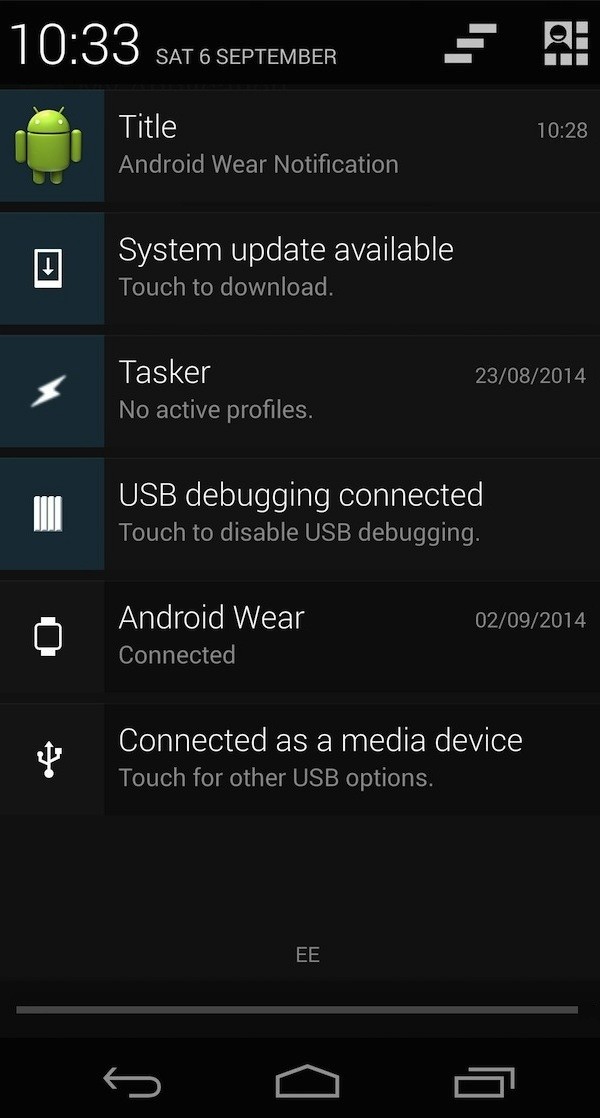
To test that all-important notification, tap the app's Notify Wearable button. A notification will then appear in the smartphone or tablet's notification drawer. Open the notification drawer to check this part of the notification is displaying correctly.
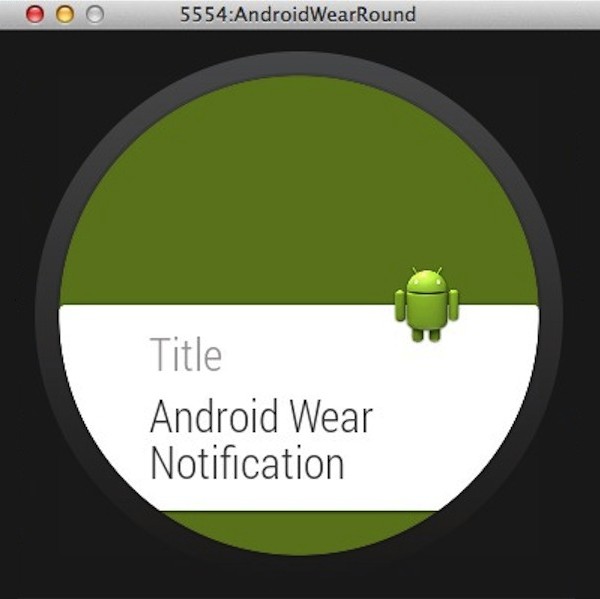
On your Android Wear AVD, scroll through the notification cards until you find the card generated from your wearable-ready notification. Again, check this notification is displaying correctly. And you're done.
5. Sample App 2: Full-Screen Wearable App
Wearable Component
Although Google are encouraging developers to integrate their apps with Android Wear's Context Stream, it is possible to create full-screen apps for Android Wear devices.
Wearable full-screen apps actually consist of a handheld and a wearable component. The user installs the handheld app on their smartphone or tablet, and the system automatically pushes the wearable component to the paired Android Wear device. If you want to create a full-screen wearable app, you need to create a handheld app that contains a wearable component.
This may sound complicated, but you can create this kind of two-in-one project just by selecting the right options in Android Studio's project wizard:
- In Android Studio, open the File menu and select New Project.
- Give your project a name, and click Next.
- Select Phone and tablet and Wear. You can choose which minimum SDK the Phone and tablet module supports, but the Wear module must support API 20. Click Next.
- Select Blank Activity and click Next.
- Give your activity a distinctive name so there's no chance of you confusing it with your project's wearable activity, for example, HandheldActivity. Click Next.
- Select Blank Wear Activity and click Next.
- Give the wearable activity a name that makes it impossible to confuse with the project's handheld activity.
- Create your project by clicking Finish.
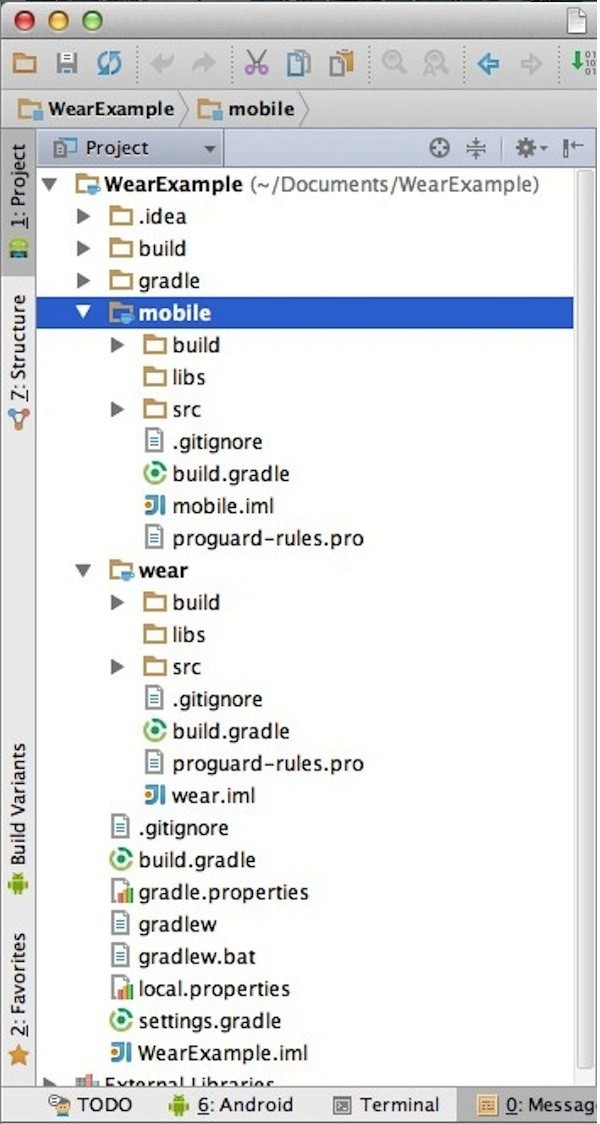
Exploring Hello World Projects
When you tell the project creation wizard to create Phone and tablet and Wear components, it creates two modules:
- Mobile: Despite the name, this module can run on smartphones as well as tablets.
- Wear: The Android system pushes this module to the paired wearable device.
If you open either module, you'll see Android Studio has already populated the module with a host of classes, directories, and resources.
Test Hello World Code
Android Studio not only automatically generates the layout for both modules, it also kits them out with some Hello World code. Although you'll replace this Hello World code, the process of testing a project that consists of handheld as well as wearable content remains the same. This is a good opportunity to learn how to test this kind of project.
Before you start, make sure your wearable AVD is up and running and that it's connected to your handheld device.
To test the project's handheld module:
- Open the Run menu in the Android Studio toolbar and select Run....
- In the popup that appears, select mobile.
- When prompted, choose the handheld device that's currently connected to your computer. Your app's handheld component will then appear on your smartphone or tablet, ready for you to test.
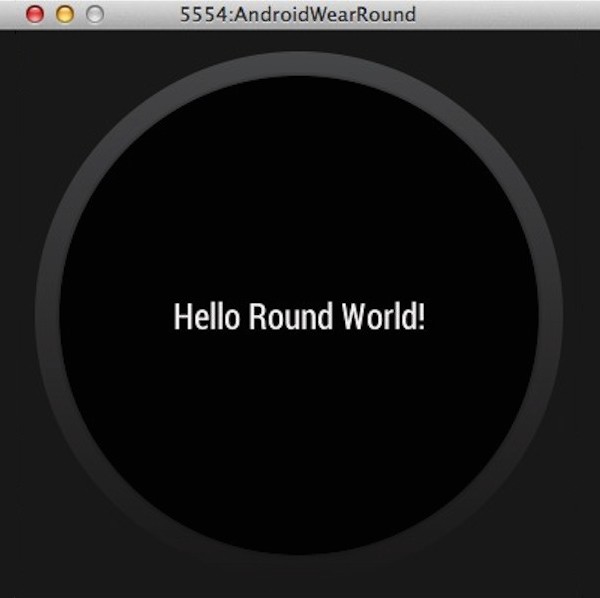
To test the project's wearable component:
- Open the Run menu in the Android Studio toolbar and select Run….
- Select Wear from the popup that appears.
- Select your wearable AVD.
- Your app's wearable component will appear on your AVD.
Note, if your project doesn't appear automatically, you may need to swipe the screen several times to find it.
6. Troubleshooting
While it's normal to encounter the occasional bug or known issue when you're working on a software project, chances are you're going to run into a lot more problems when you're developing for Android Wear, simply because you're using an IDE that's still in beta to develop for an entirely new version of the Android operating system.
In this section, I share a workaround for a known issue, alongside some general tips and tricks to help you overcome any other problems you may run into.
At the time of writing, when you create a project with a wearable module or add wearable-ready code to a handheld project, you may encounter a known issue with the Gradle build file. This issue causes the Gradle build to fail with the following errors:
Could not find any version that matches com.google.android.support:wearable:+.
Could not find any version that matches com.google.android.gms:play-services-wearable:+.
The workaround involves adding a URL to the IDE's list of user defined sites. Launch the SDK Manager, then select Tools from the toolbar and click Manage Add-On Sites.
At this point you may encounter another issue, where the SDK Manager opens but its toolbar doesn't. If you have the SDK Manager selected, but its toolbar doesn't appear at the top of your screen, you need to minimize the SDK Manager and then select it once more. The toolbar should then appear and you can select Tools > Manage Add-On Sites.
In the Add-On Sites window, click the User Defined Sites button, click New and add https://dl-ssl.google.com/android/repository/addon-play-services-5.xml to the list of URLs. Click OK to finish.
If the error persists, check you have the latest version of the Google Play Services and Google Repository packages installed. If you've completed all these steps and are still seeing the Gradle errors, it's possible your IDE hasn't registered the changes you've made to the development environment. Closing and relaunching Android Studio should fix this.
If you encounter a different Gradle error message or you run into a completely different problem, here's some general fixes that can help get your project back on track:
Update Packages
If some of your Android SDK packages are out of date, it's possible you're encountering an issue that's already been addressed by an updated package. Boot up your SDK Manager and check for updates.
Relaunch
If you've made some changes to your Android SDK packages and are still encountering the same problem, try closing and relaunching your IDE so you know Android Studio has registered your changes.
Android Studio Version
Since Android Studio is in beta, it's particularly important you keep it up to date as most updates bring new fixes. To make sure you're running the most recent version of Android Studio, select Android Studio > Check for Updates….
Conclusion
You now have everything you need to start adding Android Wear support to your own handheld projects. If you've been following along with this tutorial and decide to create wearable-ready notifications, then your handheld Android device and AVD Manager are already prepped to test your wearable-ready code.
If you're eager to develop full-screen Android Wear apps instead, you already have the basic structure in place, so why not continue working on the Hello World sample app?

Comments